I hope you will excuse a rather self indulgent post this week, but it is a post I have been wanting to write for a long time – my first attempt at using my father’s Leica IIIg camera.
He used two main cameras for the 1940s and 1950s photos. A Leica IIIc for the earlier and a Leica IIIg for the later photos. He sold the IIIc to help pay for the IIIg, and gave the Leica IIIg to me about 20 years ago.
He last used it at the end of the 1970s, when it developed a problem with the shutter sticking, and rather than getting it repaired, he purchased a new SLR camera.
I have been wanting to use the camera for some years. A couple of years ago I had it repaired to fix the sticking shutter problem, and a few weeks ago I finally had the time to learn how to use the camera. I purchased some film, and took the camera on a walk through London to take a reel of film and see how it performed – mainly how I performed using a very different camera to my digital cameras and my old Canon AE-1 film camera.
The Leica IIIg is completely manual. Everything has to be set, shutter speed, the aperture opening of the lens and the focus. The film also needs to be moved to the next frame ready for the next photo.
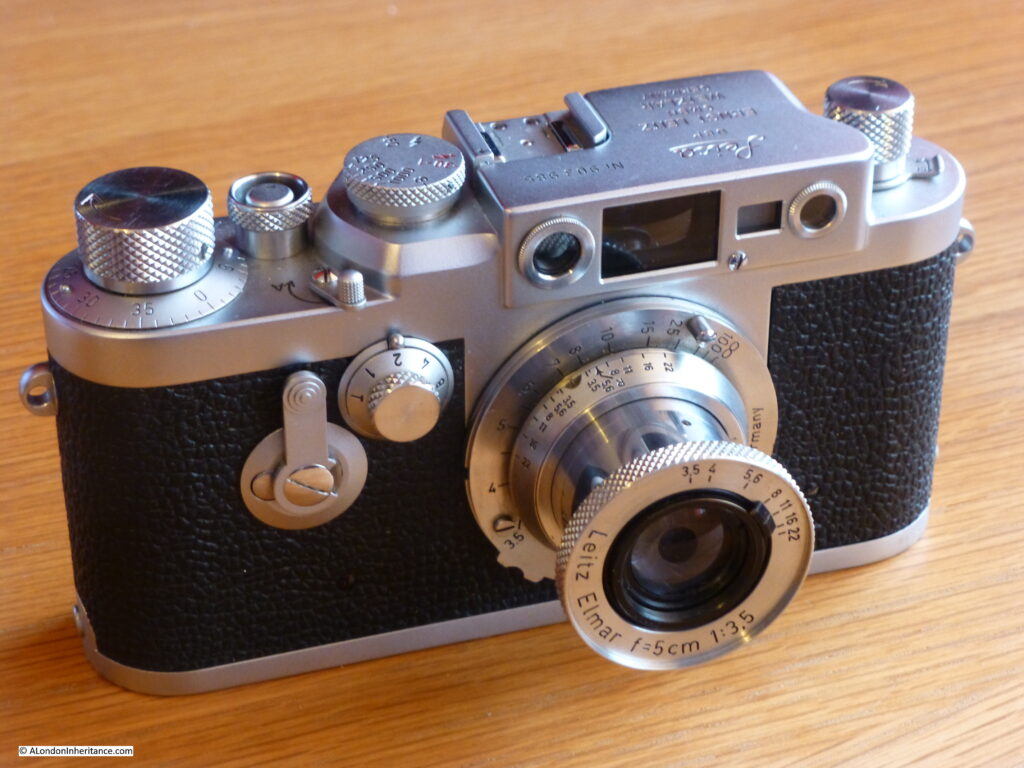
The Leica IIIg:
The lens is not the lens meant for the camera. It is from my father’s earlier Leica IIIc. He wrote the following in his notes to the camera “the lens is not the standard lens that should accompany the body, but is from my previous Leica IIIc bought, because it was the best lens to be used in both camera and enlarger”.
He developed and printed his own films, therefore the reference to the enlarger is to the item of equipment that you would use to shine a light through the negative and focus onto photo paper during the printing process. The lens would be unscrewed from the camera and placed in the enlarger to allow negatives to be printed onto photo paper.
The lens is therefore the lens through which the majority of my father’s photos which I feature on the blog from the 1940s and 1950s were taken.
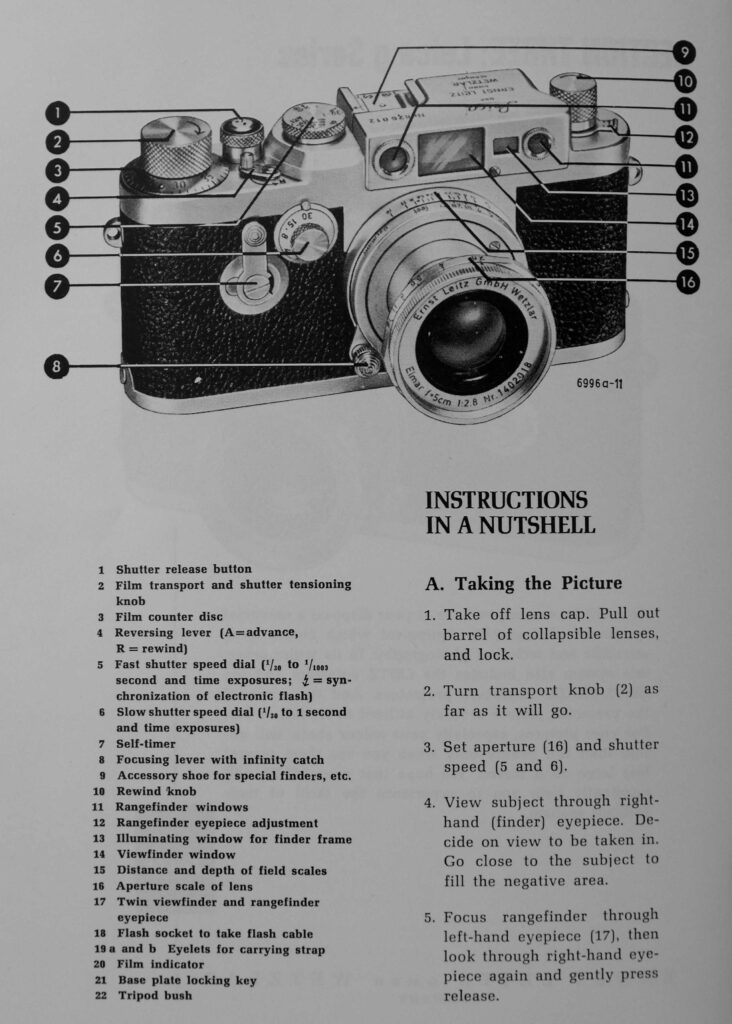
Luckily, I have the instruction booklet that came with the camera, and a diagram in the booklet details all the functions of the various knobs, levers and windows on the camera.
You may have noticed there is no light meter on the camera, to measure the amount of light and therefore setting the correct speed and aperture – I will come on to this later.
You may also be asking why on earth I would want to use such a camera, limited to 36 photo films, with the cost of film and developing, when digital cameras are so good, and after buying the camera, the cost of photos is almost zero?
A couple of reasons. Obviously the sentimental one that it was the camera and lens that my father used for so many of his early photographs, but also because using such a camera really forces you to think and perhaps relearn the whole process of photography.
The number of photos available on each roll of film, and the cost of film and processing means you really have to be selective and think about the photo you want to take – I could not take the 200 to 400 photos that I would normally take on a walk around London.
It also makes you really think about light. Having to manually measure the light coming from the scene you want to photograph, deciding the combination of speed and aperture, focusing on the specific object you want to be the focus of the photo, all combine to make you think more about the process. I know all these combinations of manual options are available in many digital cameras, but so often using the auto option is the easiest way, along with the internal light meter.
The first challenge was to load the film.
The choice of film was relatively easy. I went with Ilford FP4 Plus. The reason being it is a very tolerant film which “will give usable results even if it is overexposed by as much as six stops, or underexposed by two stops” (a stop is basically either the halving or the doubling of the light hitting the film, so the film can still give good results if too much or too little light hits the film for the ideal photo).
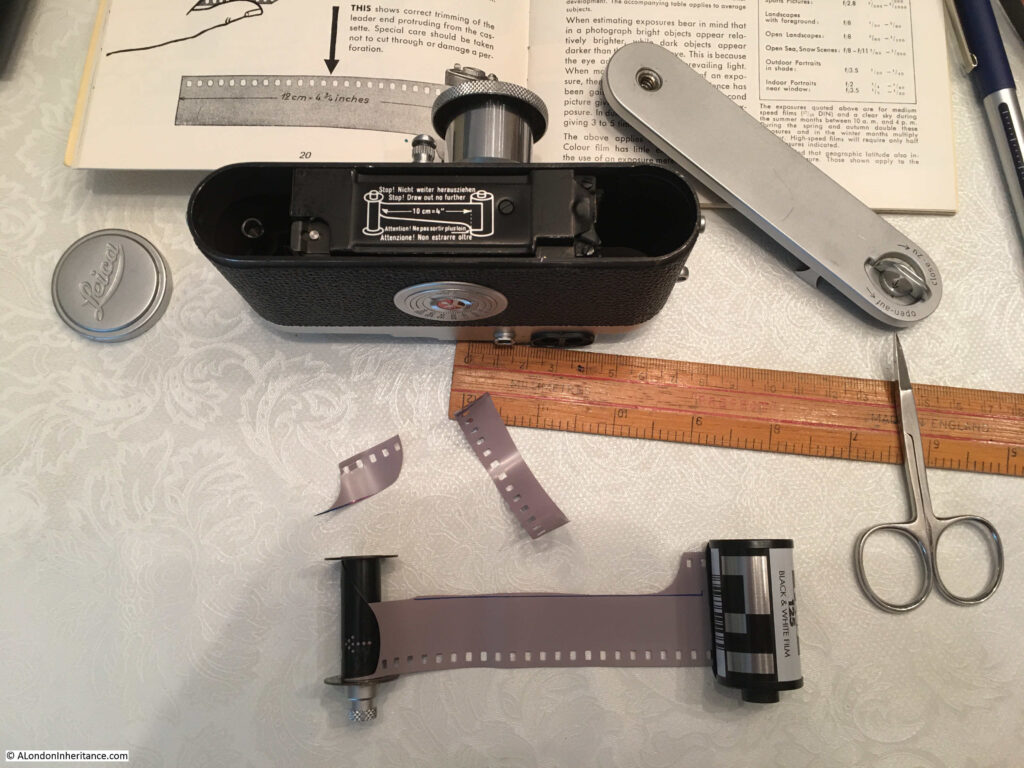
My first attempt at loading the film in the camera was not good. Firstly, the film has to be trimmed with scissors so there is a long enough length of half width film to avoid the winding mechanism, then the film needs to be securely and accurately wound onto the take up spool.
And you will not know if it has worked correctly until the film is in the camera and you start winding on the film.
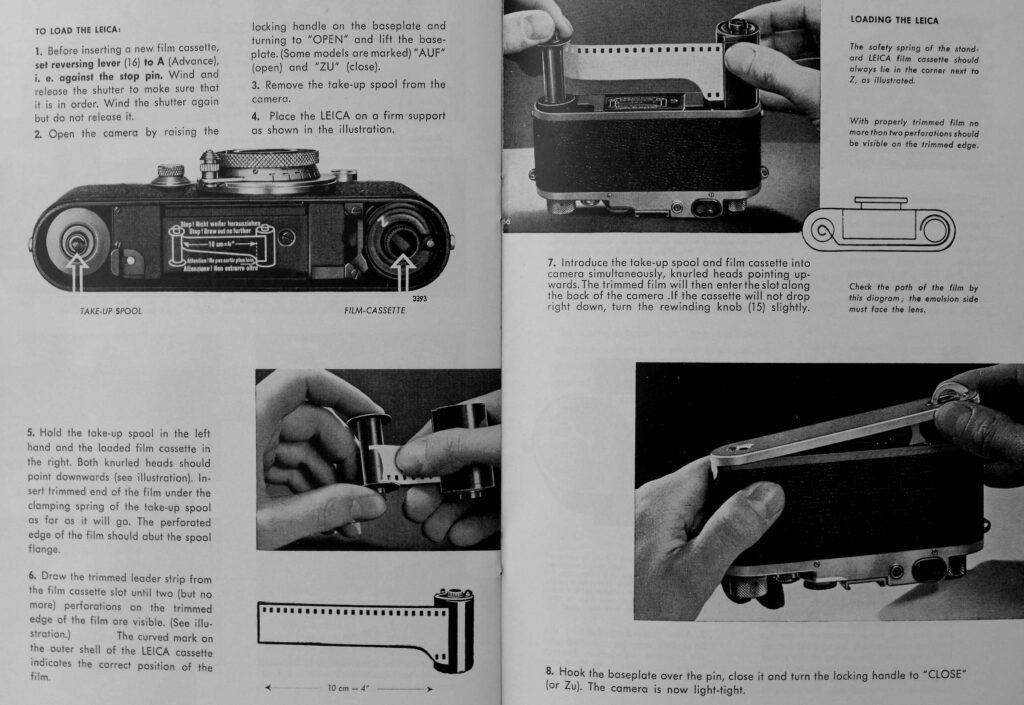
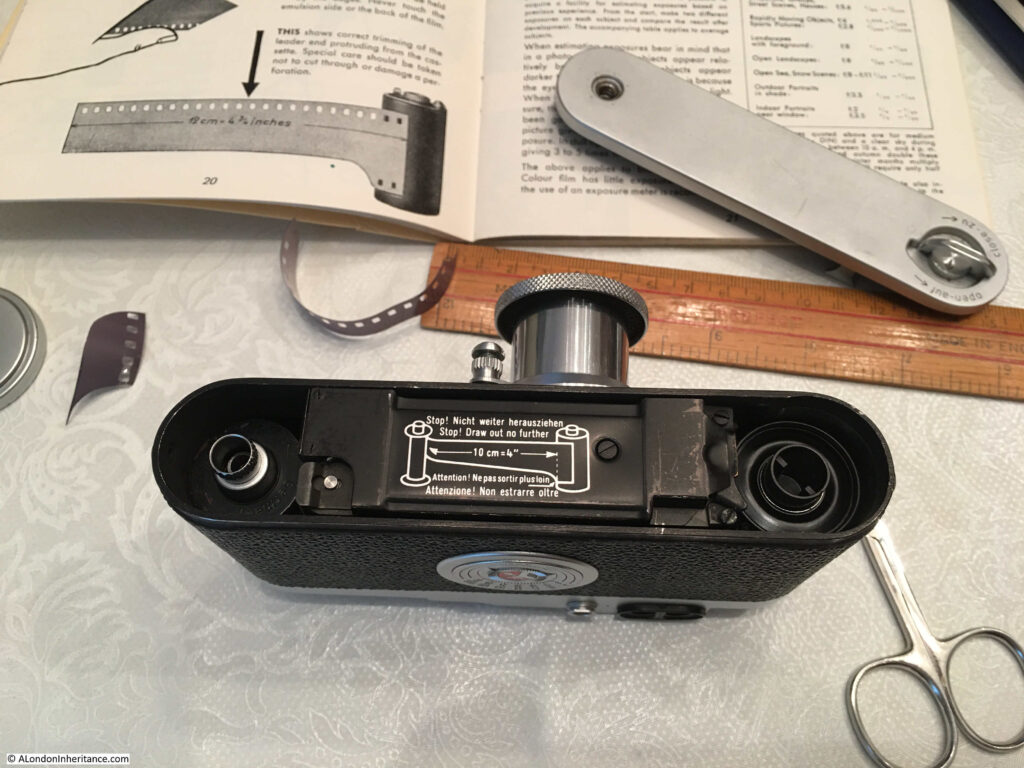
The pages from the manual detailing the film loading process:
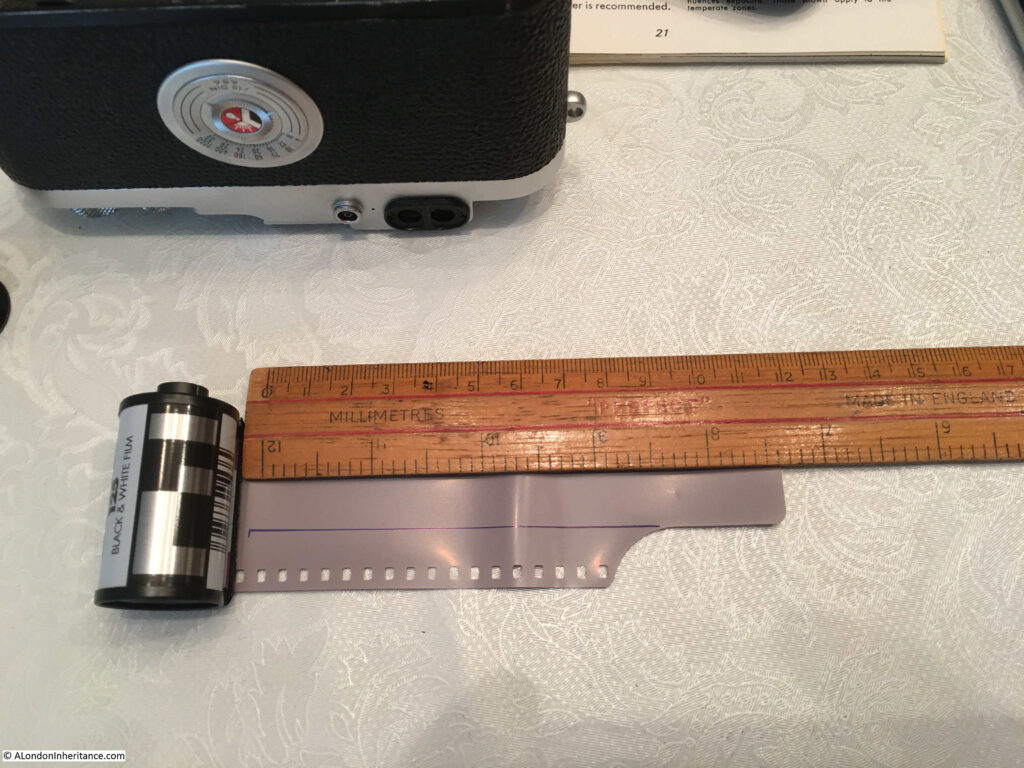
Trimming the film – Ilford FP4 already comes trimmed, but not enough for the Leica, so I had to measure and cut a longer trimmed length of film. There must be a winding mechanism at the top of the slot behind the lens, which the film cannot be inserted over, but engages with when the film is pulled through the camera.
The end of the correctly trimmed film then needs to be inserted into the take up spool. This is where I had most problems as the film has to be parallel with, and tightly up against the lower end of the take up spool as in the following photo. If the film is not correctly positioned (as I found on the first two attempts), the film does not grip and wind onto the take up spool.
The film cassette, film, and take up spool is then carefully inserted into the slot at the rear of the camera, and the cassette and spool pushed into their positions at the two ends of the camera.
My first two attempts failed. You cannot confirm the film is inserted correctly until you try winding on the film.
There are two knobs at either end of the top of the camera. The Film Transport and Shutter Tensioning Knob – which pulls the film forward, out of the cassette and onto the take up spool after each photo has been taken, as well as tensioning the shutter ready for release. The second is the Rewind Knob that engages with the film cassette and is used to rewind the film back into the cassette when the full length of film has been used.
If the film is inserted correctly, winding the film transport knob, should also result in the rewind knob turning as film is pulled out of the cassette.
With my first attempt, the film had slipped off the take up spool, and with my second, the film was winding on correctly, but there must have been so much slack in the cassette that the rewind knob was not turning. I wasted that film as I was not sure how much film had been wound on and therefore exposed when I opened the camera to see what was going on.
With the film correctly loaded (hopefully) in the camera, there was one final element to learn before taking the camera out on the streets of London – how to set the speed and aperture correctly.
Basically, the aperture sets how much light the lens allows through to the film, and the speed is the speed with which the shutter opens, also changing how much light is let through to the film. They also impact the photo in different ways. Low speed can lead to a blurred photo of a moving object and with aperture you can change the elements of a photo which are in focus, for example by a blurred background with the foreground object in focus.
To know the correct range of settings, you need to know how much light is coming from the scene you want to photograph towards the lens of the camera. Today, cameras have built in light meters, but 1940/50s Leica’s needed a different solution, and this was by using an external, hand held light meter, and along with the camera, my father had given me his Weston Master Exposure Meter.
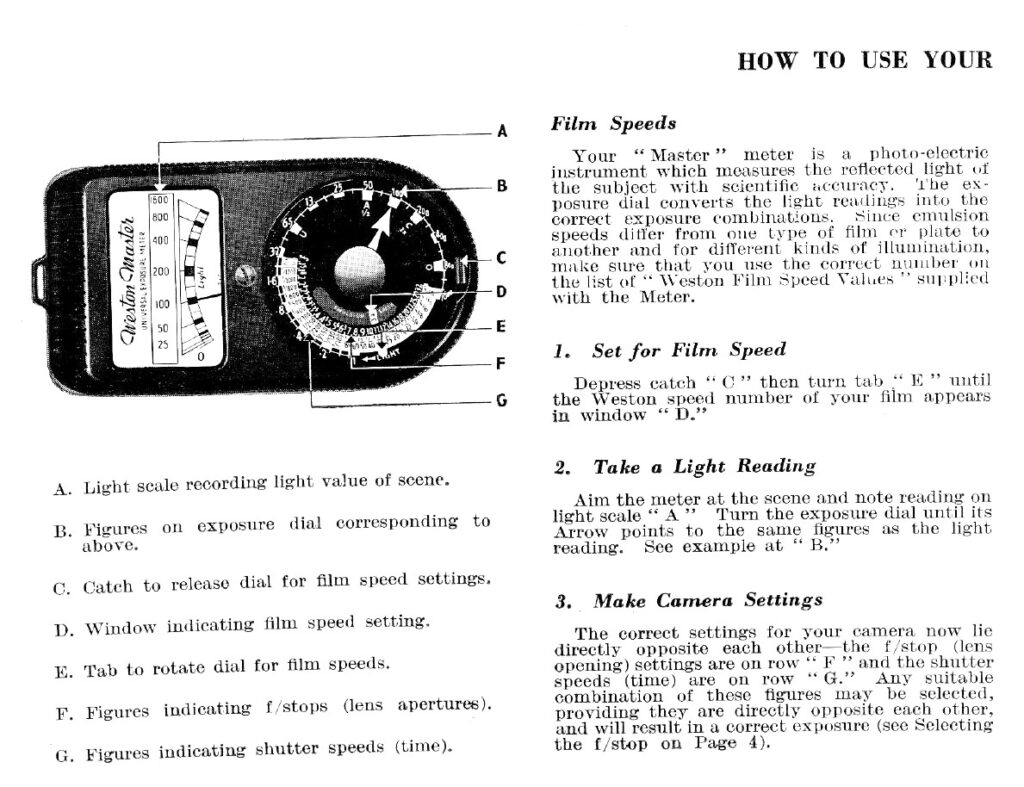
As the text describes “Your ‘Master’ meter is a photo-electric instrument which measures the reflected light of the subject with scientific accuracy”.
There is a photo cell in the rear of the meter, which generates an electric current dependent on the strength of the light. This electric current drives the pointer on the meter on the front of the meter.
The pointer, points to a scale of numbers. The light meter first needs to be set up correctly with the speed of the film (tab E and window D as described in the instructions), then the exposure dial is turned to point at the number the pointer in the electric meter is pointing at, and the range of aperture and speed combinations can be read from the scales F and G in the instructions.
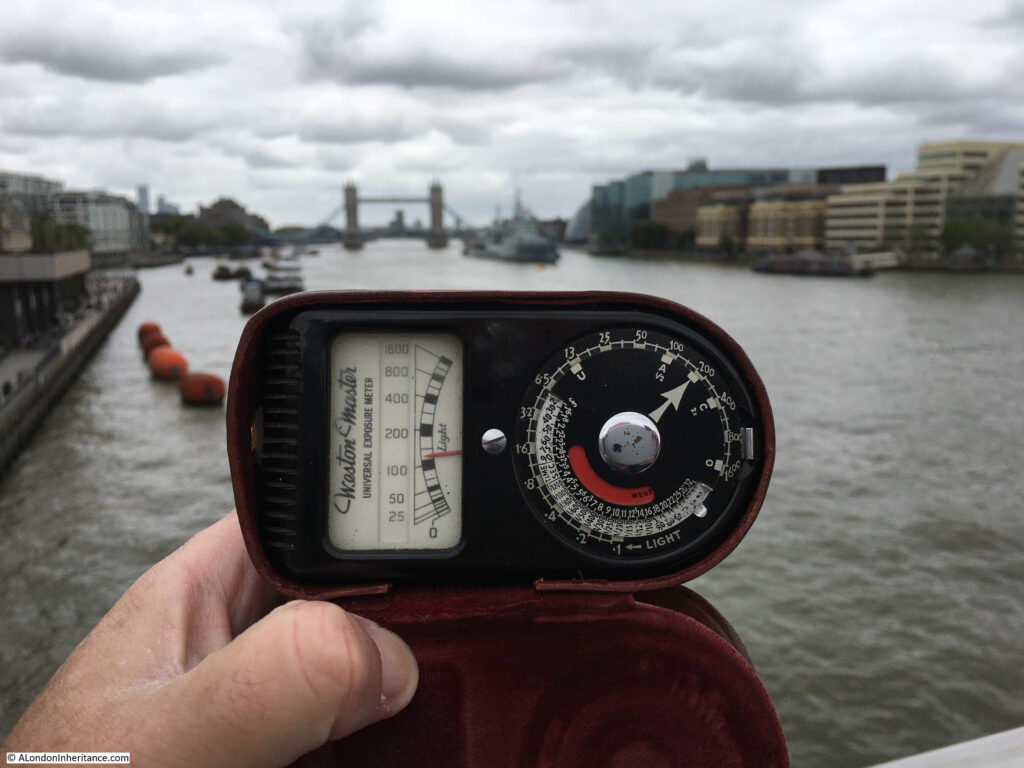
One of the problems with using the meter was that the pointer would be moving up and down depending on where I was pointing the meter in the overall scene to be photographed. It was relatively stable in a scene where there was little change in light, but looking at a combination of river, buildings and sky, the meter would change considerably with minor changes in position.
The same challenge happens with digital photography, but again using an entirely manual method really gets you thinking about light.
Using the light meter on London Bridge (photo taken on my phone which handled light measurement, speed, aperture and automatically focused without me having to do anything – how photography has changed)
So, with film loaded, a reasonable understanding of how the camera and light meter worked, I went out for a walk to see if the camera worked, did the light meter still give accurate readings, and could I take photos using a Leica IIIg.
Back at home, the film was wound back into the cassette, posted to Aperture (who as well as repairing cameras, also develop and print), and I waited expectantly for 10 days for the negatives and prints to drop through the letter box.
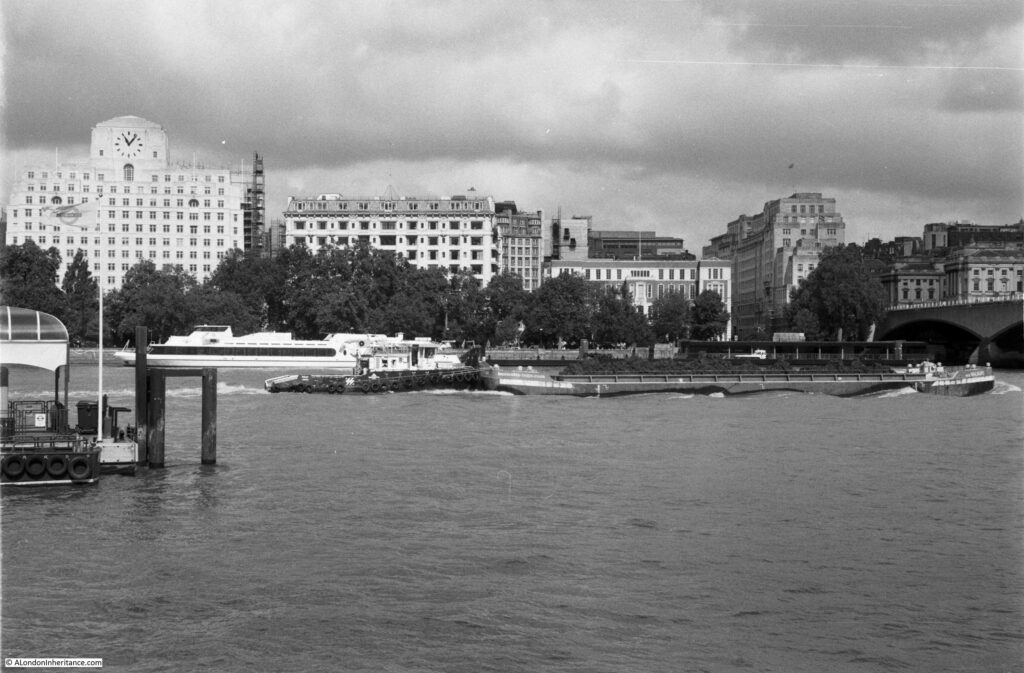
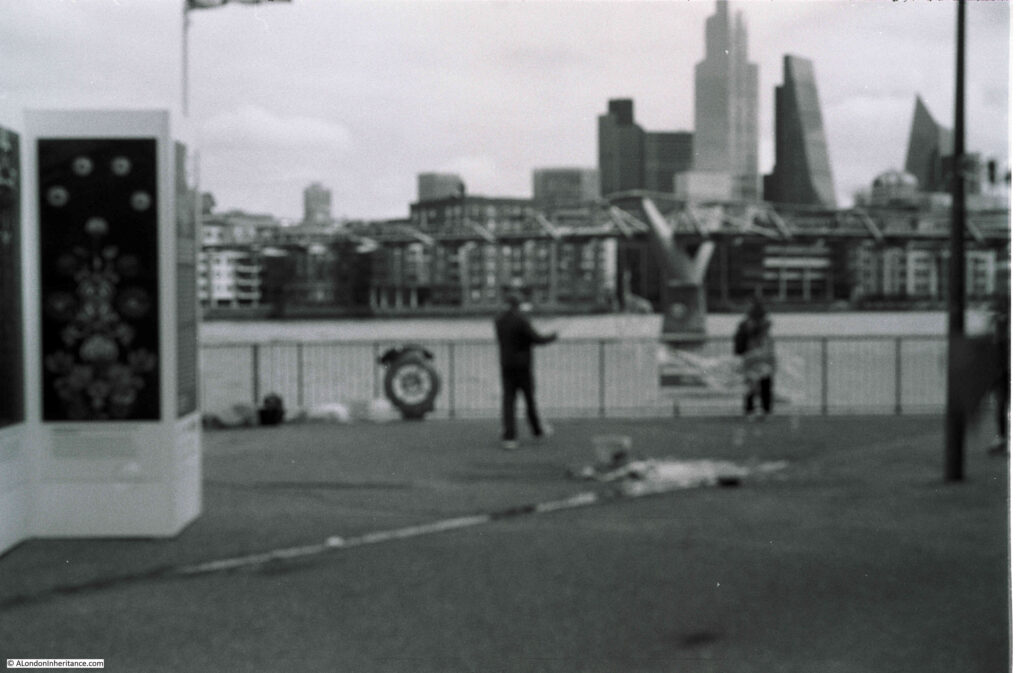
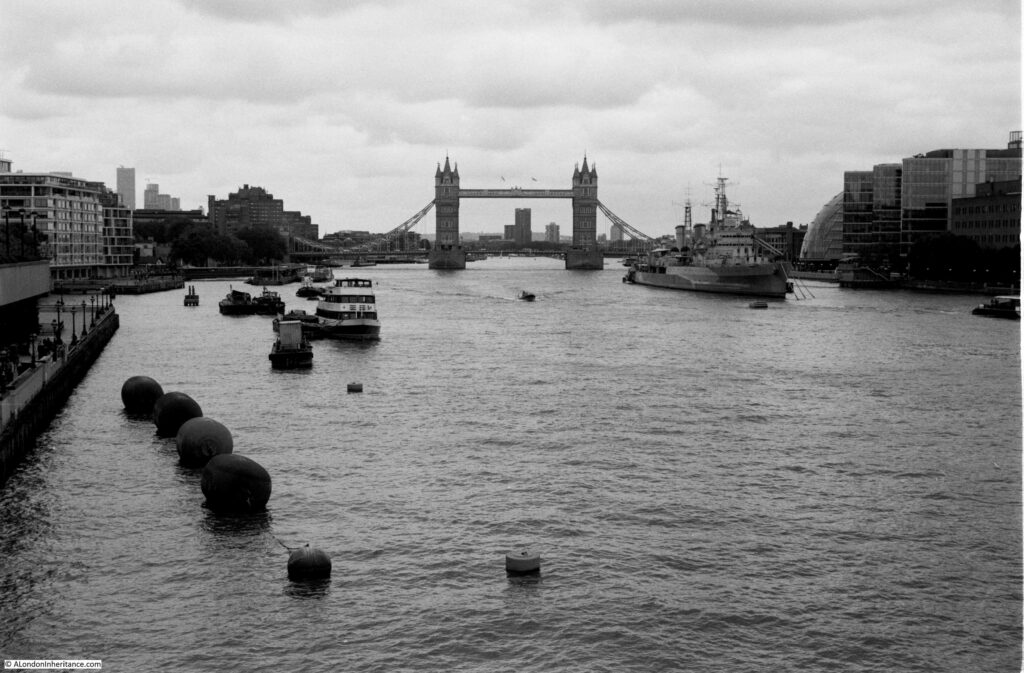
The first photo taken by the Leica IIIg in over 40 years – looking to the north bank of the river from the south bank.
Much to my surprise, the photo came out well. The river, buildings and sky all gave different light readings, so I used an average to see what would happen.
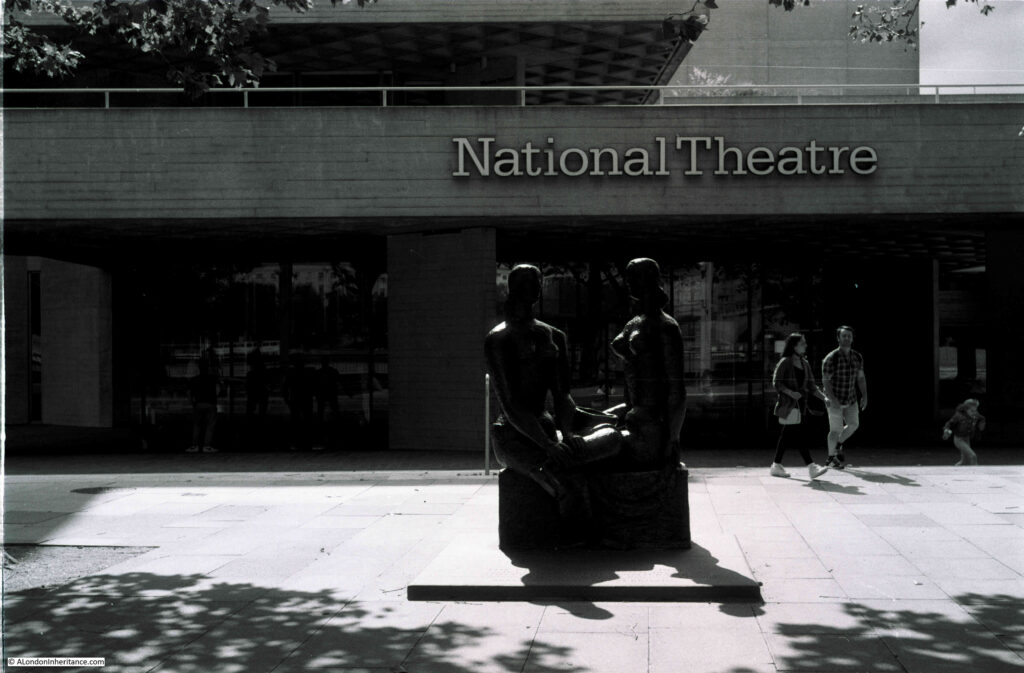
I was not aiming to take photos of specific objects, or scenes of any historic or architectural value, it was just a random walk looking for different scenes to see how the photo would come out. This following photo did not do so well.
The photo is of the Frank Dobson sculpture “London Pride” in front of the National Theatre. The sculpture was backlit with bright sunshine, The photo works well for the National Theatre, but the sculpture is too dark.
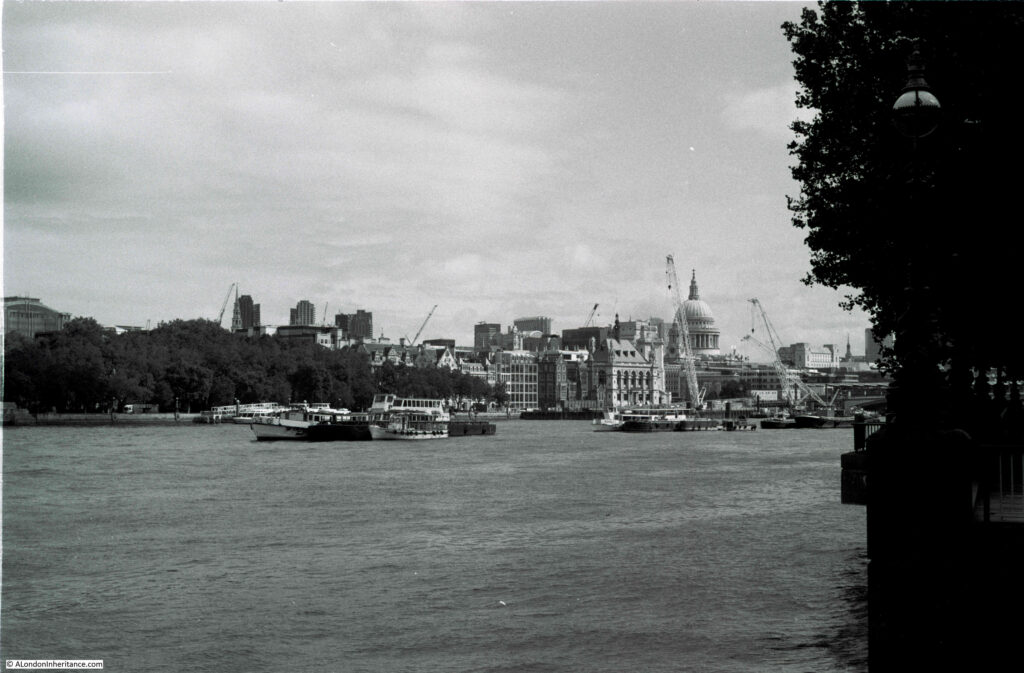
A view across the river to St Paul’s:
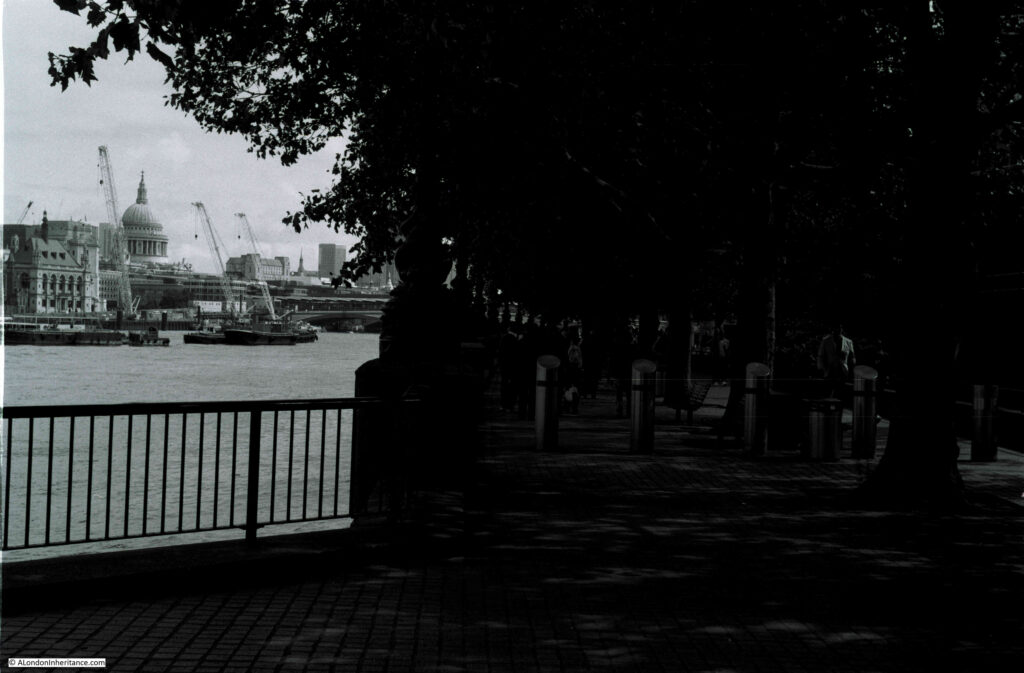
The following photo did not work well. On the left was the brightly lit view across to the City. The view on the right should have been really good as shafts of sunlight were breaking through the tree cover onto the walkway. I had set the exposure for the view on the left, not the view through the trees.
Really not sure what happened with the following photo, but it seems out of focus.
Focusing needs to be set manually on the Leica IIIg. There is a separate viewing window to focus the view. Looking through this window and if the scene is out of focus, you will see two views of the same object, each slightly apart.
To focus the camera on the scene, you need to turn the lever adjacent to the lens, which should bring the two views of the scene together. When the views of the primary object in the scene meet as one, the camera is correctly focused.
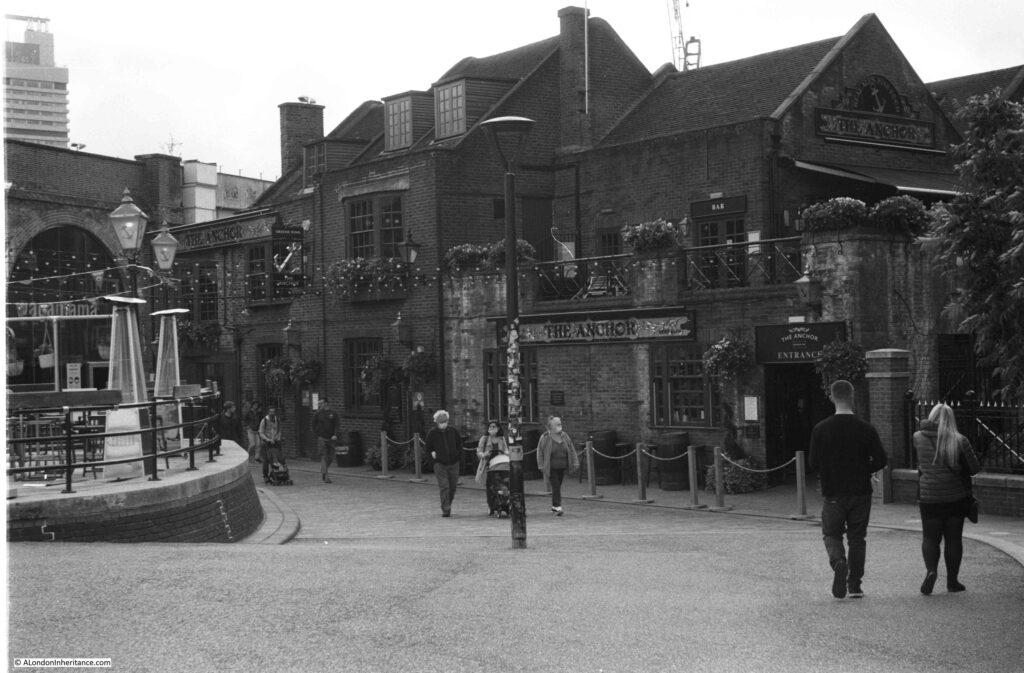
The Anchor pub:
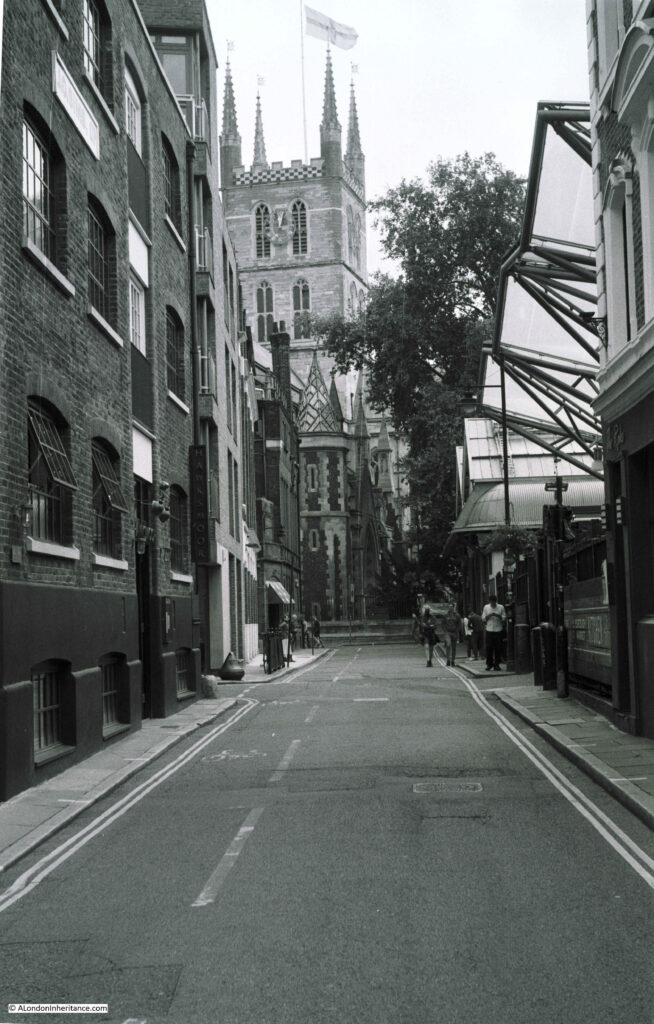
I was starting to get to grips with the light meter and camera, and took the following photo in Winchester Walk. Borough Market on the right and Southwark Cathedral at the end of the street.
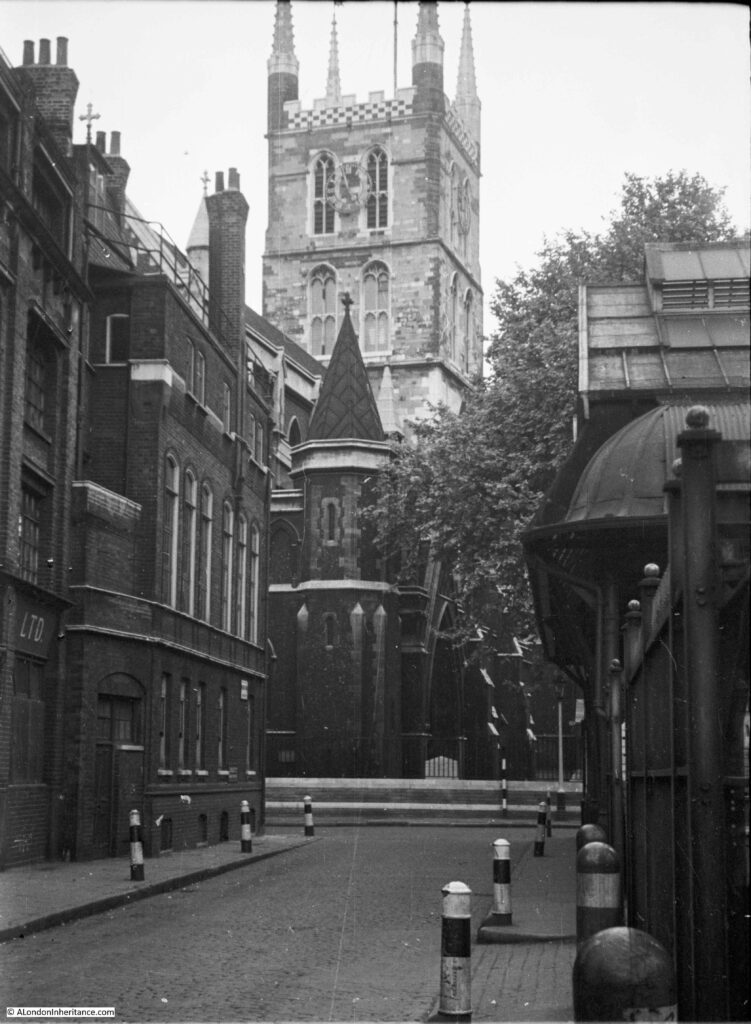
I took the above photo as my father had used the same camera, 67 years ago to take a very similar view (I did not have the original with me, so I was not at exactly the right location). The same camera and lens – 2020 above and 1953 below:
The following photo was taken from London Bridge, where the colour photo earlier in the post with the light meter was taken. It was a difficult scene. Point the light meter at the sky and it would shoot up, down at the river and a much lower light reading. Going for an average reading seems to give a reasonable result.
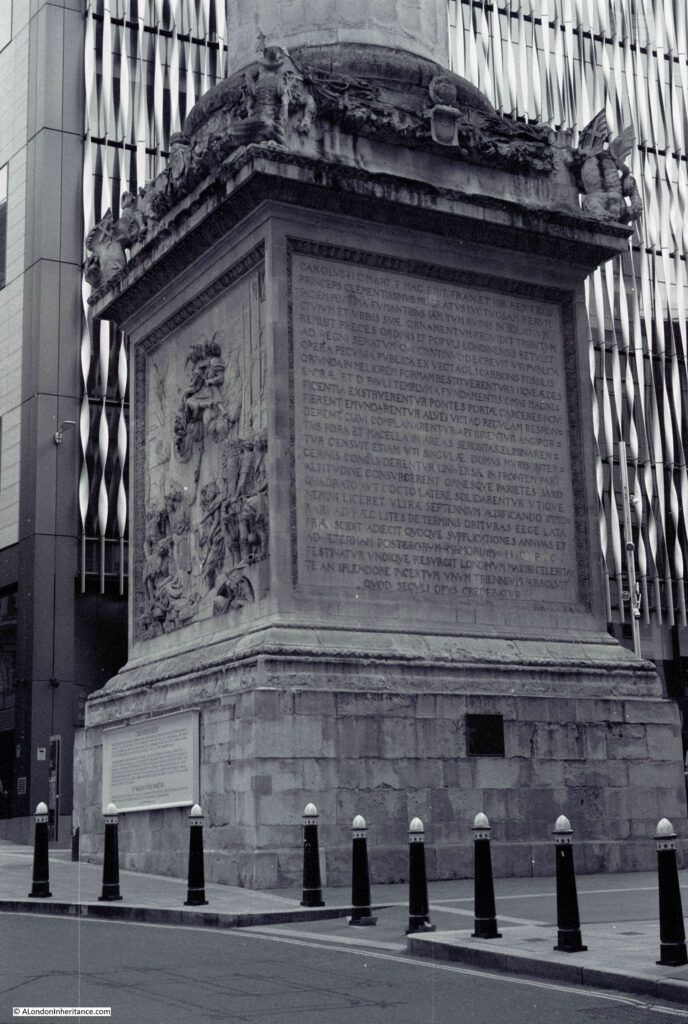
I took the following photo as there was plenty of detail on the base of the monument, a building in the background, and the scene in relative shade due to the surrounding buildings.
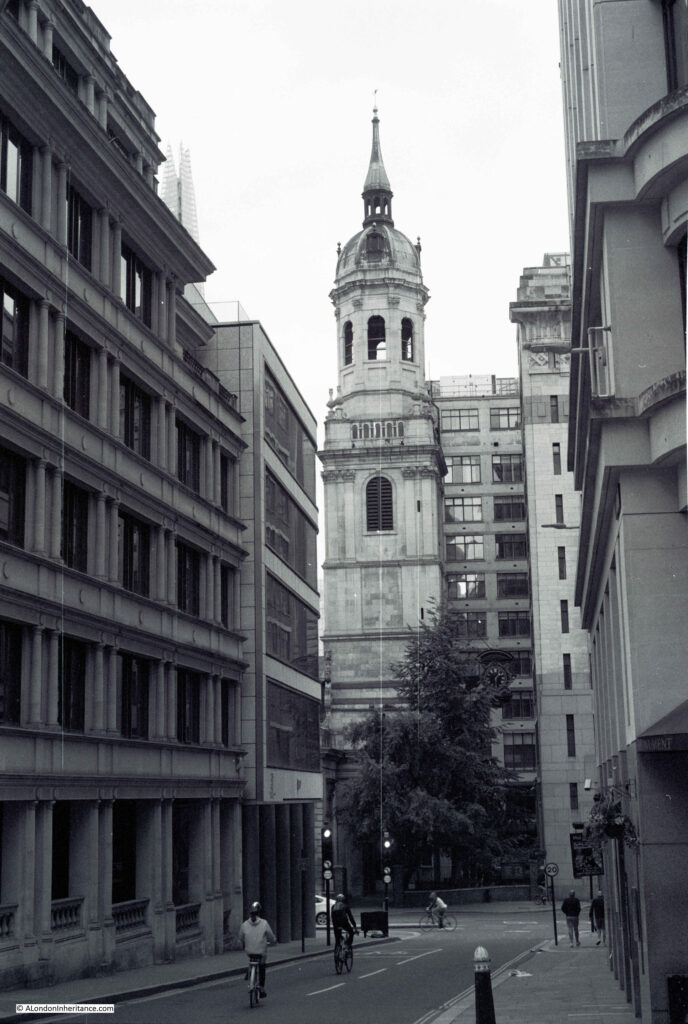
View down Fish Street Hill to the church of St Magnus the Martyr:
The view looking up Gracechurch Street from Eastcheap:
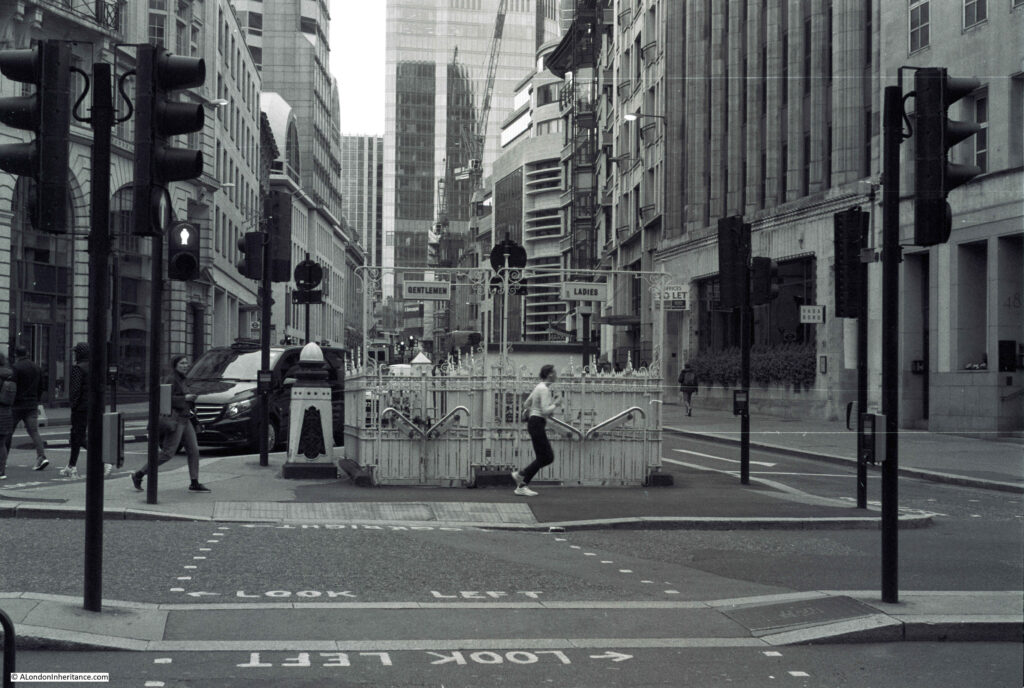
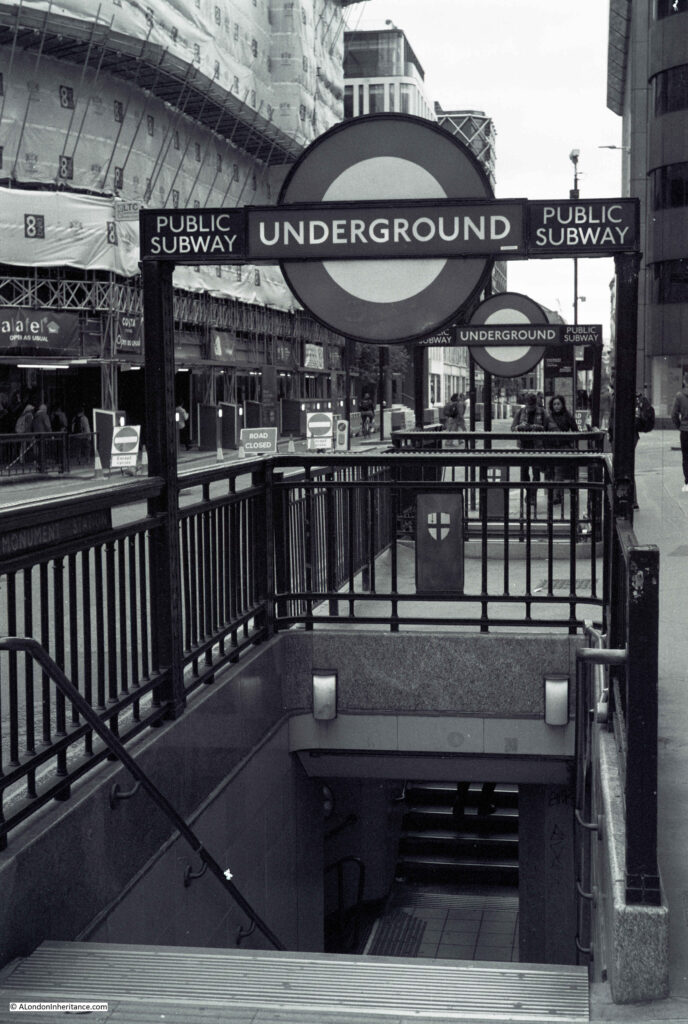
Entrance to Monument Underground station in King William Street. I wanted to see if I could get the exposure right for the street scene and the steps below ground, and also focus on a close object and with the rest of the view in focus.
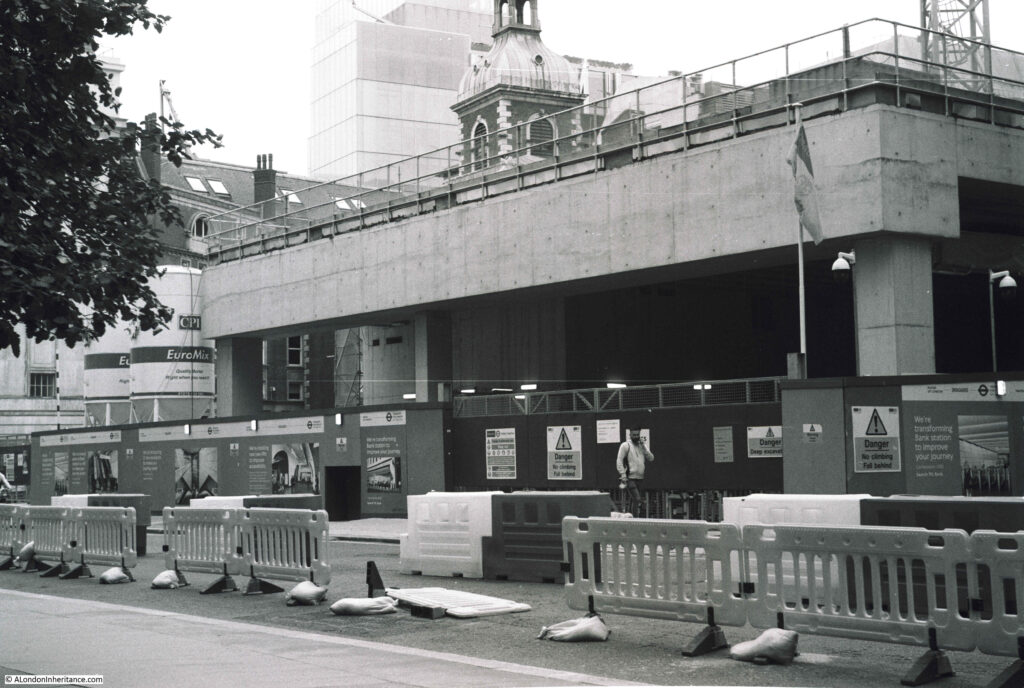
Construction site for the new entrance to Bank Underground station in Cannon Street with the tower of St Mary Abchurch in the background.
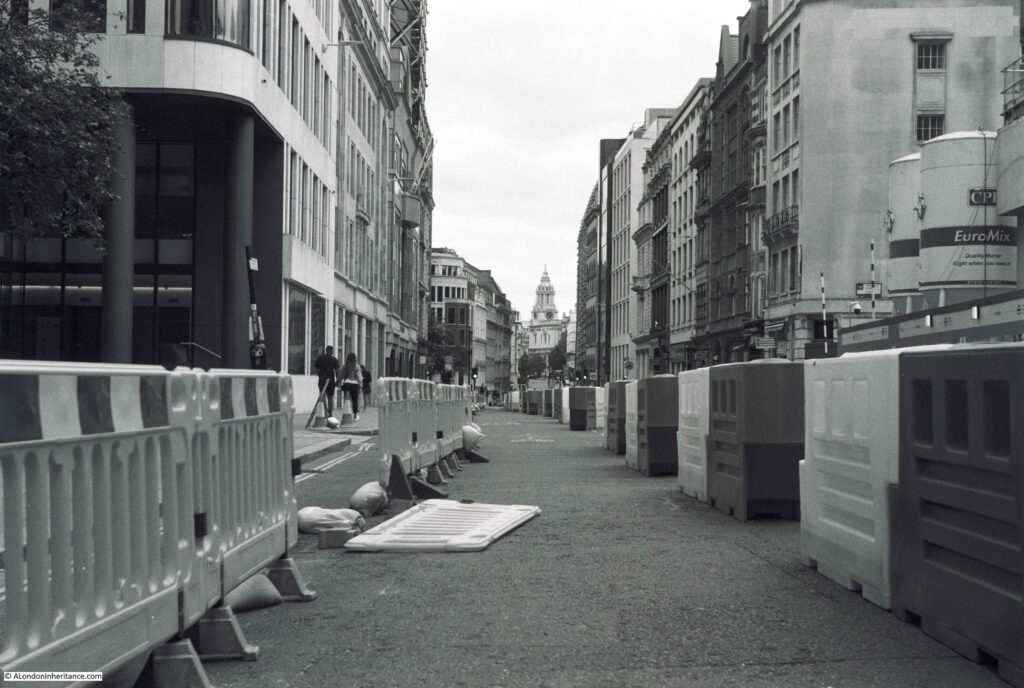
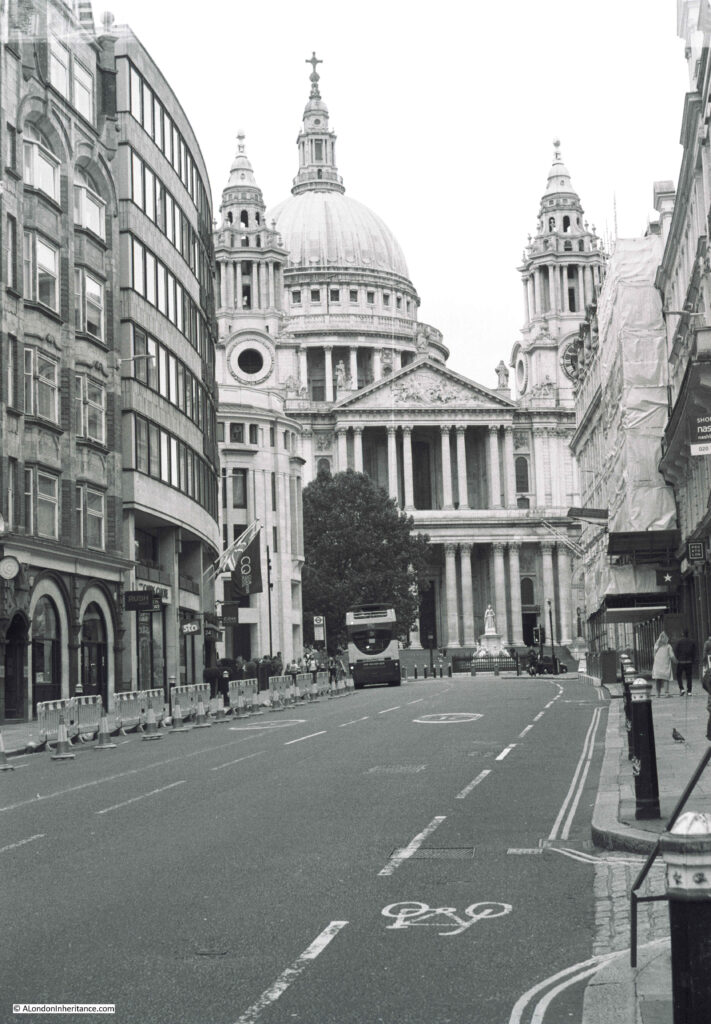
Temporary bike lane in Cannon Street. Pleased with this as both the adjacent barriers and the tower of St Paul’s at the end of the street are all in focus.
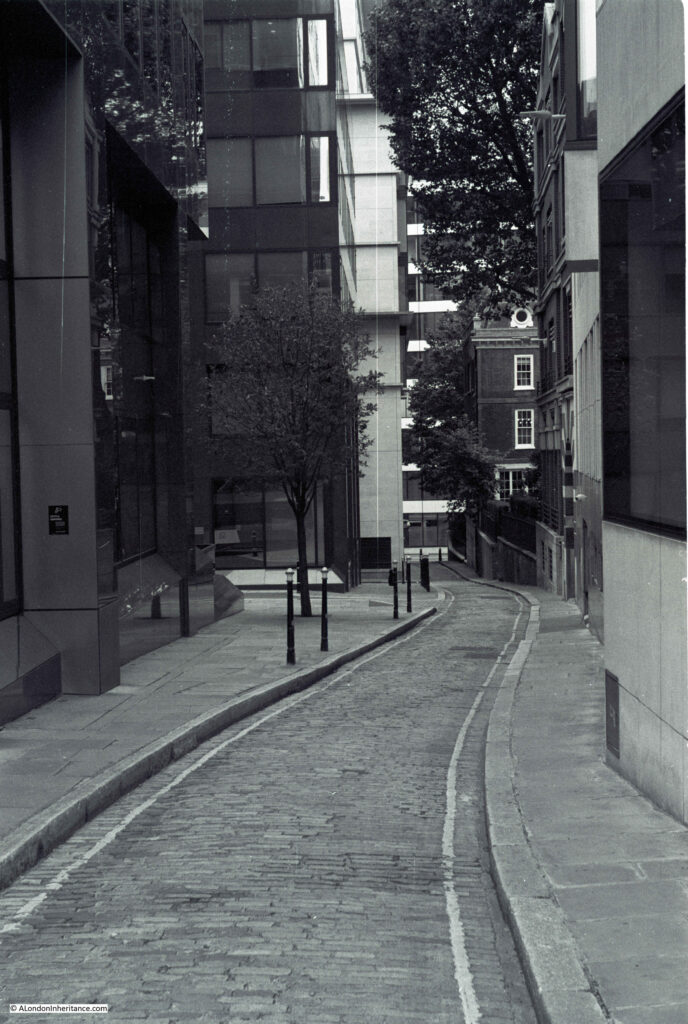
View down Laurence Pountney Lane:
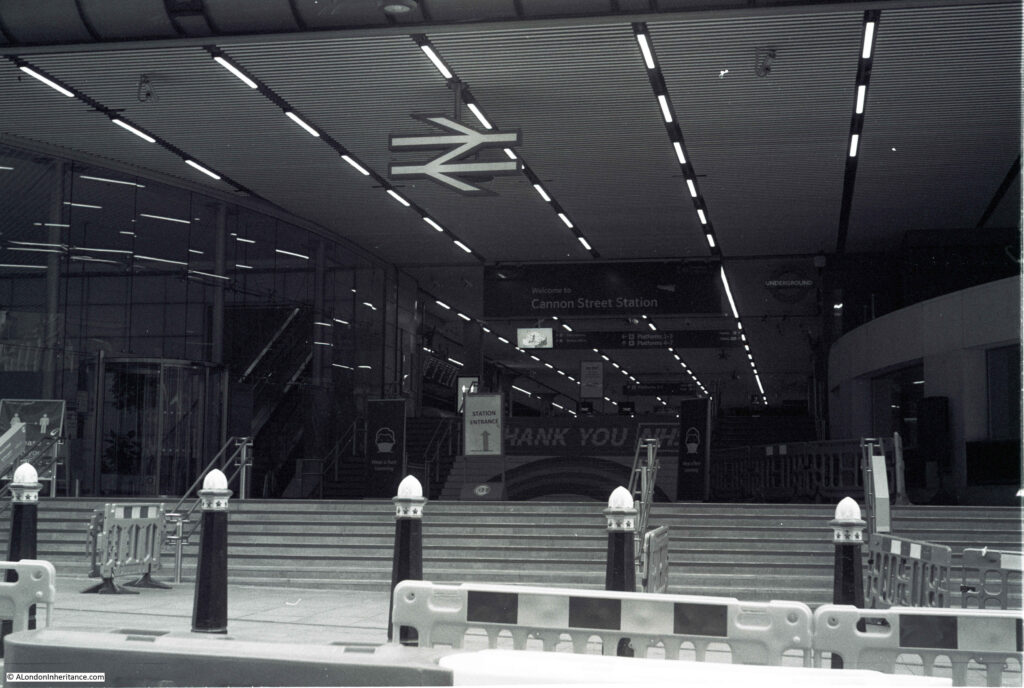
Entrance to Cannon Street Station – I should have exposed more for the darker interior of the station, but I was trying to get the way the lights swept into the station.
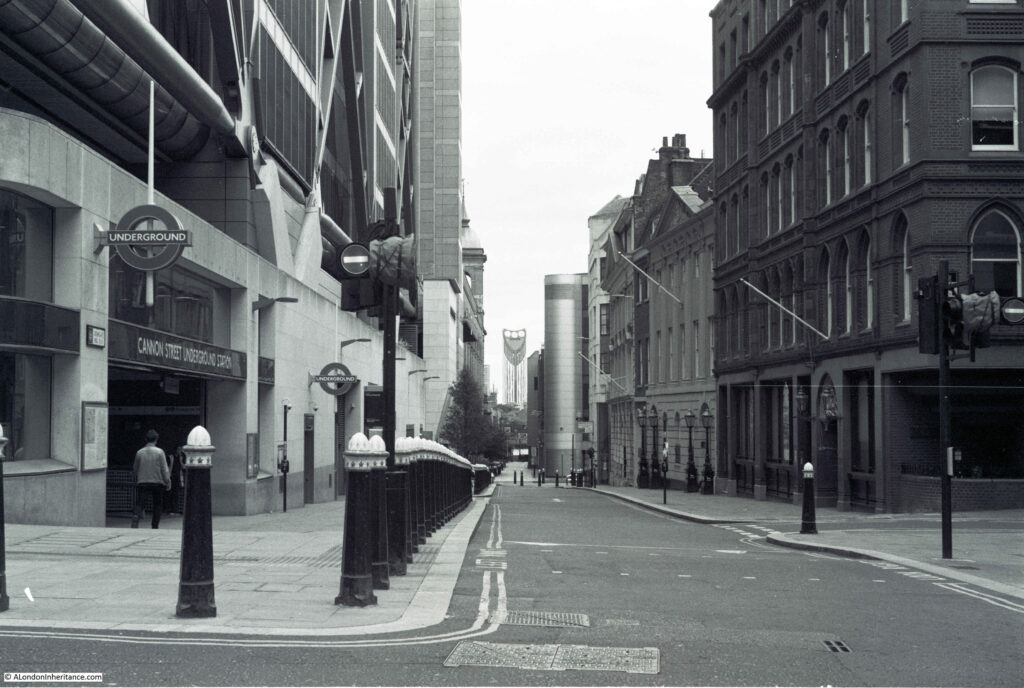
Dowgate Hill at the side of Cannon Street Station, with the Strata Tower at the Elephant and castle in the distance:
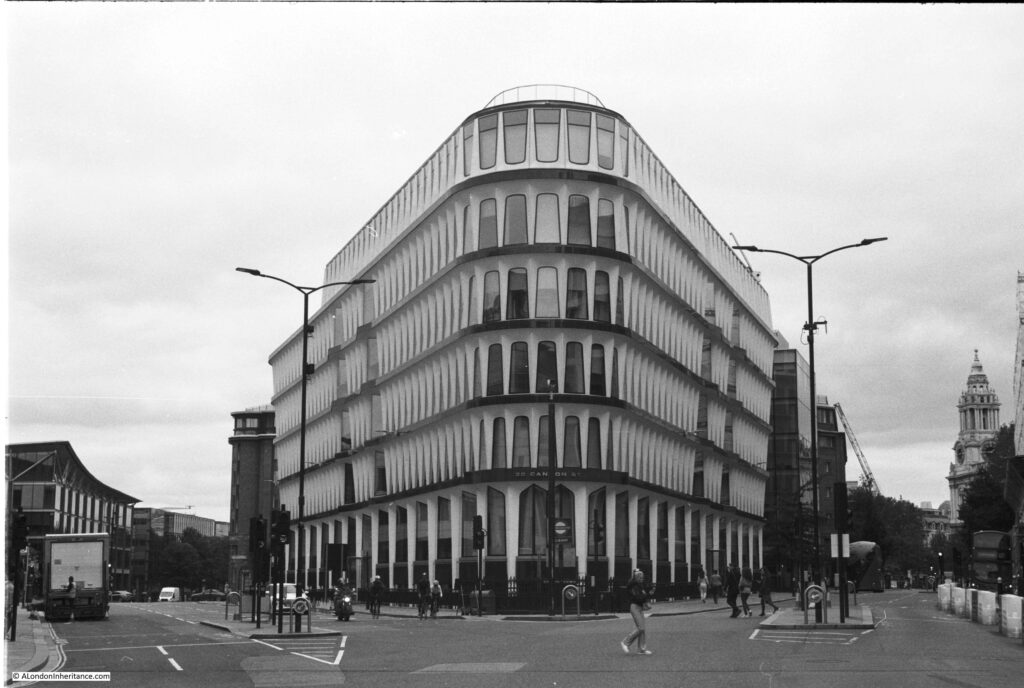
One of my favourite City buildings – 30 Cannon Street:
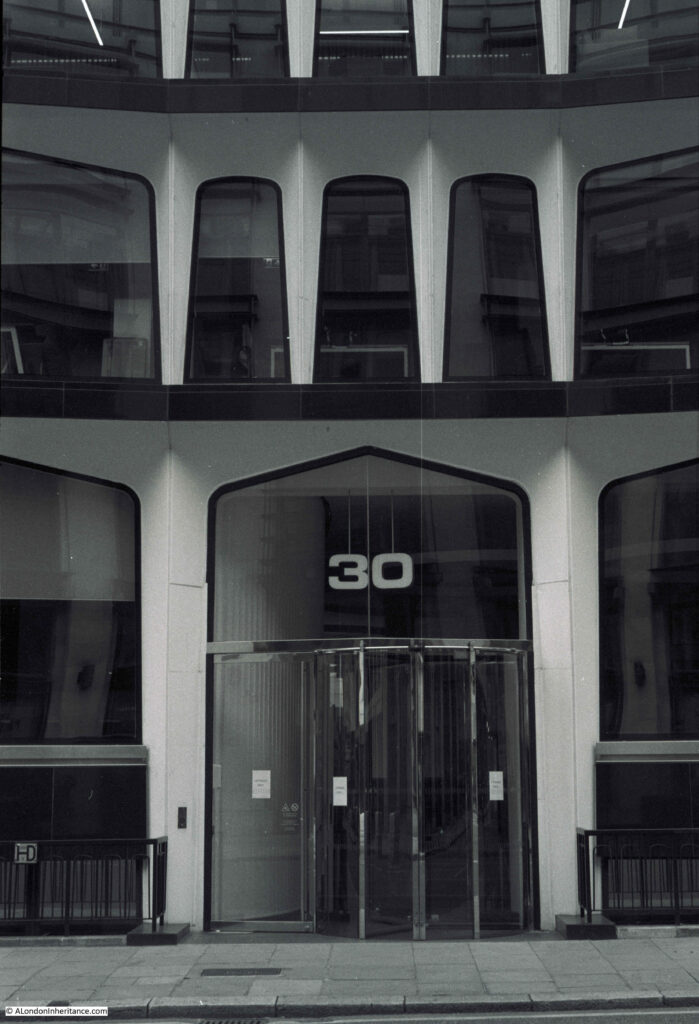
The main entrance to 30 Cannon Street:
Really pleased with the above photo. Architectural photography is one of the areas where black and white photography seems to work well.
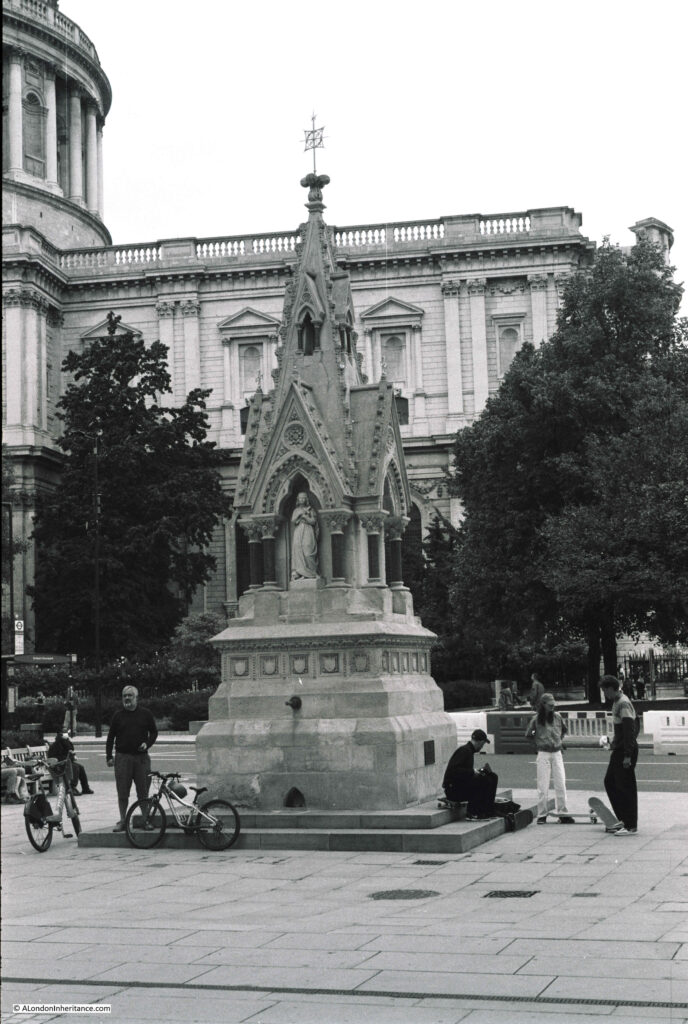
The St Lawrence Jewry Memorial Drinking Fountain at the top of Carter Lane. A good spot for skateboarding down into the lane.
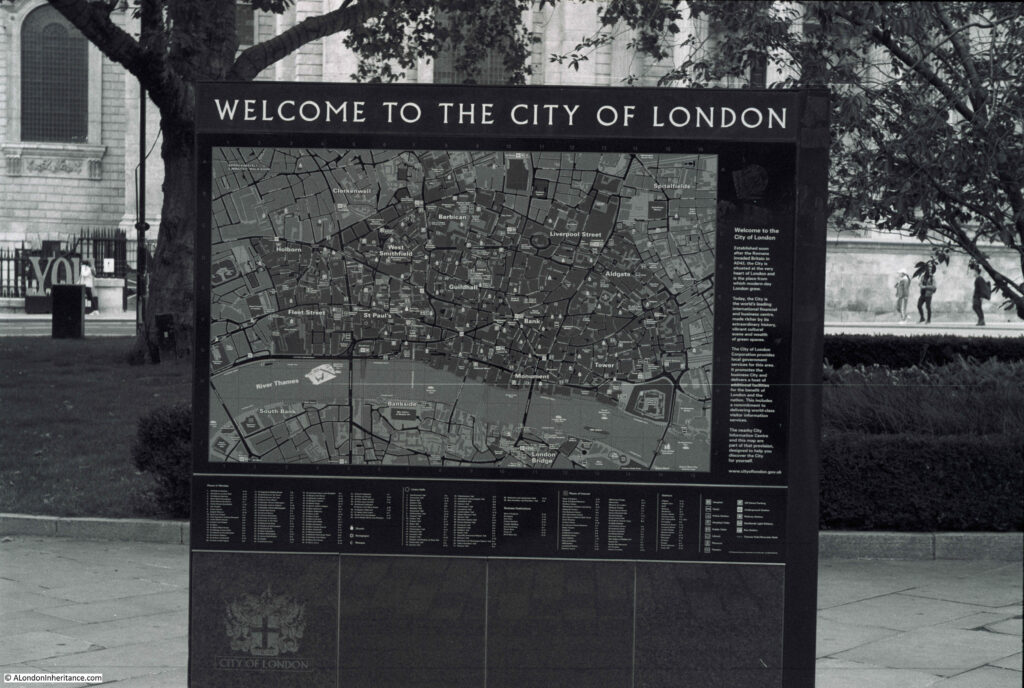
Welcome To The City Of London – map near the visitor information center.
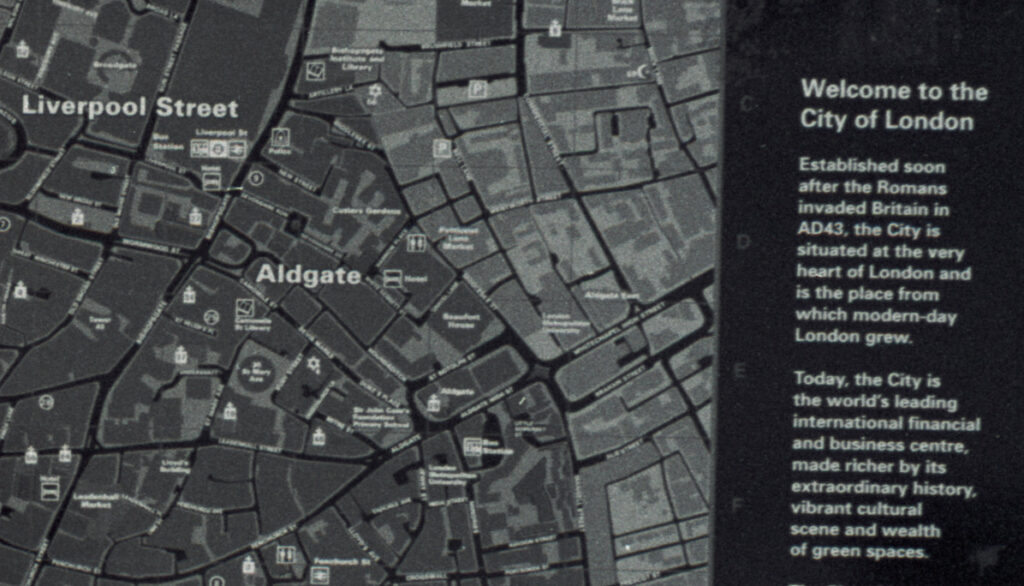
I took the above photo as I was interested in the level of detail that could be recorded on film. The map had lots of text and detail within the map, and the photo below is a small extract of the above. It shows that extracting a small part of the photo and enlarging still retains an excellent level of detail.
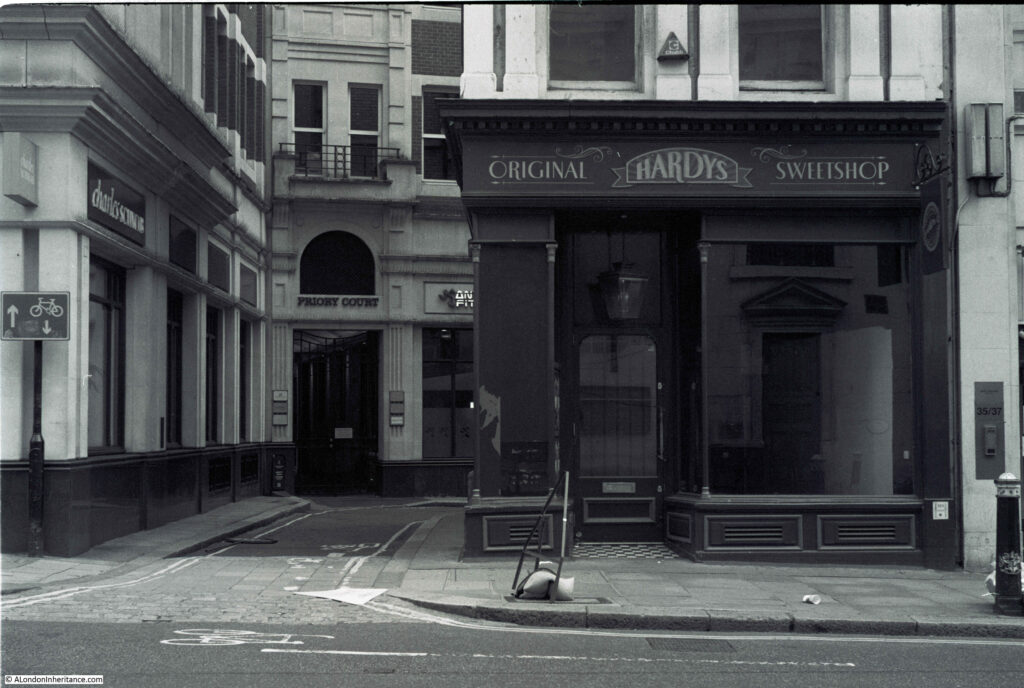
Walking down Ludgate Hill and I noticed this closed shop. Originally a “traditional” sweet shop, probably catering to the tourist trade on the route to and from St Paul’s Cathedral. Now closed and empty – possibly a victim of the lack of tourists for most of the year.
Looking up Ludgate Hill towards St Paul’s Cathedral – I have never seen it so quiet on a Sunday afternoon in late August.
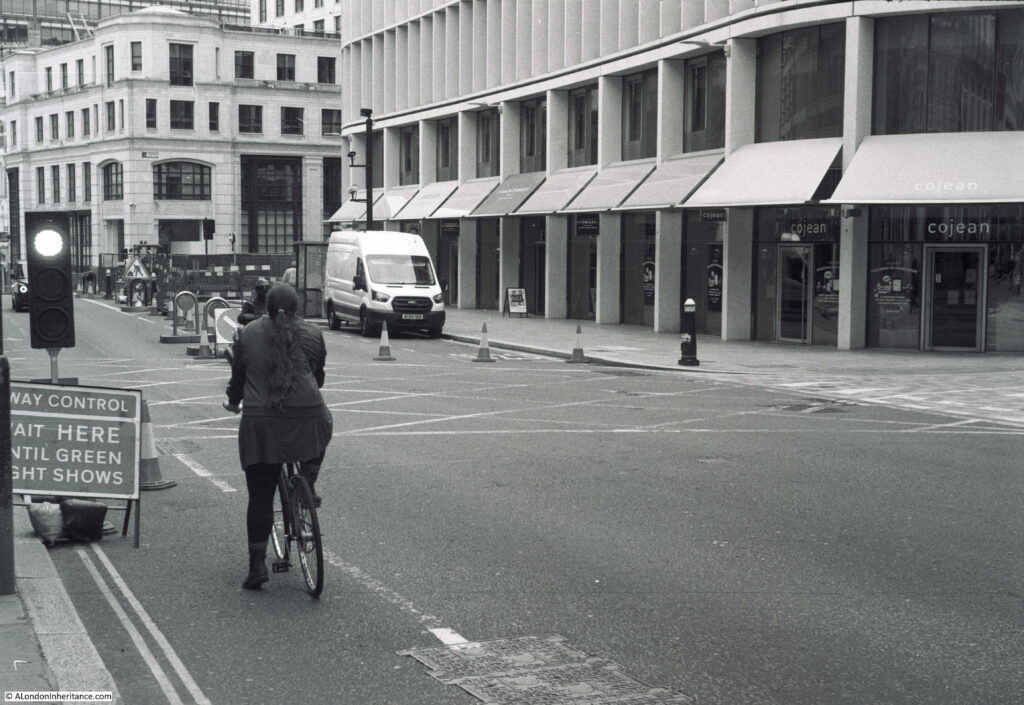
Road works and temporary traffic lights looking down Ludgate Hill:
The film I was using was theoretically capable of 36 exposures, however I only managed 29 photos from the roll of film. I suspect I lost some at the start of the film by needing to trim an extra long length, then winding the film on too much to make sure it was on the take up spool and the rewind knob on the film cartridge was turning. Whilst this showed that the film was correctly loaded – it did waste some of the total number of photos that should have been available.
The camera does have a dial that shows the number of photos that have been taken, and the dial is manually set to zero before the first photo is taken, however the dial assumes the film is loaded with minimum film on the take up spool to give 36 exposures.
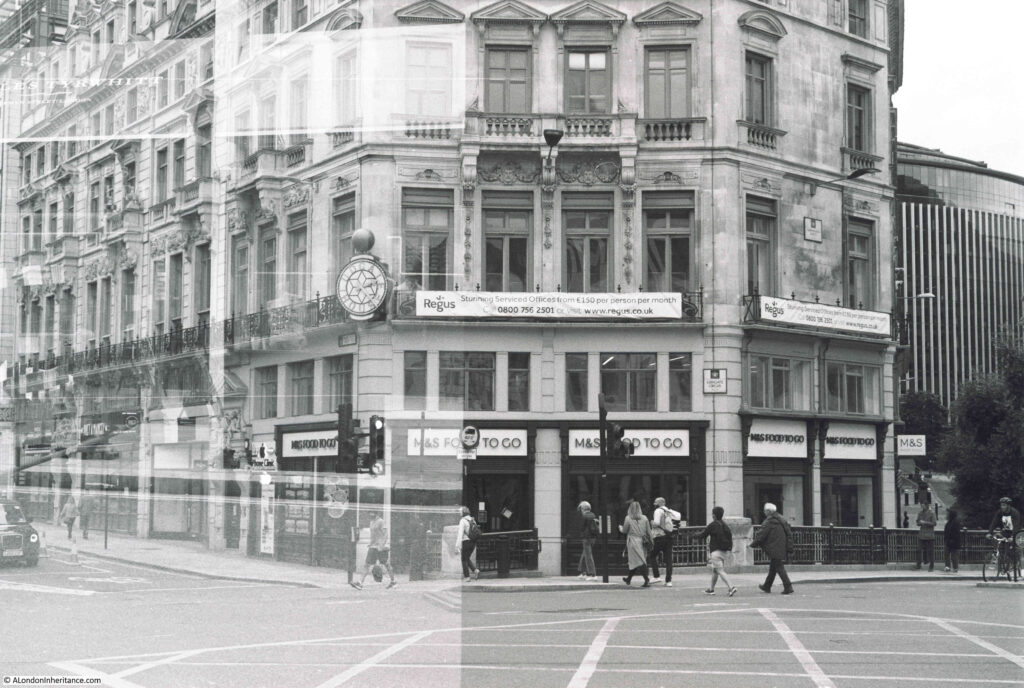
The final couple of photos on the film showed problems with double exposure, the following photo is an example. Not sure why as the film did appear to wind on correctly, but obviously a problem at the very end of the film.
The photos are very routine photos of the south bank of the river and the City of London, however, for me, they are very special.
They show that the Leica camera and the Weston light meter are working well, and that I have a basic understanding of how to use them.
There is something rather special taking photos with such a camera. The lens is over 70 years old, and was already taking photos of London in the late 1940s.
One of the problems of taking the “now” photos to compare with the photos from the 1940s and 1950s is that my current camera is so very different to the Leica. Completely different lens, different method of capturing the photo etc. This means that whilst I can take a “now” photo of the scene, it is never exactly the same as the original. What I hope to do is revisit the sites of my father’s original photos with the Leica and take new comparison photos. With the same lens and camera I should be able to get the new photos to be exact comparisons.
I also still have much to learn. The camera also came with a number of accessories such as an open frame sports viewfinder, red and yellow/green filters to add contrast to a black and white photo etc. I suspect I will be experimenting with the Leica and film far more over the coming months.

Congratulations in taking up your father’s Leica. This will surely provide a new lens through which to illustrate your fascinating walks. Wishing you all the best with your new old technology!
It is good to use old school cameras to to remind you of the basics . Composition etc. I recently got myself an Olympus OM,-1. And used some Ilford XP2 b/w film . Good results. And London is a good subject for B/w
Barry Devonshire
Milford XP-2 is my favorite film, and I should load up my SLR and go take some photos with it.
Fuji film was the best. Transparencies came prepaid for development!
Hi enjoyed this very much,brought back memories, of when I first started work at 15, in a photographers, ” Cambells press studio” in Ludgate Sq. All so the closed sweet shop on Ludgate hill, when I worked there it was a Jewelry shop called Yableys . All our work was obviously black and white and all glass plate negatives. How things have changed.
Which just goes to show that practise is key. I love that camera and especially the instructions – In a Nutshell – with their polite exactitude. Like my venerable sewing machine and its instruction booklet which is beautifully precise, a thing of glory. I hope you have many hours of pleasure with that camera. Re 30 Cannon Street, a favourite of mine too which I sometimes use to anchor myself if I get a bit lost in the lanes around that area and, as for the sweetshop, I noted its closure a couple of weeks ago. Those empty streets.
Amazing blog. Thanks.
Long ago I was told when loading film in a camera you should very GENTLY use the rewind to put a TINY bit of tension in the film. Then the rewind know will always turn yo confirm it is being moved forward when you wind on. Worth a try?
Exactly – used that rick on my old Zenit B for many years 😉
Thanks for a lovely piece.I too love using my Dads old”stuff”,he was a cabinetmaker and passed away 19 years ago and I’m still using his Disston saws,Rabone wooden rules,His Brace and Bits( just got to master how to use the 20 wooden moulding planes in the outhouse now and find somewhere to get the saws sharpened and set).He would be 95 in 6 days time,just where does the time go? Once again thanks for the marvellous article and the memories.
Good to see such a classic old camera being used again. I cut my teeth on a Zenit B and used the rewind knob to take up the slack film when loading. It might work on the Leica. I still have my 1981 ‘college’ camera – a Pentax ME Super. A wonderful lens (50mm f1.7 SMC) came with it, which I still use with an adapter for my Canon digital bodies. I’m pleased to see that a whole new generation are using film cameras and a great online resource, if you are thinking of buying one is Zenography on YouTube. They are very affordable and make you learn ‘proper’ photography in the process. Lovely post for those of us missing London.
That takes me back. With some practice you will become adept at adjusting the aperture and speed settings mentally without having to use the Weston for every shot. Good luck and happy shooting.
Lovely post. A great resource for choosing an old film camera is Zenography on YouTube. A lot of darkroom ‘dodging and burning’ was necessary with film shots. It made me value each shot, knowing the work I’d have to put in at the printing stage. Film images have a certain character, even now and a whole new generation of photographers are using film, which is great to see.
Great post. Lovely to see the old classic Leica being used again. If you are thinking of getting into film cameras, check out Zenography on YouTube. I still use the lenses from my 1981 Pentax film camera on my digital bodies. All manual settings, but using the camera light meter as a guide. The best of both worlds!
Nice post, not least because your wander covered where I used to work until recently and the same parts of the City I too walked last week. My late father used a Voigtländer Vito BL which I only used once – I still have it, with its box, manual and accessories. It’s also a viewfinder but at least has its own light meter… Years ago I used to use FP4 too in the then new Docklands.
I inherited a Rollieflex twin lens which I’ve never had out of its leather case. Hmm . . . But your post this week reminded me of using my east German Exa SLR at the London College of Printing and developing and printing from my own negs. Thanks for the memory and the lovely photos, too.
One of the biggest rows my wife and I had was after our first baby was born. forty five years ago…
Before she went in to hospital I had loaded the film in the camera and wound it on.
At the hospital after the birth I took all 36 photos available on the roll, noting the numbers as I neared the end.
A few days later I took the roll to the local chemist for developing and printing. We were both so excited to see the resulting prints and looked forward to showing them to our parents.
I went in to pick up the prints at the end of the week — to be told the film hadn`t been used. No exposures. In my haste to get everything right I hadn`t secured the end of the film in the other reel. I was simply winding on the numbers but with no film attached.
I was devastated. And my wife never forgave me.
…….
Ouch. My SLR has a visual indicator mechanically linked not to the winder but to the supply spool, so you know the film is threaded when you load and wind.
The whole basis of exposure assumes the target has a 50% average brightness. You can buy (or at least could) 50% grey cards which you hold up (assuming it is illuminated in the same way as the scene) to cover the view you are photographing and take a reading off that. This is a bit of a fag – I find holding my hand up vertically with the fingers horizontal at arms length and taking a reading off my palm works well – skin tone is generally about 50% and this ensures skin tones in the photo come out correctly.
Some great shots there.
In the digital age, I’ve favoured HP5 over FP4. It’s more forgiving, and the graininess disadvantage that it has over FP4 is actually a plus when shooting b&w these days. It’s what people want to see.
I think most of the off shots could be rescued if you learned to develop your own. Maybe not the sculpture, but the rest would come out fairly well if tweaked in the darkroom. I think one of the great joys of b&w film is how easy it is to develop your own. Colour is a right pain, by comparison.
Genuinely fascinating. Thank you.
Impressed that your first picture has the headquarters of the Institution of Engineering and Technology so clearly as the subject! And also pleased that you included 30 Cannon Street. One of my employers had their hq there and I went to many meetings there.
My trips to London have completely stopped for obvious reasons. I look forward to your blogs each week to get my fix.
How your day out with the Leica took me back, although I am only 72 the joys of getting the correct settings, the winding on and especially the planning of the shot all brought back memories. I do have to say that I prefer my digital set up now, so much easier. Thank you for your trip down memory lane.
How your day out with the Leica took me back, although I am only 72 the joys of getting the correct settings, the winding on and especially the planning of the shot all brought back memories. I do have to say that I prefer my digital set up now, so much easier. Thank you for your trip down memory lane.
I love the photography you’ve done with your father’s Leica camera! Bravo to your determination, most people would have given up.
I think those pictures look wonderful, they have a bit of the vintage look associated with black and white. But it’s not just that, I think the contrast is really good. The quality of the clouds for example is very good. And also it’s a beautiful shade of black and white, not yellowy or sepia or blueish. Just very beautiful grey.
Very emotional to see the image you replicated from your father’s photography, with the same camera. It carries all those years and emotion. Wonderful.
Chemical photography is good fun. Regarding the difficulty of using the weston meter you may find that it originally came with an incident light dome that fits over the meter eye?. If you clip it on and take a reading of the “sky” it will give you a useful “average” for a quick shot. See here http://www.westonmeter.org.uk/westoninvercone.html
Most 400ASA speed film will give you a good result at 60th second between f11 and f16 outside. Rule of thumb the wider the aperture the wider the depth of field (front to back of scene sharpness) Do consider using a tripod to take architectural subjects where you can have very wide apertures and slow shutter speeds. Hope this helps.
I still use a Rolleiflex 120 black & white camera along with my 1960s Nikon kit. Keep it up.
Thank you for this post, which brought back so many memories. We’ve all had that roll of film that didn’t go through the camera at all or was partly double exposed. The first camera I bought with earnings from my Saturday job, some 50 years ago, was a Russian copy of the Leica and I used it with a Weston Master 5 light meter. That came with an optional white plastic dome you could fit over the sensor to take a reading of the light falling on the subject (rather than reflected from it). Like (almost) everyone I only use digital these days, but early experiences with my Grandmother’s 2 1/4 square format folding camera taught me the value of composing every shot – when you only have a roll of 12 shots for an entire holiday you have to make each one count.
My favorite reason for preferring film over digital is the absence of pixelation. With certain films, exposures and chemistry you can achieve amazing results with enlarged prints. I still have my Canon FTB 35mm and Yashicamat Twin Lens Reflex (2.25” film). Your adventure has been an inspiration!!
What fun! I always wanted a Leica, but ended up with twin-lens reflexes. But I did have a Weston. I have a vague memory of a metal temple to cut the tail on bulk film when filling a cassette
It is not immediately obvious from online sources to what extent Hardys sweet shops are open or closed. Some seem to be open according to their Twitter feed, but in common with Ludgate Hill (above), the branch at the bottom of Oxford’s High Street is permanently closed and the building empty. That branch was very reliant on the tourist trade, much like Ludgate Hill.
Wonderful post! I love. 30 Cannon and blogged about it earlier this year:
https://irontongue.blogspot.com/2020/06/friday-photo.html
I longer for a Leica in the days when they were completely out of reach financially; now…not sure I want to acquire more photo gear.
Love your photos!
Lovely photos. My first camera was my father’s, a Nikon FM2, as in fully manual, but with an inbuilt lightmeter. Lots of fun, but making 36 pictures last climbing in the Alps over 2 weeks was a challenge! If you were careful you could squeeze 37 pictures out by not winding on the film fully initially. A risk but ultimately worth it if you got an extra picture! The best advice from my father was to keep a log of the pictures alongside the settings, that way if a picture didn’t work you could learn for next time. The beauty of an old fashioned camera is that it makes you think about the composition, light, etc before actually taking the picture, rather than blasting off a whole load of shots and hope one works…
The Leica feature was excellent and brought back some memories.
I particularly liked the photo of Dowgate Hill, and the building in which I used to work in the very early 1970s. A very absorbing feature, of a time when we really had to work assiduously at taking good photos.
I am amazed by the way these black and white photos work to make 2020 London look so wonderfully old fashioned… like a time-warp.
Terrific post. Brought back so many memories of learning photography from my father…with all the attendant difficulties of properly loading film, hoping that it would catch and wind so as to avoid the dreaded double exposure–though some of those kinds of shots had unintentional hilarious results. Remembering how much thought and care went into taking each photograph. Or trying to find a dark place to unload and change film when out and about to avoid any possible exposure Your photos were wonderfully evocative. Can’t wait to see more of your Leica shots.
Absolutely fascinating post – I love the photos. They remind me of photos my dad took with his manual camera. I’m hopeless at something so technical, so must rely on my DSLR and phone cameras, but truly admire people who can do what you did…
The photos have a very historical feel – if I didn’t know better (it’s obvious when looking at the vehicles and clothing), I’d think they really had been taken in the 40s…
Really enjoyed your careful and detailed description and the development of your relationship with the camera. Love the photos. Especially taken with Winchester Walk.
Thank you.
Very different world with phone cameras super black and white pictures.
Thanks for a very good description from a ‘young’ man’s perspective; you see, I traded my Nikon FTn and Nikkormat in ’79 for a Leica M2 AND a IIIg. Still use them today. Leica made a tool that helped cut the end strip quite accurately: the cut shouldn’t go through a sprocket hole but in-between, as you did. And you can check the proper positioning of the film simply by unscrewing the lens: direct access to the negative!
I liked the way you described your first steps with it and the Weston. True, you do pay attention to what you’re shooting and how you set up when you have only 36 exposures. You saw that you can adjust the clarity of the rangefinder window with the help of a little lever on the eyepiece to compensate for weak eyesight!
Snap!
I too inherited a Leica from my father. From your description I think it is a IIIC. With exactly the same Elmar f=5cm 1:3.5 lens. My Dad always claimed it was the best lens ever made. I used it for many years and I honestly believe the pictures it took had a particularly sharp and crisp quality. The Weston light meter broke eventually but I found that I could judge the exposure pretty well myself – I think modern films became a lot more tolerant. I still have the Leica but I haven’t used it for years. I moved on to an Asahi Pentax SLR and then today I just use a cheap Canon Powershot digital camera. So much easier to use and less fiddly. But your post may have inspired me to buy some film (do they still sell and process it?), get out the scissors, carefully load it and take a few real photographs!
Thanks for a great post!
Nick
Starting out in film photography with a Leica IIIg will be a bit like learning to drive in an Aston Martin DB5. You will find it challenging and expectations will be high, but you won’t be able to blame any shortcomings on the apparatus. Good luck and have fun!
Hello I enjoyed the article about the Leica and the way to use the camera. My first camera was Ansco Speedex with Bellows and the second was a Voigtlander Vito B similar to your Leica but much cheaper I think. It has a filter on the lens..that sharpens the view…also had a clipped in body attachment for Light Flash. I got that one in the late 50s.
One of my first jobs was at a Medical School art and photography dept and we did the film developing the enlarging and the prints, slides, and photos for research papers. This just before the advent of colour film… The head photographer had a Linhof which held good sized clips of film which were slid into the camera. His camera was the large size that newspaper photographers used. He used sets of lights or the camera extension/ Yes one used the Light Meter and fiddled the fstops and the timing for the film. Most films came with good info on which stop with which film speed.The Voigtlander was a heavy camera but very compact and easy… with the meter and the film speed one could take good photos…and again as you said you paid for each one so you were careful on what you took…and also careful on what you printed. The photos were mostly black and white and the enlarger had a lot to do with how the print came out. Then we used a wet/dry drum to coat the prints. We also made slides 2×2 for the various departments. It seems like a long time ago…but was only about 1955
Look forward to seeing the posts with the film.
There is something magical about a black and white photo. [London Ontario]
I’ve only just found this post, sorry I’m so late. Such an interesting article! In some ways we are so spoilt today with the technology of smartphone cameras, but there is something special about real film. I well remember starting photography with basic ‘instant’ and then SLR cameras in the 1980s. As others have said, one of the great things about film is the lack of pixellation when you enlarge an image. Pictures could be blown up massively without losing detail, which just isnt the case with standard digital images today.
Also I love any attempt to get to grips with the technology of the past.
Lovely to see Shell-Mex House featuring in your first photograph. A building that really is in monochrome. Happy memories of Shel-Mex and B.P. , the Petroleum Board and its great architectural significance. And a very big clock !
The iiig is a great camera and even with the f3.5 elmar, when stopped down to f8, you’ll be hard pressed to tell the difference between negatives taken on this camera versus a new leica MP with a summicron. These Barnack leicas should not be dismissed as merely ‘vintage’. You have some excellent images, please continue using it. I suggest you learn sunny 16. Also developing at home with Rodinal 100:1 stand development is easy and cheap. Take a look at Foma 100 film, much cheaper tha fp4.