Monthly Archives: October 2018

Tryon Street, Chelsea

If you walk from Sloane Square, along the King’s Road, pass the Saatchi Gallery on the left and a short distance further on the right will be Tryon Street, a very narrow Chelsea street leading from the King’s Road. No entry signs indicate that you cannot drive directly into the street as it is a one way street with traffic entering from Elystan Place to the north.

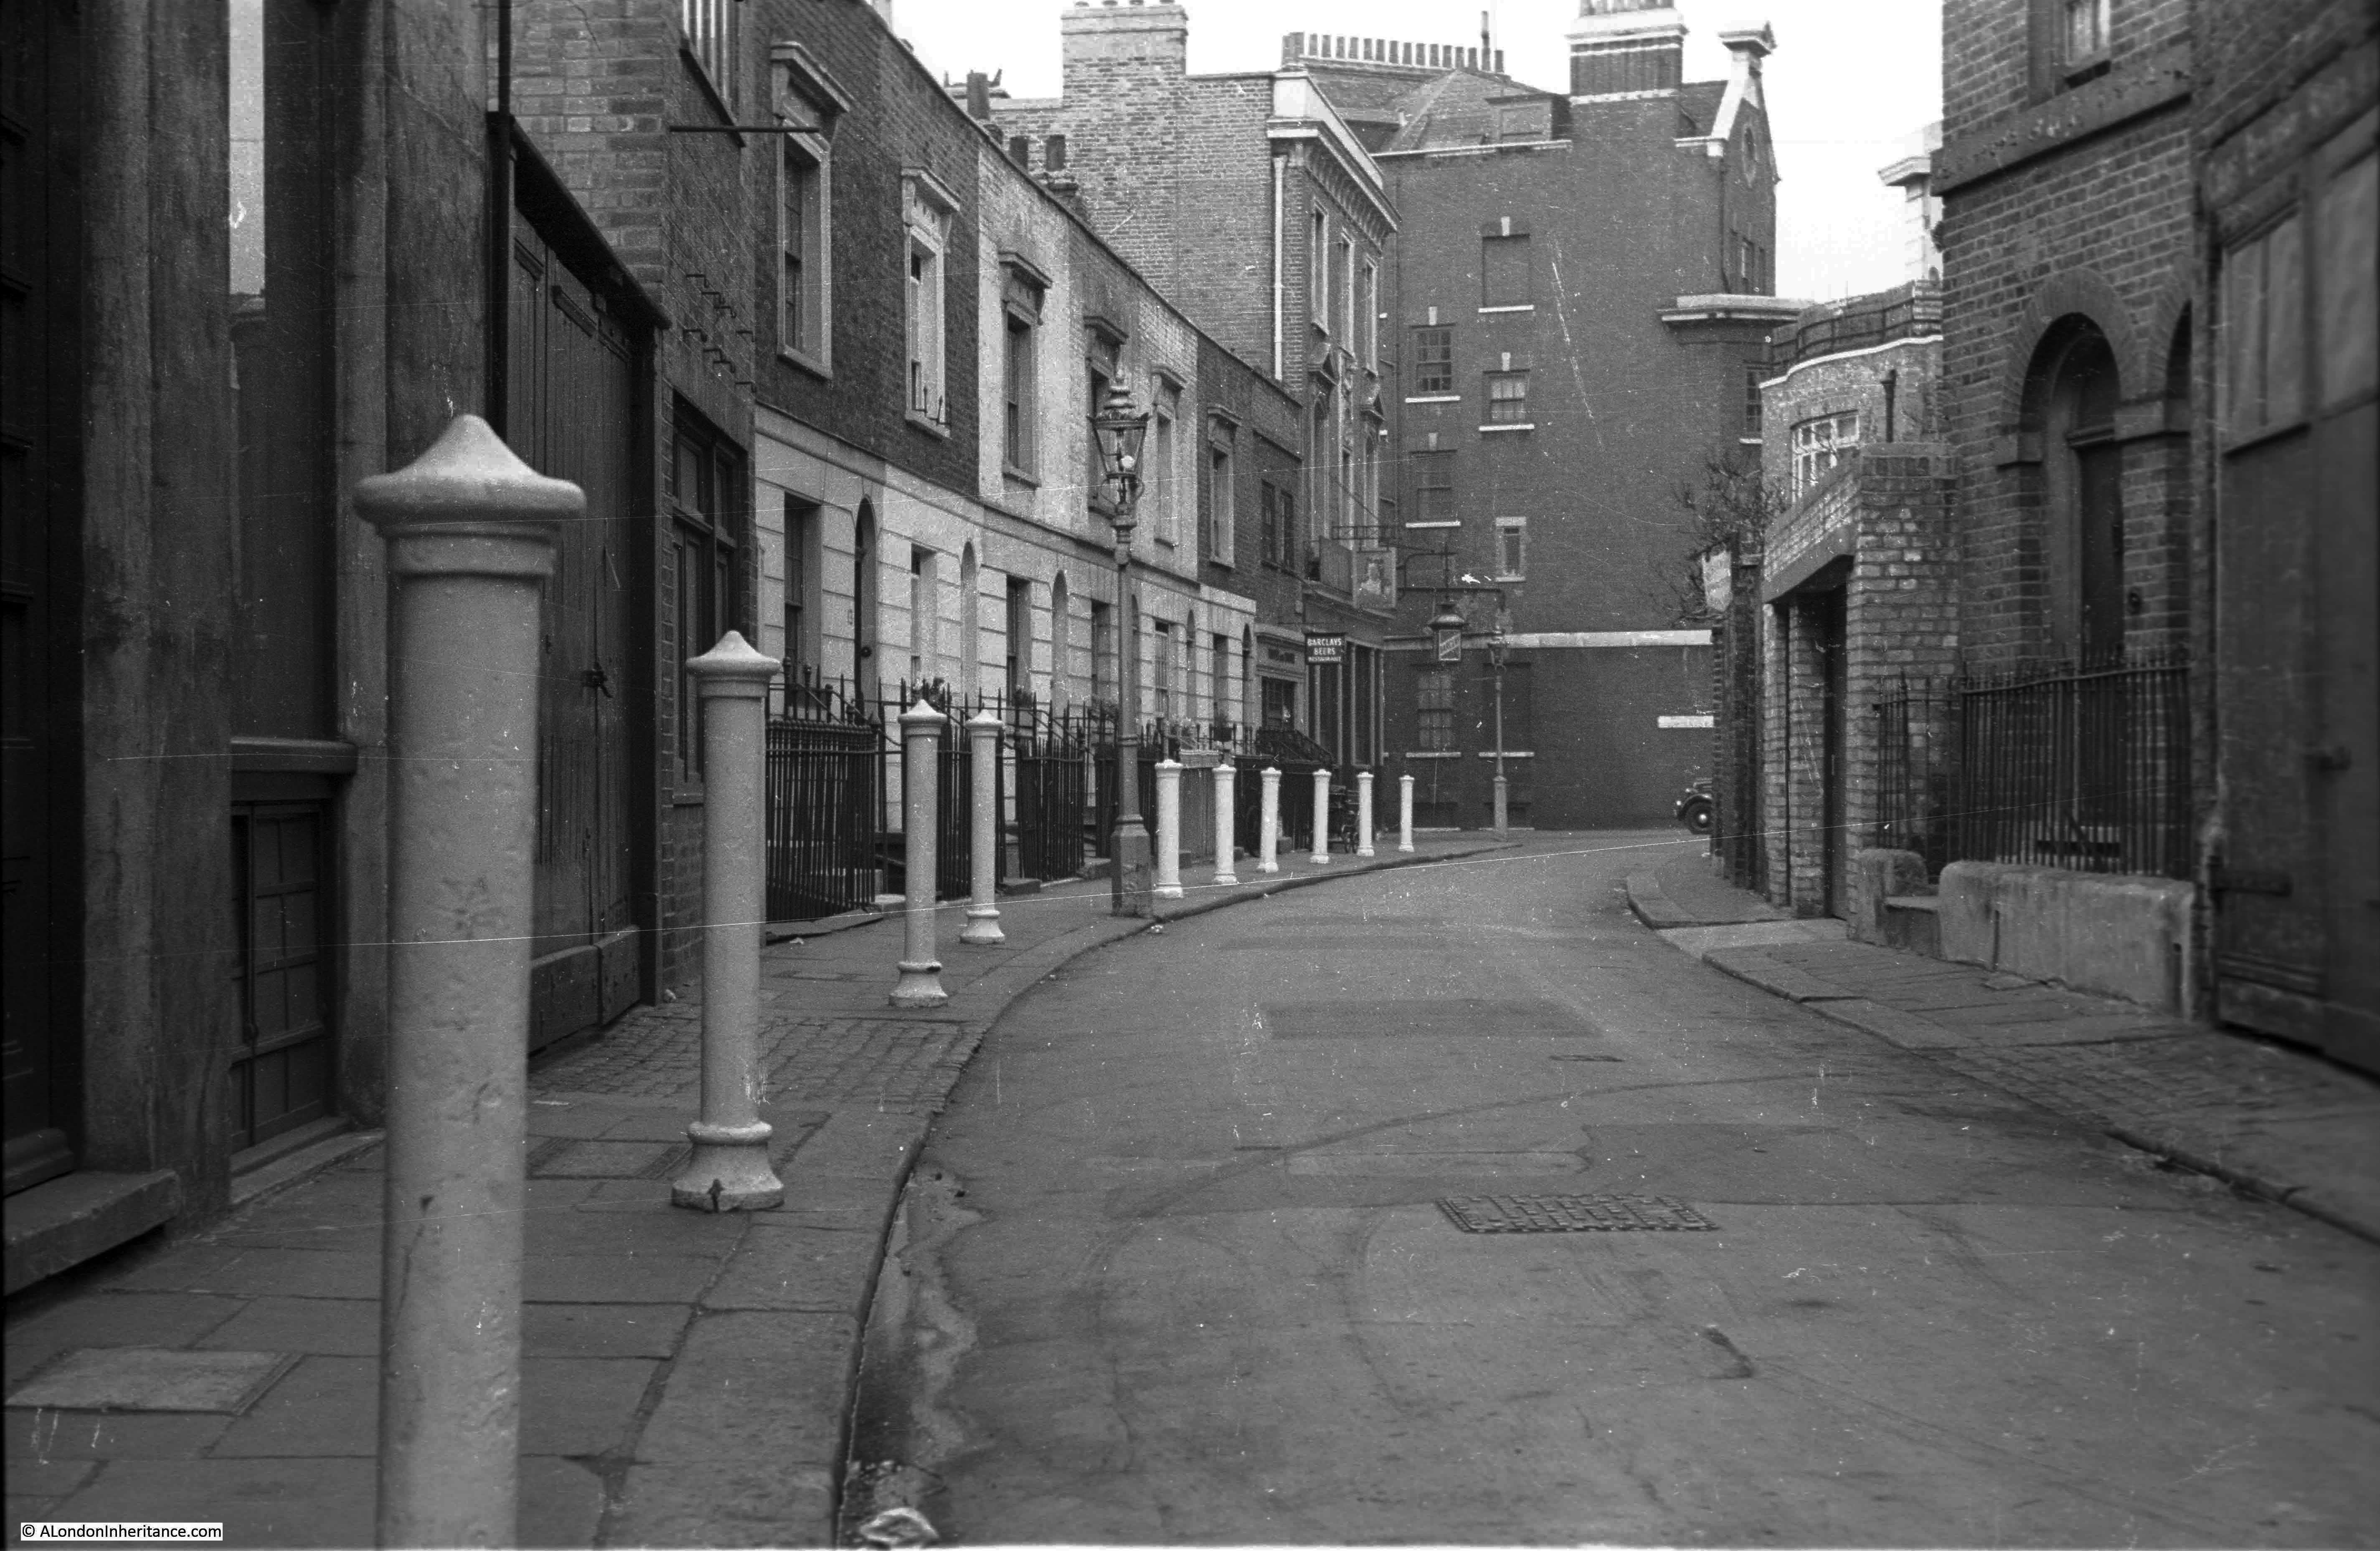
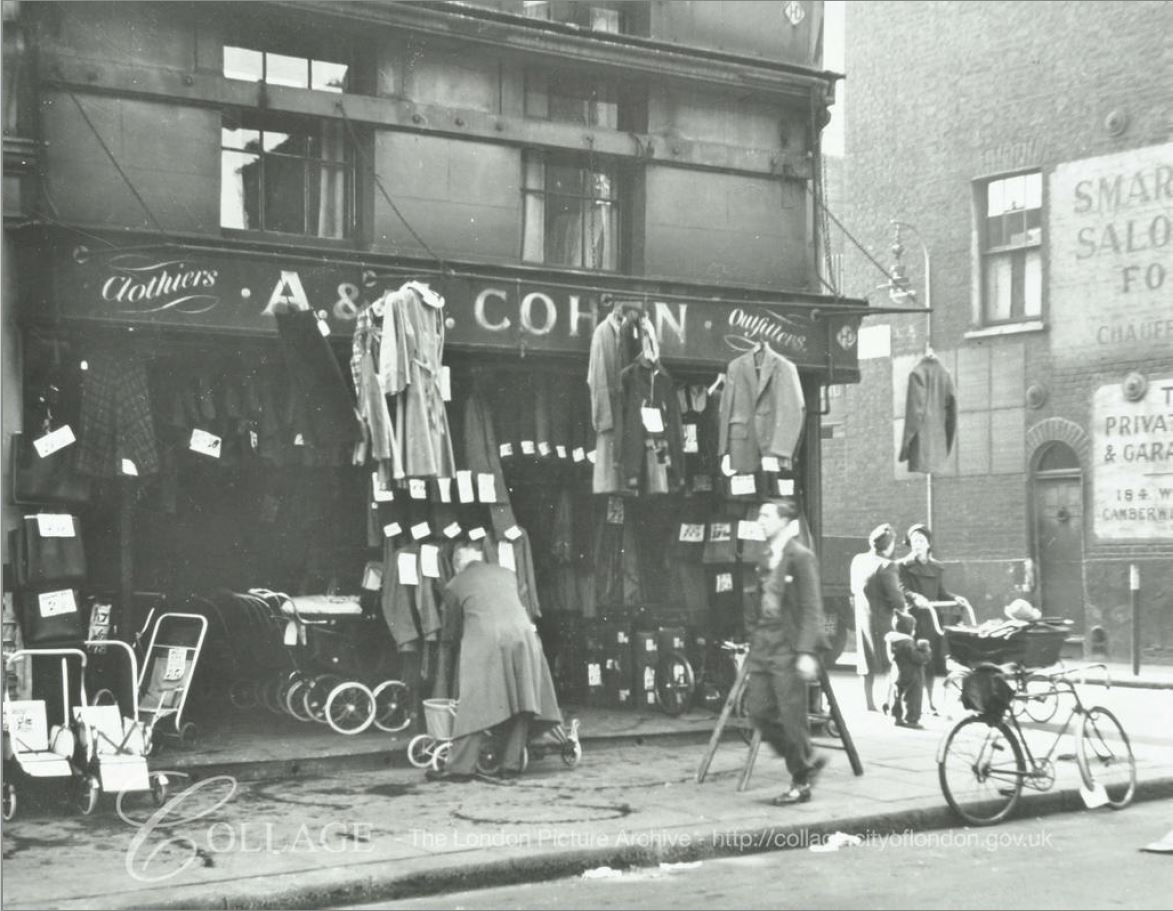
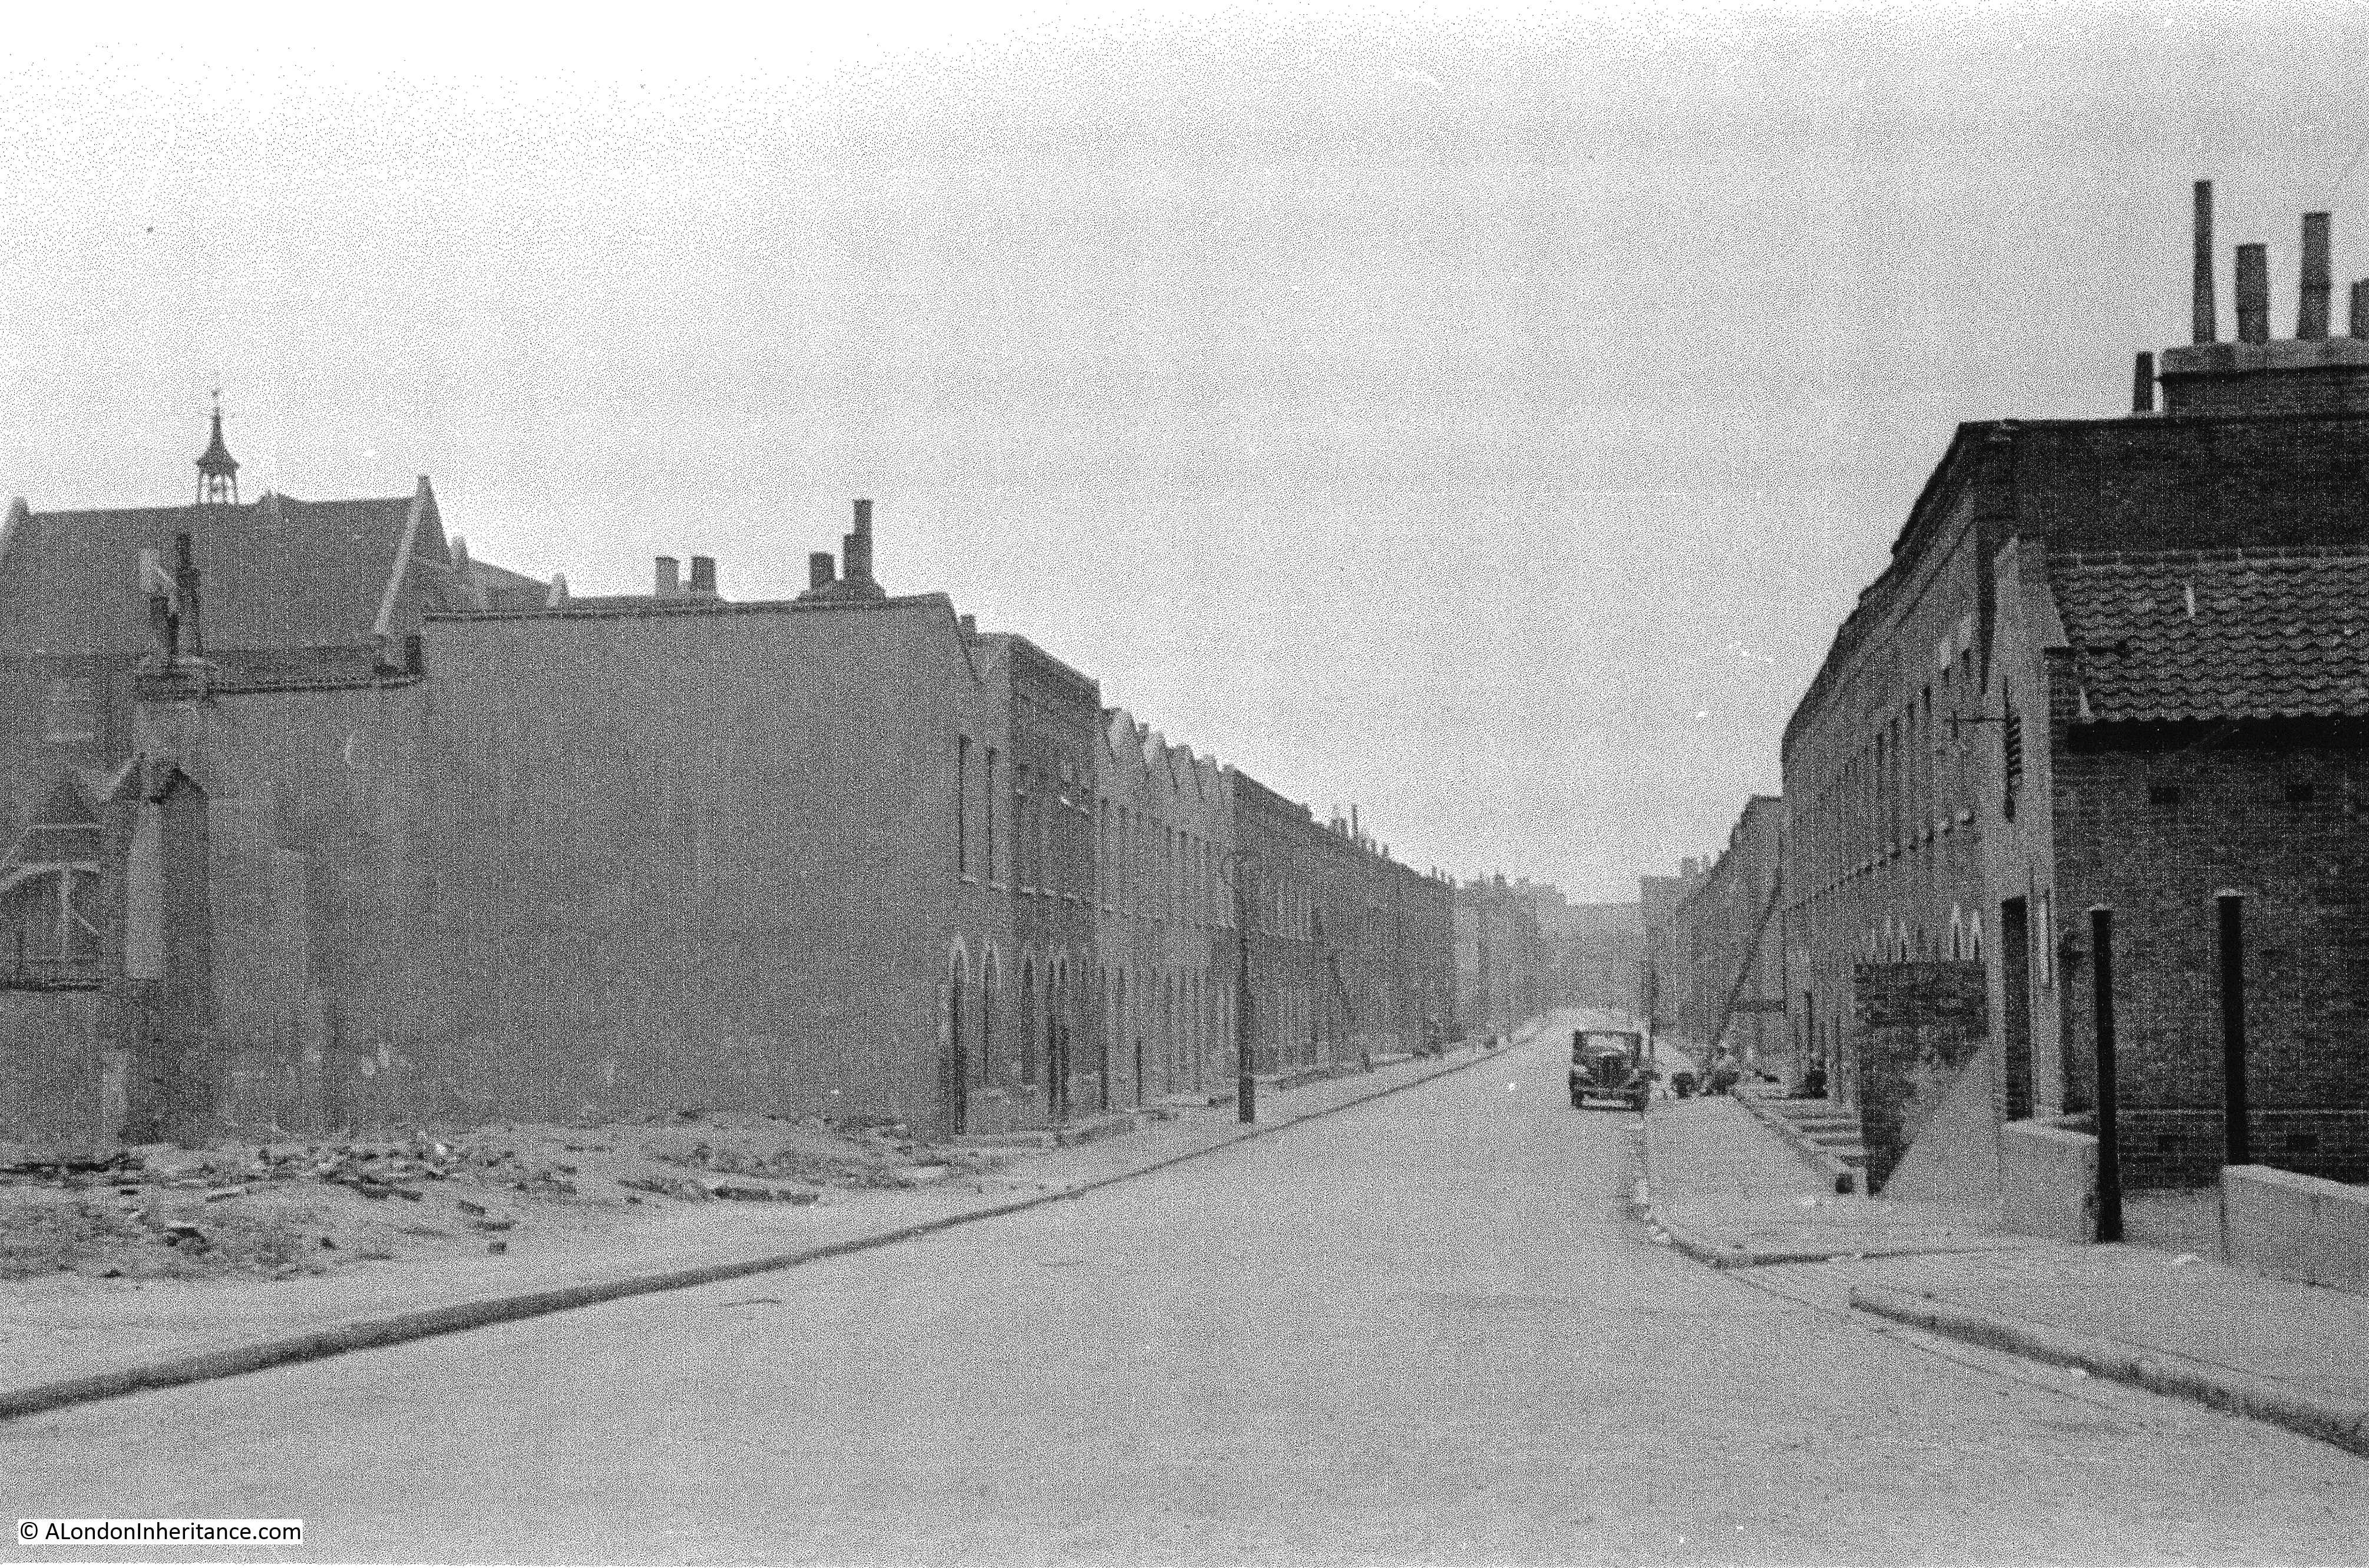
Walking from the King’s Road reveals a street that has hardly changed in 70 years. This is my father’s photo:

Tryon Street

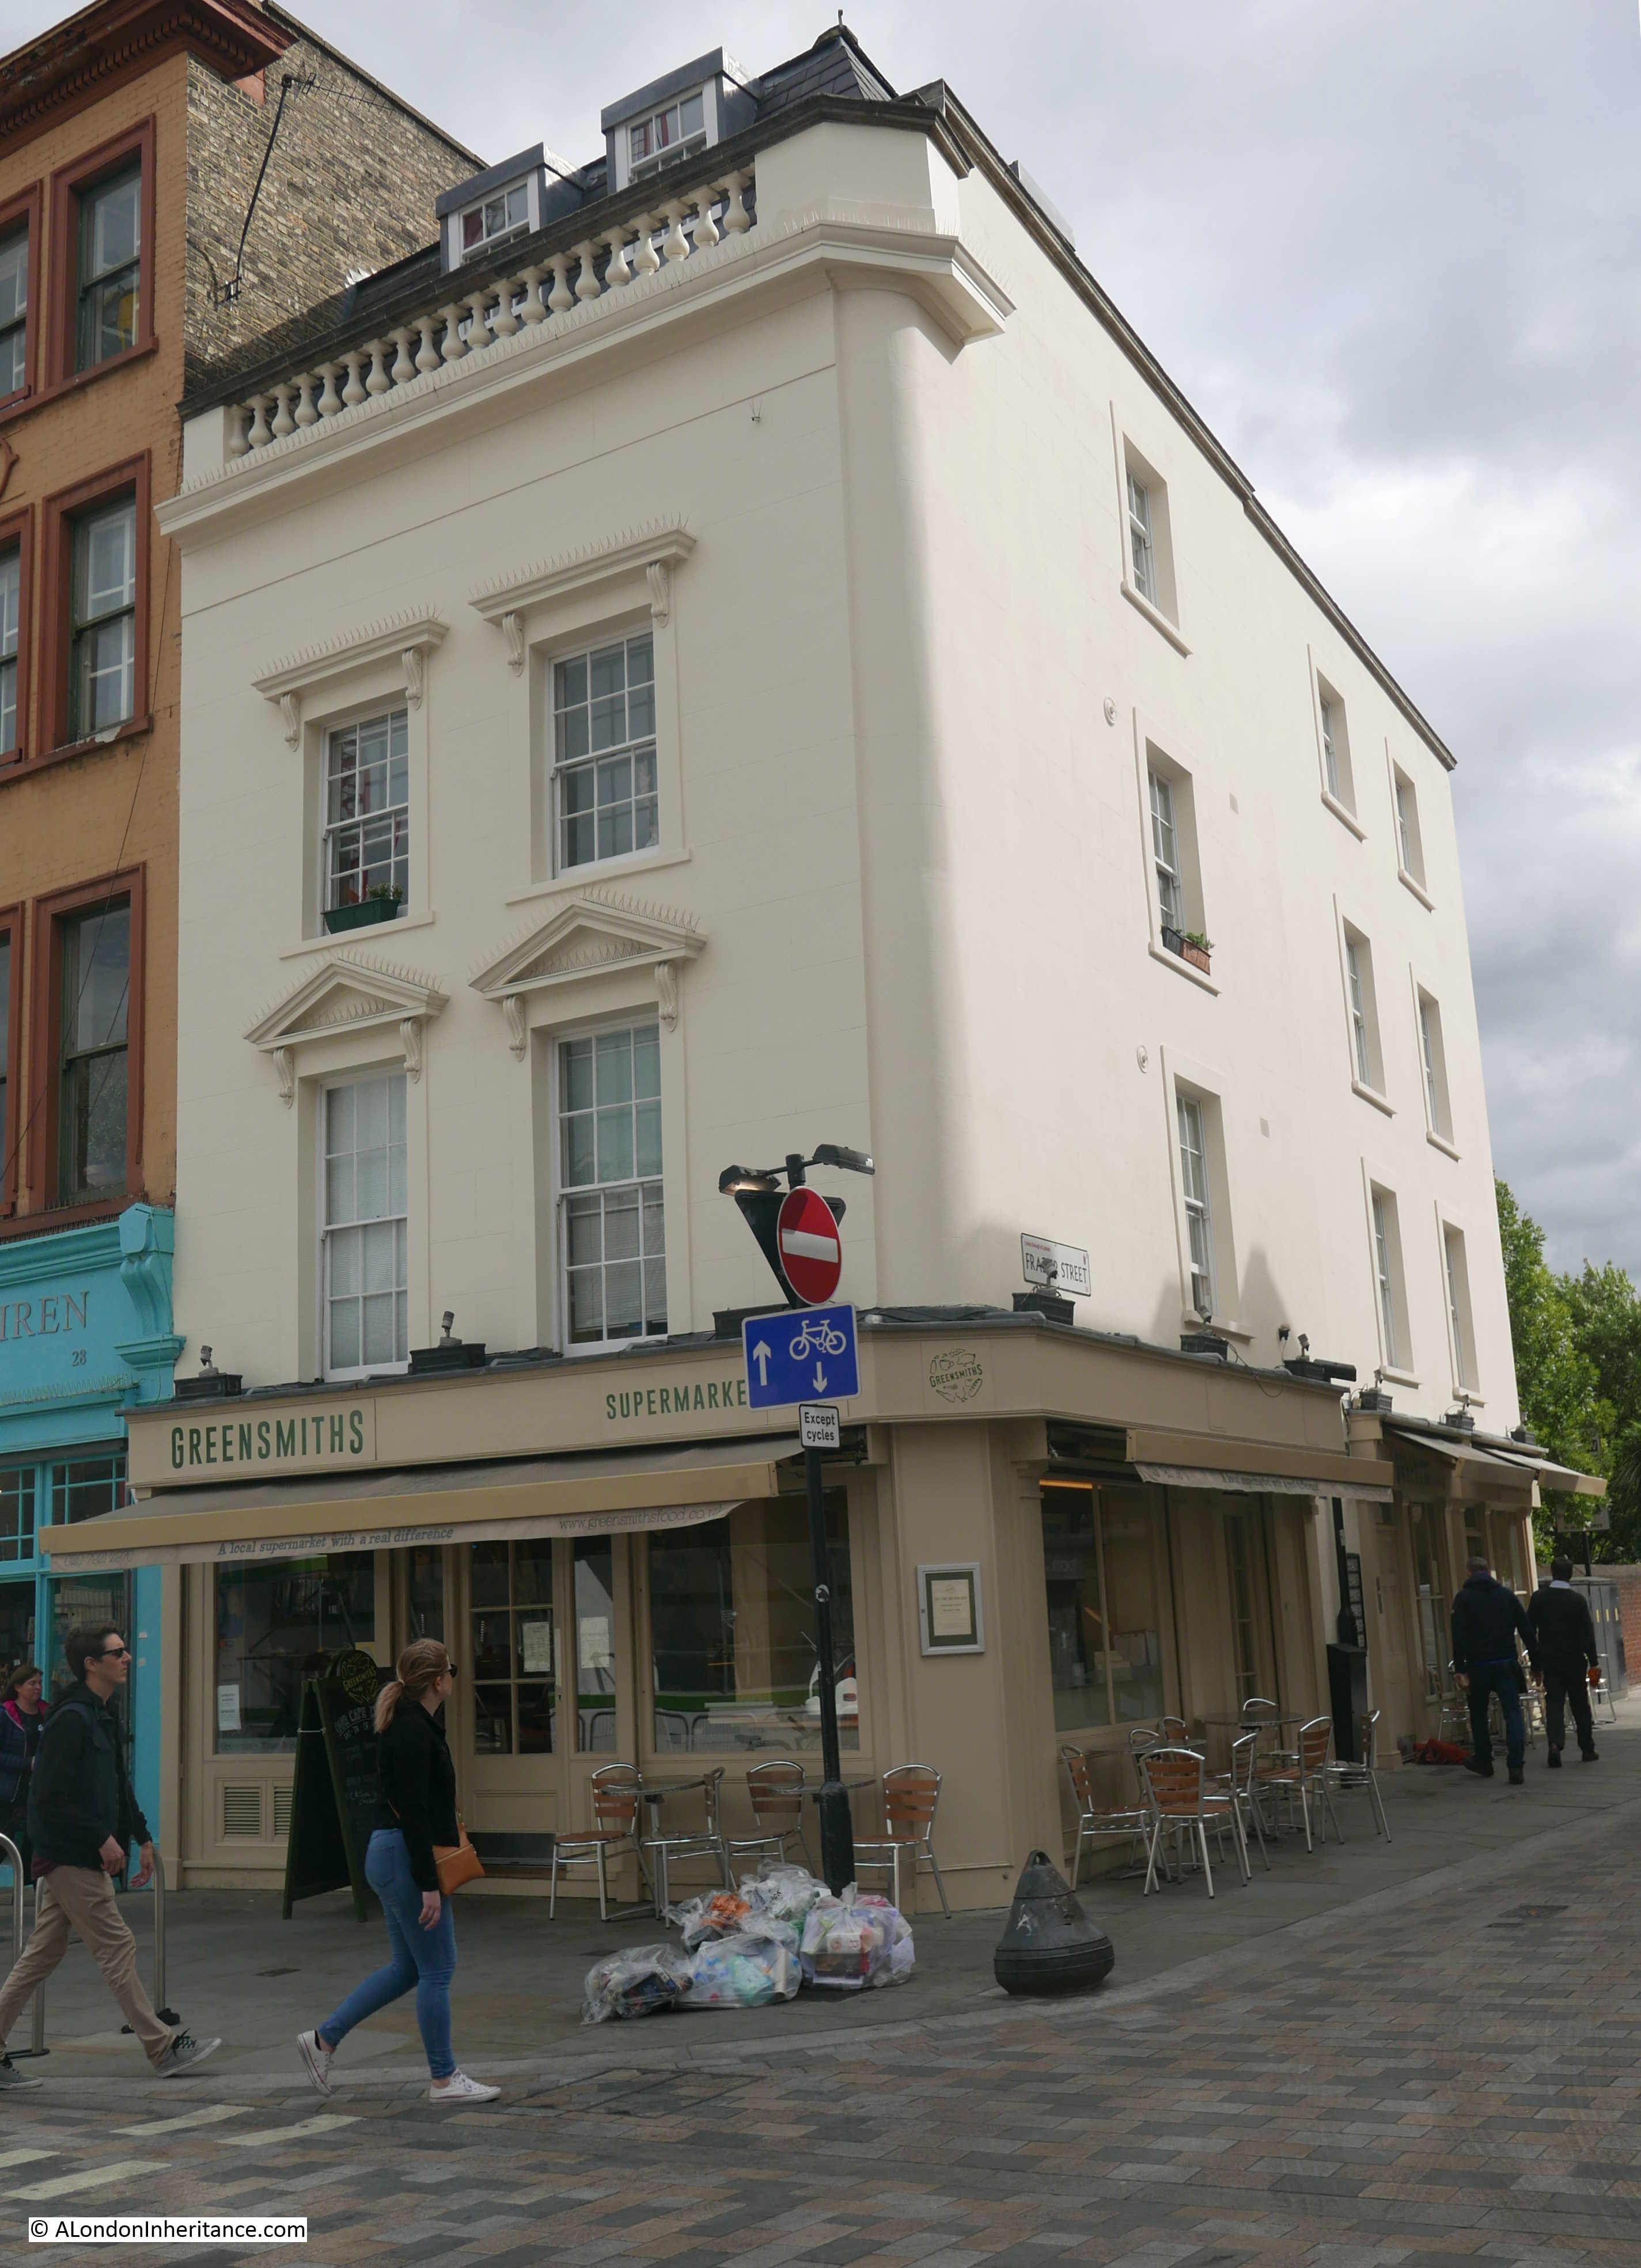
And my 2018 photo taken on a very sunny September afternoon:

Tryon Street

I took the 2018 photo in Black & White as I suspect using colour artificially over emphasizes the changes in a scene, and in Tryon Street there has been very little change in 70 years.

The bollards have been changed, however a continuous line of bollards still runs the length of the street. There have been some cosmetic changes to the buildings, with a bit more structural change in the buildings nearest the camera. The road has been resurfaced, yellow lines have been added and the same metal chamber cover is in the same place in the middle of the road.

I am not sure why my father took the photo of Tryon Street. There is no obvious feature in the photo. i suspect the bollards had something to do with the decision to photograph the street as the line of bollards leading of to the end of the street enhances the composition of the photo.

I could not find that much information about Tryon Street. It is only a short street, the above photos show the full length of the street and it was only named Tryon Street in 1913, the street was originally part of the much longer Keppel Street, however the origin of the name is fascinating.

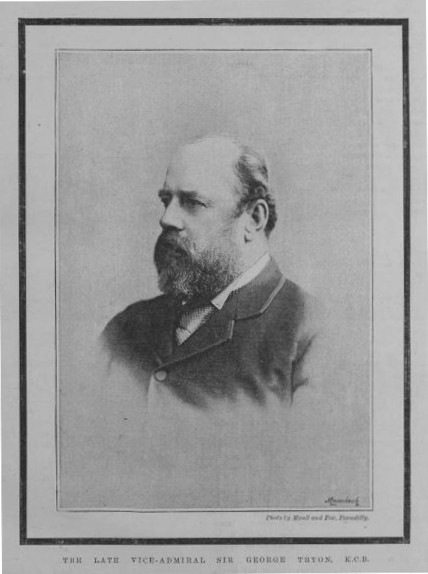
Tryon Street was named after Vice-Admiral Sir George Tryon who died when his ship sunk in the Mediterranean in 1893. The name of Tryon Street recalls a major naval tragedy.

Vice-Admiral Sir George Tryon was the Commander-in-Chief of the Mediterranean Fleet and leading the fleet in his ship Victoria. The fleet was to move from off the coast of Syria and make their way to new anchor positions off the Lebanon at Tripoli. The London Evening Standard on the 4th July 1893 details the circumstances of Tryon’s death and the sinking of the Victoria in a letter from “a Senior Office of the Fleet”:

“When ships are in columns of divisions, as we were, they ought to be twice the number of cables apart as there are ships in the longest line or column. We had six ships in the first division, and five in the second division- i.e. we ought to have really twelve cables apart (2400 yards); but we were only six cables (1200 yards). The diameter that the slowest ship is supposed to take in turning 16 points or right round is 800 yards. therefore two ships would occupy 1600 yards. We were coming up from Beyrout about six miles from the shore, and were in two divisions, but only six cables (1200 yards) apart.

The Admiral wanted to anchor the Fleet in line abreast, one division behind the other, to do which he had to re-form the fleet first, by turning the ships right round. He could have done two things, either turning each division outwards, or each inwards. He, for some reason, made the signal to turn inwards, namely, each ship in the division to turn in succession inwards on arriving where he turned. The two ships turned inwards, and the Camperdown closed watertight doors, seeing it impossible to avoid a collision. She struck the Victoria nearly at right angles, both ships going eight knots, just before the fore turret on the starboard side.

The Victoria had a fearful hole in her side, and as she heeled, her turrets and guns may have got loose and helped to turn her. She first seemed to have her bows under water, but made the signal ‘Negative sending boats’ and a semaphore, ‘Do not send boats but have them ready’. the next thing that I saw was that she began to heel over to starboard, and then more, until I could see her port screw going round out of water, it was a horrible sight. Next she seemed to make a plunge forward to starboard, and suddenly went right over, and we saw for a brief moment a most sickening sight, which I am sure, filled us all with awe – the enormous bottom upwards and both screws going round. I can see it now. In fact, one can never forget it. Then she sank and all was still. Of course, all boats in the Fleet were away as soon as we saw her with such a heel, and remained there until dark. However it was soon known that our Commander in Chief was gone. The poor engineers and the stokers in the engine-room and the stoke-hole ! Theirs must have been an awful death – too awful to think of. Thank God though that their end was not a slow one, for I think she blew up, as a few seconds after a huge volume of smoke arose to the surface.

One of the ship’s officers told me that there was hardly time to close the water-tight door, and when he tried to get below, he was stopped by the volume of water, so he began to get the boats out. But soon it was a case of ‘all hands for themselves’.  I believe the Admiral was last seen holding on to the rails of the chart-house forward, and would not leave the ship. poor fellow, I suppose at that last minute, he perhaps realised the mistake he had made and thought it best to show an example to duty by stopping at his post, although he told those around him to save themselves, for which I hope the country will forgive him. None of us can understand why the signal was made, although Markham hesitated in obeying it, and why the latter, fully knowing and realising the danger of the manoeuvre, ever carried it out.”

As well as Vice-Admiral Sir George Tryon, 22 officers and 336 men died in the sinking of the Victoria, although some reports put the number of casualties as high as 422. Of the casualties, 19 were were recorded as ‘boys’.

The wreck of the Victoria was considered to be in too deep water to attempt any recovery of bodies, and HMS Victoria still sits at the bottom of the Mediterranean near Tripoli, Lebanon.

The Illustrated London News carried a number of illustrations of the tragedy, including the following illustration showing the Victoria starting to turn over, with one of the screws already out of the water.Tryon Street

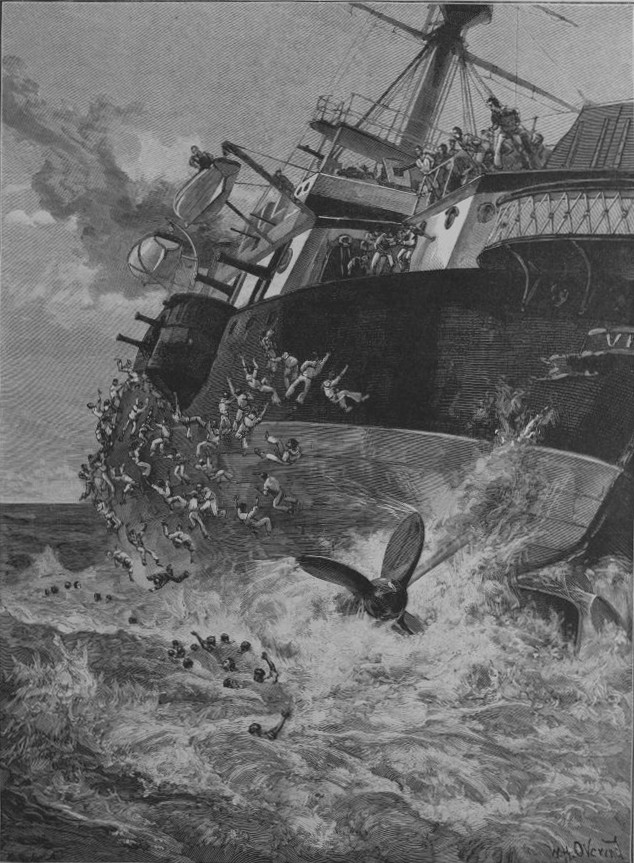
HMS Victoria before the tragedy:

Tryon Street

Image from: https://commons.wikimedia.org/wiki/File:HMS_Victoria_(1887).jpg

I cannot find any association between Sir George Tryon and the street that now has his name, however he did have a London house at Eaton Place, not that far away, on the other side of Sloane Square, where his wife was in residence at the time of the disaster.

Portrait of Sir George Tryon from the many newspaper accounts of the disaster:

Tryon Street

Whilst Tryon Street may appear rather ordinary, the origin of the name is anything but.

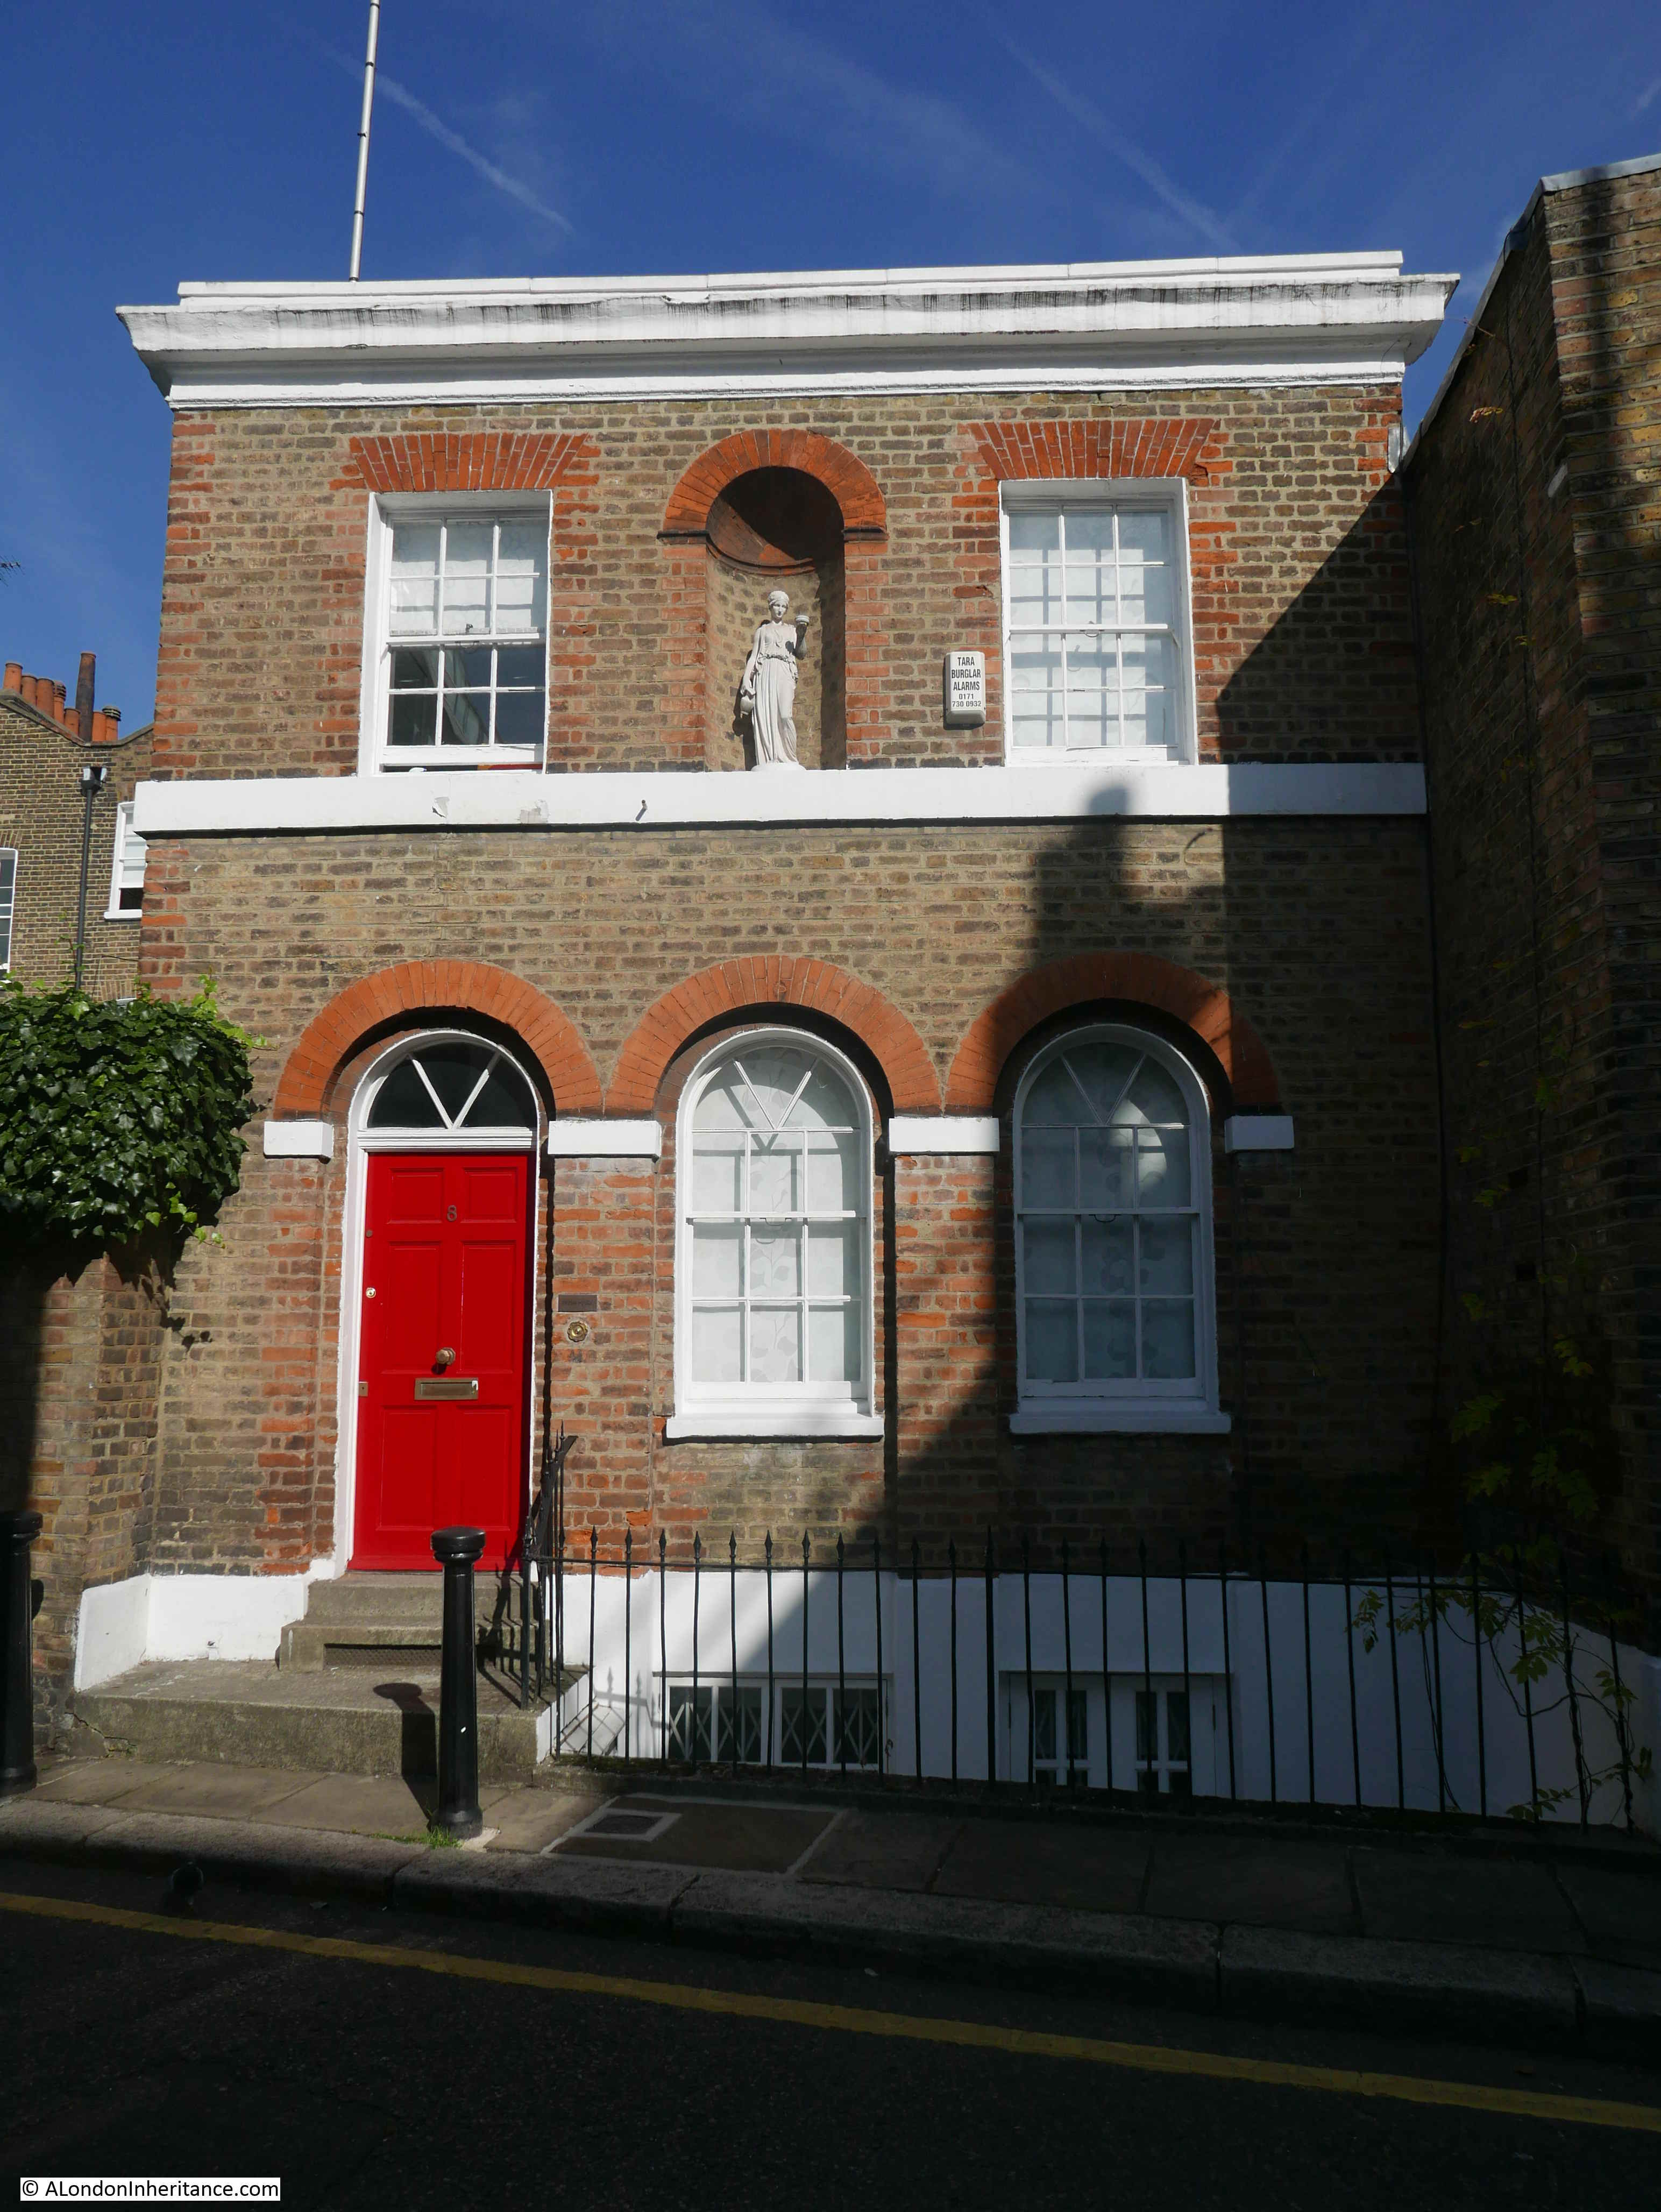
Walking down Tryon Street, there are some interesting buildings. A short distance along on the right is this building. In the original photo, just the entrance on the left is visible.

Tryon Street

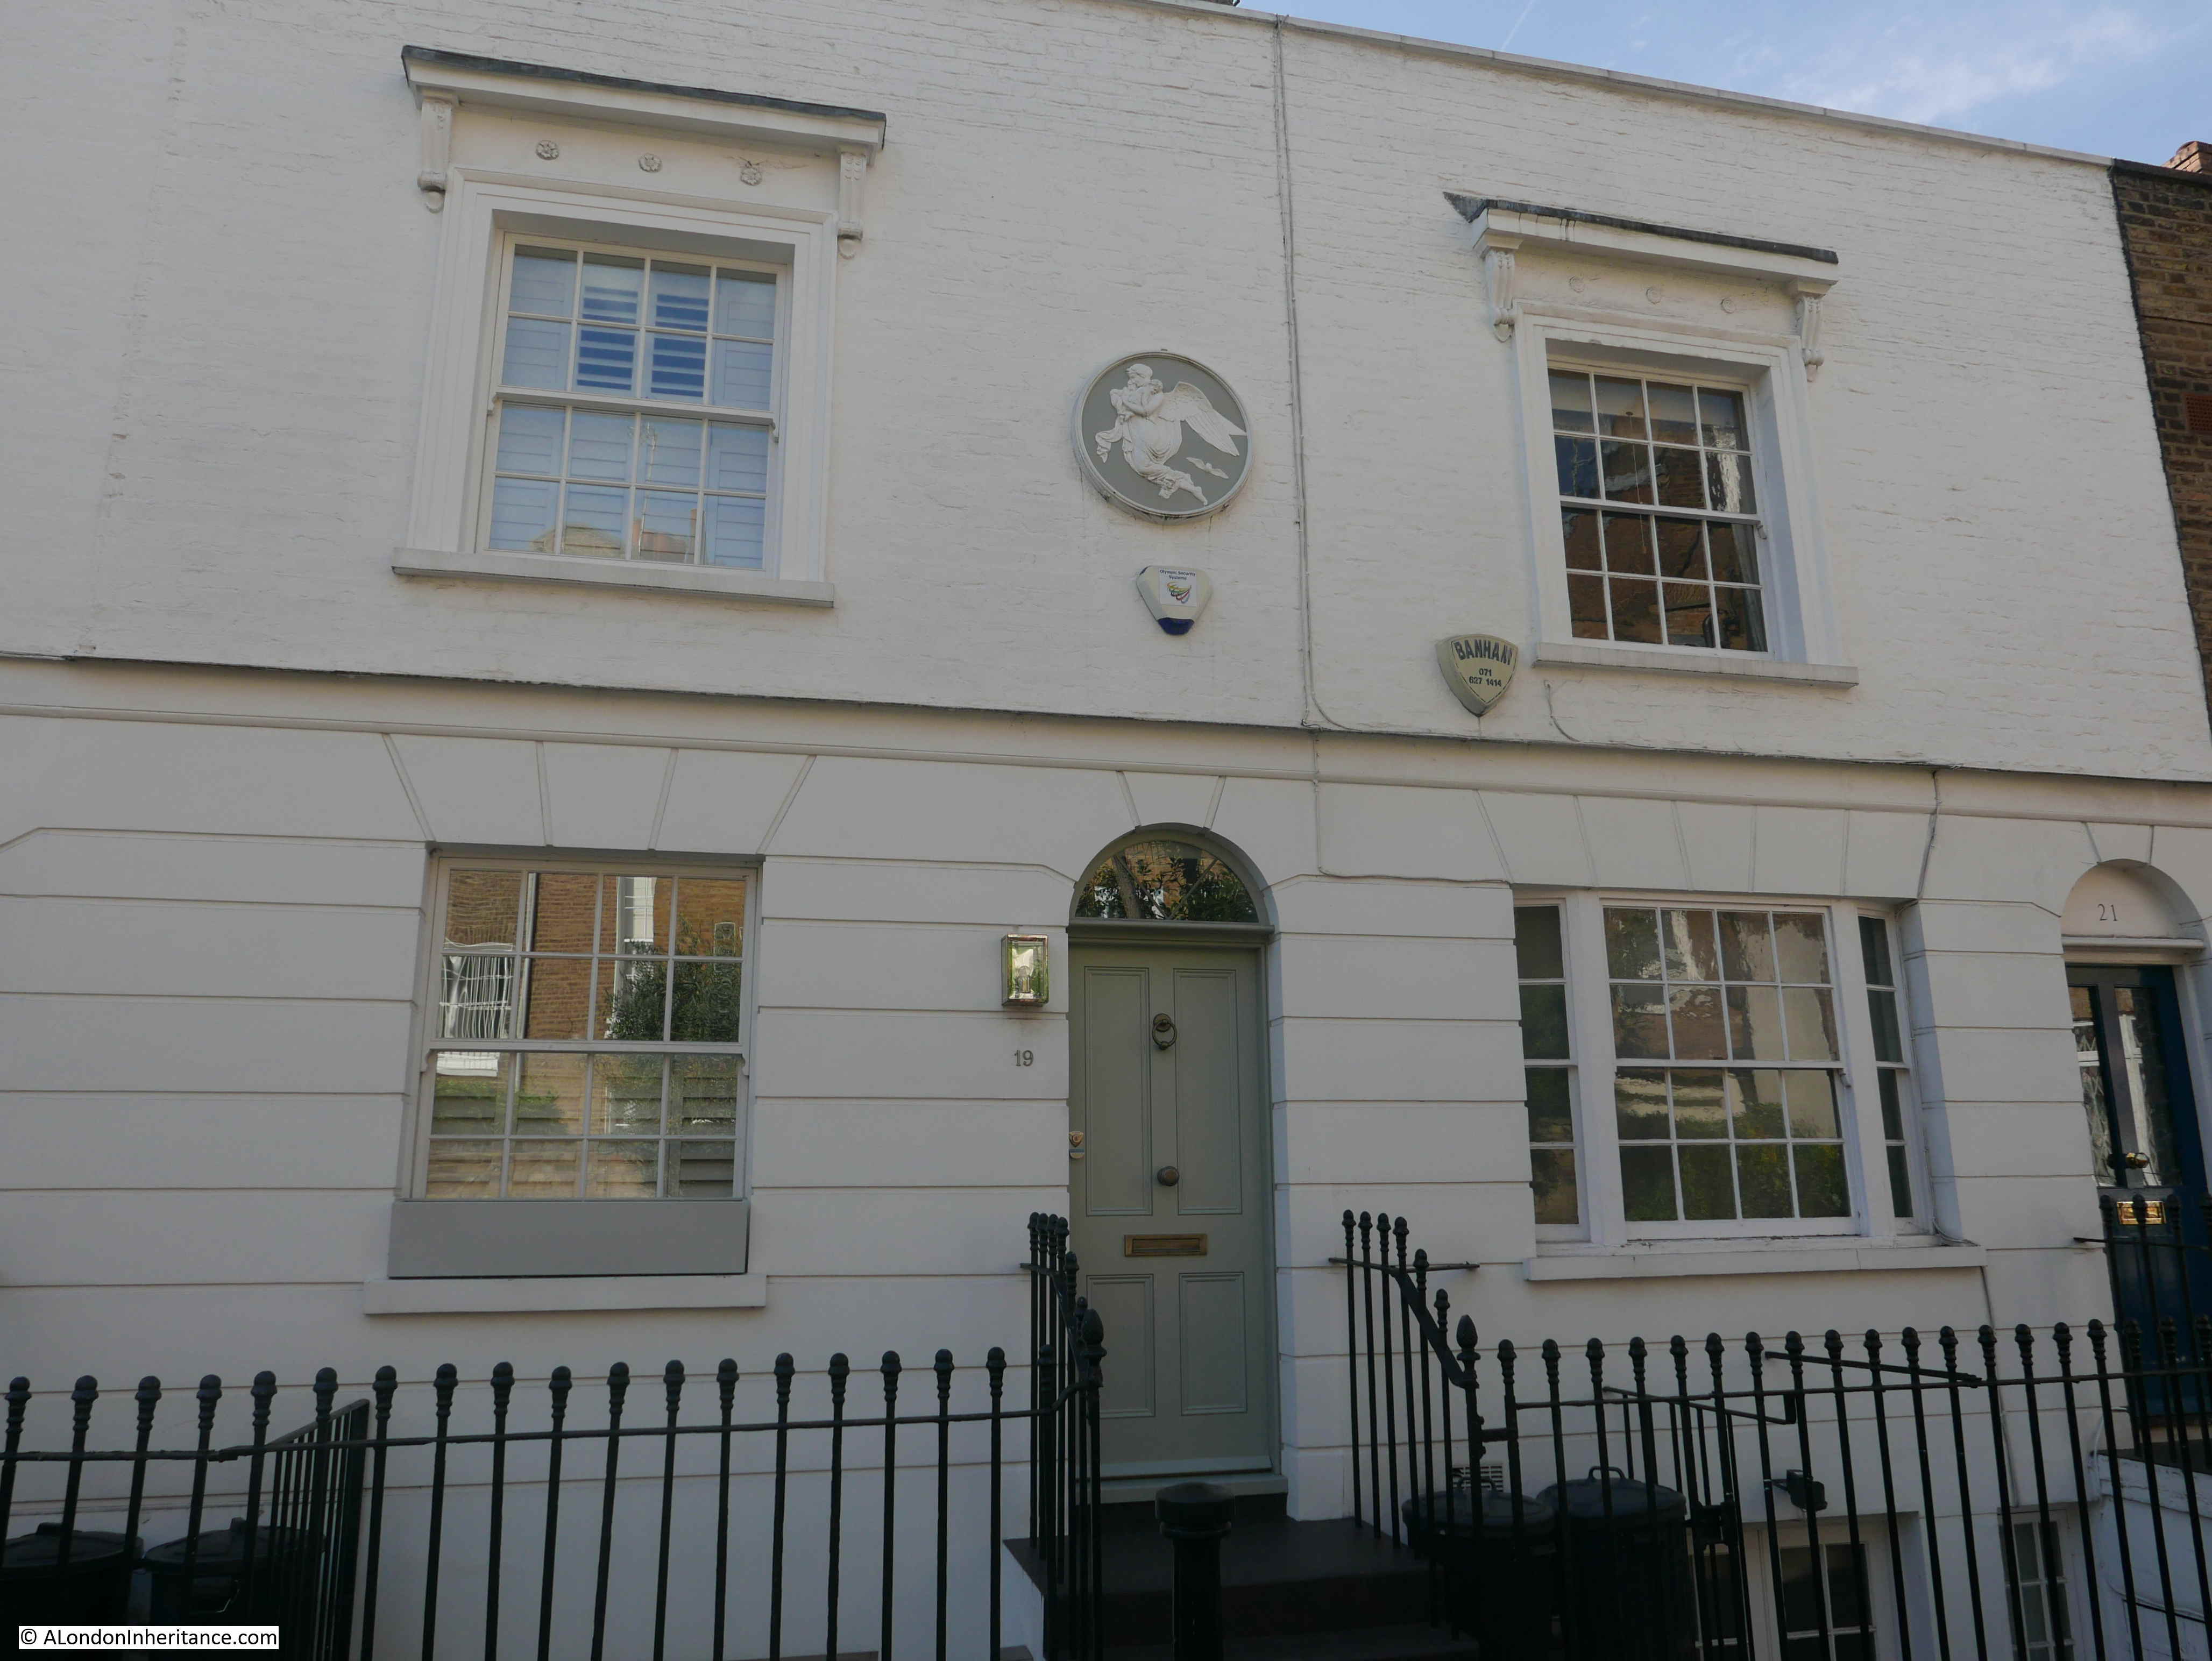
Further along, on one of the terrace houses on the left is a rather ornate plaque. Chelsea had a a long association with pottery so perhaps the plaque is from, or has some relevance to the Chelsea potteries.

Tryon Street

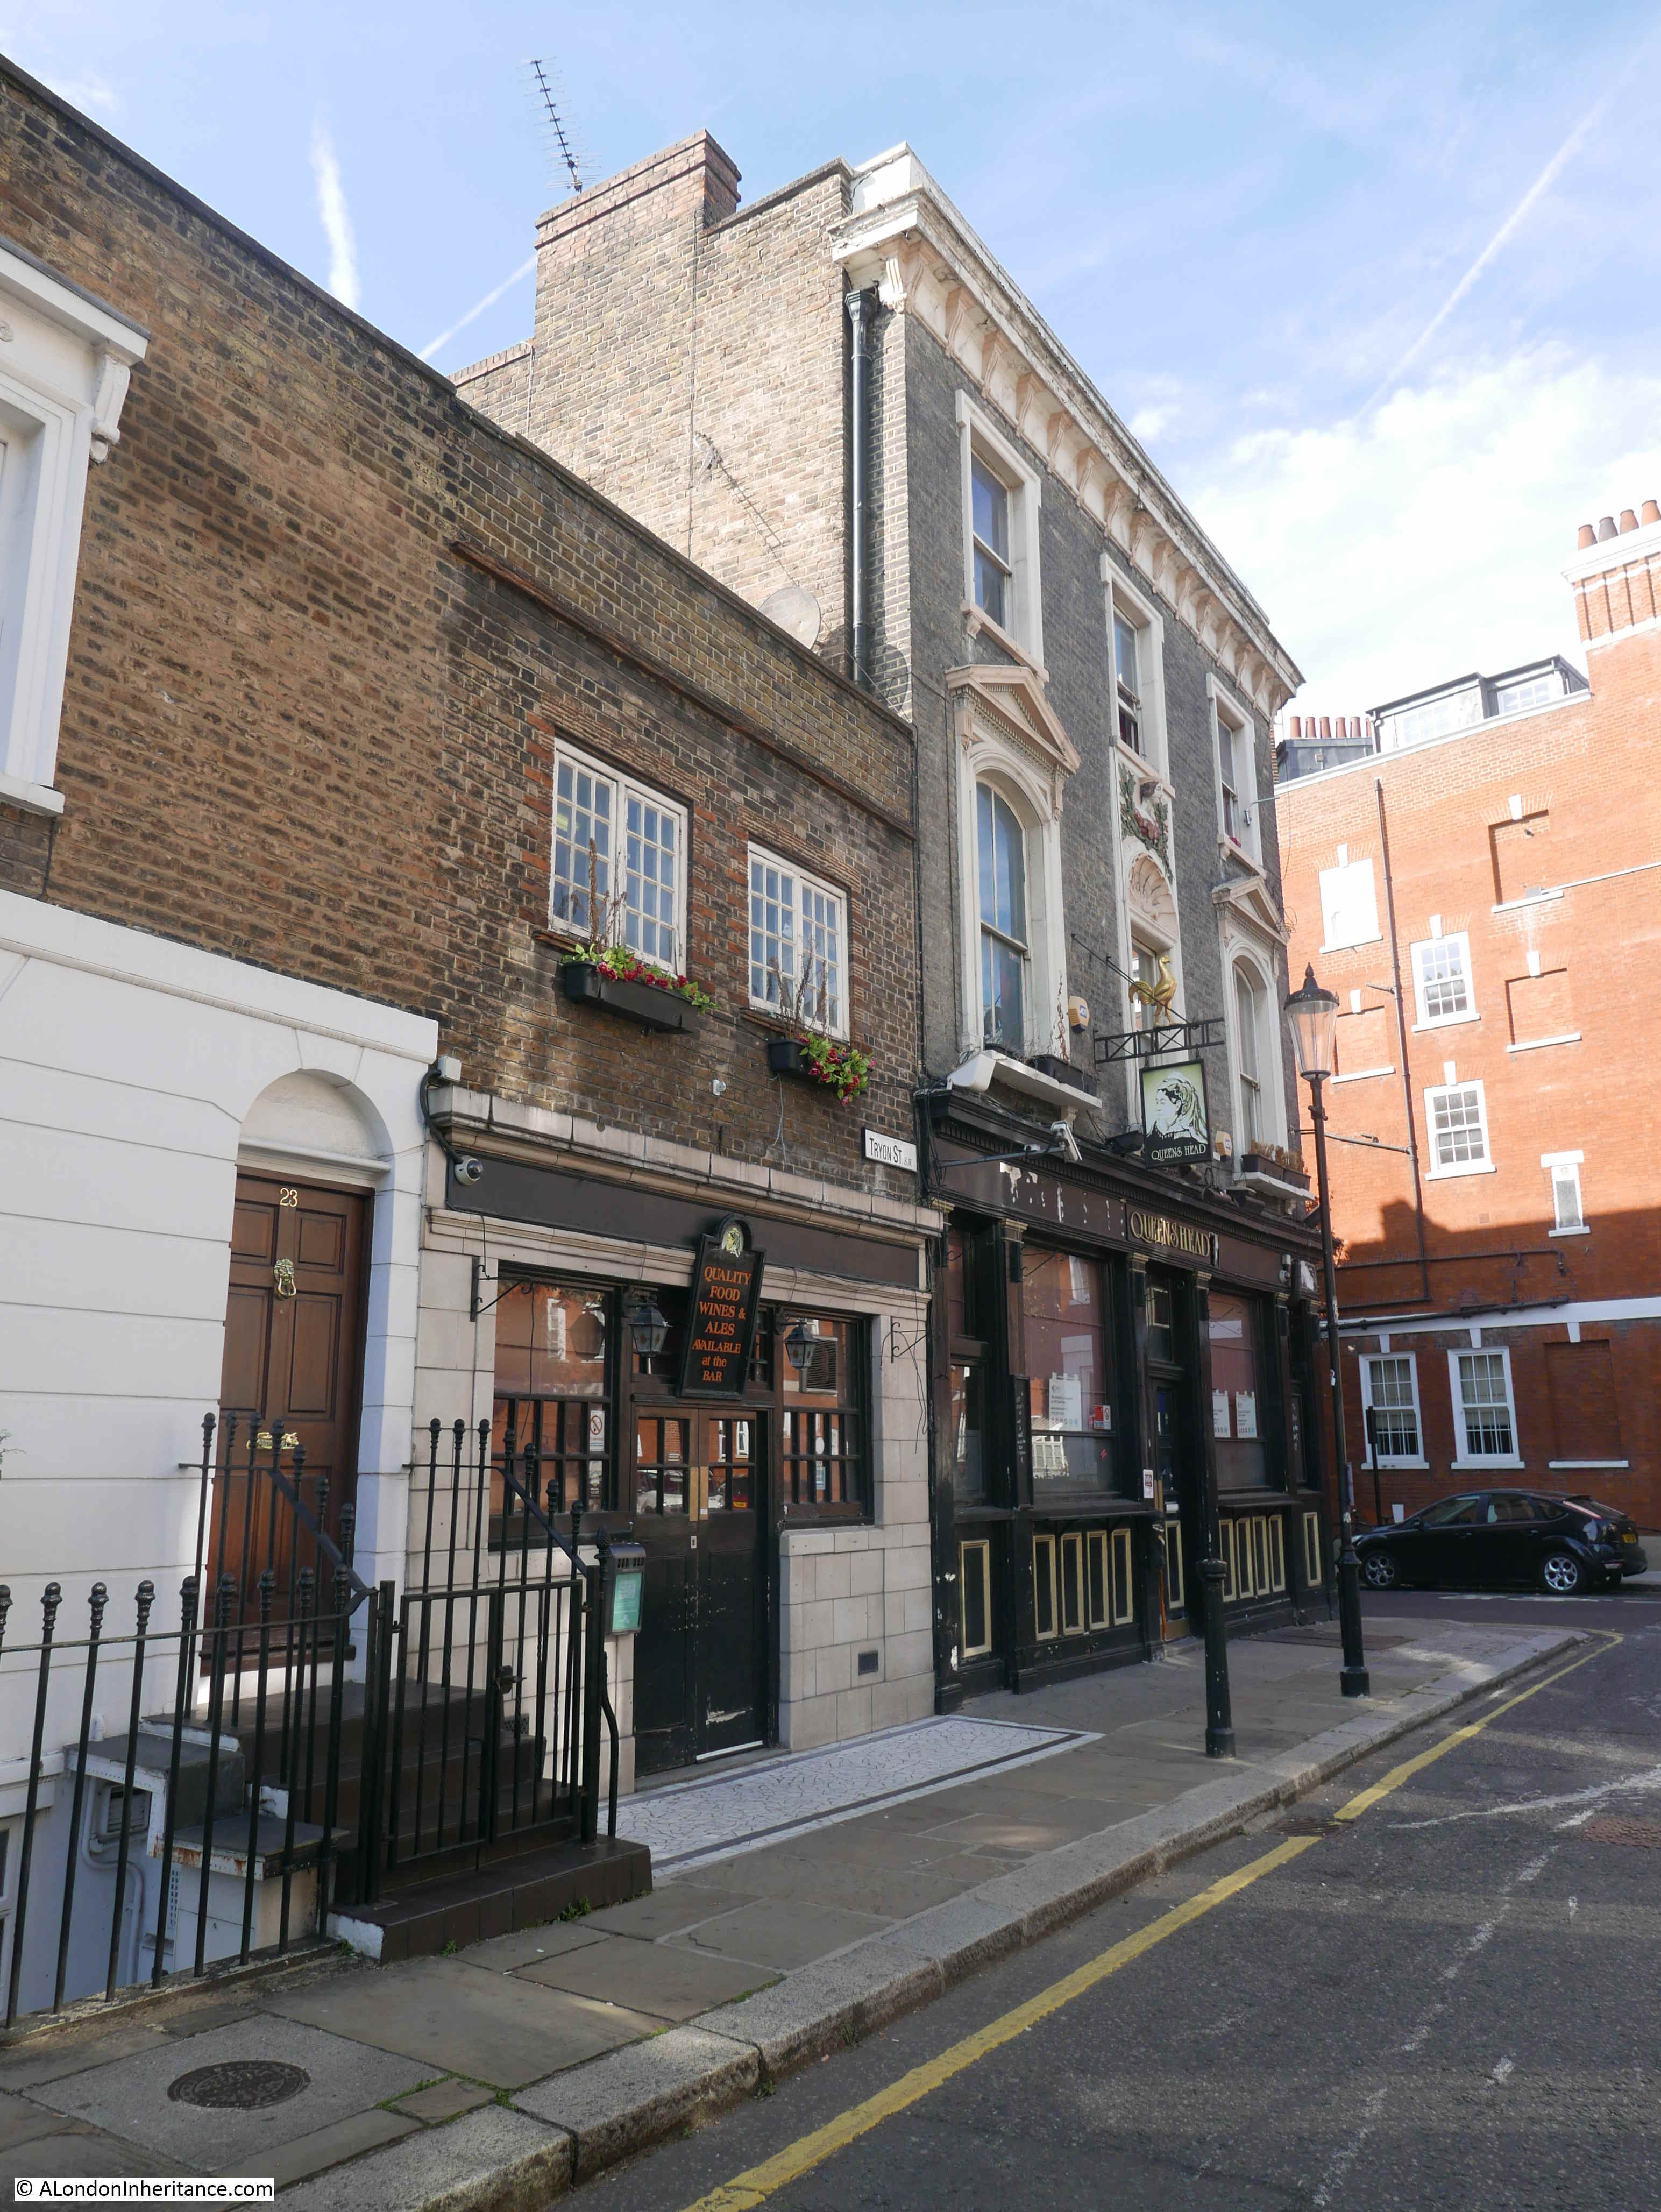
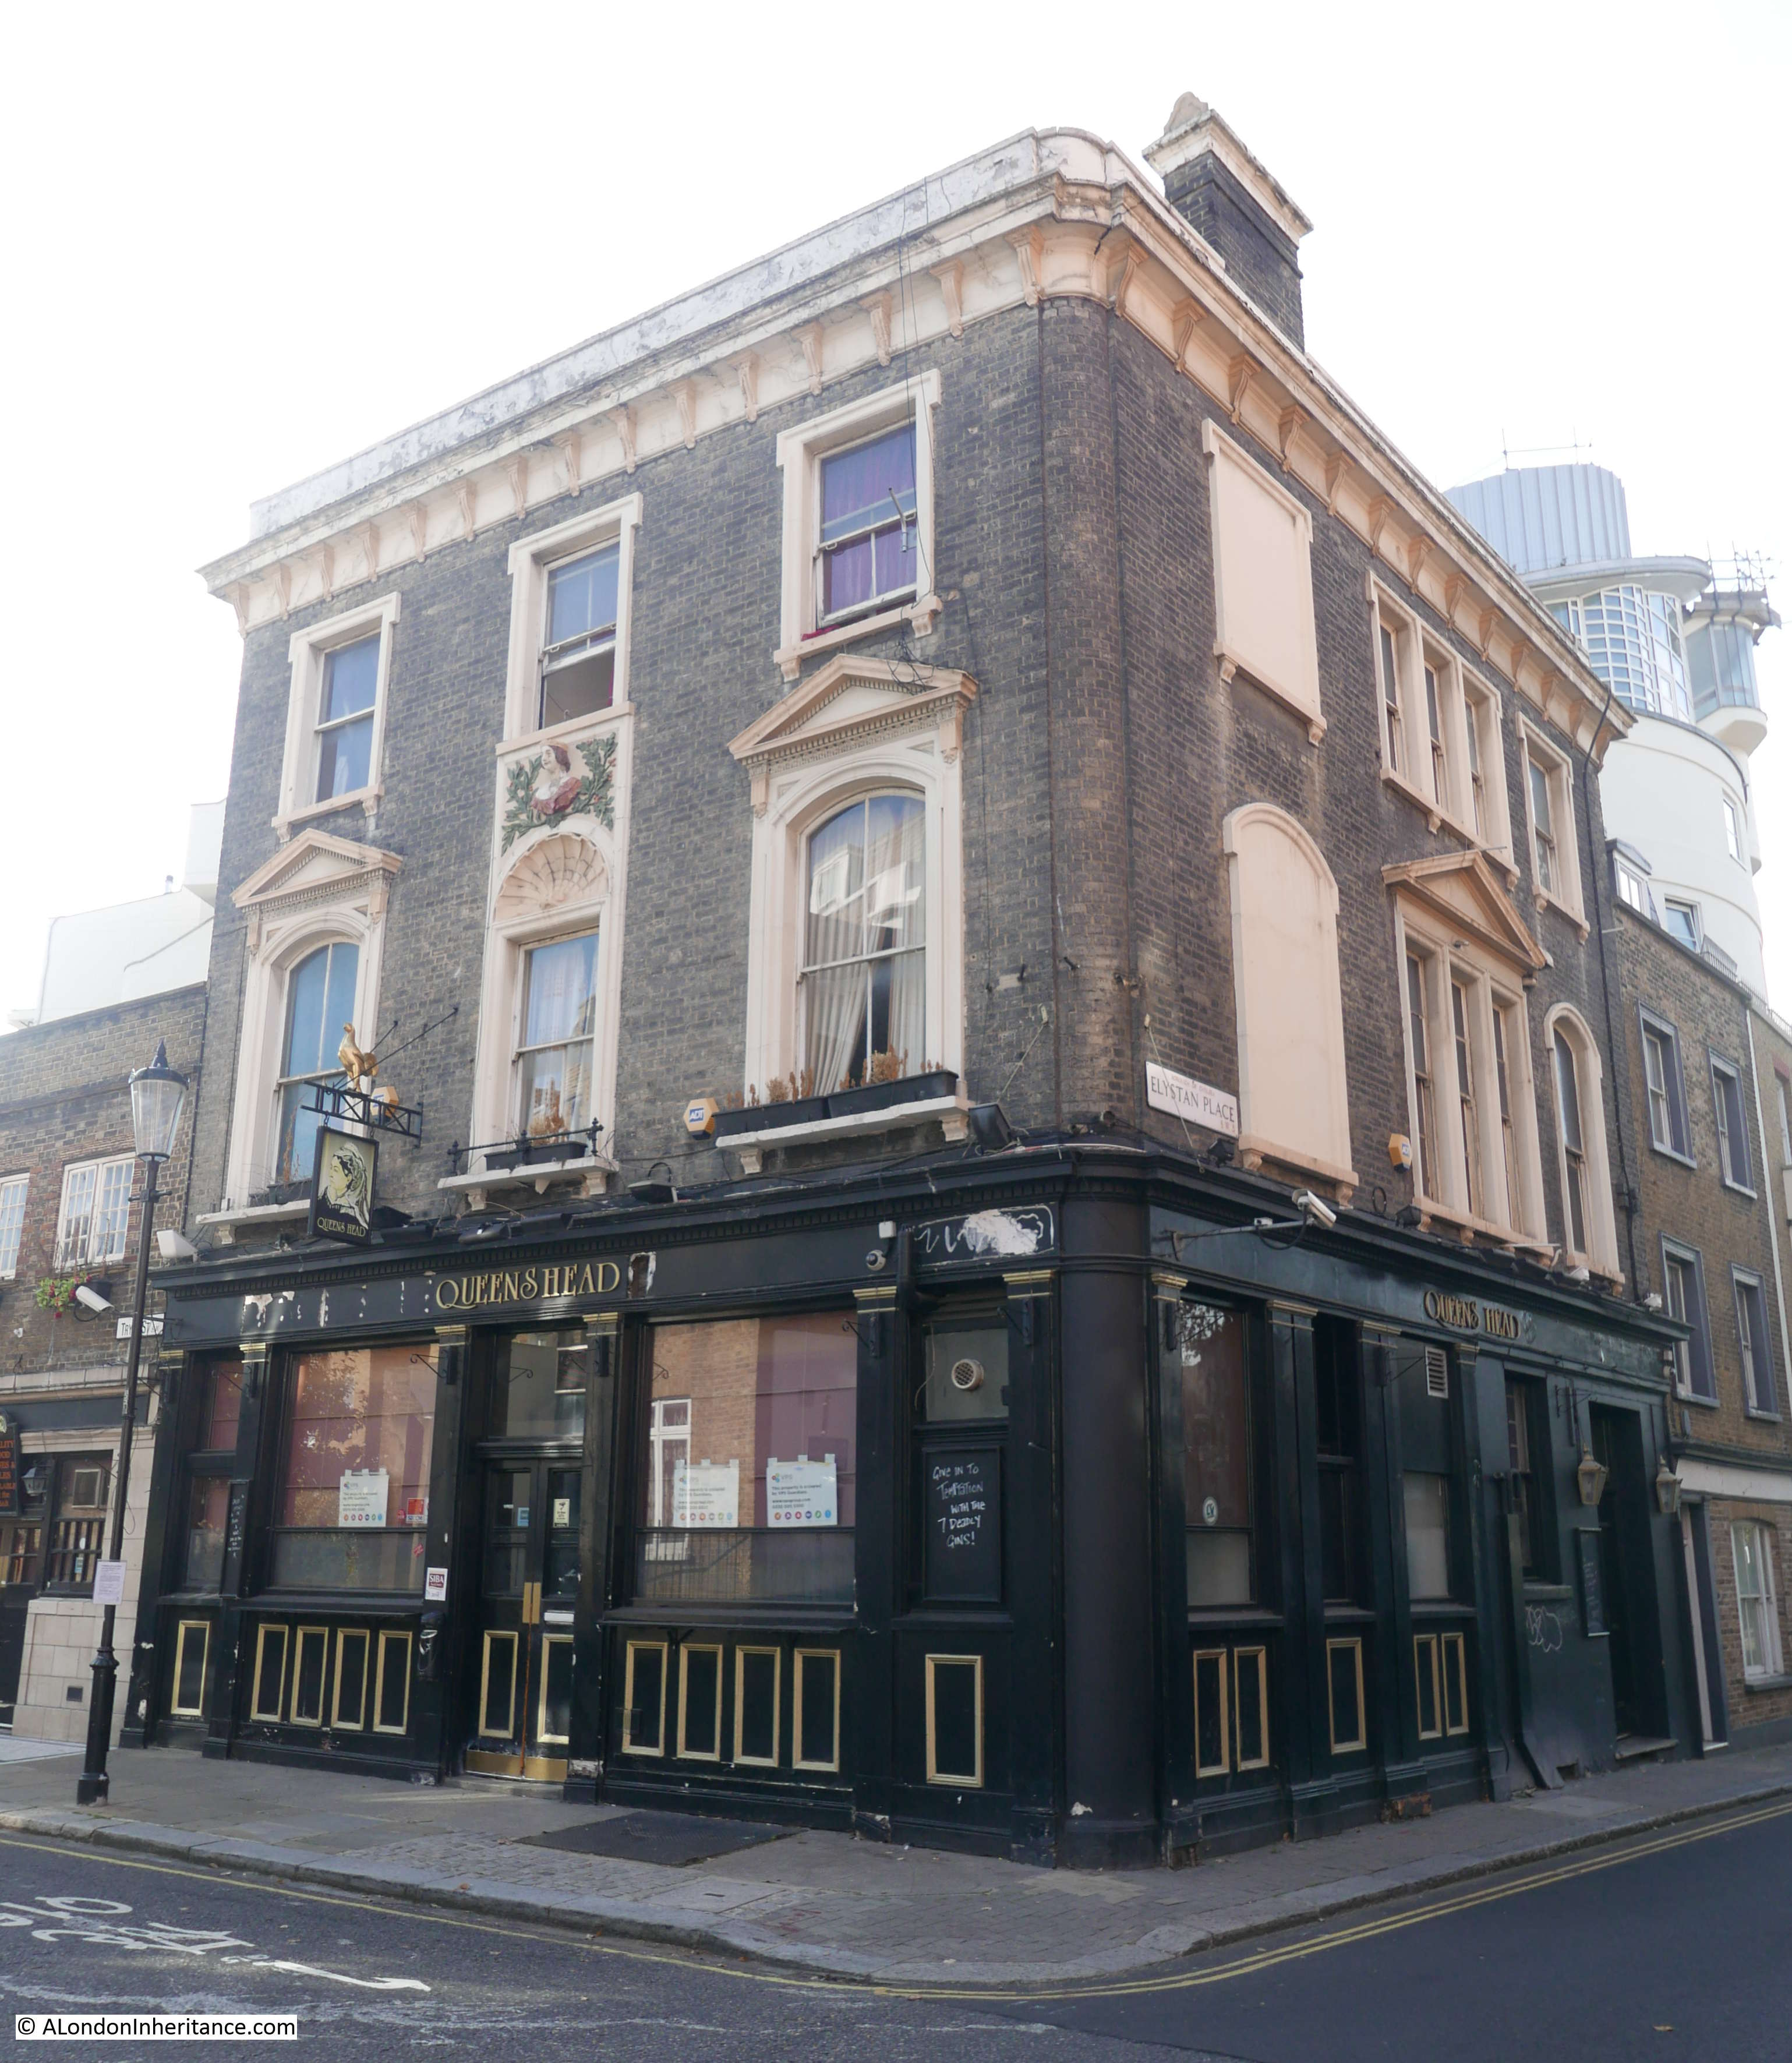
At the end of the street is a typical Victorian corner pub – the Queen’s Head.

Tryon Street

The pub closed on the 7th September 2016 and has been waiting for planning permission to be granted for changes. Originally a full conversion to residential was proposed, however the latest planning request is for residential on the first and second floors, and extension to the roof with conversion of the extension to the left of the pub also to residential.

The intention is that the pub will reopen on the ground floor and basement as a pub and restaurant.

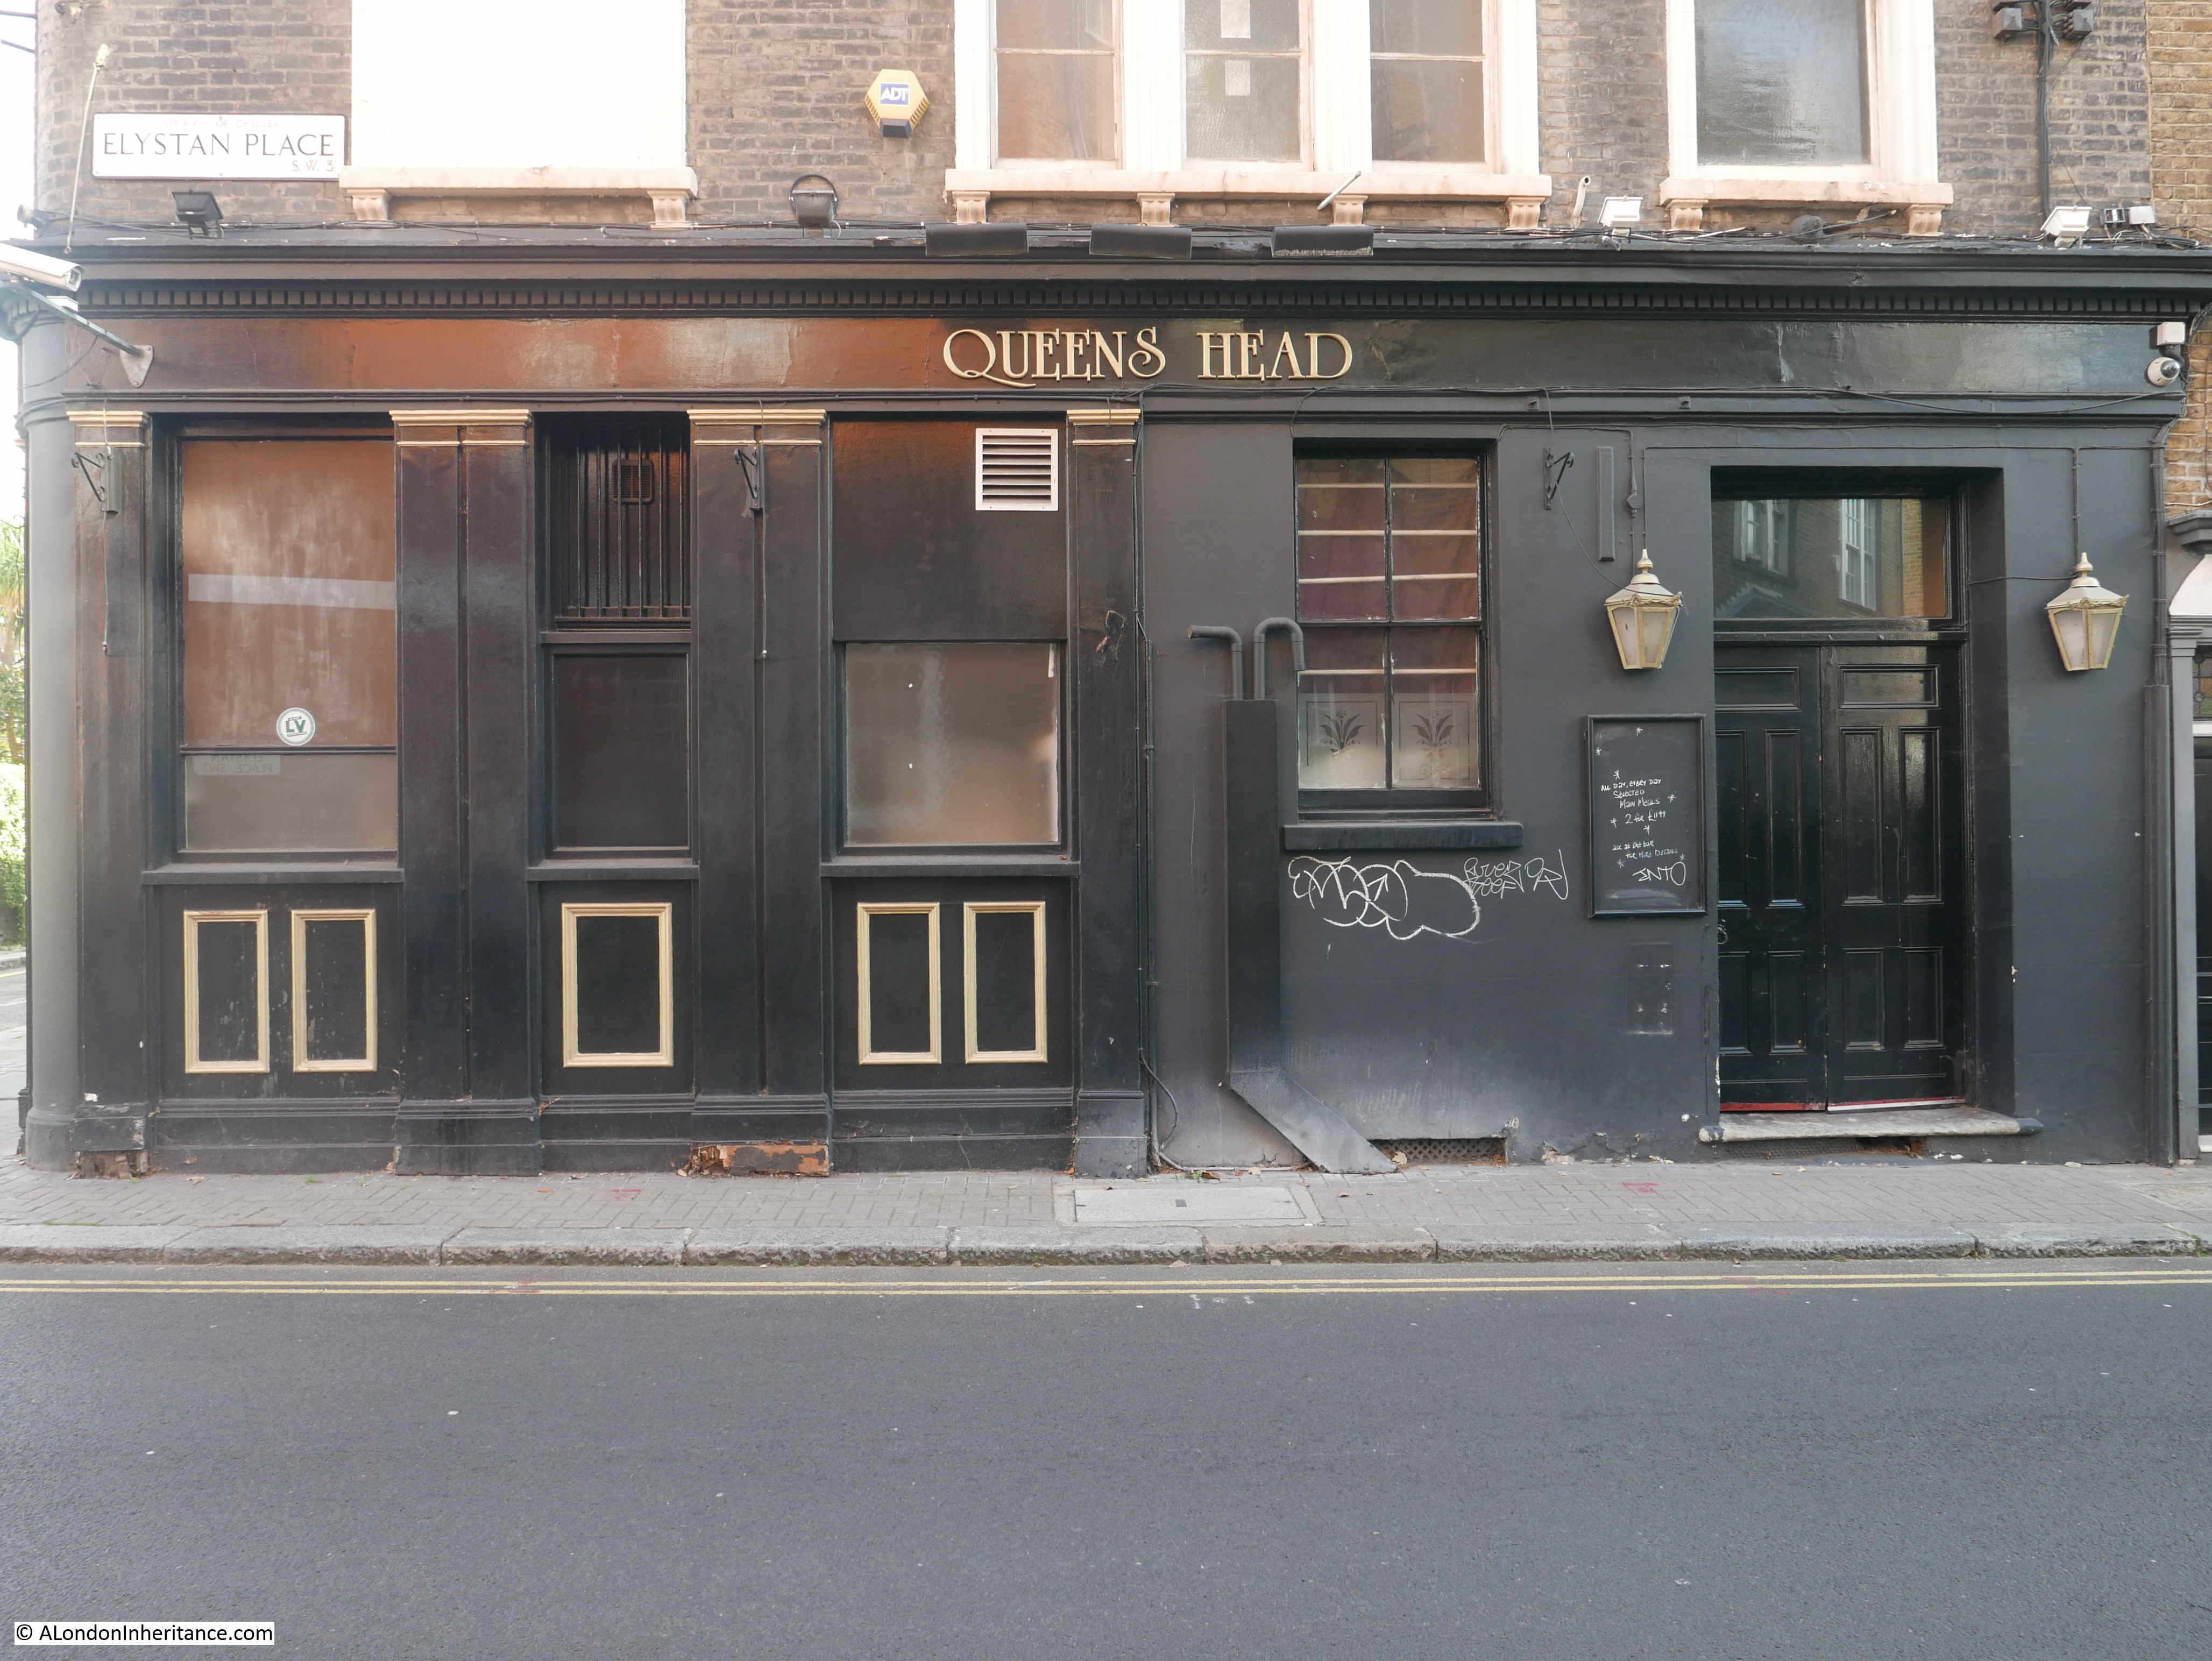
The rather strange looking extension on the left of the pub is an early 20th century conversion, where the original house that was part of the 19th century terrace that runs along Tryon Street, was demolished and the pub extension built. It was used as a lounge bar to the pub.

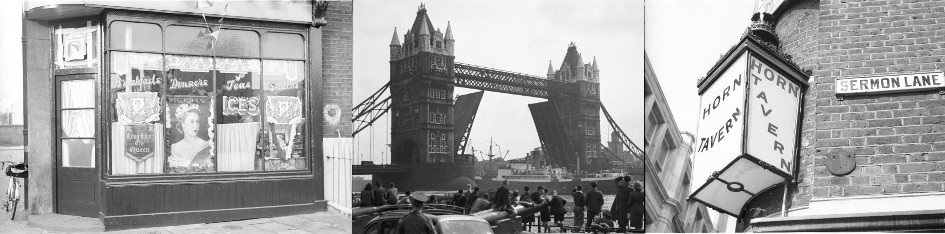
I cut an extract from my father’s original photo to show the detail of the pub as it was.

Tryon Street

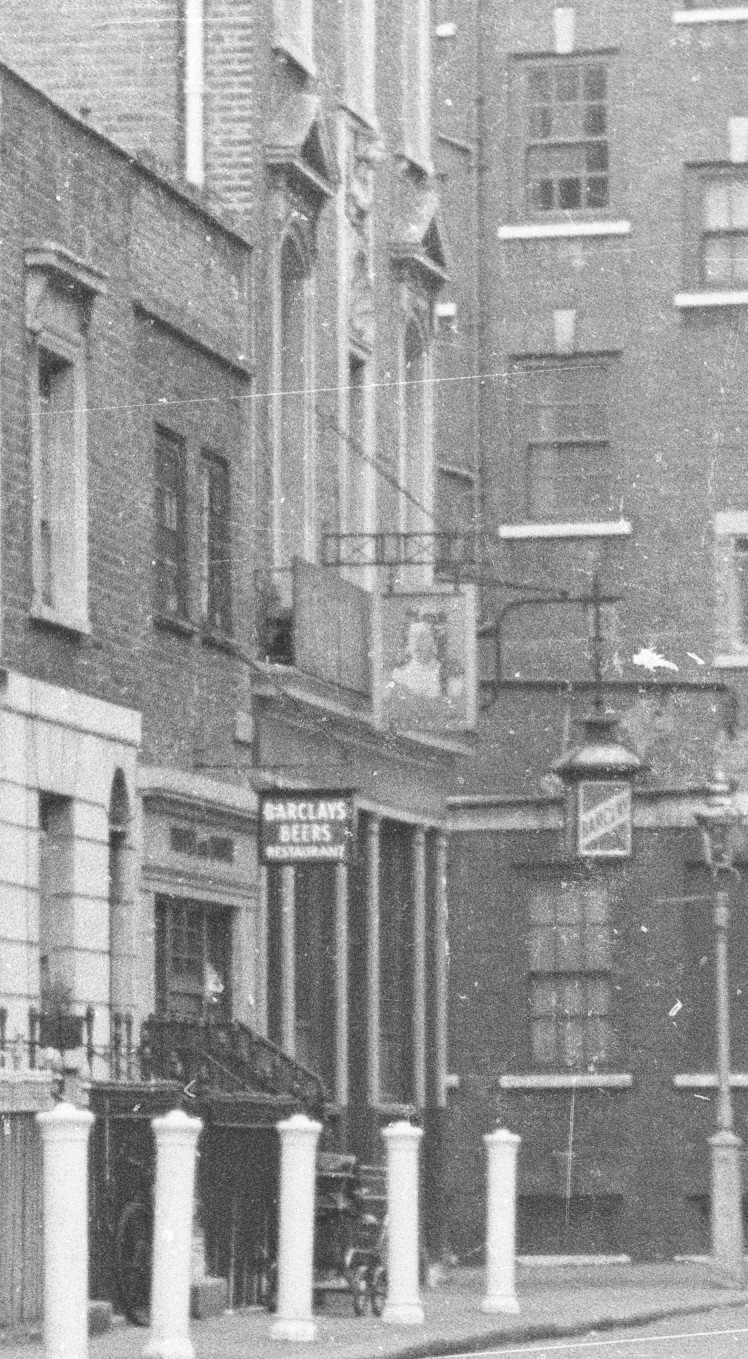
The pub sold Barclays Beers. There is what appears to be a pram parked outside the pub.

The Queen’s Head is a very distinctive feature on the corner of Tryon Street and Elystan Place. The building is higher than the terraces on either side helping the pub to stand out.

Tryon Street

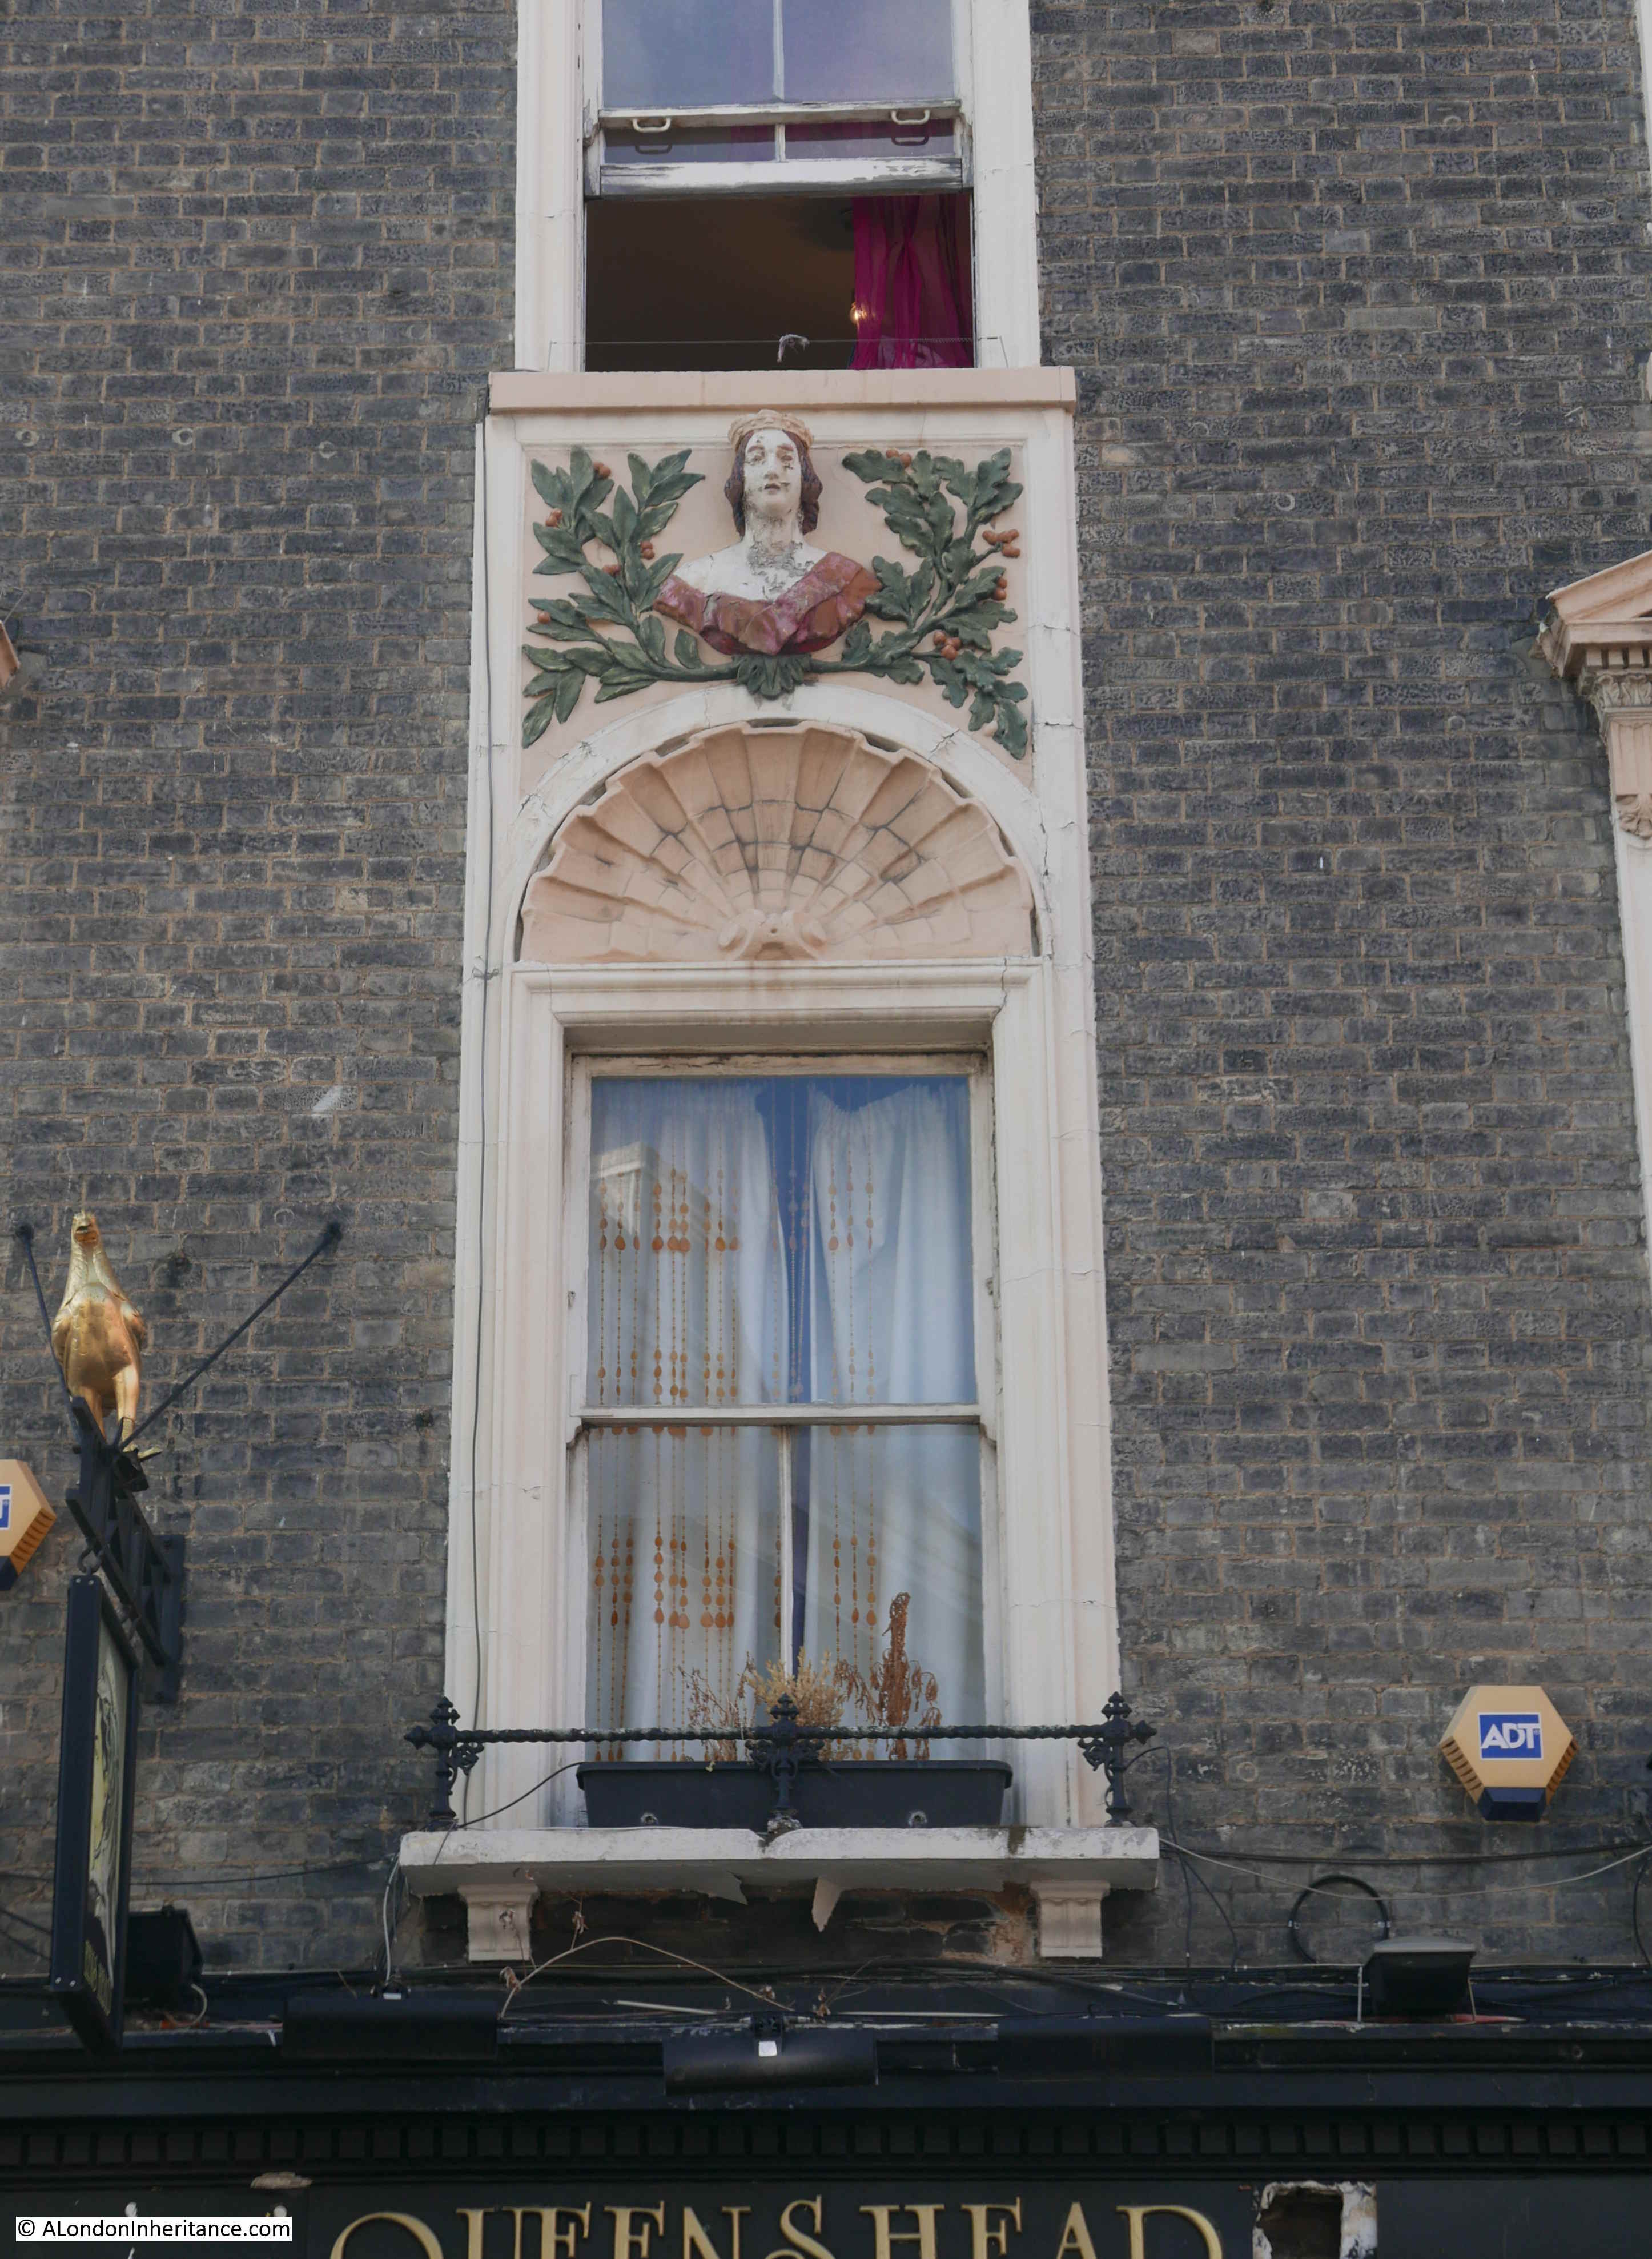
Decorative feature of the Queen’s Head on the first floor of the pub facing onto Tryon Street.

Tryon Street

The Queen’s Head facade facing Elystan Place.

Tryon Street

In the short time I was in Tryon Place, it seemed very quiet, very different to the King’s Road at the end of the street. There was no through traffic and just the occasional walker using the street as a cut through to somewhere else.

A search through newspapers revealed the normal adverts of goods for sale, situations vacant, tragedy and strangeness that can be found in any London street over the years.

On the 2nd of August 1940, Mr William Hendra aged 70 dropped dead in Tryon Street whilst on his way to work. He had been a foreman painter for 46 years and left a widow, fours sons and three daughters.

In October 1952, a man was arrested at 4:40 am “because he insisted on standing in the middle of Tryon Street, Chelsea and playing a trumpet. David Patrick (aged 22 and described as of no occupation), of Sheffield Terrace, Kensington, was at West London, fined £1 on a charge of insulting behavior. He was ordered to forfeit 10s of his bail because he arrived late.”

In February 1940, the secretary of the Ye Old Bell Loan Club and the Queen’s Head Loan Club, both of the Queen’s Head pub, Tryon Street was sent to prison for a month after the loss of £70. In what must have been a very common situation, the secretary was out of work and having to support five children on 39s a week unemployment benefit. The magistrate appears to have been sympathetic as he said “I am exceedingly sorry to see you in the position you are now. It is impossible to pass over an offence of this sort. I don’t say you started taking money intending not to repay, but it is gross carelessness on your part to take £70 without knowing what had become of it. Unless you had a good character I would certainly have given you a long sentence. As it is, go to prison for a month and think yourself exceedingly fortunate”.

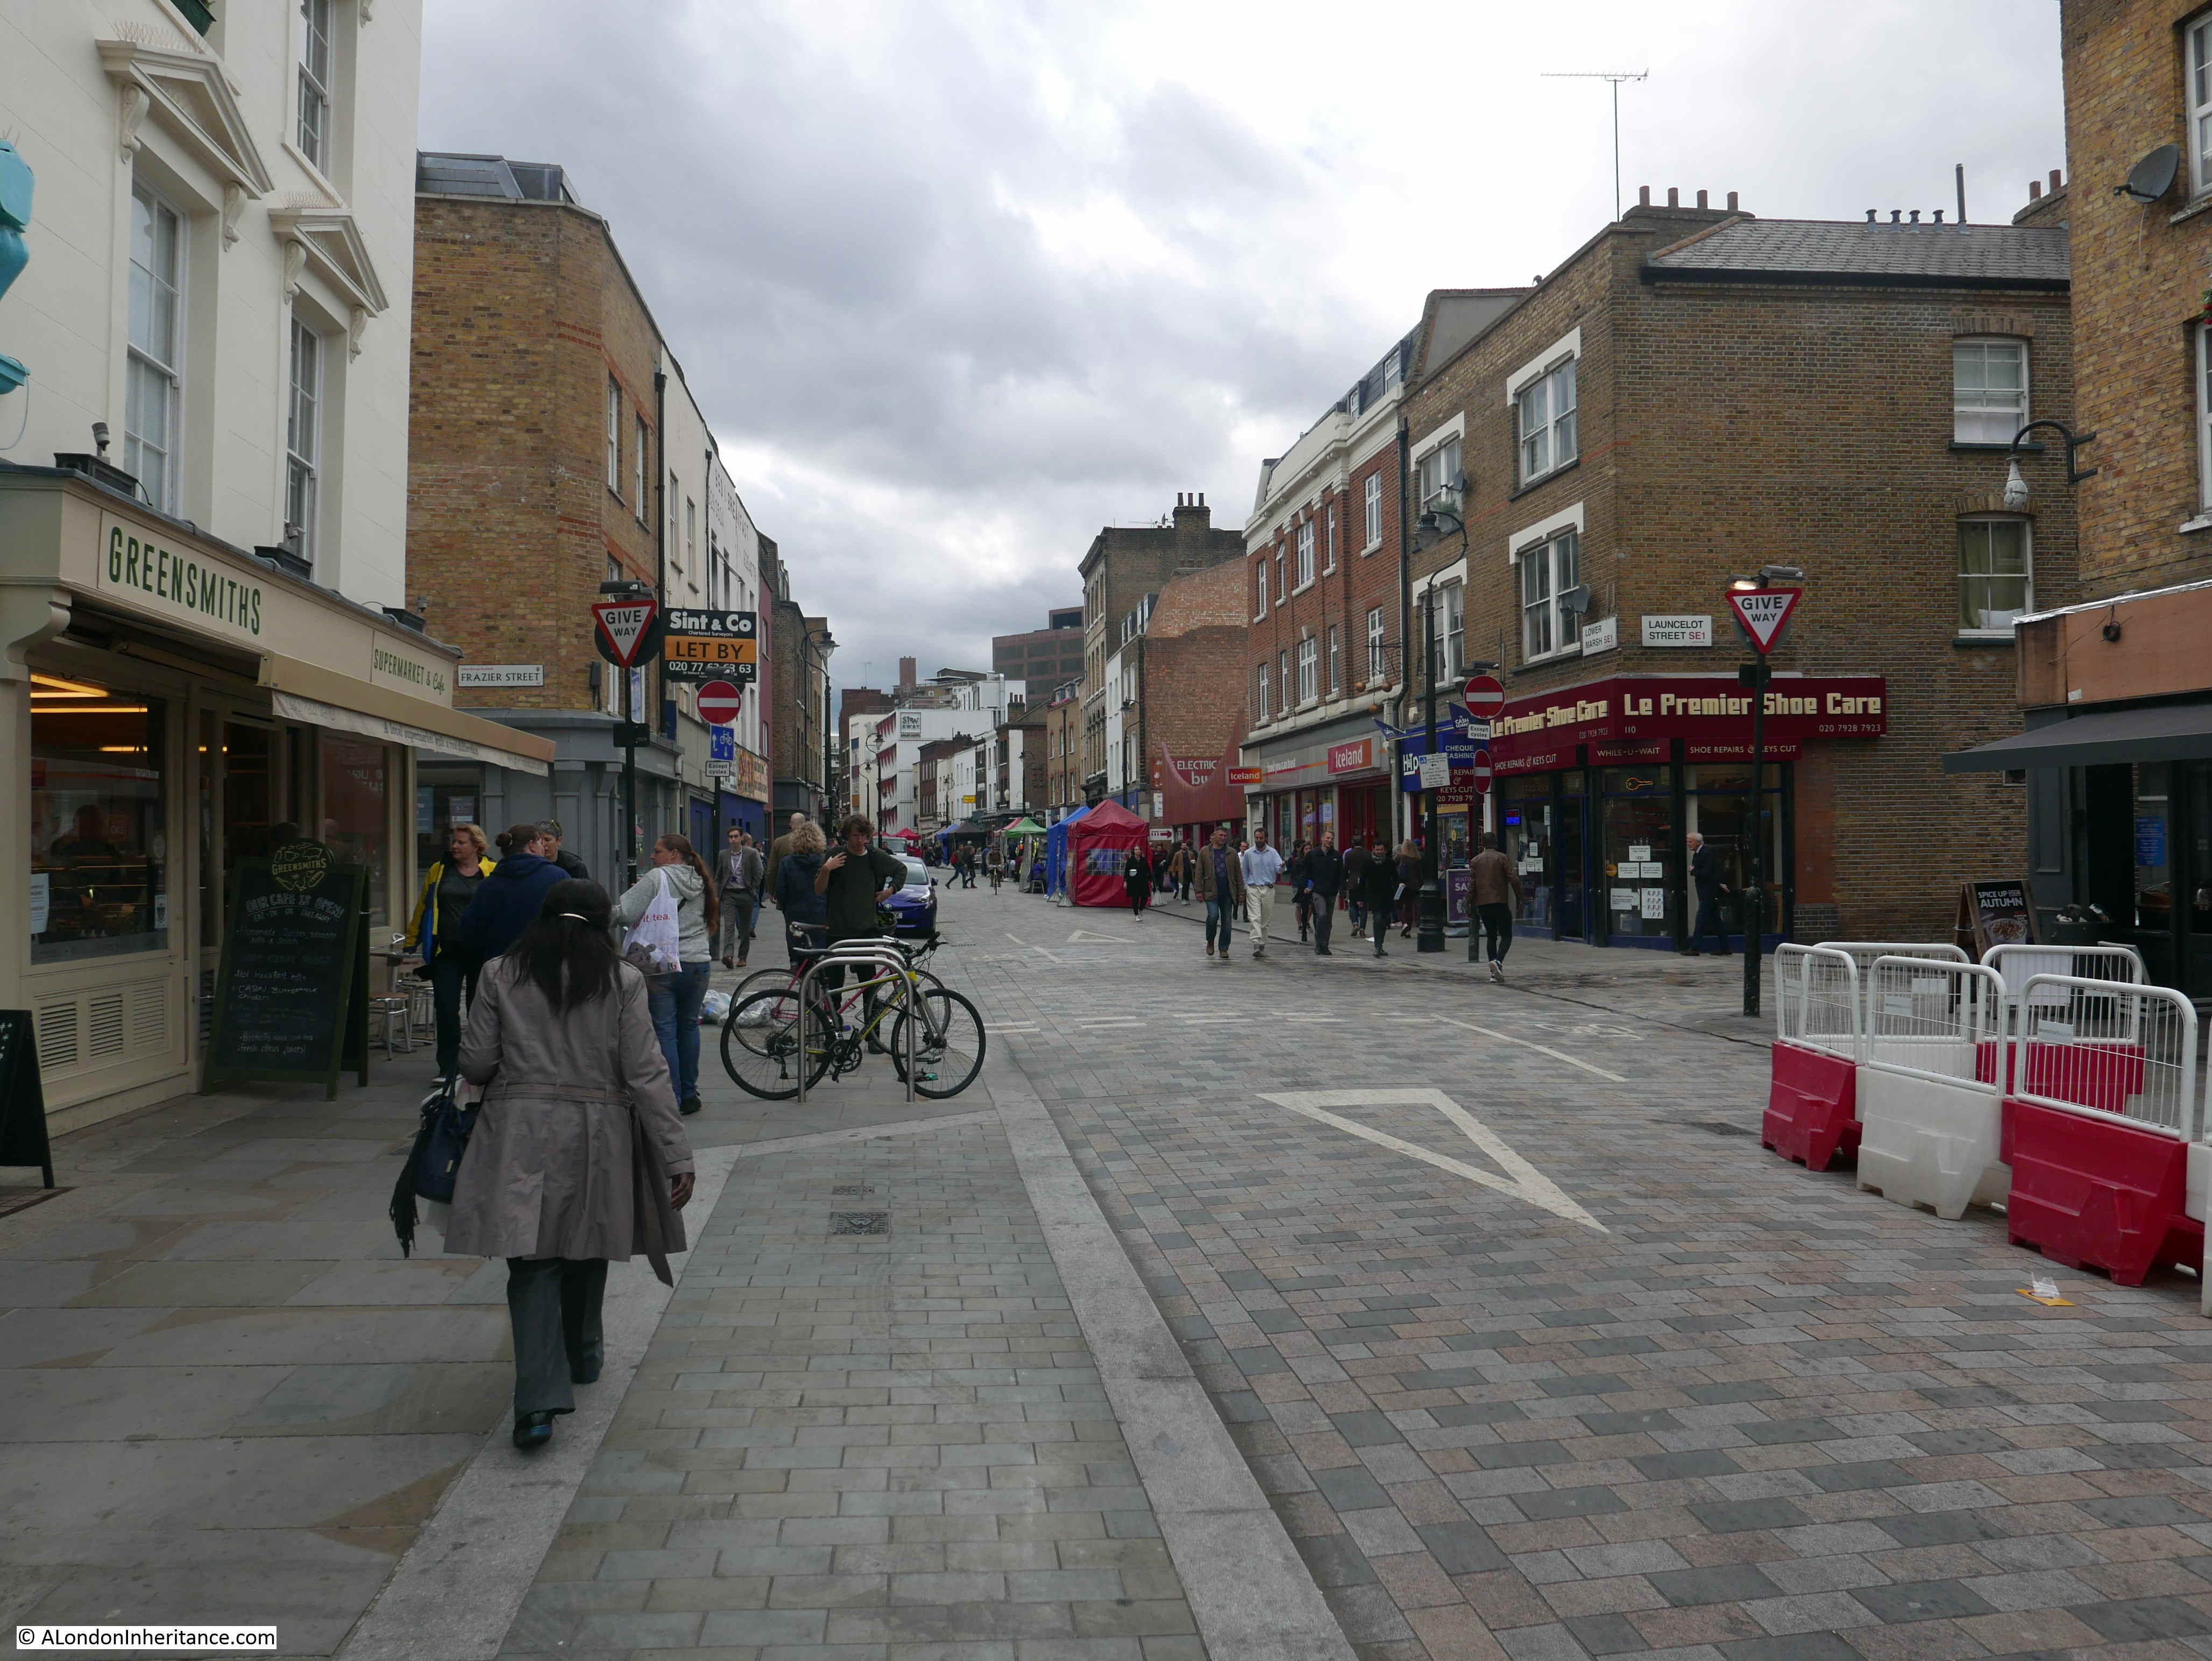
Looking back down Tryon Street towards King’s Road:

Tryon Street

It is always interesting to look at the pavement when walking London’s streets, as well as the buildings. There are plenty of covers to coal holes along the pavement. This one is marked as Green & London – Chelsea, London, SW.

Tryon Street

The cover was purchased locally as Green and London were an ironmongers located at 121 King’s Road.

Tryon Street has changed very little over the last 70 years. A short street that most people appear to use as a cut through to and from the King’s Road, however it is a street with a name that recalls a naval tragedy of the late 19th century.

It will be good to see the Queen’s Head restored and reopened as a pub. There are too many lost pubs in London so retaining this fine Victorian example will be one small victory.

alondoninheritance.com

Lower Marsh Market And L & N Cohen

For this week’s post, I am in Lower Marsh, just to the south of Waterloo Station, however before getting into the post, can I say a big thanks for all the comments to last week’s post. Within a few hours on Sunday morning, your comments provided:

  • The source of the name Flockton – Webster Flockton, who had a tar works in Spa Road, Bermondsey
  • It appears there was nothing sinister with Violet Rose Dicker’s disappearance, she probably ran away with her future husband
  • The correct location of the photograph – Bevington Street

It is really good to have another of my father’s photos correctly identified, I will never know why he labelled it as Flockton Street, I will check the photos again to see if there is one of Flockton Street as perhaps the wrong photo was labelled. I will also take a walk to Bevington Street to take a photo in the right location.

There is no such mystery with today’s location. I worked around Waterloo for 10 years between 1979 and 1989, and one of the lunchtime walking routes was along Lower Marsh, a street lined with shops and a busy market occupying the length of the street.

This is the shop of L&N Cohen at 27 Lower Marsh on the corner of Frazier Street photographed in 1986:

Lower Marsh

This is the same building today:

Lower Marsh

The two photos provide a summary of the changes in the area, as can also be seen across so much of London. The building is no longer the “House for Value” and is now an independent local supermarket selling artisan bread.

I assume the same Cohen family had been running a clothes shop in Lower Marsh for many years. I found the following photo of the same shop in the LMA Collage archive. The photo is dated 1950.

Lower Marsh

Image credit: London Metropolitan Archives, City of London: catalogue ref: SC_PHL_02_0942_80_3901

The initials changed between the 1950 and 1986 photos, so I assume ownership of the shop moved to later generations of the Cohen family. It is interesting that the same structures can be seen across the front of the first floor of the building, running across the windows. I could not work out what these were for, whether a very large awning, fixing for signage that was once in place, or strengthening of the building wall. What ever it was, it has long gone and the building today has been considerably renovated and extended along Frazier Street.

Lower Marsh runs in the shadow of Waterloo Station. The name hints at what the land in the area was like before the developments between the street and the river. When I worked in the area the street was always known as the Cut rather than Lower Marsh. However the street today named The Cut runs to the east of Waterloo Road.

The following map extract shows the location of the building (the red dot, just to the lower left of centre), Lower Marsh runs from lower left to upper right. Waterloo Station dominates the area to the north. Waterloo Road is the orange road on the right, with The Cut leading off Waterloo Road to the top right corner.

Lower Marsh

Map  © OpenStreetMap contributors. 

When I work in the area, the Lower Marsh market was always busy with the street lined with stalls selling all manner of typical market goods, however today, the street appears much quieter with nearly all the stalls selling food. I have not walked along here for a few years, so not sure if this was a typical day, however it is a very different market to that of the 1980s.

Lower Marsh

The Lower Marsh market has a long history, but trading was not always peaceful. An article in the Illustrated London News on the 27th January 1872 shows some of the problems with attempts at Sunday trading:

“SUNDAY TRADING IN THE NEW-CUT: The Lower Marsh, Lambeth, which is popularly called ‘the New-cut’, has long been the regular weekly haunt of a numerous assembly of costermongers, dealers in fish, rabbits, and pork, sellers of cheap hosiery, pottery, hardware, trinkets and toys, who have been permitted to set up their little stalls, or to place their barrows and baskets at the sides of the wide street. This trade has gone on every Sunday at eight o’clock in the morning to one in the afternoon, while most of the neighbouring shopkeepers were obliged in self-defence, to have their business open at the same time.

Two or three weeks ago, the vestry board of St. Mary’s, Lambeth, passed a resolution to the effect that printed notices should be posted through the parish, cautioning all persons in the habit of exposing goods for sale that such a practice would not in future be allowed on Sunday mornings, and that any person so found offending would be summoned before the magistrate on the charge of creating an obstruction, the penalty on conviction being 40s. It was also resolved that the inspectors of nuisances for the parish should be employed to see that the terms of the notice were strictly enforced. The police authorities had declined to interfere, unless the order were to be applied to shopkeepers as well as to costermongers; but a double force of constables was placed on duty to prevent any breach of the peace.

On Sunday week, the trade began at the usual hour, but at nine o’clock, six of the Lambeth nuisance inspectors, in uniform, appeared upon the scene, and, accompanied by police-constables and followed by a large body of roughs, yelling and hooting, visited the stall-keepers in succession, ordering each to remove the stall, barrow or basket at once. If they merely removed to other places, they were followed by an inspector, who took down the name and address of the offending dealer, informing him he would be summoned.

As a rule, the officers, while performing their disagreeable duty, were treated with civility; but were very generally told that, if prevented selling their goods as usual, the costermongers would be compelled to throw themselves upon the parish, as they mainly depended for their scanty living upon the profits of the Sunday morning sales, when they did more business than on all the other days of the week.”

The articles goes on to state that the issue was discussed further in a number of vestry meetings, with a considerable number of shop-keepers, rate payers, shop assistants and costermongers urging the vestry that regulation rather than prohibition was required.

The vestry agreed on a compromise that allowed the market to go ahead on a Sunday morning, providing the stalls were removed by half-past ten o’clock, before church time.

The article finishes with a sentence that illustrates the working conditions that constrained the lives of so many of the working class:

“It is said that many of the working-class families in Lambeth cannot get their needful purchases for Sunday on Saturday night, because they work late on Saturday and do not receive their wages till the evening.”

Lower Marsh today, looking west with the old Cohen shop immediately on the left:Lower Marsh

Another view along Lower Marsh:

Lower Marsh

There are still many interesting 19th century buildings along Lower Marsh. On the front of one building at 127 Lower Marsh, there are two large urns on the either side of the first floor windows.

Lower Marsh

Apparently these are Tuscan oil jars and were often found on the facades of former oil shops. The ground floor of the building today is occupied by a Thai Restaurant, however in 1972 it was occupied by “Taps & Tiles”:

Lower Marsh

Image credit: London Metropolitan Archives, City of London: catalogue ref: SC_PHL_01_251_72_1090A

The Eastwood’s sign on the side of the building in 1972 has disappeared. I have not been able to find out if this was the name of a possible oil shop, or some other business on the premises.

Lower Marsh from Westminster Bridge Road end:

Lower Marsh

The London metropolitan Archives, Collage collection has a number of photos of the Lower Marsh market over the years, the following are a sample.

The first is one of the earliest I could find and is dated 1896, only 24 years after the Sunday trading issues detailed earlier in the post.

Lower Marsh

Image credit: London Metropolitan Archives, City of London: catalogue ref: SC_PHL_01_251_77_1062

This is from a time when the majority of shops had awnings and frequently large advertising boards across the facade, as can be seen with the Danish Dairy Company in the above photo. I wonder if the remains of these fixtures could still be seen across the front of Cohen’s shop in 1986.

The following photo is from 1950. The text that goes with this photo states that “the market stretched from Blackfriars to Vauxhall”.

Lower Marsh

Image credit: London Metropolitan Archives, City of London: catalogue ref: SC_PHL_02_0942_90_3903

I have not been able to find any evidence that the market stretched all the way from Blackfriars to Vauxhall – this would have been a considerable distance. It may have been that, as described in the 1872 Illustrated London News article, costermongers and traders could have sold from baskets and stalls anywhere along the roads south of the river from Blackfriars to Vauxhall, rather than a single, organised market. Street trading was much more haphazard before the 20th century.

This photo is again from 1950, and is at the eastern end of Lambeth Marsh, close to the junction with Waterloo Bridge Road.

Lower Marsh

Image credit: London Metropolitan Archives, City of London: catalogue ref: SC_PHL_02_0942_90_3903

This final photo from the Collage archive is also towards the Waterloo Bridge Road end of Lambeth Marsh. The photo is from 1950 and shows Waterloo Station in the background.

Lower Marsh

Image credit: London Metropolitan Archives, City of London: catalogue ref: SC_PHL_01_251_80_3912

I hope the early Friday afternoon that I walked down Lambeth Marsh was not a normal market day, it was very quiet and with considerably less variety than the market of the 1980s, however demographics change and I suspect the market today reflects local demand as it is, rather than as it was.

These changes between 1986 and 2018 can be clearly seen in the changes to 27 Lower Marsh.

alondoninheritance.com

Flockton Street – A Bermondsey Mystery

The location for this week’s post is a bit of a mystery. The notes my father wrote for the following photo were “Flockton Street looking south from Bermondsey Wall. 19th century slum dwellings ravaged by the blitz – Summer 1948”.

Flockton Street

I will explain why this photo is a bit of a mystery as I go through the post, but firstly, where was / is Flockton Street?

The location is on the south of the River Thames, east of Tower Bridge. The street ran south from Bermondsey Wall, a short distance to the east of St. Saviour’s Dock. The following extract from the 1895 Ordnance Survey map shows the location. I have rotated the map so north, and the River Thames is at the bottom of the map and south at the top of the map. This rotation is to align the map with my father’s photo.

Flockton Street

So far, all looks good. I have marked the position from where I assume the photo was taken, and Flockton Street is the street running upwards from the red circle. My father’s photo is looking along a street with housing either side (although not as much housing in the map close to the camera as there is in the photo). The space on the right of the photo could be the location of the slate works shown on the 1895 map.

In my father’s photo there is a taller building on the left, behind the terrace houses. In the 1895 map, roughly where this building would have been located there is a school, and the limited view of the building in the photo does look like a typical Victorian London school.

But when I went to find the site, I started to have doubts.

As would be expected, the area is very different today. Flockton Street was a long street in the 1895 map, but today, only a couple of short stretches remain, one of which did not exist in 1895,

The following map shows the area today (with north and the River Thames at the top of the map). (Map  “© OpenStreetMap contributors”)

Flockton Street

I have circled one stretch of Flockton Street at the top of the map. This stretch meets Bermondsey Wall at the top of the map, and presumably the point from where my father took the photo.

At the other end of this short stretch is Chambers Street, a street that did not exist in 1895.

I have circled the next identifiable stretch of Flockton Street in the middle of the map. This is a short length from George Row that also did not exist in 1895.

Flockton Street in its original alignment has all but disappeared, although there is what appears to be an unnamed street running from Chambers Street roughly where Flockton Street would have been, although today this is more a walkway in between the flats that now cover the area, rather than a street.

Whilst walking around the site of Flockton Street, there were two main issues with confirming it was the location of my father’s 1948 photo. The first is the short stub of Flockton Street where it joins Bermondsey Wall.

Bermondsey Wall is an old street, that as its name implies was at one time aligned or part of the wall / embankment along the edge of the river. I am not sure when the name Bermondsey was used for the street, in Rocque’s map of 1746 it is called Redriff Wall for the section just east of St. Saviours Dock, then Rotherhithe or Redriff Wall for the rest of the street (Redriff was one of the earlier names for Rotherhithe, hence the alternatives shown on Rocque’s map).

Flockton Street is also not the original name. The London Evening Standard on the 8th August 1878 reported that “Salisbury Lane, Neckinger Road, Bermondsey will be renamed Flockton Street and also renumbered”. There is no additional information to explain why the renaming was needed, or why the name Flockton was chosen. The only person named Flockton that appears in 19th century newspapers is a Thomas Flockton of Leadenhall Street who was a shipping and insurance broker.

Today, Bermondsey Wall has been divided into two sections (with the addition of east and west to the street name) by the works for the Thames Tideway Tunnel.

In the following photo I am standing in Chambers Street looking down Flockton Street towards Bermondsey Wall.

Flockton Street

And in the following photo I am at the Bermondsey Wall end of Flockton Street looking in the direction of my father’s photo.

Flockton Street

There is a significant difference between my father’s photo and the above view. The street is very narrow (as confirmed in the 1895 map) and there is a significant dip in the street unlike my father’s photo which shows a much broader, flat street.

The dip in the street is significant as this hints at the undisturbed nature of this section of Flockton Street.

One of the documents that the Thames Tideway Tunnel had to complete as part of the application for development consent was a Heritage Statement. This document provides an interesting read to get a better idea of the history of the area. For Flockton Street there is the following text:

Flockton Street

The dip in this section of Flockton Street is therefore the evidence for a deep 19th century drainage channel. It does not appear in my father’s photo.

My next thought was whether the 1948 photo was taken from Chambers Street looking along Flockton Street, rather than from Bermondsey Wall. I checked the 1940 edition of Batholomew’s Atlas of Greater London and Chambers Street was not there in 1940. The following extract shows Flockton Street (just to the right of centre of the map) running up to Bermondsey Wall.

Flockton Street

The 1940 map does show the school in the same possible as in 1895 and in the right position as regards the 1948 photo. I doubt that Chambers Street would have been built between 1940 and 1948.

Walking to the other side of Chambers Street, opposite the entrance to the small stretch of Flockton Street is this view.

Flockton Street

This is looking along where Flockton Street was on the 1895 Ordnance Survey map. In this lower part of Flockton Street, there is an open area on the left and the new school buildings that have replaced the Victorian building.

On the right is a block of flats, the first of the flats that cover the land up to where Flockton Street originally met George Row to the south.

It is the design of these flats that also gave me a problem with confirming that this was the location of my father’s photo. Another view of the flats is shown in the photo below, standing in the open space that would once have been Flockton Street.

Flockton Street

My problem with these buildings is that they do not look like post war design, and indeed they are not. I could not find the exact date of construction, however there are newspaper reports which mention some of these blocks in the 1930s. One of these reports, from the Daily Herald on the 9th November 1938 concerns Weller House, one of the blocks of flats between George Row and the original southern end of Flockton Street. The report itself hints at what appears to have been some rather tragic events in the area:

“Police Seek Clue From Blonde – South London police are seeking a young, fair haired girl, who, they think, may be able to help them trace 16 year-old Violet Rose Dicker missing from Weller House, George-row, Bermondsey. Violet is the fifth girl to disappear from Weller House, a block of flats, in six weeks. 

Rosie seemed quite happy until she went to a dance a fortnight ago, her mother said last night. She said she had stayed away two nights, and said she had been with a girl friend.”

I can find no further reports of what happened to Violet Rose Dicker or the other four girls who disappeared from Weller House so no idea whether this was normal teenage rebellion, or something more sinister.

This is the view of Weller House from Scott Lidgett Crescent (part of what was East lane in the 1895 map). The southern end of Flockton Street would have been through the middle of the flats, roughly where the building moves from light to shade.

Flockton Street

So I am still not sure whether Flockton Street is the location of my father’s photo. The notes were generally written after he had taken the original photo, often after he had developed the negatives and printed some of the photos. As I have worked through his photos, it is very rare for the written notes to be wrong, however I suspect with this photo the location may well be wrong.

The school is in the right position, but if the view of Flockton Street is from Bermondsey Wall, the narrow section with the dip is not visible and I doubt Chambers Street was in existence in 1948 – it was not on the 1940 map.

Also the blocks of flats between George Row and Flockton Street appear to be of pre-war construction, certainly those to the southern end of what was Flockton Street are pre-war.

The photo is in Bermondsey, photos on the same negative strip either side of this photo are in Bermondsey. Perhaps some time spent in local archives may reveal the location, but at the moment, this is still a mystery location.

alondoninheritance.com

The Airborne Wandeltocht

My final post from the Netherlands before returning to London for next Sunday’s post. The Airborne Wandeltocht (or Airborne Walking Tour) is an annual event on the first Saturday in September where a series of different length walks takes participants around the sites in Oosterbeek that featured in the events of September 1944.

The first walk took place in 1947 and walks have been held annually since, to commemorate and remember those who fought and died around Oosterbeek and Arnhem, and to raise money for charities associated with military veterans and youth projects.

Airborne Wandeltocht

This year, on the 1st September, the 72nd walk took place and 32,809 walkers took one of four route options around Oosterbeek. The routes start at 10km with longer options up to 40km. All routes take in the Hartenstein Hotel (now the Airborne Museum), the Oosterbeek War Cemetery (which I will write about in November) and the Oosterbeek Old Church on the edge of the town and river which featured in the defence of the critical length of river needed to escape to the south.

The 40km walk extends to include the landing grounds to the north west of Oosterbeek.

The walk formally starts at 11 o’clock with a parade along the main road in front of the Airborne Museum, although many of the longer distance walkers will have started earlier in order to complete the walk during the mid-afternoon.

Across the whole event the flags of Poland, the United Kingdom and the Netherlands are very much in evidence to commemorate the airborne forces, the resistance and the civilians who fought and died in and around Oosterbeek.

The opening ceremony makes very clear that this is not a glorification of war, it is to remember those who fought, were wounded and died in the liberation of the Netherlands and the restoration of freedom and democracy.

Airborne Wandeltocht

The parade to formally start the walks includes a wide range of groups – those from the emergency services, scouts, charities along with current armed services and cadets, including representatives from the UK,

Airborne Wandeltocht

In between there are groups of walkers. The walk is very much a family day out.

Airborne Wandeltocht

Along with marching bands – a Dutch specialty.

Airborne Wandeltocht

The formal start / end point on the Utrechtseweg, the main road running through Oosterbeek and one of the roads taken by the airborne forces as they moved from the landing grounds towards Arnhem.

Airborne Wandeltocht

A number of British veterans attend the event each year, they have pride of place in the marquee next to the start / end point. Here, they are standing by the memorial to commemorate the 65th Airborne Wandeltocht – 74 years after they fought in the surrounding area.

Airborne Wandeltocht

All around Oosterbeek there are permanent signs telling the story of September 1944. In the following photo of a house on Utrechtseweg, a pillar can be seen on the pavement to the right of the front door.

Airborne Wandeltocht

The pillar records that the 10th Parachute Battalion fought here to virtual extinction, and that on the 23rd September the remnants of the battalion were withdrawn.

Airborne Wandeltocht

A key point on the route is the Oosterbeek Old Church. The church is on the outskirts of the modern day town, close to the flat stretch of open land that runs between town and river. The church is one of the oldest in the Netherlands, dating at least back to the year 900. In restoration work after the war, pre-christian features were found under the church so the site has been of importance for many centuries.

The church is open on the day of the Airborne Wandeltocht and all four routes pass by the church. It makes a good resting point and a fascinating location to explore.

Airborne Wandeltocht

As well as the permanent pillars, there are also photo signs at various points along the walk showing what the site looked like following the events of September 1944. The church was badly damaged in the fighting.

Airborne Wandeltocht

There are still plenty of bullet holes to be found in the walls.

Airborne Wandeltocht

The church was a central point in the fighting to defend the gradually shrinking pocket of land held by the airborne forces. Keeping a length of the river and the route open to withdraw to the river was critical in making sure that the airborne forces were not cut off in Oosterbeek. Towards the end of the battle, the width of land occupied by the British, and the Polish forces that had made it across the river was down to 700 yards.

Airborne Wandeltocht

The restored interior of the church – very busy on the day of the Airborne Wandeltocht.

Airborne Wandeltocht

The Pegasus emblem of the Parachute Regiment can be found across Oosterbeek and Arnhem. In the Oosterbeek Old Church it is on the kneeling cushions, wall memorials and on the font.

Airborne Wandeltocht

Another view of the church.

Airborne Wandeltocht

A small plaque underneath the tree reads:

“In the thick of the fighting when a patrol of five Airborne warriors was standing by this lime tree, a mortar shell hit the place and killed four of them.

Only Mark Leaver survived. Staff sgt. G Squadron, Glider Pilot Regiment, born 20th January 1920, died 31st October 2000″

Another memorial in the churchyard to the British, Polish and Dutch men and women “who fought a grim battle around this ancient church to liberate the Netherlands from Nazi tyranny.”

Airborne Wandeltocht

The flat lands between the church, the southern edge of Oosterbeek and the river in the distance. A bridge over the river can be seen in the distance. It was over this land that the final overnight withdrawal took place, across the river to the southern shore where advance parties of the British 2nd Army and the Polish forces who had landed a few days earlier, had taken the river bank.

Airborne Wandeltocht

The Airborne Wandeltocht threads its way through the streets of Oosterbeek, walking through streets that were once the scene of deadly fighting. Pegasus flags of the Parachute Regiment fly from the majority of houses.

Airborne Wandeltocht

Another example of the information posters along the route showing the same scene in 1944.

Airborne Wandeltocht

Crowds of walkers returning through the central streets of Oosterbeek:

Airborne Wandeltocht

Returning through the formal end point of the Airborne Wandeltocht. The walkers return to the main assembly field to collect their medals.

Airborne Wandeltocht

Not something you expect to see, a bagpipe band in the Netherlands. These are the Seaforth Highlanders of Holland. They were formed to commemorate the Seaforth Highlanders of Canada, who were part of the Canadian armed forces who liberated parts of the Netherlands during 1945. They were formed in Vancouver in 1910 following the large number of Scottish immigrants to Canada.

Although the Airborne Wandeltocht is just one of many events held during September to commemorate the impact of Operation Market Garden in Arnhem and Oosterbeek, it is by far the biggest event with this year well over 32,000 people of all ages taking part.

The walk does an excellent job of weaving together the history of September 1944, events at key locations and remembering the sacrifices of the British and Polish airborne forces and the Dutch civilians.

Next year’s event will take place on the first Saturday in September and details can be found on the web site of the Airborne Wandeltocht. (There is an English version, but Google translate does a good job with the full site).

alondoninheritance.com

Operation Market Garden – Arnhem And Oosterbeek

For my last Sunday post from the Netherlands, I have reached Arnhem, the final bridge in the chain of bridges that were to be taken during Operation Market Garden, and by doing so, clearing a path across the rivers to a point where the Allied forces could turn east with an unobstructed path into the heart of industrial Germany.

As well as Arnhem, I will also visit Oosterbeek, a suburb to the west of Arnhem that became the centre for British forces during the operation when German attacks prevented the majority of the airborne forces from fighting their way through to the bridge.

Operation Market Garden involved the landing of airborne forces that would capture key towns and bridges from Enindhoven in the south through to Arnhem. Capture of these towns and bridges would allow the British 2nd Army to break out from the Belgium border and drive north along the corridor of captured land through to the final bridge at Arnhem.

The 101 US Airborne Division would capture the city of Eindhoven and key points north where they would meet up with the 82 US Airborne Division which would capture the route from Grave through to the bridge at Nijmegen. This would allow the British 2nd Army to move on to Arnhem and the bridge that was to have been taken by the 1st British Airborne Division and the 1st Polish Independent Parachute Brigade.

The plan was that the bridge at Arnhem would only need to be held for two to three days before the ground forces reached the airborne forces, however delays along the route, as well as the failure to immediately capture the bridge at Nijmegen and the fighting in the town before the bridge could finally be taken resulted in significant delays.

The expectation was that only light German forces would be found in Arnhem, however the quick reactions of the occupying forces along with SS Panzer Divisions being in the area meant that the British airborne troops faced much stronger defending forces than expected.

The British Airborne forces also had to land several miles to the west of Arnhem. The area chosen was the only flat land suitable for both parachute and glider landings, as well as being away from a German airfield to the north west of Arnhem, with significant anti-aircraft fire.

The operation started on the 17th September 1944 with parachute drops and glider landings to the west of Arnhem. Troops were organised to hold the landing grounds for future drops and to move forward to capture both the bridge and other strategic locations around Arnhem.

The following map from the book Arnhem by Major General Roy Urquhart shows the Drop Zones and Landing Zones to the west of Arnhem along with Drop Zone K to the south for the later drop of the Polish airborne. The map shows the intended plan to capture the bridge and the defensive positions to be taken whilst waiting for the 2nd Army to reach them from the south. The suburb of Oosterbeek can also be seen just to the west, alongside the river.

Arnhem

The German forces were much stronger than expected, with more, experienced and better equipped opposition both already in the area, and hastily assembled.

The 2nd Battalion led by Lt. Col. John Frost reached the bridge on the first day and took the buildings either side of the northern end of the bridge, however stiff resistance prevented the rest of the 1st Parachute Brigade from reaching the bridge, and fighting would take place from the landing zones through to Arnhem as the Germans pressed in on the attacking force.

The small force from the Parachute Brigade would hold the northern end of the bridge from Sunday 17th to Wednesday 20th September. Intensive attacks on the occupiers over the four days with a gradually shrinking perimeter and occupied buildings being demolished by German tank and gun fire, as well as very high numbers of dead and wounded and running out of ammunition resulted in the remnants of the parachute battalion being taken into captivity in the early hours of Thursday 21st September.

My father only took a few photos of Arnhem, not as many as Nijmegen, so I am not sure if Arnhem was to the end of the route he was taking through the Netherlands and he was running low on film.

The first is of the bridge, and includes his two friends and their bikes:

Arnhem

During my visit I walked over the bridge to the same position:

Arnhem

The bridge as seen from the east, just in front of a new, and very busy “Airborne at the Bridge” visitor centre:

Arnhem

The view from the bridge looking north east into the city. The buildings that originally stood here were occupied by the parachute brigade:

Arnhem

Fighting took place at several sites across Arnhem as British forces attempted to get to the bridge. On the right in the above photo can be seen the tops of two church towers. My father took the following photo of the church in 1952. Whilst the church had been repaired, the surrounding land has been cleared of buildings damaged during the fighting.

Arnhem

I could not get the same view of the church today, as buildings obscure the view, so the following shows the front of the church as it is today:

Arnhem

Back to the bridge – on the lamp post on the left can be seen a sign with the Pegasus symbol of the Parachute Regiment and that the name of the bridge is John Frostbrug.

Arnhem

After the war, the bridge was named after John Frost, the commanding officer of the Parachute forces who lasted so long on the northern end of the bridge.

On the right, there is a small building, again with the Pegasus symbol and a plaque:

Arnhem

The plaque reads:

“On the 17th of September 1944, the 1st British Airborne Division began to land some eight miles to the west of Arnhem with the object of forming a bridgehead north of the lower Rhine.

The 2nd Battalion the Parachute Regiment fought its way into Arnhem and occupied the buildings which commanded the site of the bridge. Here it was joined by elements of other units of the division.

For three days and four nights the bridge was held against far greater numbers of the German 2nd Panzer Corps, until with ammunition expended, with few survivors unwounded and all the buildings destroyed around them they were finally overwhelmed.

The gallant defence of this detachment, cut off by enemy action from the remainder of the division had a marked influence on the conduct of the campaign in Holland, and the delay imposed on German reinforcements moving south to stem the allied advance enabled crossings over the Rhine at Grave and Nijmegen to be firmly secured.”

Another plaque alongside the bridge gives some background as to the naming of the John Frost Bridge, finishing that “the bridge with his name in now proudly wrought.

Arnhem

One of my father’s photos shows one of his friends looking at what appears to be a monument in Arnhem with the 17th September 1944 date engraved on what looks like a damaged pillar from a building. There were no identifying features so I was dubious that I would find the location of this photo:

Arnhem

However walking north off the bridge and through some pedestrian tunnels under the roundabout at the end of the bridge revealed the same monument:

Arnhem

I have no idea if the monument is in the same position today as in 1952. The area around the bridge has been significantly altered and rebuilt with a number of large roads converging on the spot.

The Imperial War Museum have a number of photos showing the bridge during the battle. The following two photos show the northern end of the bridge in the early days of the battle. The debris of the initial German attack over the bridge can be seen.

Arnhem

THE BRITISH AIRBORNE DIVISION AT ARNHEM AND OOSTERBEEK IN HOLLAND (MH 2062) An aerial view of the vital bridge at Arnhem, taken immediately after the operation. This shows more clearly the wrecked German vehicles at the north end of the bridge. Copyright: © IWM. Original Source: http://www.iwm.org.uk/collections/item/object/205084668

The buildings either side of the bridge are occupied by the Parachute Brigade. In the coming days, German tanks and guns would systematically destroy these buildings.

Arnhem

THE SECOND WORLD WAR 1939 – 1945: THE ALLIED CAMPAIGN IN NORTH-WEST EUROPE JUNE 1944 – MAY 1945: THE BRITISH AIRBORNE DIVISION AT ARNHEM AND OOSTERBEEK IN HOLLAND (MH 2061) Aerial view of the bridge over the Neder Rijn, Arnhem; British troops and armoured vehicles are visible at the north end of the bridge. Copyright: © IWM. Original Source: http://www.iwm.org.uk/collections/item/object/205193321

After leaving the centre of Arnhem, we then traveled out to Oosterbeek.

After the initial success with the 2nd Battalion the Parachute Regiment reaching the bridge, German defences responded quickly and built a blocking defensive line between Arnhem and Oosterbeek to prevent further British forces from reaching Arnhem and the bridge.

The main body of the 1st British Airborne Division therefore started to collect around Oosterbeek, building a defensive perimeter leading up from the river to north of the main road from Utrecht into Arnhem.

Adjacent to what was the main Utrecht to Arnhem road through Oosterbeek was the Hartenstein Hotel. When the airborne forces were landing, the hotel was being used by the German General, Field Marshall Walter Model. Thinking he was the target of the airborne attack he quickly left the hotel.

The hotel was taken over by Major-General Roy Urquhart as his headquarters for the 1st British Airborne Division operations in Oosterbeek and Arnhem.

The hotel continued to be used until the point where the airborne forces were running out of ammunition and the number of dead and wounded were severely reducing the numbers available to fight and hold and gradually reducing perimeter. On the evening of Monday 25th September, 9 days after the initial landings, those who could were finally withdrawn from Oosterbeek across the Nederrijn as by then allied forces had reached the river bank south of Oosterbeek.

My father’s 1952 photo of the Hartenstein Hotel:

Arnhem

The building today:

Arnhem

In 1978 the building opened as the Airborne Museum, a role it continues to this day, indeed in a much expanded format.

Directly opposite the hotel, across the original Utrecht to Arnhem road is a memorial to the events of September 1944:

Arnhem

During my 2018 visit, the memorial was decorated ready for a major annual commemoration which I will cover in a mid-week post. The flag of the Netherlands, along with the flags of the United Kingdom and that of Poland fly together at the base of the memorial.

Arnhem

The Polish flag is in recognition of the 1st Polish Independent Parachute Brigade. The Polish brigade’s flight from England was delayed due to weather and when they did land they were met with heavy fire from German forces and suffered significant casualties.

A number of Polish forces did make it across the river to support the 1st British Airborne Division  and they also helped with the link up to the advancing British army from the south.

Around the base of the memorial are representations of the participants in the events around Oosterbeek (the bright background sunlight resulted in the two photos on the right being in shadow).

Arnhem

From left to right:

  • the attention given to the wounded by the women of Oosterbeek
  • the landing
  • the support of the Dutch underground resistance
  • the last stand in Oosterbeek

The original Hartenstein Hotel building has been magnificently restored and recently considerably extended to add additional displays to tell the story of the events around Arnhem and Oosterbeek. The view of the rear of the building:

Arnhem

During Operation Market Garden, the building was used as headquarters for British operations. It was constantly under attack with shelling, mortar fire and snipers who had infiltrated into the surrounding woodland.

In the first days of occupation of the building Major-General Roy Urquhart was photographed standing at the rear of the building. The photo is from the Imperial War Museum archives:

Arnhem

OPERATION ‘MARKET GARDEN’ – THE BATTLE FOR ARNHEM, SEPTEMBER 1944 (BU 1136) Major-General Robert E Urquhart, commanding 1st British Airborne Division, with the Pegasus airborne pennant in the grounds outside his headquarters at the Hartenstein Hotel in Oosterbeek, 22 September 1944. Copyright: © IWM. Original Source: http://www.iwm.org.uk/collections/item/object/205192016

The same view today:

Arnhem

The Airborne Museum provides a very comprehensive overview of Operation Market Garden and the events around Arnhem and Oosterbeek, using a mix of display items from the time of the battle, as well as multi-media recreations of the events. The museum was very busy during our visit and is a perfect example of what a small museum can achieve.

The following map from the museum provides an overview of the battle and the location of British, Polish and German forces.

Arnhem

There are several rooms full of weapons used during the battle, uniforms, documentation as well as items recovered from the battlefield, including this piece of wallpaper from a house at Pietersbergweg 34 in Oosterbeek showing the dark humour of the battlefield:

Arnhem

There are recreations of the rooms within the hotel during the battle, including this view of how the cellars were used as the headquarters offices during the battle:

Arnhem

And there is a large multi-media recreation of street fighting during the battle. A single photo does not recreate the intensity of walking through with the sounds of battle all around.

Arnhem

A large memorial outside the museum, erected in 1994 on the 50th anniversary of the battle. The memorial is from the British and Polish forces in recognition of the impact that Operation Market Garden had on the people of the area, the support of the women of the Oosterbeek and Arnhem in helping the wounded and the Dutch resistance who supported the British and Polish forces during the battle.

Arnhem

After the battle had ended, the Dutch people continued to help by hiding members of the Parachute Brigade who had escaped capture and there was a slow trickle of soldiers returning back to allied lines as soon as it was safe to do so.

The Imperial War Museum has a number of photos from the battle in Oosterbeek. Along with the fighting troops, three Army Film and Photographic Unit photographers landed with the 1st Parachute Brigade and documented the fighting as it took place in the days leading up to the withdrawal across the river. Despite taking photos in the front line, all three survived.

The following photo shows Sgt D M Smith, Sgt G Walker and Sgt C M Lewis the day that they arrived back at the Army Photographic Unit at Pinewood. Sgt. Smith had been wounded in the shoulder.

Arnhem

OPERATION ‘MARKET GARDEN’ – THE BATTLE FOR ARNHEM, SEPTEMBER 1944 (BU 1169) The three Army Film and Photographic Unit Photographers who took the graphic still and cine pictures of the 1st Airborne Division epic fight at Arnhem. Copyright: © IWM. Original Source: http://www.iwm.org.uk/collections/item/object/205192044

A small sample of photos, the initial advance along the road entering into Oosterbeek from the west:

Arnhem

OPERATION ‘MARKET GARDEN’ – THE BATTLE FOR ARNHEM, SEPTEMBER 1944 (BU 1089) Men of the 2nd Battalion South Staffordshire Regiment entering Oosterbeek along the Utrechtsweg on their way towards Arnhem, 18 September 1944. Copyright: © IWM. Original Source: http://www.iwm.org.uk/collections/item/object/205216205

The same street today, the area is wooded, there are trees lining the streets and houses set back from the road. Very different to when the perimeter was roughly across this photo in September 1944:

Arnhem

A 6-pounder anti-tank gun of No. 26 Anti-Tank Platoon, 1st Border Regiment, 1st Airborne Division, in action in Oosterbeek, 20 September 1944. The gun was at this moment engaging a German PzKpfw B2 (f) Flammpanzer tank of Panzer-Kompanie 224 and successfully knocked it out:

Arnhem

OPERATION ‘MARKET GARDEN’ – THE BATTLE FOR ARNHEM, SEPTEMBER 1944 (BU 1109)  Copyright: © IWM. Original Source: http://www.iwm.org.uk/collections/item/object/205203182

The German forces had over run the planned drop zones for resupply of the airborne forces. The aircraft were under instruction to ignore signals from the ground as they could have been enemy diversions so the majority of dropped supplies landed in German held territory. There was also significant loss of the aircraft dropping supplies.

1st Airborne Division soldiers use parachutes to signal to Allied supply aircraft from the grounds of 1st Airborne Division’s HQ at the Hartenstein Hotel in Oosterbeek, 23 September 1944.

Arnhem

OPERATION ‘MARKET GARDEN’ – THE BATTLE FOR ARNHEM, SEPTEMBER 1944 (BU 1119) Copyright: © IWM. Original Source: http://www.iwm.org.uk/collections/item/object/205203183

The same view today is shown in the photo below. The grounds have been beautifully landscaped. The large construction extended from the ground is the recent extension to the basement which holds the multi-media exhibitions.

Arnhem

Another example of front line Photography by the Army photographic unit during the battle. Troops of the 1st Paratroop Battalion take cover in a shell hole in Arnhem, 17 September 1944.

Arnhem

OPERATION ‘MARKET GARDEN’ – THE BATTLE FOR ARNHEM, SEPTEMBER 1944 (BU 1167) Copyright: © IWM. Original Source: http://www.iwm.org.uk/collections/item/object/205192043

There are reminders of the battle to be found all around Arnhem and Oosterbeek, from superb museums, to memorials large and small and bullet market buildings.

Of the 8,905 officers and men and the 1,100 glider pilots who had originally landed west of Oosterbeek, only 2,163 would escape. Over 1,200 officers and men died in the battle and the rest would be taken into captivity.

There is a major Commonwealth War Graves Commission cemetery at Oosterbeek – I will report about my visit to the cemetery in a post later in November.

I will also have a mid-week post on the major commemoration held in Oosterbeek in September.

Next Sunday I will be returning to London, and hopefully for my long suffering e-mail subscribers, shorter posts (thanks for bearing with me during my visit to the Netherlands.)

alondoninheritance.com

Nijmegen City Centre – 1952 and 2018

After exploring the Valkhof and the bridge over the River Waal in my last post, I have now walked into Nijmegen city centre to hunt down the locations of my father’s remaining photos of Nijmegen.

I am starting in the large market square, or Grote Markt, looking across to this typically Dutch building:

Nijmegen city centre

The same view in 2018:

Nijmegen city centre

The building is De Waagh and is the original market weigh-house.

When buying a product in the market, you would want to make sure that you were getting the amount of a product that you have paid for. This was the purpose of the weigh-house where products such as butter could be weighed and then sold with the assurance that you were getting the expected amount.

A weigh-house had been established at the market in Nijmegemn city centre in the medieval period, however the current building dates from 1612-13, and as well as weighing products to be sold in the market, the building also held a small meat market and the upper floor was used as a guard room.

Like most buildings that have been in a city centre for over 400 years, there have been a number of changes, however a restoration in 1886 restored the building to its original design, and this is the building we can see in the 1952 photo and the same today.

Part of the building is now a restaurant, also with open air tables facing onto the market square.

A different view of the building:

Nijmegen city centre

A wider angle view of the same scene today, to show the proximity of the church:

Nijmegen city centre

To the left of the weigh-house is this terrace of buildings. The building on the left with the two arches leads through to a small open space leading to the main entrance to the church.

Nijmegen city centre

Again, a wider angled view of the same scene today:

Nijmegen city centre

Nijmegen city centre suffered badly in the final stages of the 2nd World War.

On the 22nd February 1944, allied forces bombed the city by mistake, killing 800 people.  Bombers from the American 8th Army Airforce were on a mission to attack the industrial centres over the border in Germany, however low cloud caused the mission to be abandoned and the bombers dropped their bombs on what they thought was a German town (Nijmegen is very close to the border with Germany).

During Operation Market Garden in September 1944, the defending German forces set fire and destroyed parts of the city centre to create difficulties for the allied forces trying to get to the bridge.

The resulting destruction was still very visible in 1952 as shown in my father’s photos.

In the above two photos, the building on the right of the archways was a hotel, and this must have been where my father stayed in 1952 as there are a number of photos which were taken from one of the upper windows.

The first is looking across the market square towards the tower on the old town hall. The tower is under repair and there is a large open space on the right.

Nijmegen city centre

Looking to the right of the above photo is this view:

Nijmegen city centre

I could not replicate the first of the above two photos as there is no public access to the old hotel building. I did walk up the stairs to the platform on the side of the old weigh-house and took the following photo which is looking in the same direction as the above photo, showing that the buildings of the original historic Nijmegen city centre have been replaced with typical post war shops.

Nijmegen city centre

The following photo from 1952 was taken looking down to the tables outside of the restaurant outside the old weigh-house:

Nijmegen city centre

The view today from the top of the steps alongside the weigh-house.

Nijmegen city centre

In the centre of the shopping area of Nijmgen is a large square named “Plein 1944” in memory of the events of 1944 and those who died.

The following photo from 1952 is looking from Plein 1944, across to the church. There is a large statue in the centre of the square:

Nijmegen city centre

The statue is of a soldier who kneels down with a wounded comrade and is in memory of all the Dutch solders from the Nijmegen area who died during the 2nd World War.

The statue was unveiled on the 5th May 1951.

I took the photo below of the statue in 2018. I could not get the same angle as a pavement cafe was immediately to the right of the statue, however is not the exact same statue, or in the same position in the square.

When work was carried out on Plein 1944 in 2012, the original statue was temporarily removed. The original sandstone statue had deteriorated and could not be repaired, so it was replaced with a bronze copy of the original statue on a new plinth – hence the change in colour in the two photos from a light coloured sandstone to a darker bronze.

Nijmegen city centre

The following photo is looking across from the edge of Plein 1944 to the church:Nijmegen city centre

Difficult to replicate the photo, however today the derelict space in 1952 has been covered with shops:

Nijmegen city centre

In the 1952 photo above, a terrace of houses still remain in front of the church, these can still be found:

Nijmegen city centre

The church, Stevenskerk, has very old foundations, dating back to the middle of the 13th century, and has been through several rebuilds and extensions since.

The interior of the church is typical of Dutch churches with a very plain decoration.

Nijmegen city centre

The church was badly damaged in the bombing on the 22nd February 1944 when a large part of the tower collapsed and the south western quarter of the church was also badly damaged. The restoration was almost complete in 1952 as shown in my father’s photos.

I was fascinated to find the following inside the church – a text that I have not seen before:

Nijmegen city centre

I had to take the photo at an angle otherwise the reflection in the glass would have been me with a camera, click on the photo for a larger version to read.

The document dates form the 13th June 1939, a few months before the start of the war. It is written in the languages of the three European powers (German, French and English) as well as Dutch. The title of the document is “Care of Ancient Monuments”, and the English paragraph reads:

“Her Majesty’s Government having exempted this organ from requisition as a work of the foremost rank from a musical and historical point of view, instantly begs the Commanders of military forces of Foreign Powers to respect it likewise. “

The document was created by the Dutch government and Her Majesty’s Government refers to Queen Wilhelmina who was Queen of the Netherlands before and during the 2nd World War.

I assume that the Dutch Government had a programme to identify ancient monuments across the country in the months when war seemed inevitable and put up texts asking that military forces from Germany, France and the UK respect these works.

Despite the bombing in February 1944 and the battle for the bridge in September of the same year, the organ did survive, although it was severely damaged during the collapse of the tower and when bits of shrapnel hit many of the organ pipes. A full restoration was completed in 1974.

The reason for the concern expressed in the document is that the organ dates from 1773 and was built by the Cologne organ builder Ludwig König.

The restored organ looking magnificent today:

Nijmegen city centre

Nijmegen today is a busy and prosperous city. Across the city there are memorials to the events of 1944 when so many in a relatively small city lost their lives, along with the critical and hard fought battle for the bridge.

During our visit, it must have been the Dutch equivalent of freshers week for the city’s university as there were large groups of new students attending events and activities across the city. A positive look to the future after Nijmegen’s recent past.

alondoninheritance.com