A Water Pump, Bedford Row And Tracing Harpur’s Bedford Charity Estate

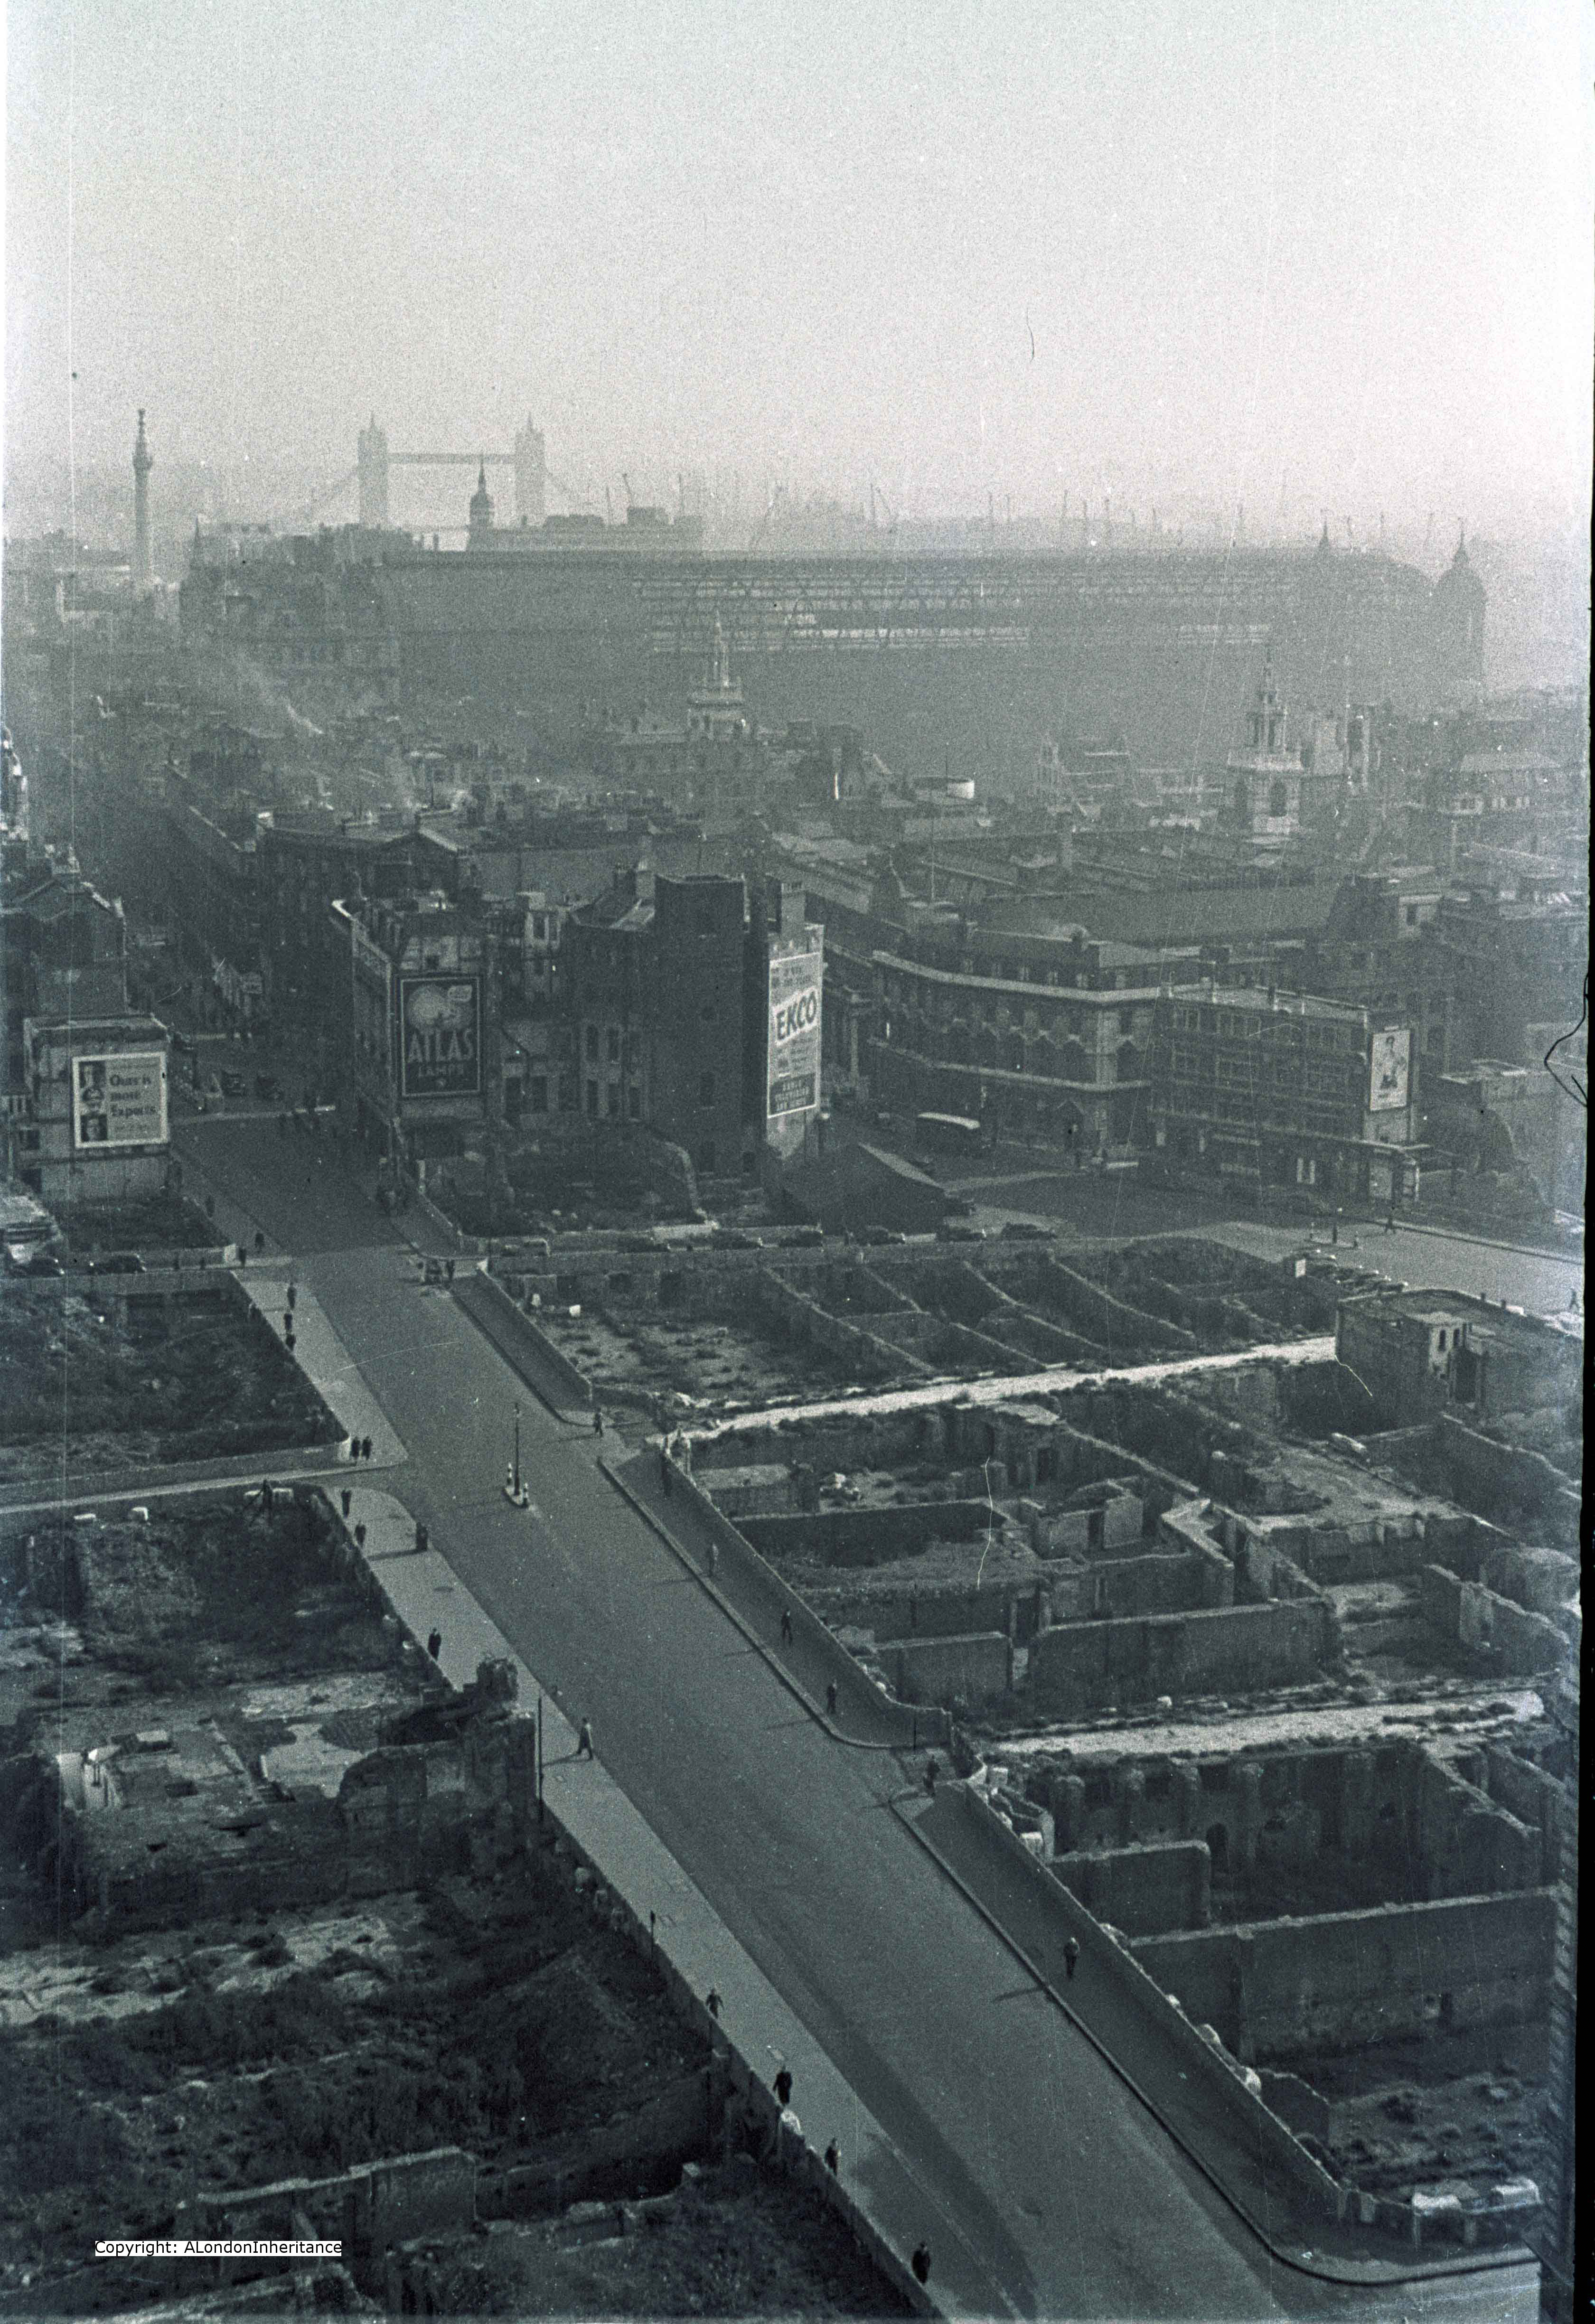
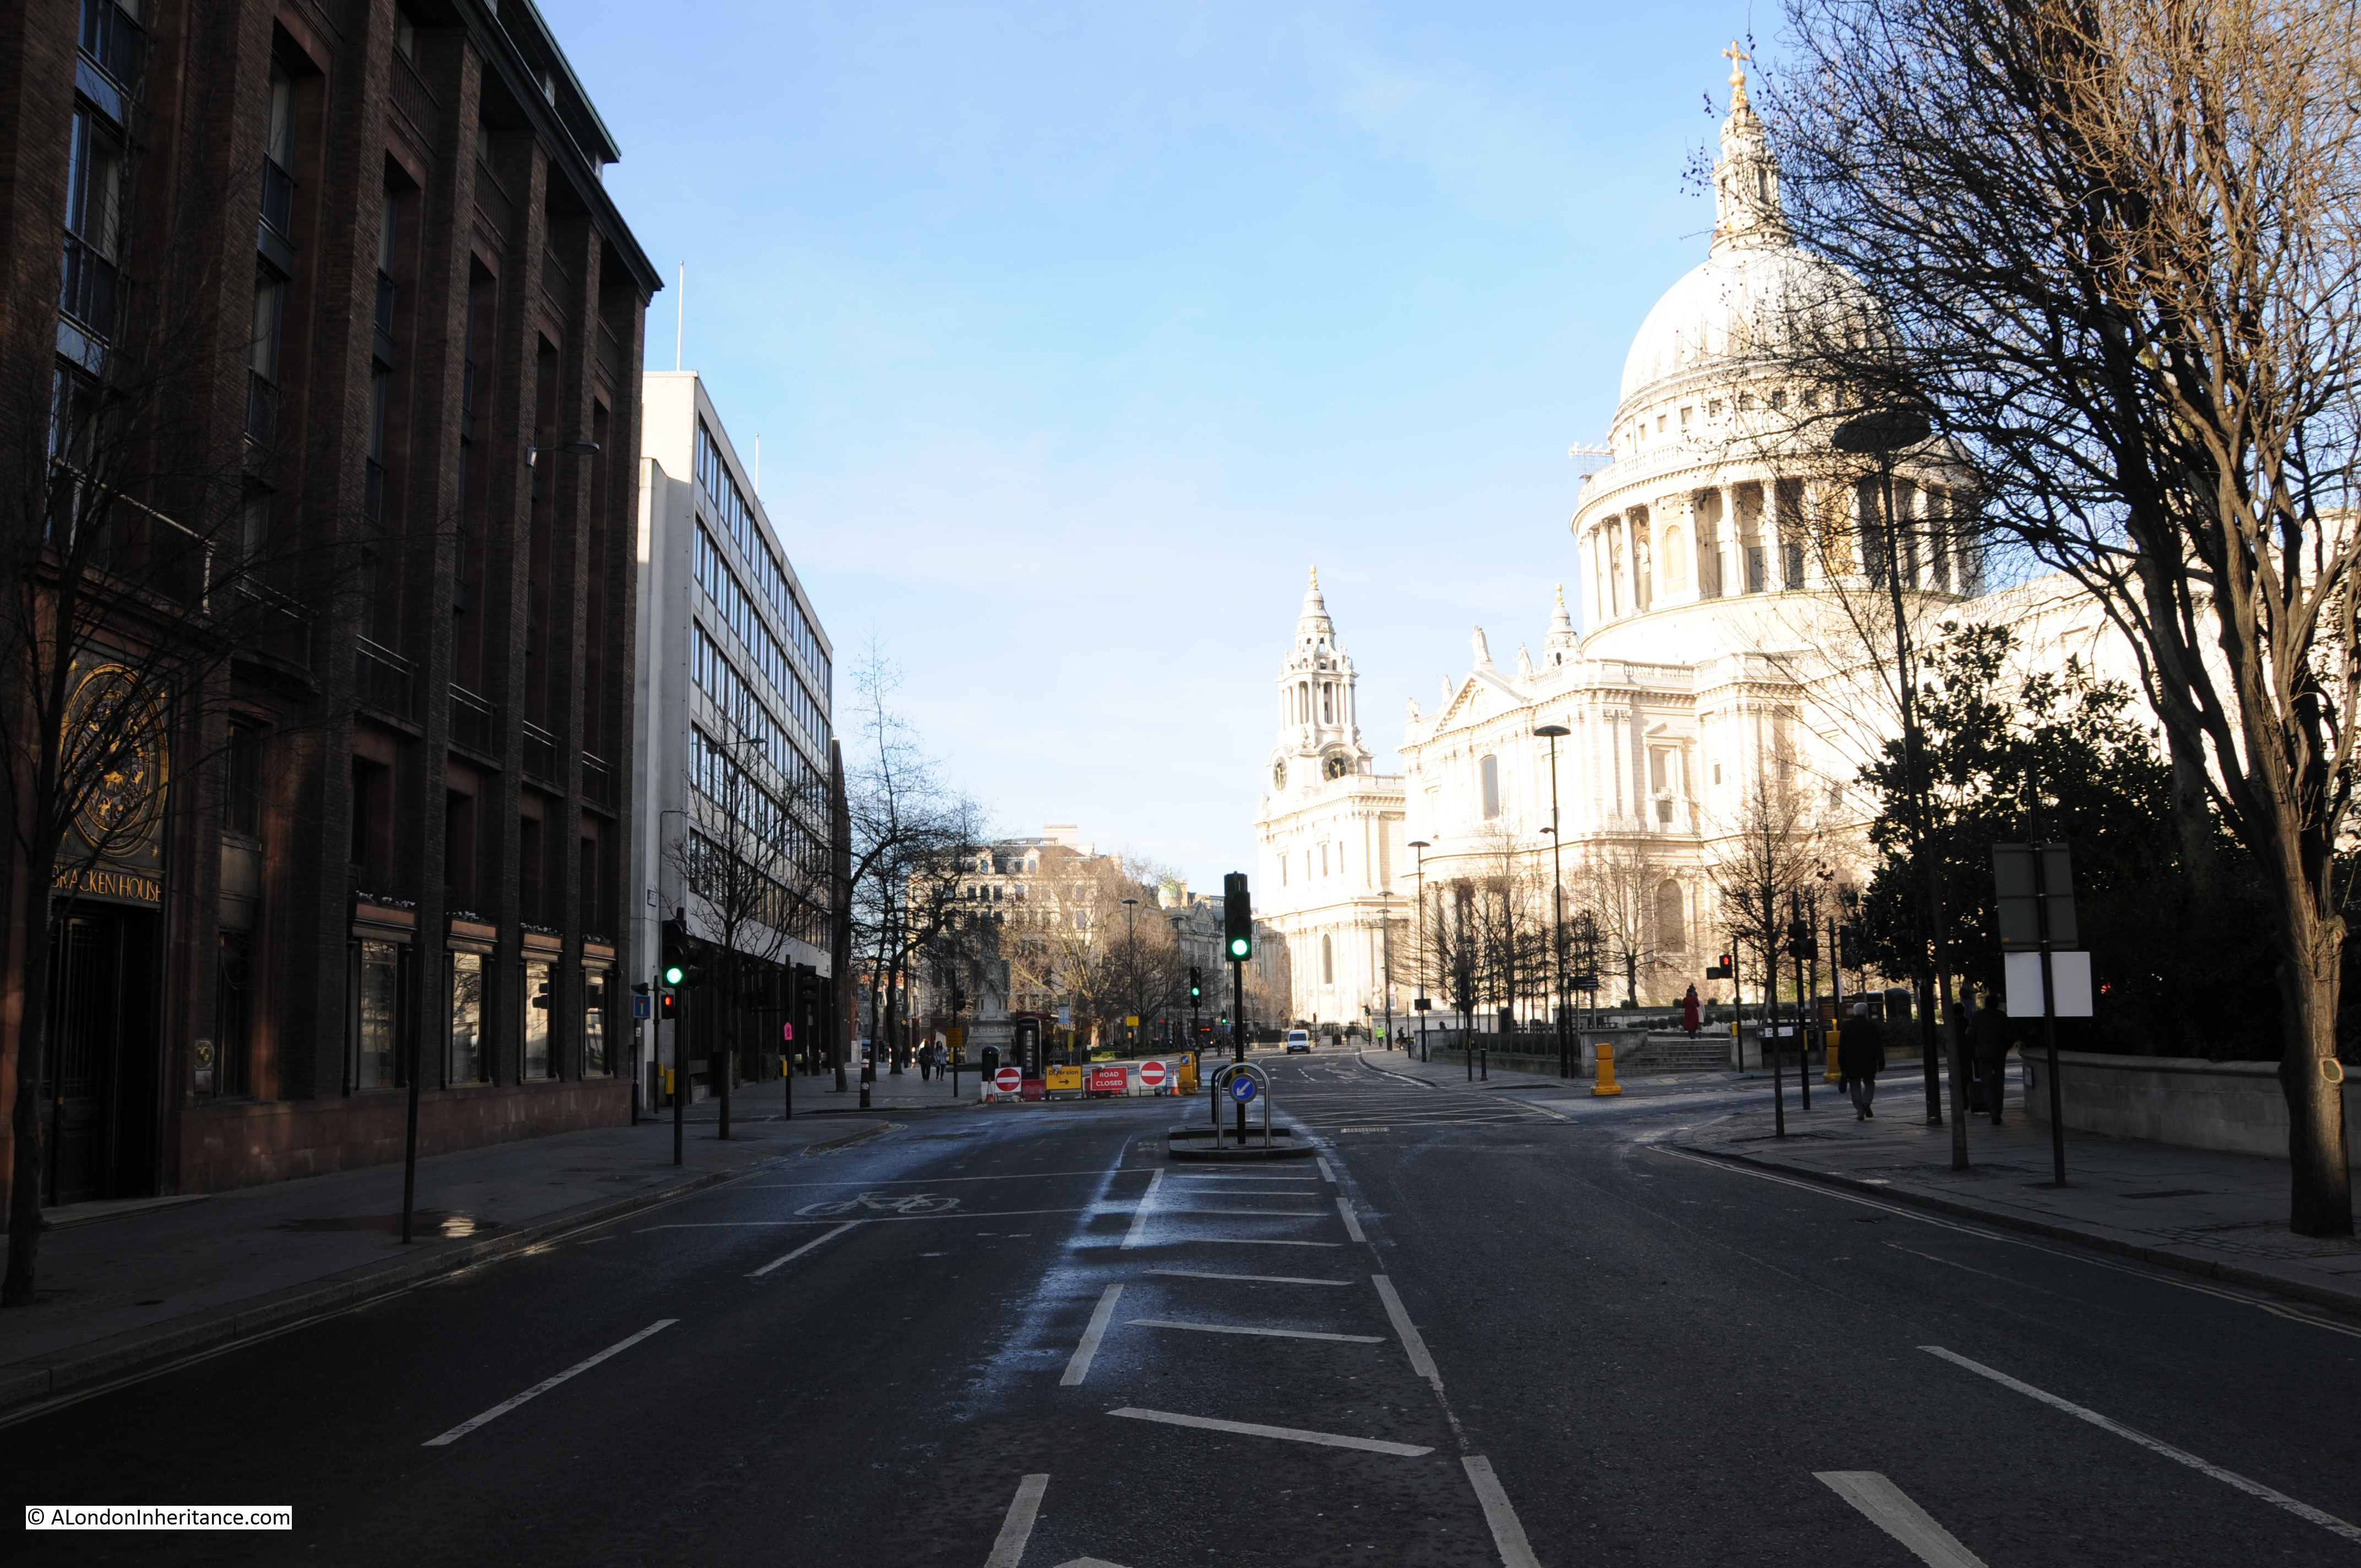
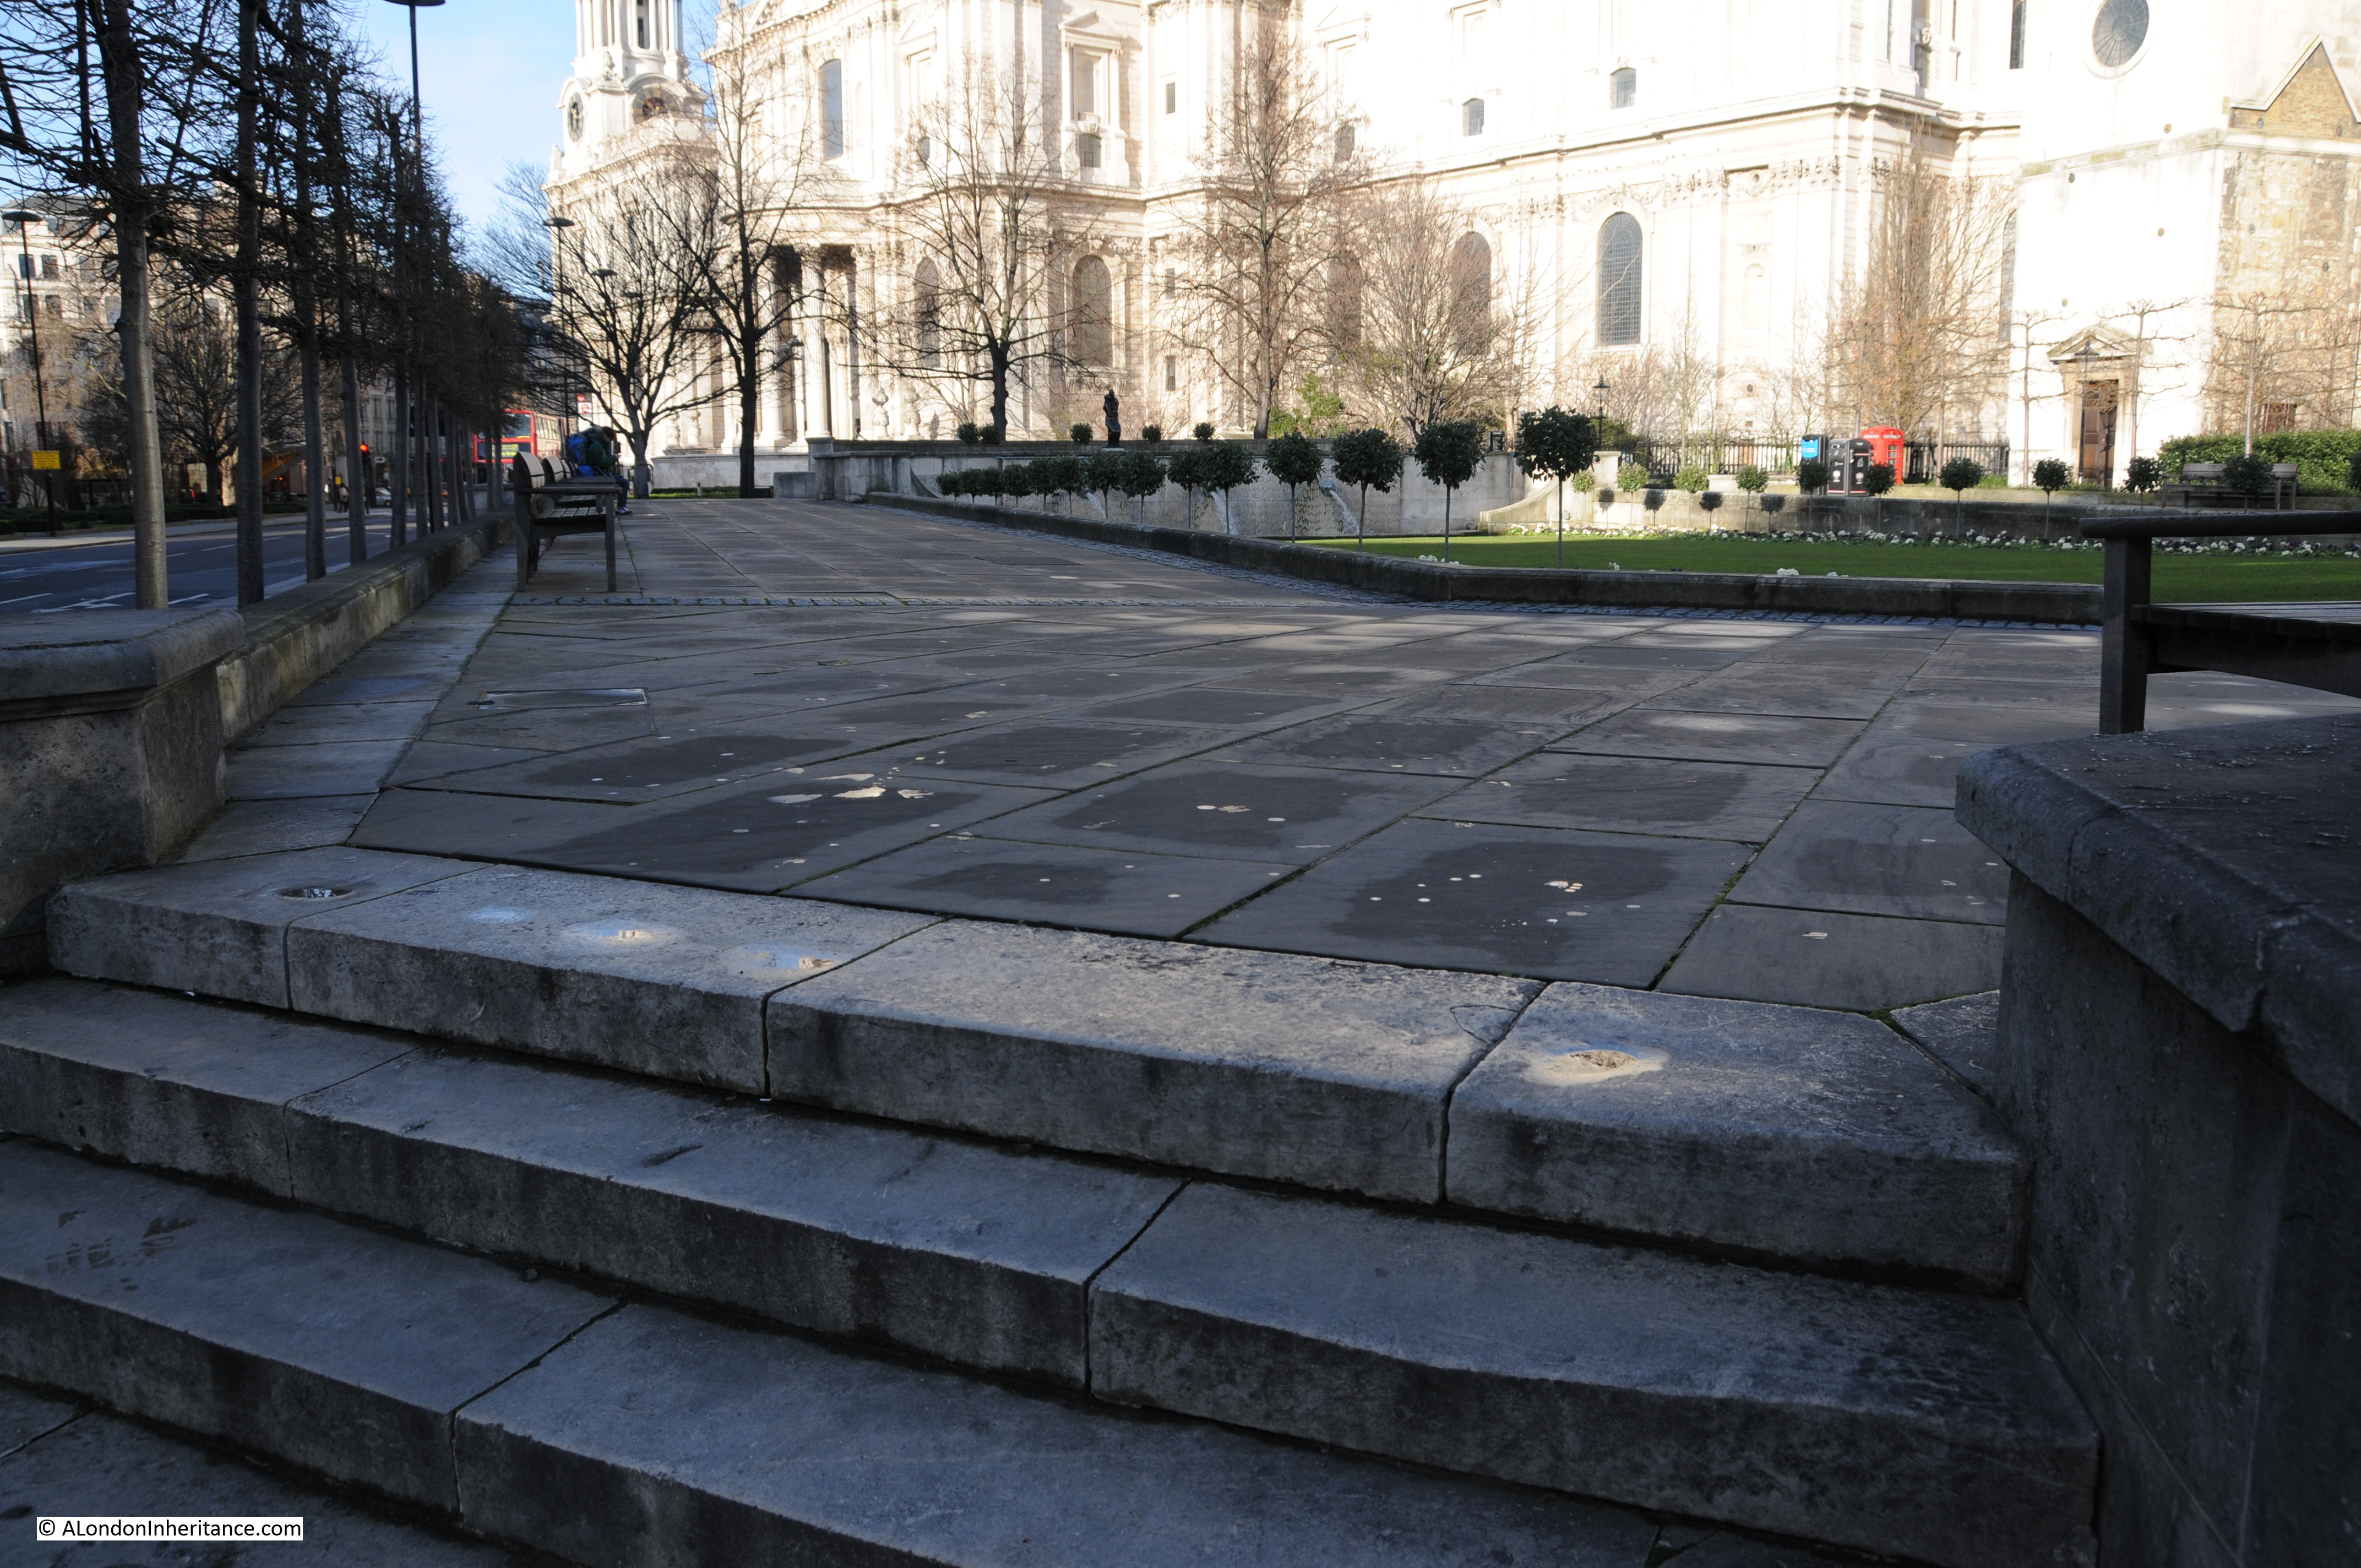
There are some locations in London that have changed remarkably little over the last seventy plus years. There are also locations where decisions made 500 years ago are still in evidence. Not the usual candidates such as the Tower of London or St. Paul’s but amongst the ordinary streets of London.

One of my father’s photo’s from 1947 was the water pump in Bedford Row.

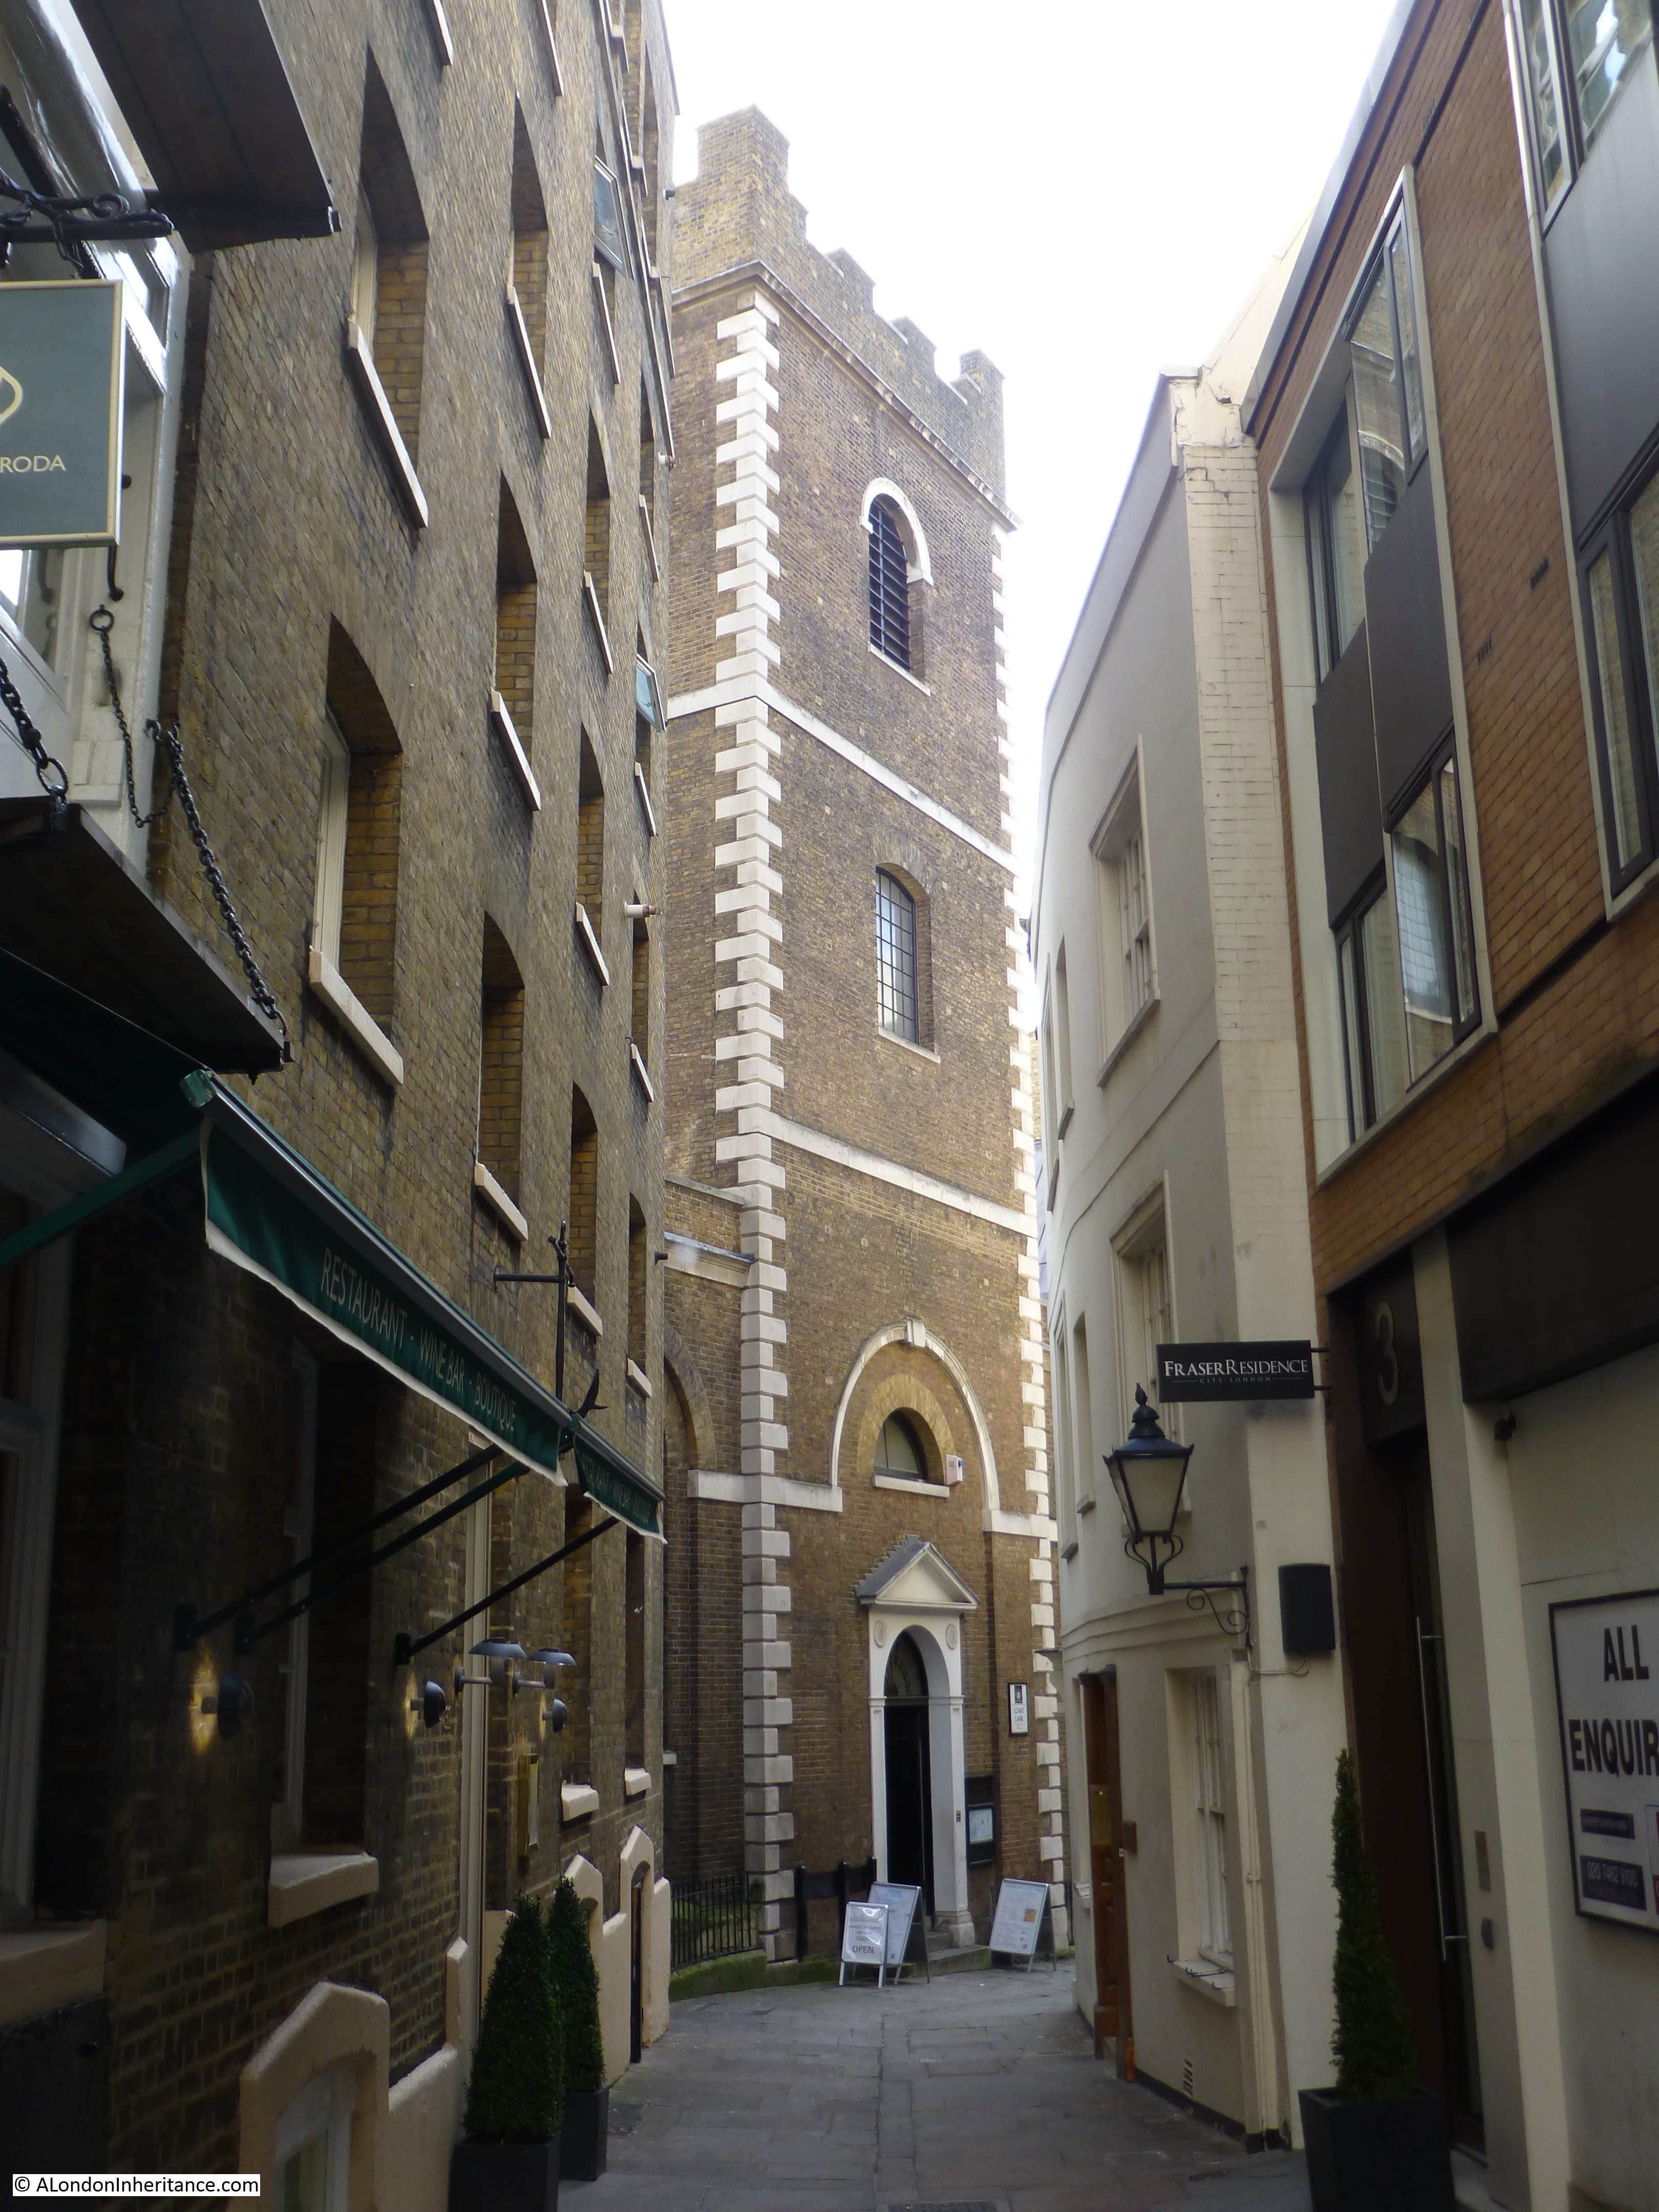
From Chancery Lane underground station, walk along Holborn to the west until you come to Brownlow Street. Head up this street and at the end you will be in part of Bedford Row, facing the water pump shown in the following 1947 photo:

Bedford Row 18

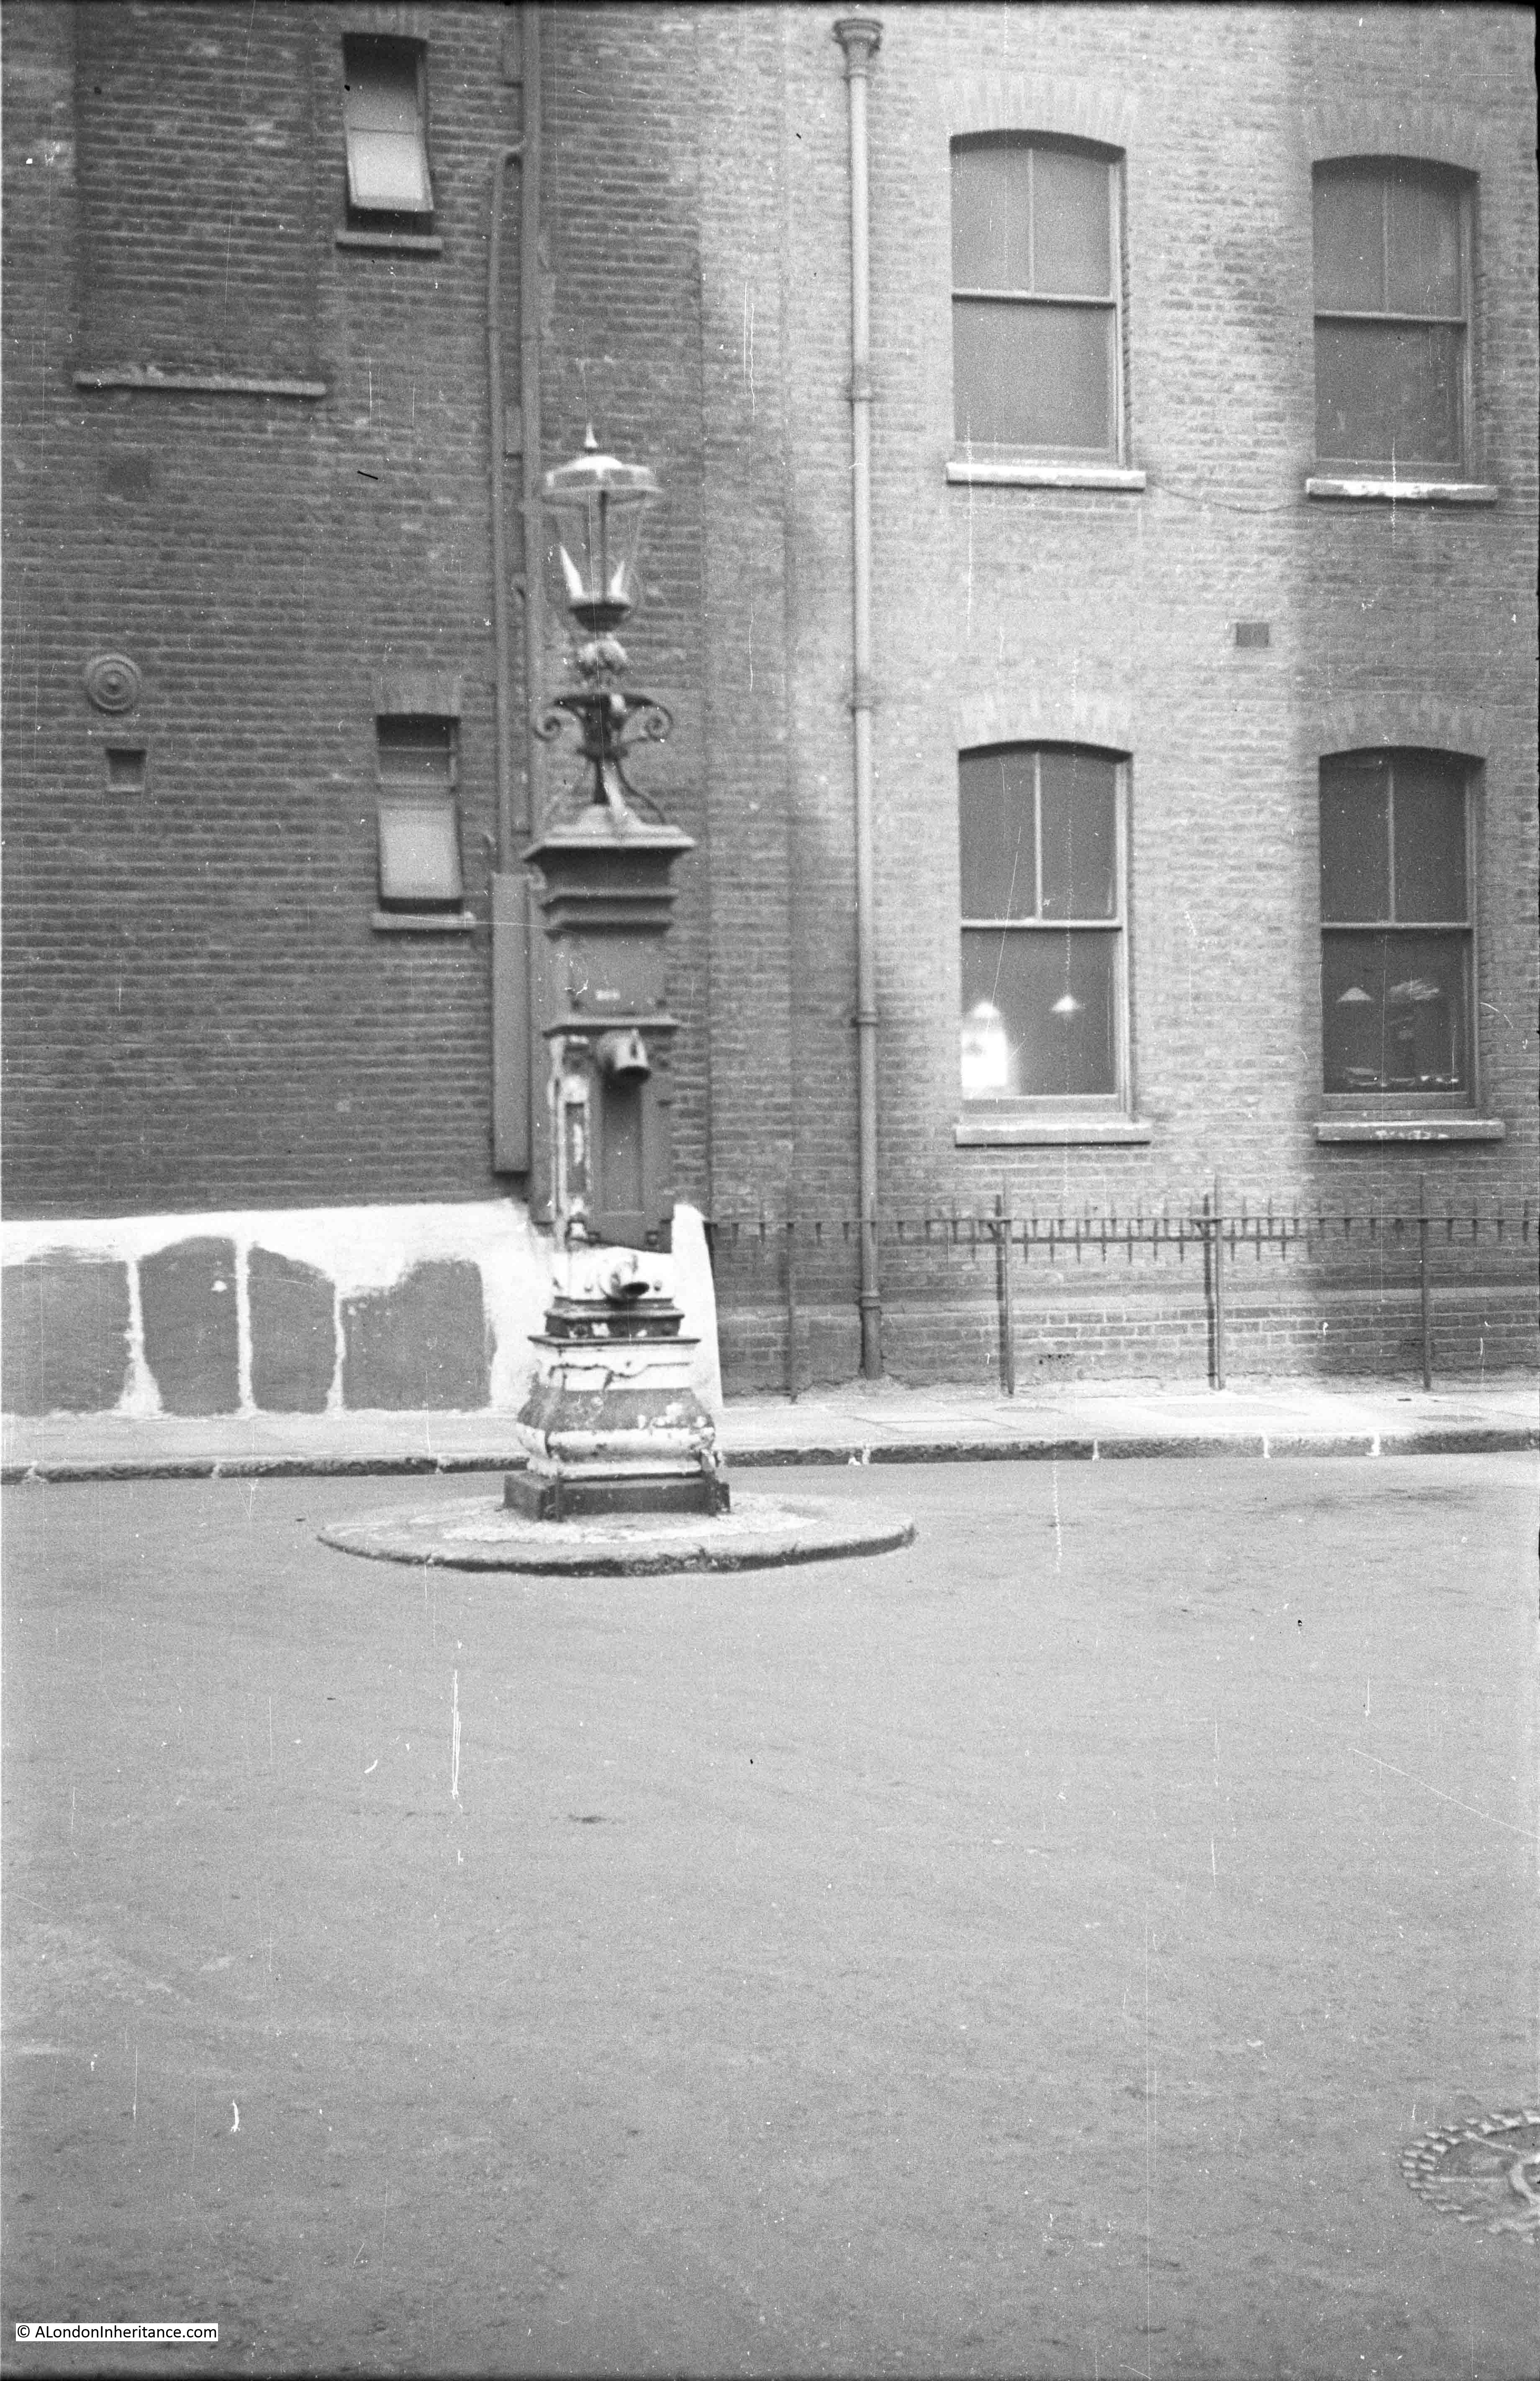
And in 2015 the scene is remarkably much the same. The pump has been painted, a sign with the street name has been put on the building behind and there are now bollards around the pump.

The buildings behind are almost unchanged, even the metal fencing along the building to the right is the same.

Bedford Row 17

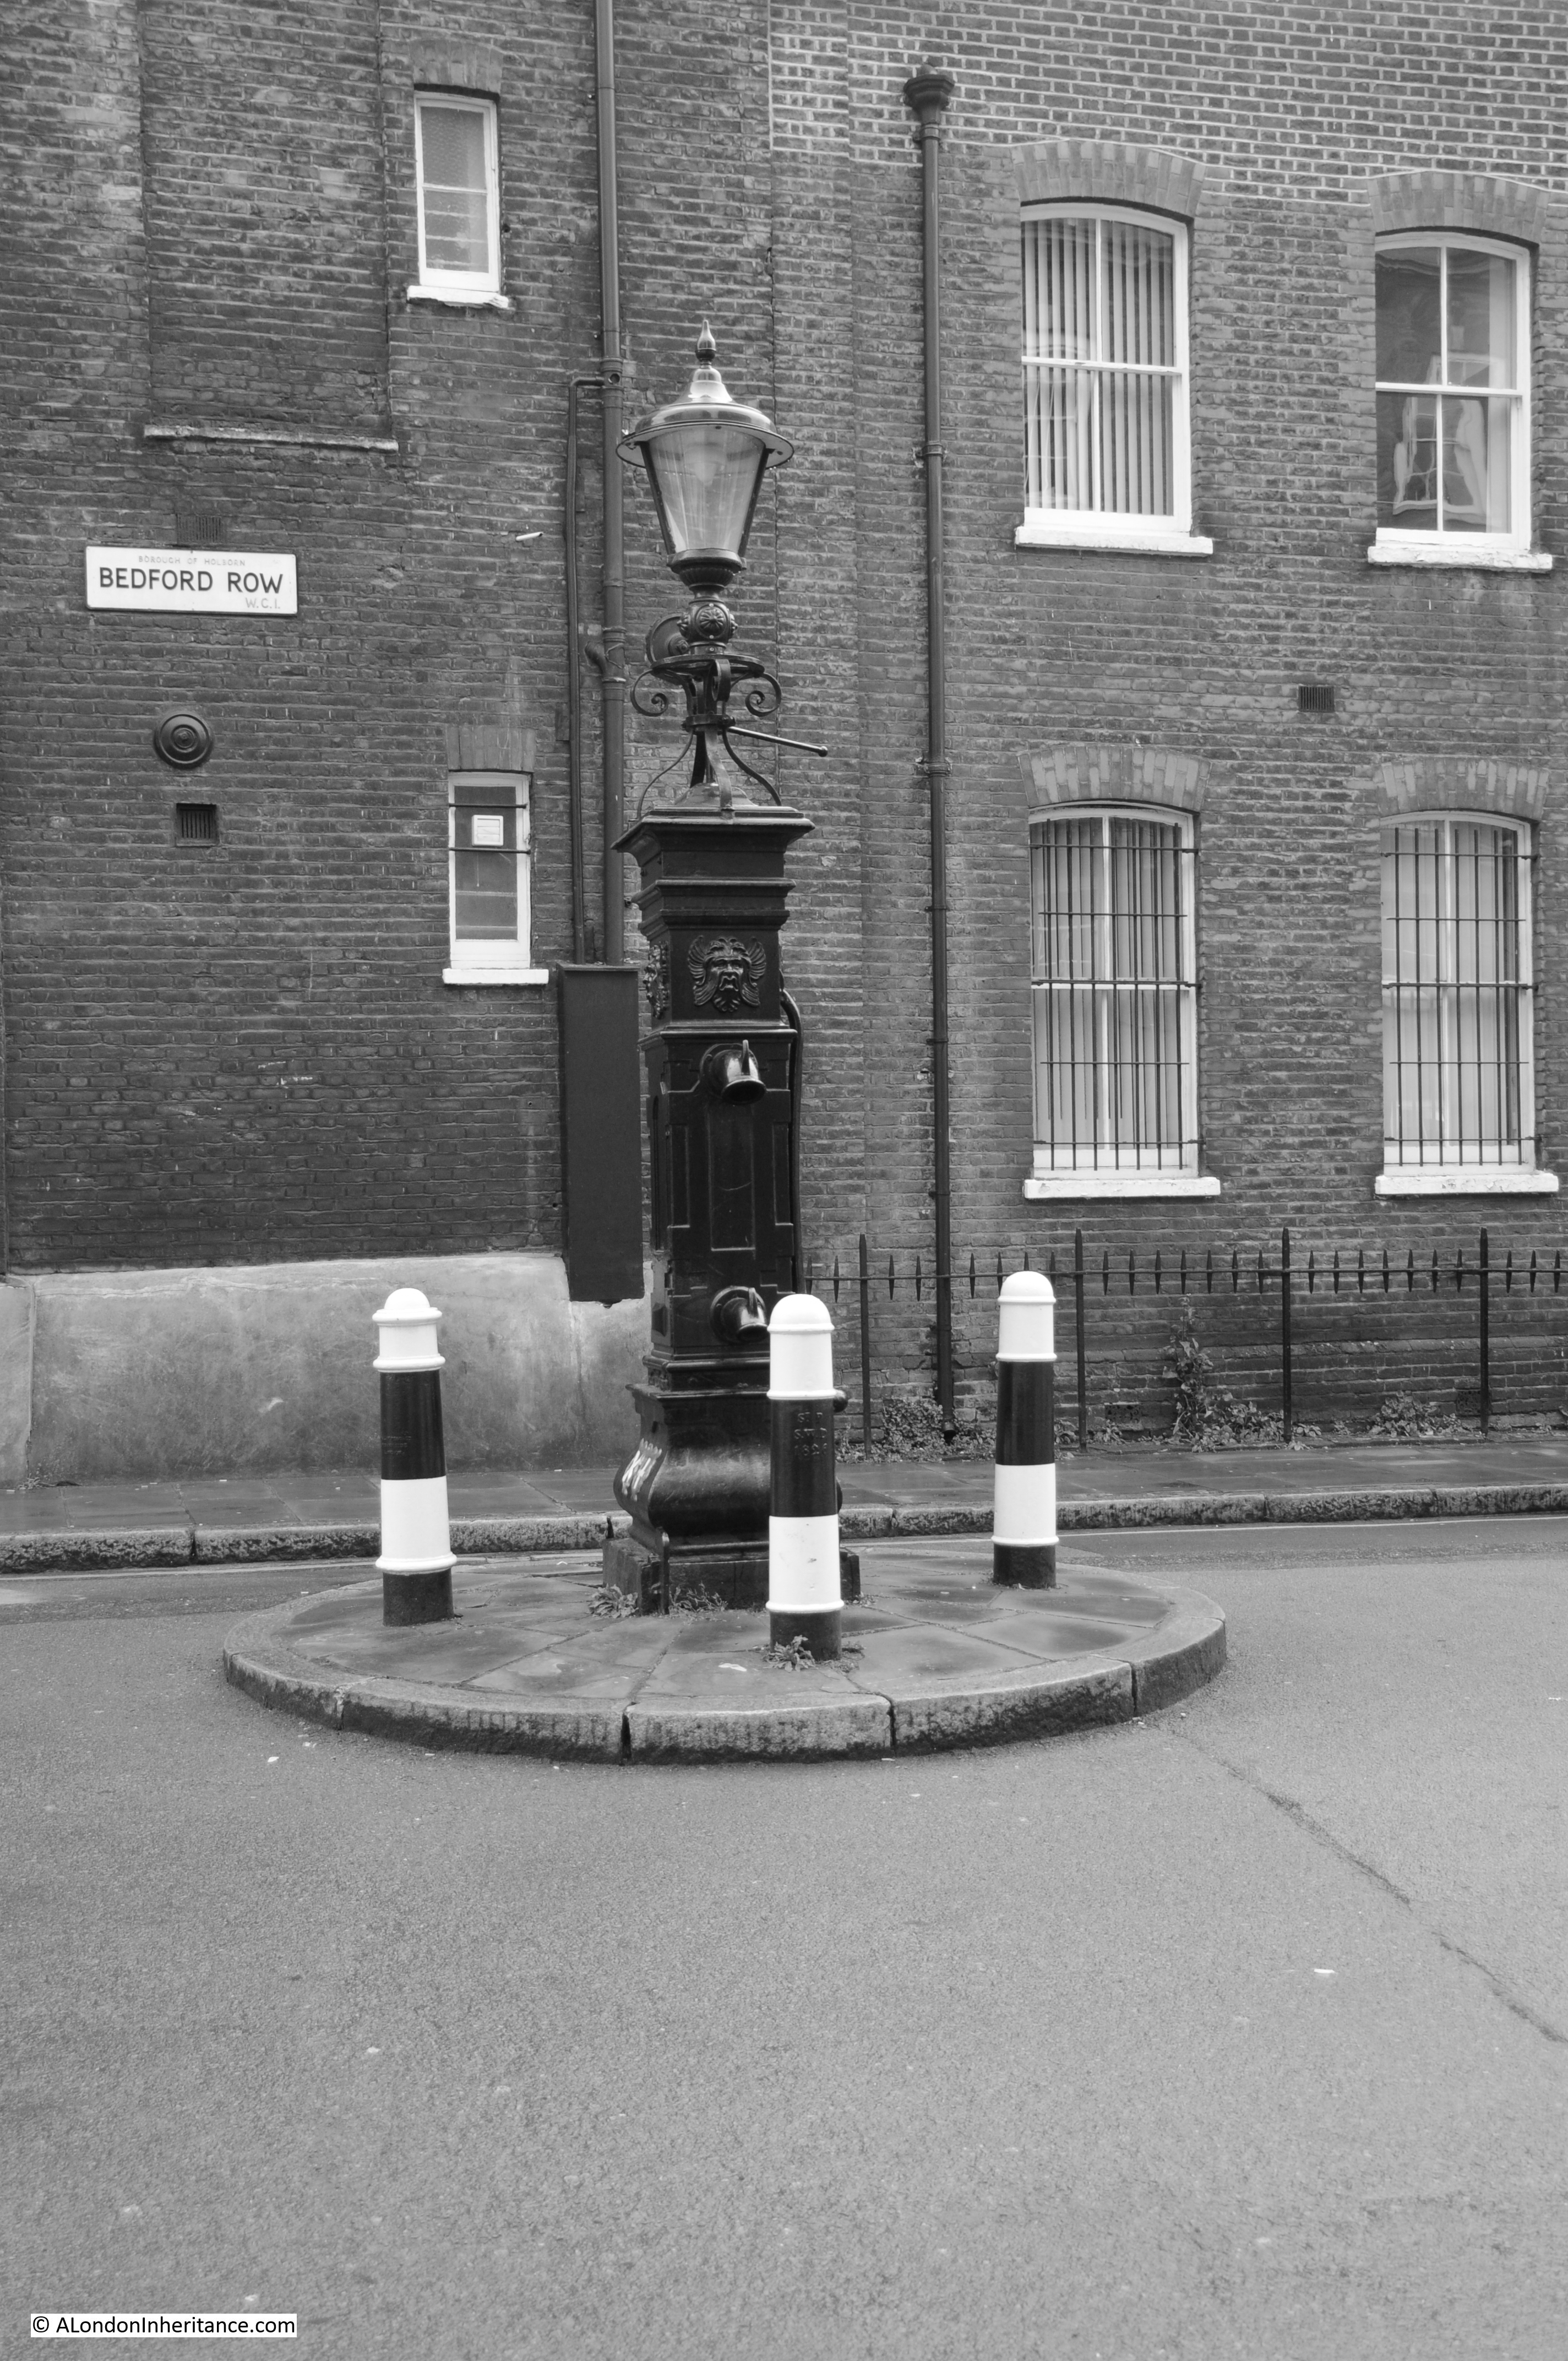
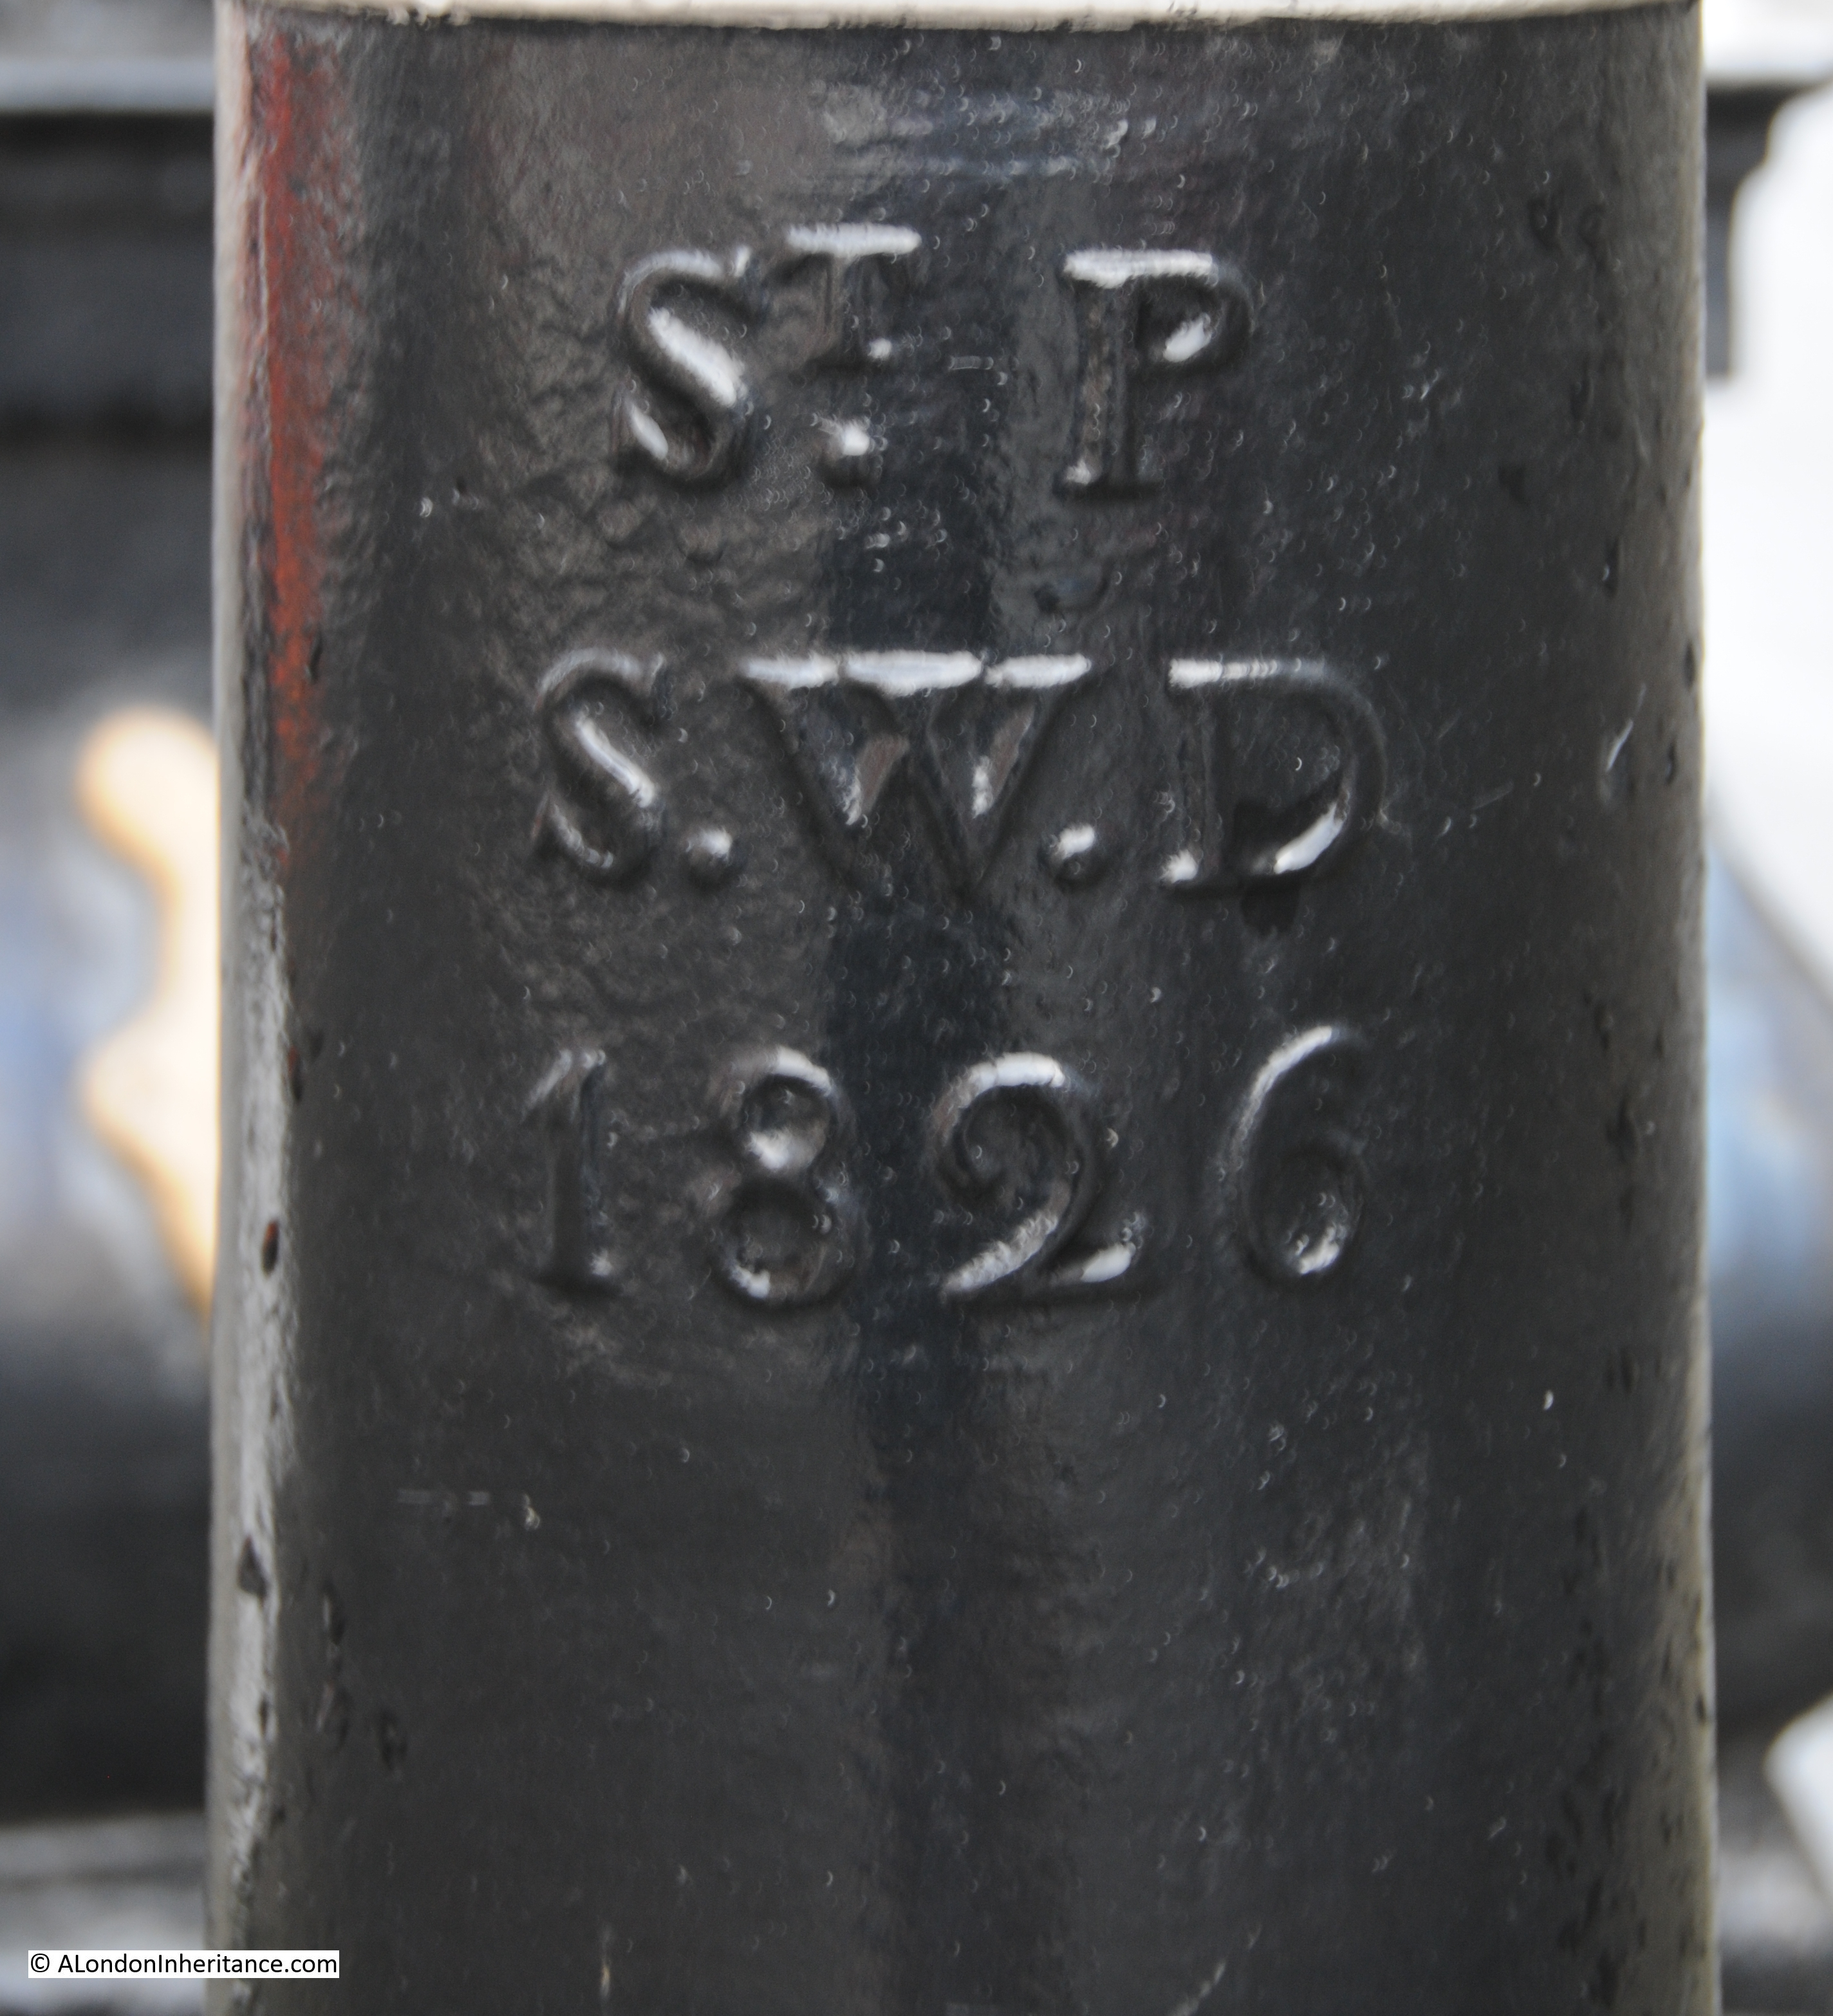
The pump is also a perfect example of not always believing what you see in London. Take a look at the bollards and they are marked St. Pancras Street Works Department, 1826, so it would be a reasonable assumption that they have been in place since 1826, however the 1947 photo clearly shows a much smaller surround to the base of the pump and no bollards.

I assume that with the size of cars and lorries that are now in use on London roads, it was decided prudent to enlarge the base and provide some protection to the pump using bollards from some other location in St. Pancras.

Bedford Row 16 small

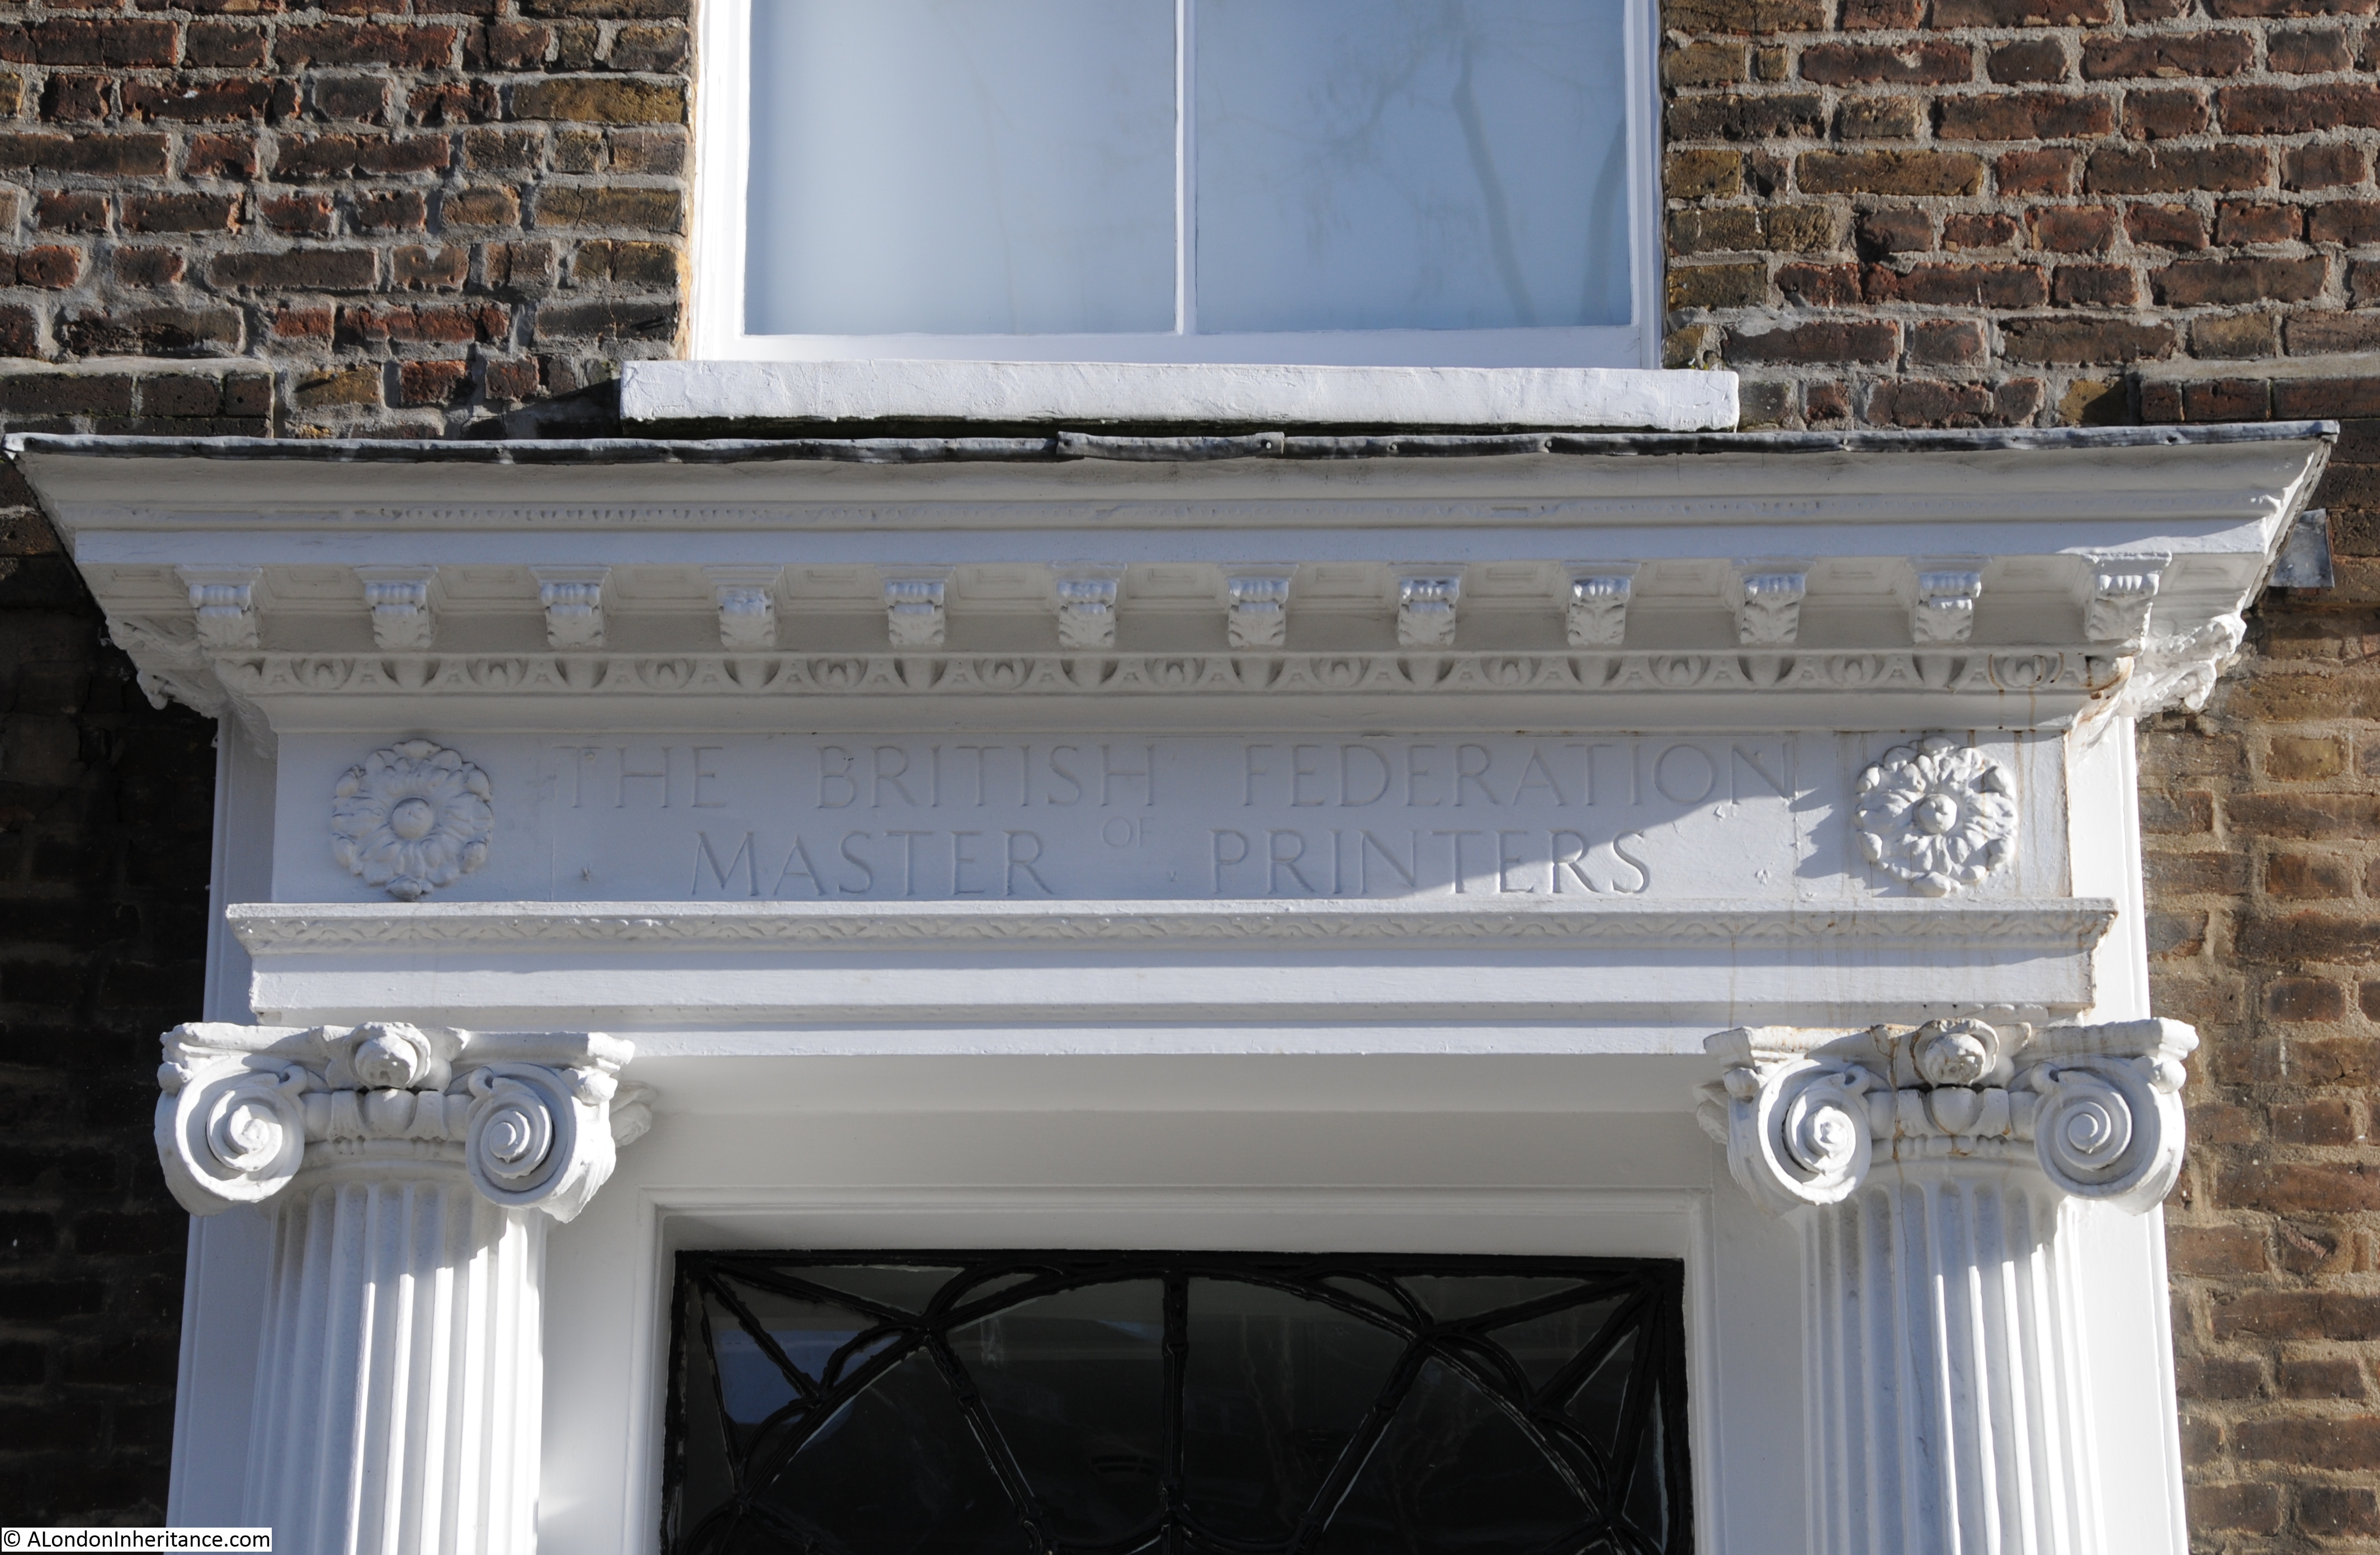
I always find it fascinating to look at the buildings around any location I am photographing. On the building just to the left of the pump is the remains of the original street signage for Bedford Row:

Bedford row 1

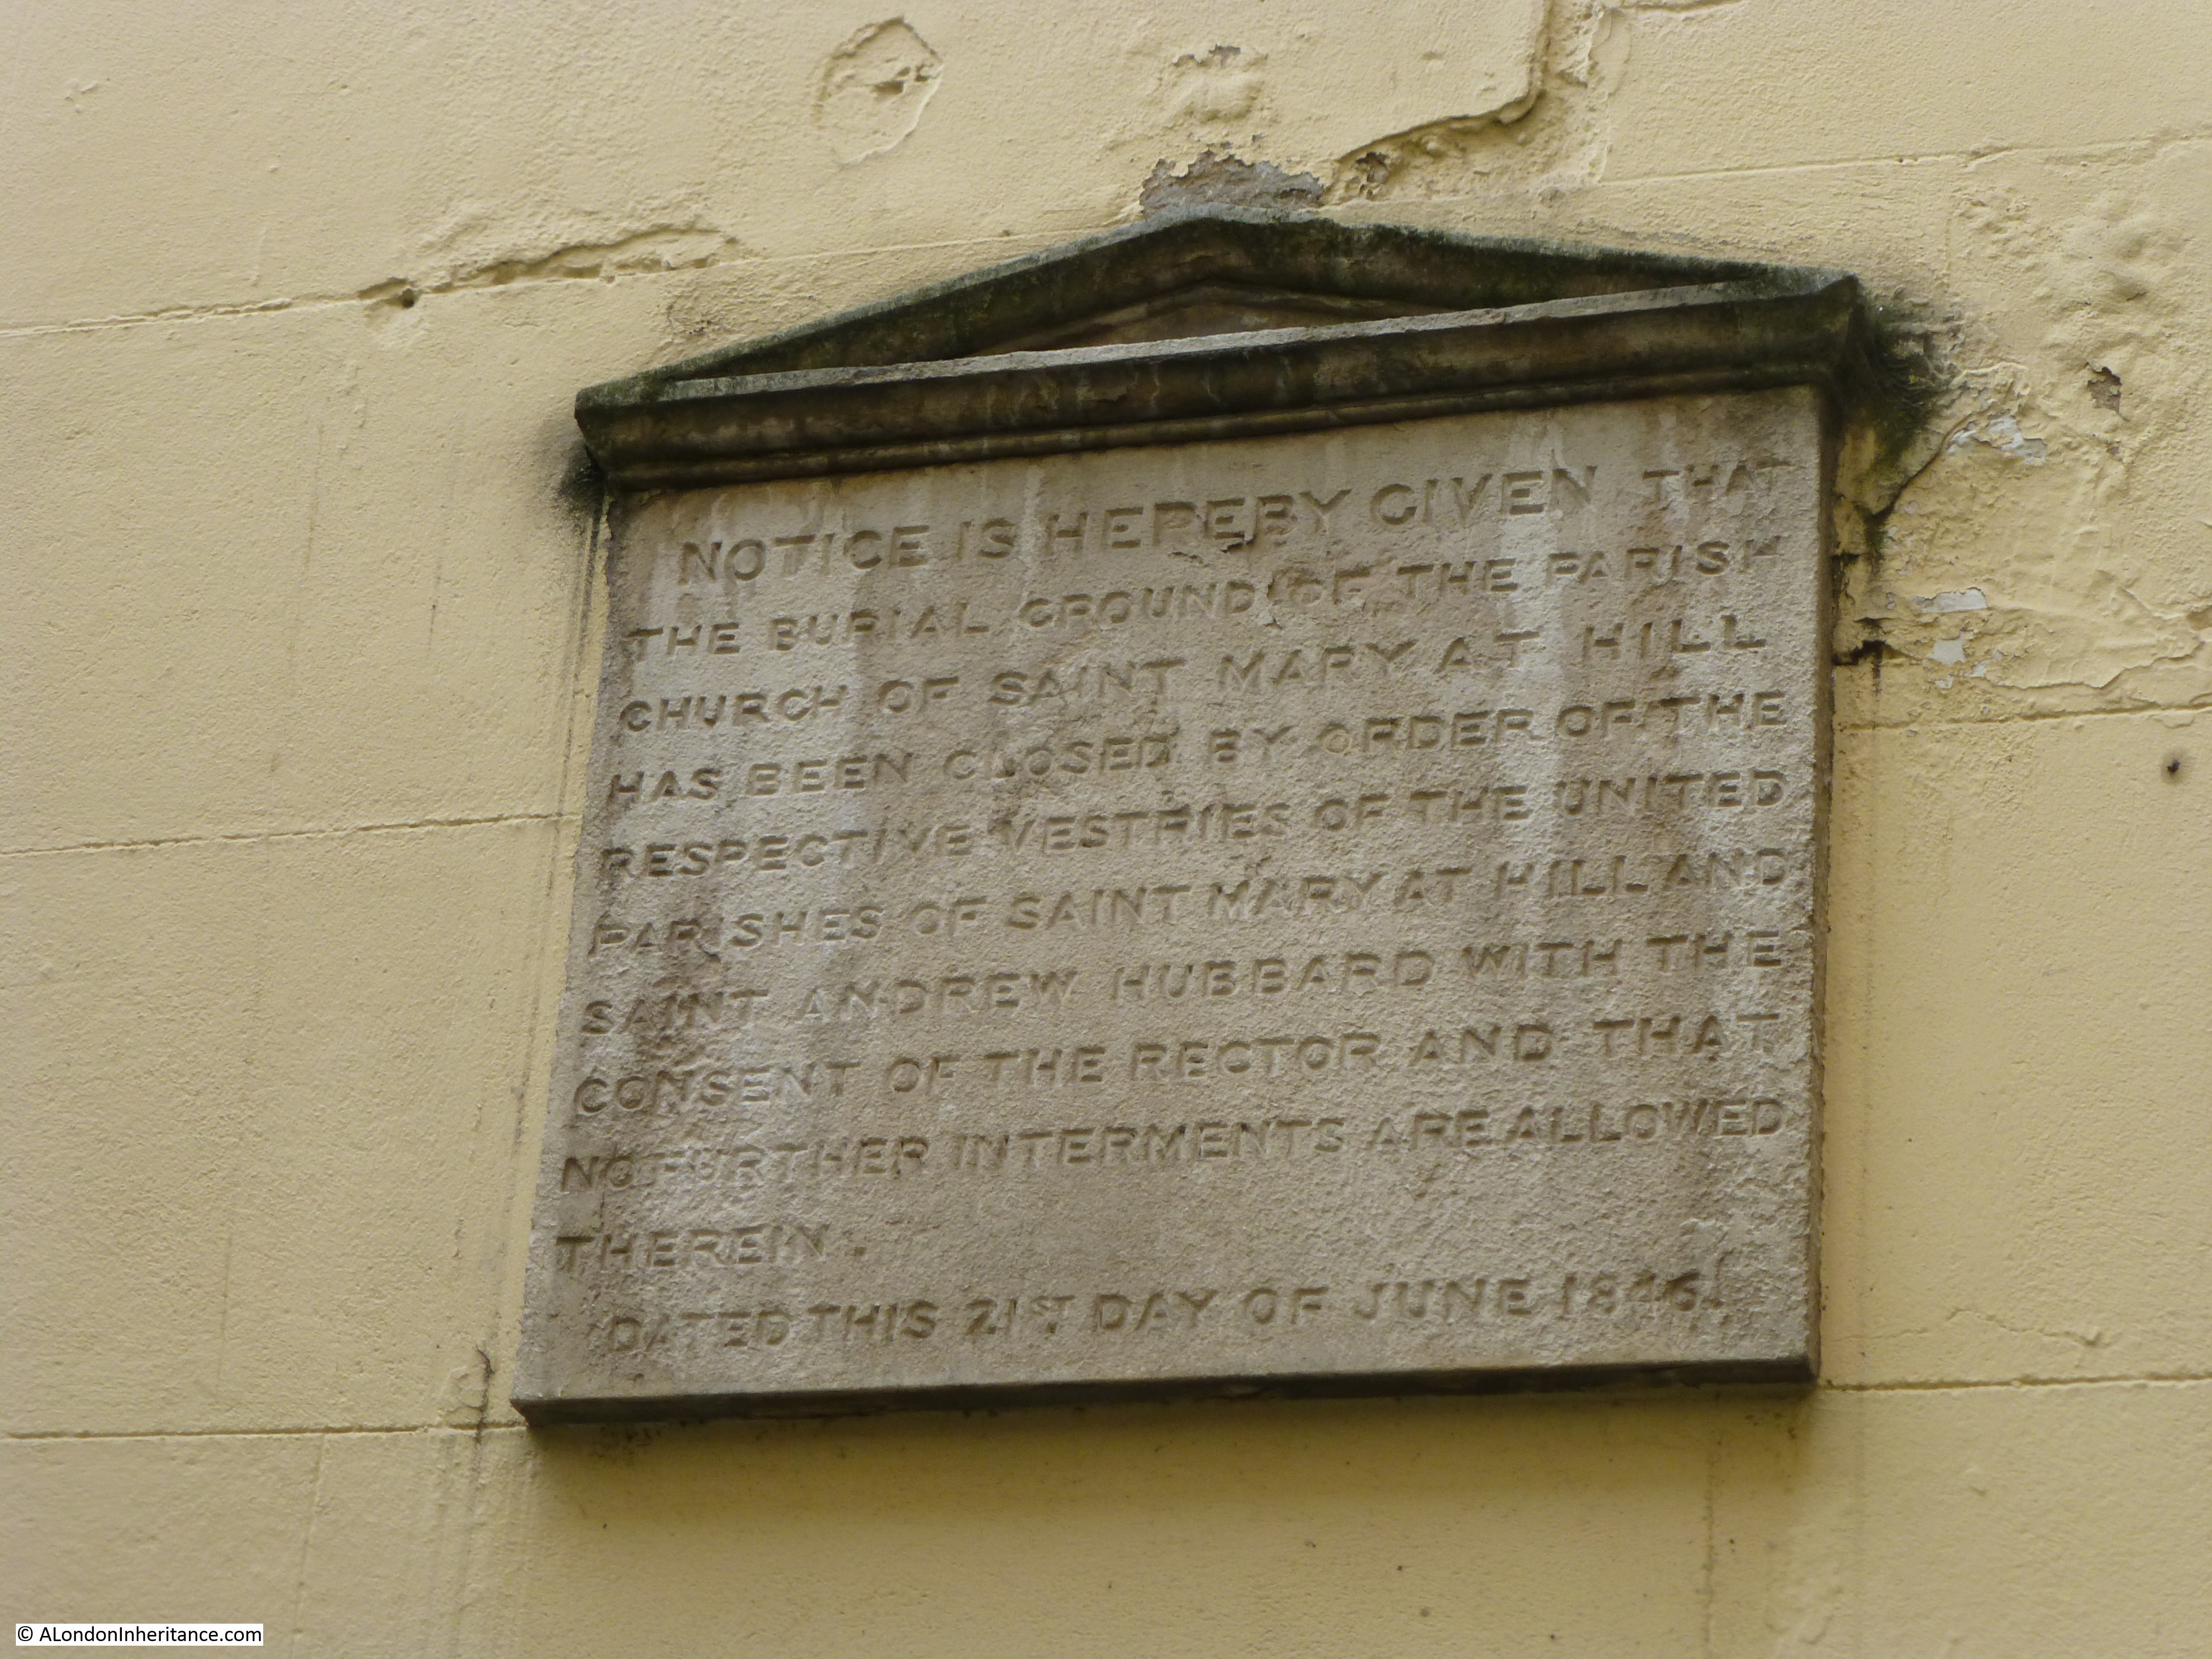
And just further along I found the following plaques:

Bedford Row 19

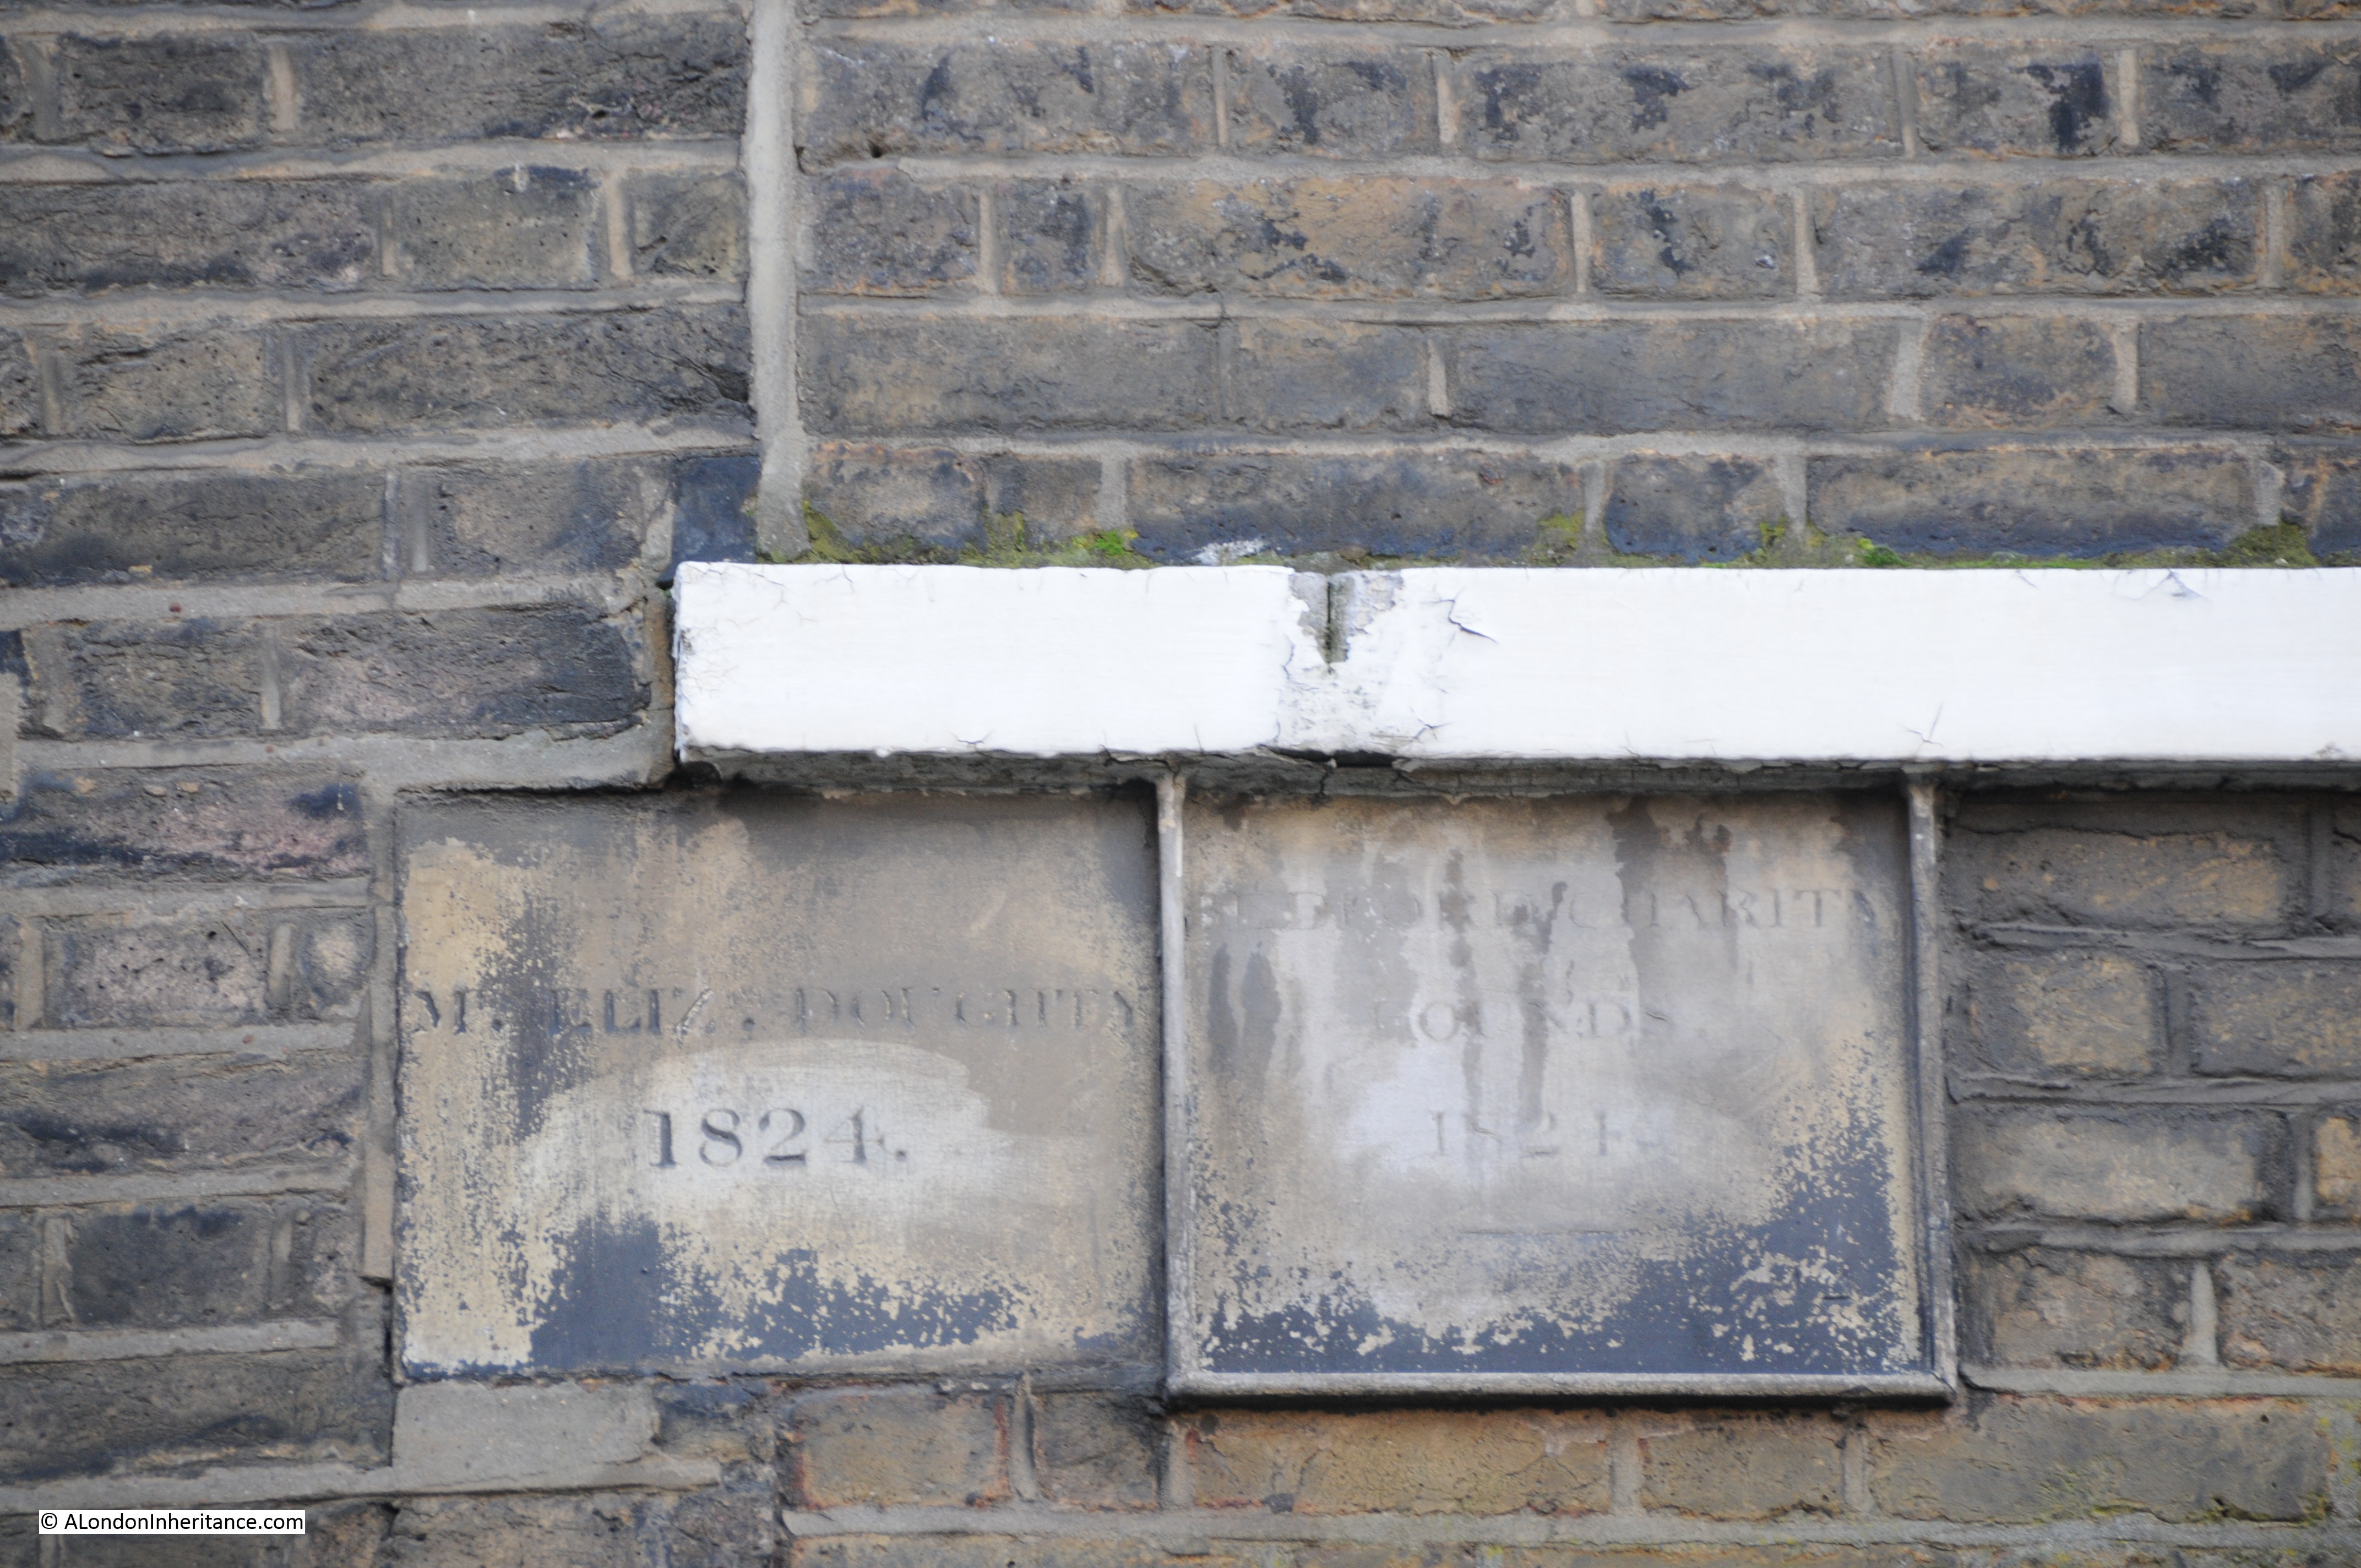
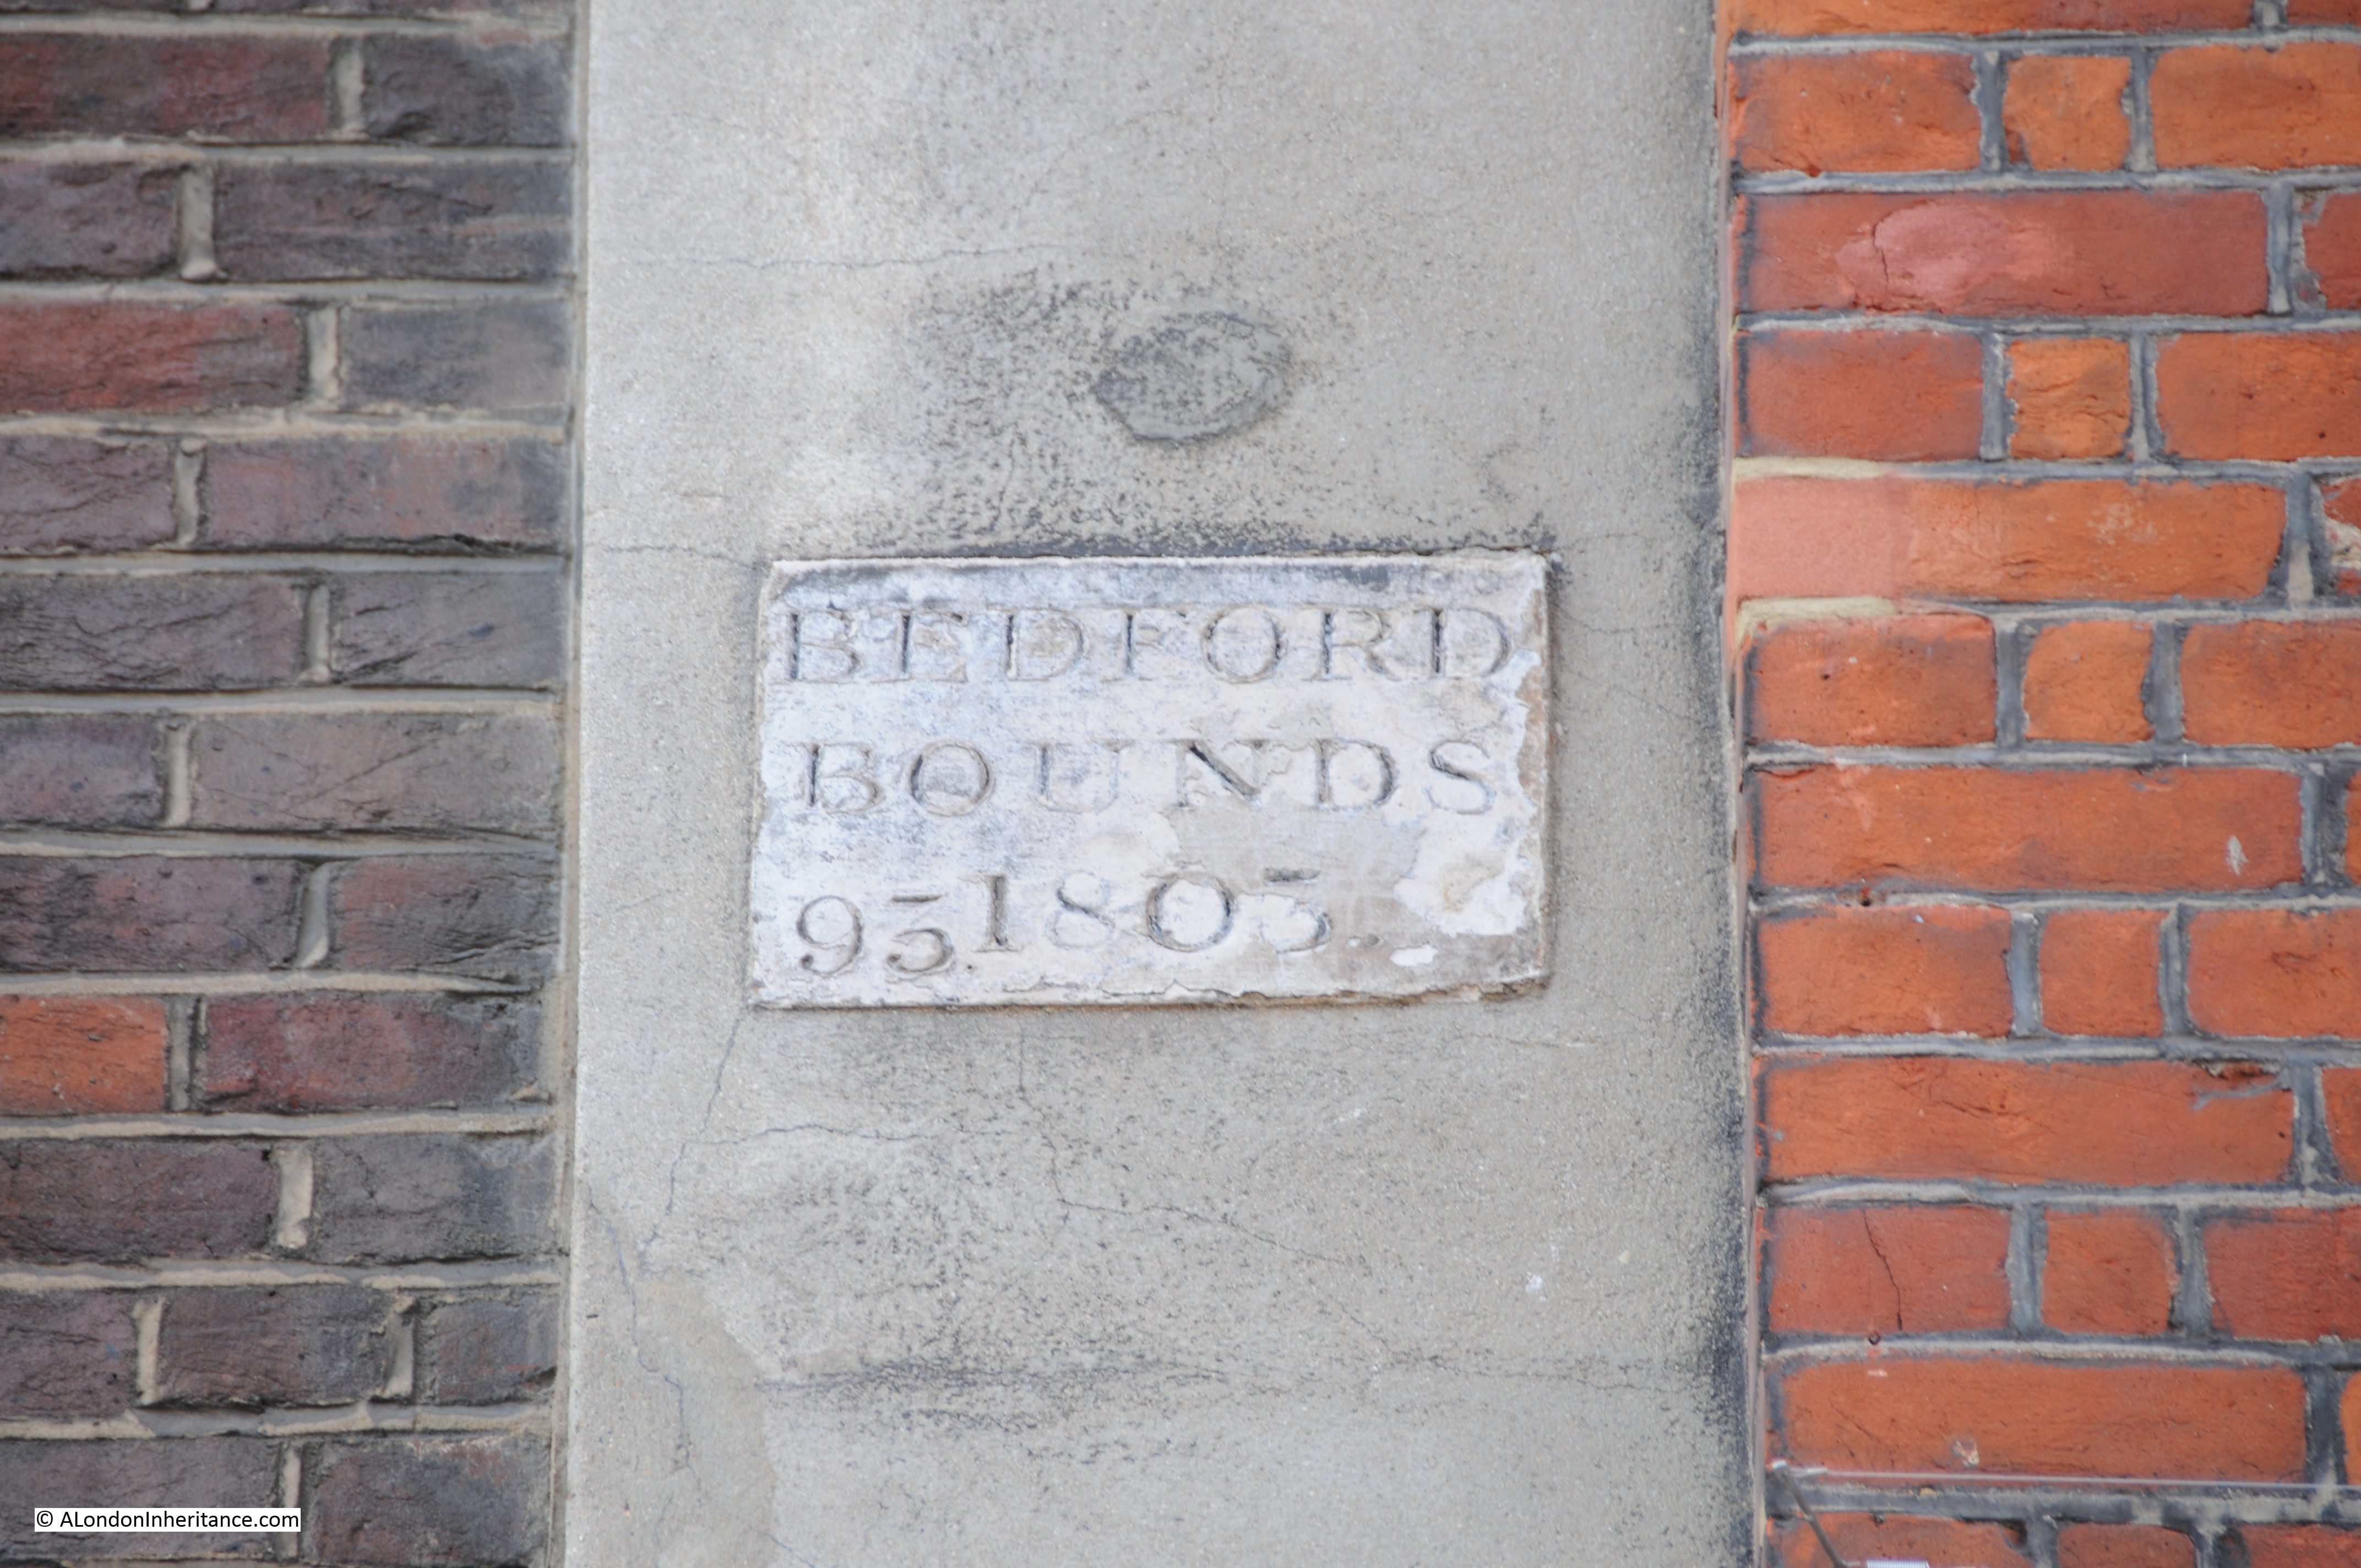
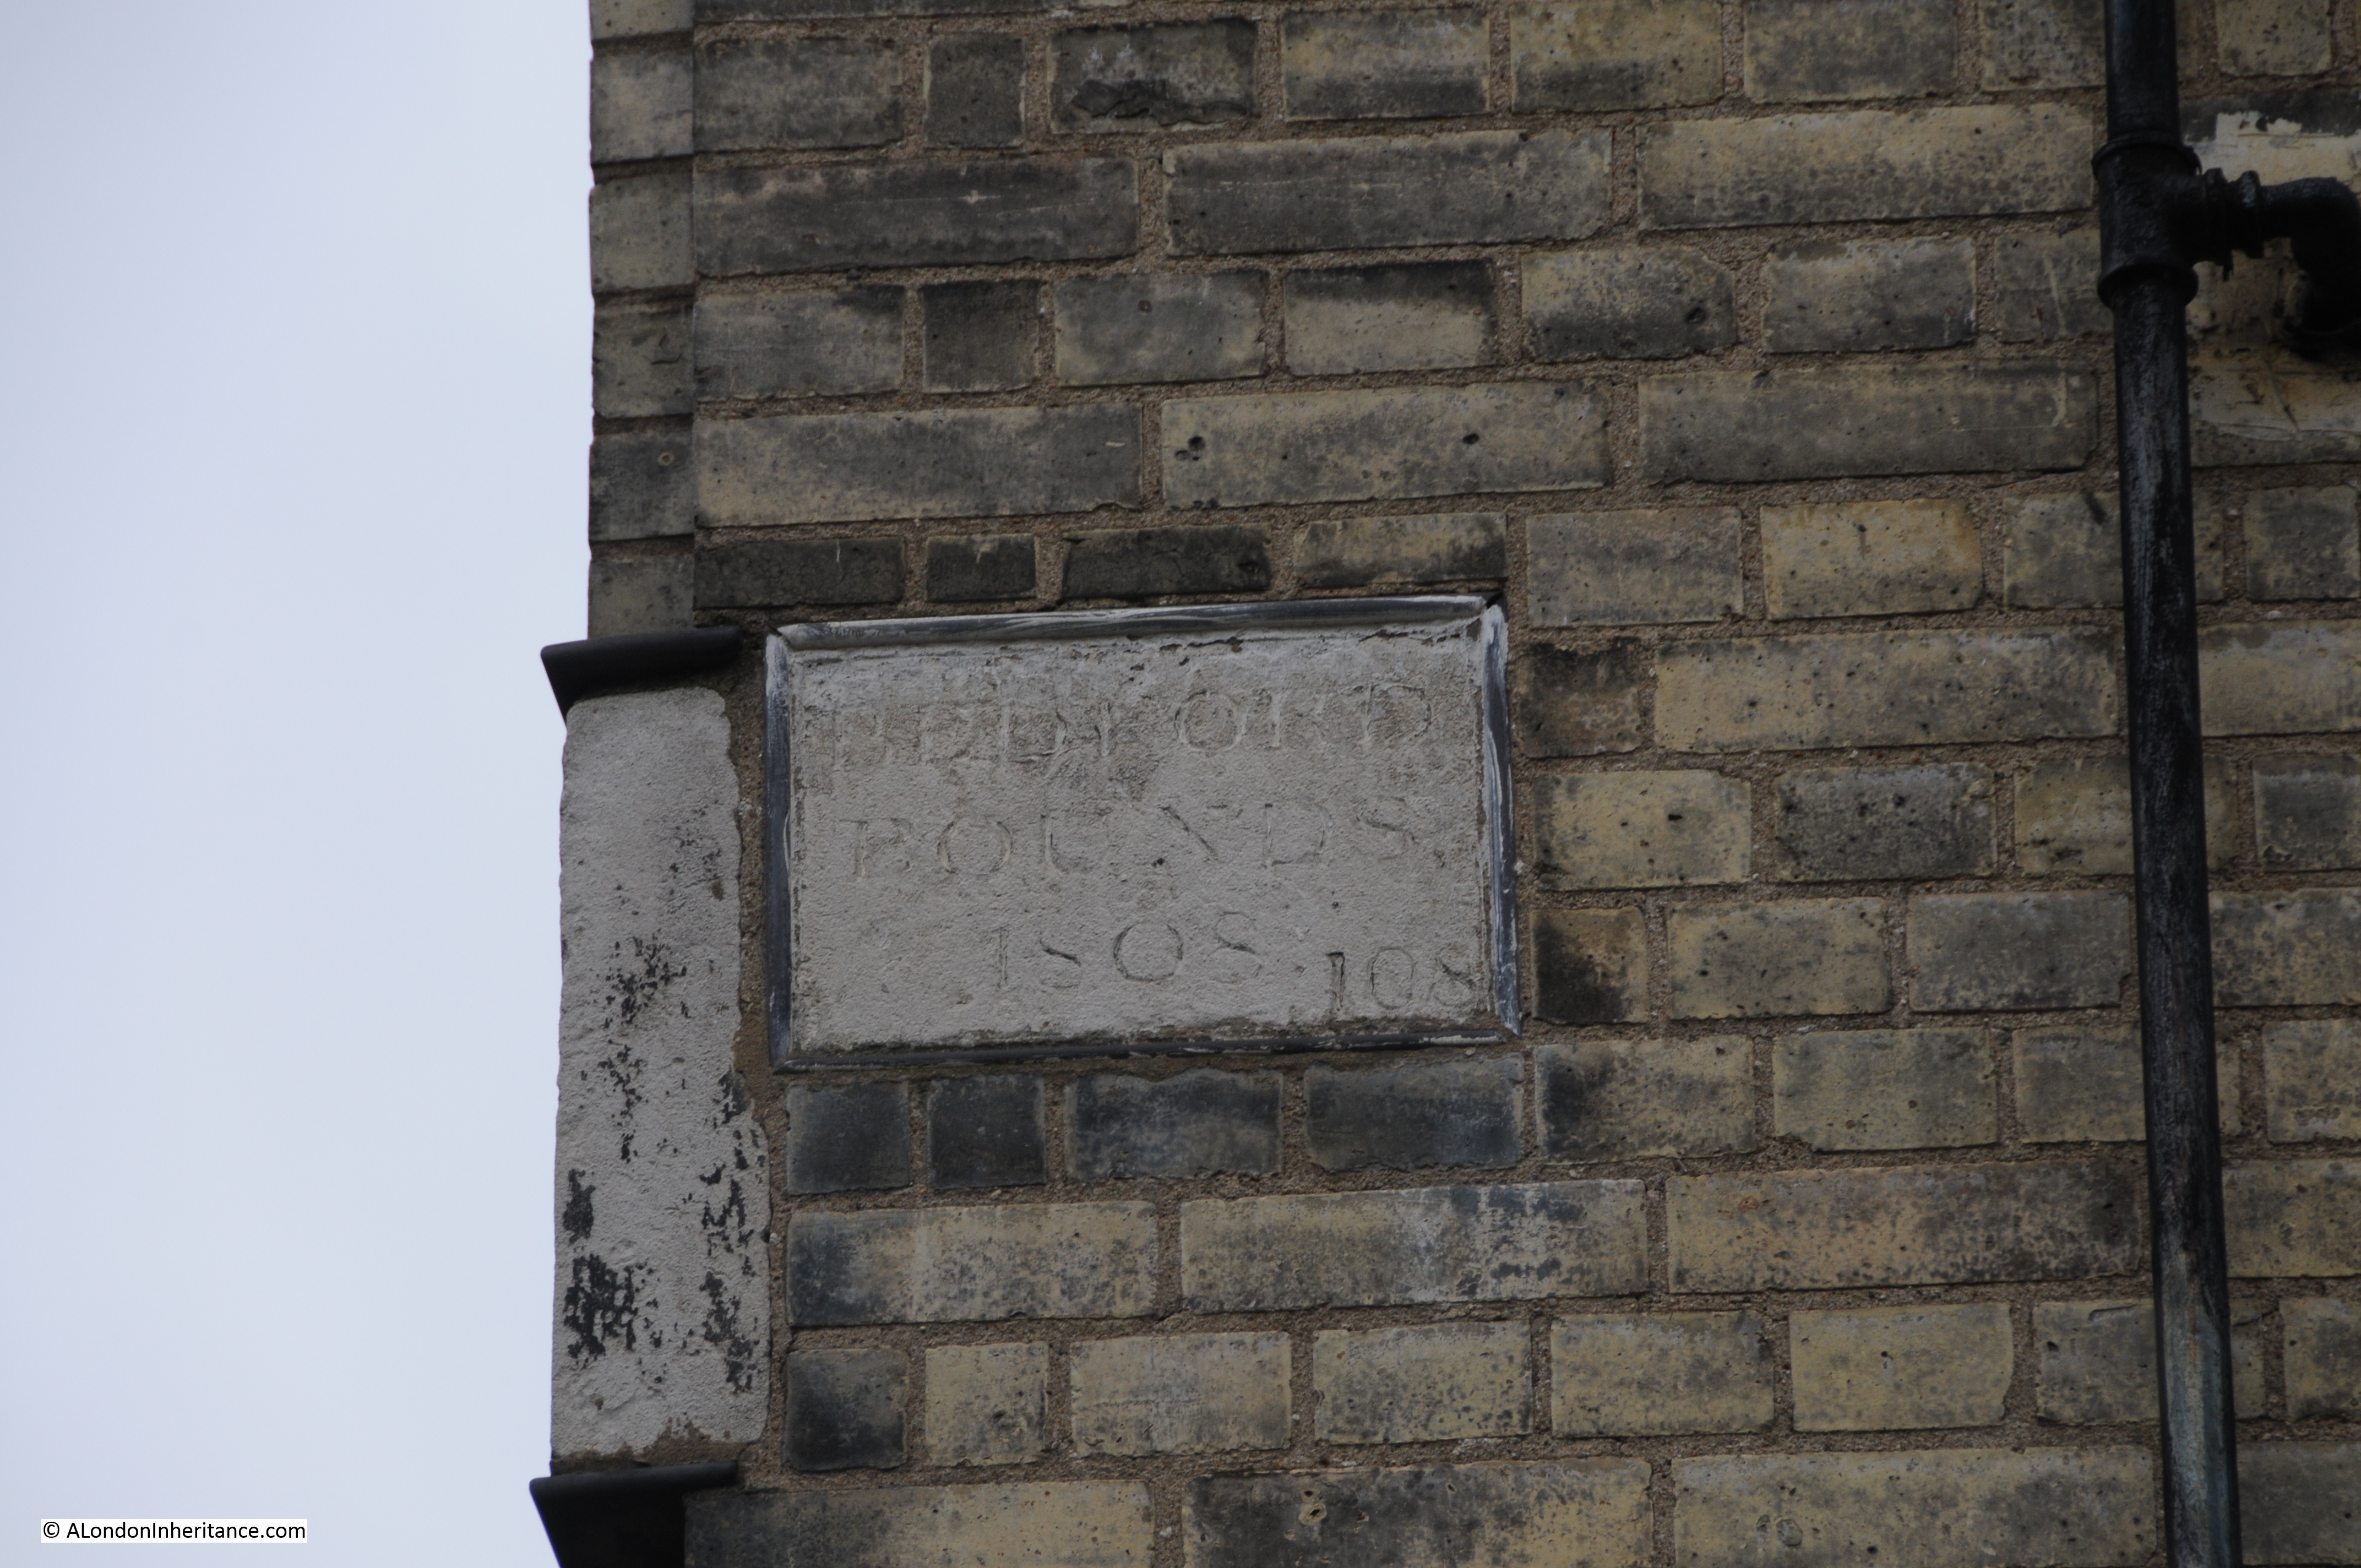
Not so easy to read. The one on the left reads “Ms. Eliz Doughty 1824” and the one on the right “Bedford Charity Bounds 1824”

These are boundary markers and were essential to identify ownership of blocks of land prior to the availability of accurate street mapping. In the days before clearly defined ownership boundaries, when parcels of land were let and sublet, when it could be decades between the times when ownership of land needed to be checked and when owners could easily extend their boundaries in the hope of expanding their ownership before anyone realised, boundary markers played a key role in defining ownership.

Much of the land across London was originally held by the Crown or Church in large blocks, and over the centuries this has gradually been sold off to leave much smaller parcels of land, however some large estates still remain.

The Bedford Charity seemed an ideal candidate for some further research, to find the original boundaries of the estate, how the estate came into being, and if anything remained.

The origin of the Bedford Charity is a gift of land made by Sir William Harpur in 1566 to the corporation of Bedford.

Sir William Harpur was very much a self-made man of the times. The Harper family (the spelling of the name appears to have changed to Harpur around 1764) had lived in the area around Bedford for many years prior to the 16th century.

A school had been operating in Bedford since before 1166 and as with most schools of this period it was part of the church and Bedford school maintained this connection through to the dissolution during Henry VIII’s reign.

William Harpur attended the original Bedford School before leaving for London. His early days in London do not appear well documented, however from the book “The Harpur Trust” by Joyce Godber;

“It my be that he was apprenticed to a tailor, but there is no certainty about this; nor is there evidence of his connection with any other trade.”

The assumption of his original apprenticeship seems likely to be correct due to his later career, as William Harpur was admitted to the Merchant Taylors company in 1533.

Harpur’s progression through the Mechant Taylors resulted in him becoming Master in 1553, the same year he became an alderman for the ward of Bridge Without.  When a vacancy appeared for an alderman within the much older and prestigious ward of Dowgate, Harpur was elected to this ward in 1556. He also served a year as treasurer of St. Bartholomew’s Hospital and was a sheriff between 1556 and 1557.

His rise continued and in 1561 he reached the peak of his career becoming Lord Mayor of London.

Through his contacts, Harpur would have been very aware of the work of others within the City of London in support of schools throughout the country.

Whilst Harpur was Lord Mayor the Merchant Taylors school was founded by Richard Hilles, the master at the time and a contemporary of Harpur. He would have known of the founding of St. Paul’s school by Dean Colet in 1509 and the work being done by schools such as Winchester where the earliest printed school text books were compiled in 1559.

He had already been assisting the school in Bedford. Newnham Priory, originally attached to the school had been closed and the property confiscated. Again from “The Harpur Trust” by Joyce Godber;

“These were unsettled times in religious matters. In 1533 when he was approaching the age of 40, Harpur would have heard that, like monasteries elsewhere, Newnham Priory had been closed, the canons pensioned off, and the property confiscated. When he visited Bedford again he would find the priory site desolate, with much of the stone carried away and what was left was being converted to a house. At Bedford it would seem he found the school still existing, probably under an aged master, but it was clearly at risk, like similar schools elsewhere; for the building was up for sale with a number of other ex-monastic properties.

And now Harpur seems to have got in touch with John Williams, perhaps once his schoolfellow. Williams in 1545 obtained a large grant of former monastic property, and with it the school-house in School Lane.

In 1548 Edmund Green came from New College, Oxford to teach at Bedford. Probably Harpur arranged this and paid his stipend. But at this stage he did not commit himself further.”

Given his position in the City, he was probably a wealthy man.

Joyce Godber’s book also provides an insight into Harpur’s life as the Lord Mayor of London;

“On the 12th January, when Harpur and the alderman went to St. Paul’s and all the crafts in London in their livery, and then came into Cheapside a lord of misrule from Whitechapel with a great company”

and in September 1562 after an inspection of the conduit heads of London’s water supply:

“after dinner they hunted the fox, and there was a goodly cry for a mile, and after the hounds killed the fox at the end of St. Giles, and there was a great cry at the death, and so rode through London my Lord Mayor Harpur with all his company home to his place in Lombard Street.”

It would not be until 1564 that Harpur commenced the work that would provide a lasting endowment for Bedford.

On the 30th September 1564 for £180, 13 shillings he purchased 12 acres and 3 roods of meadow outside the City at Holborn, old monastic land that had formerly belonged to Charterhouse.

On the 22nd April 1566 he and his wife, Dame Alice, conveyed the land to Bedford Corporation.

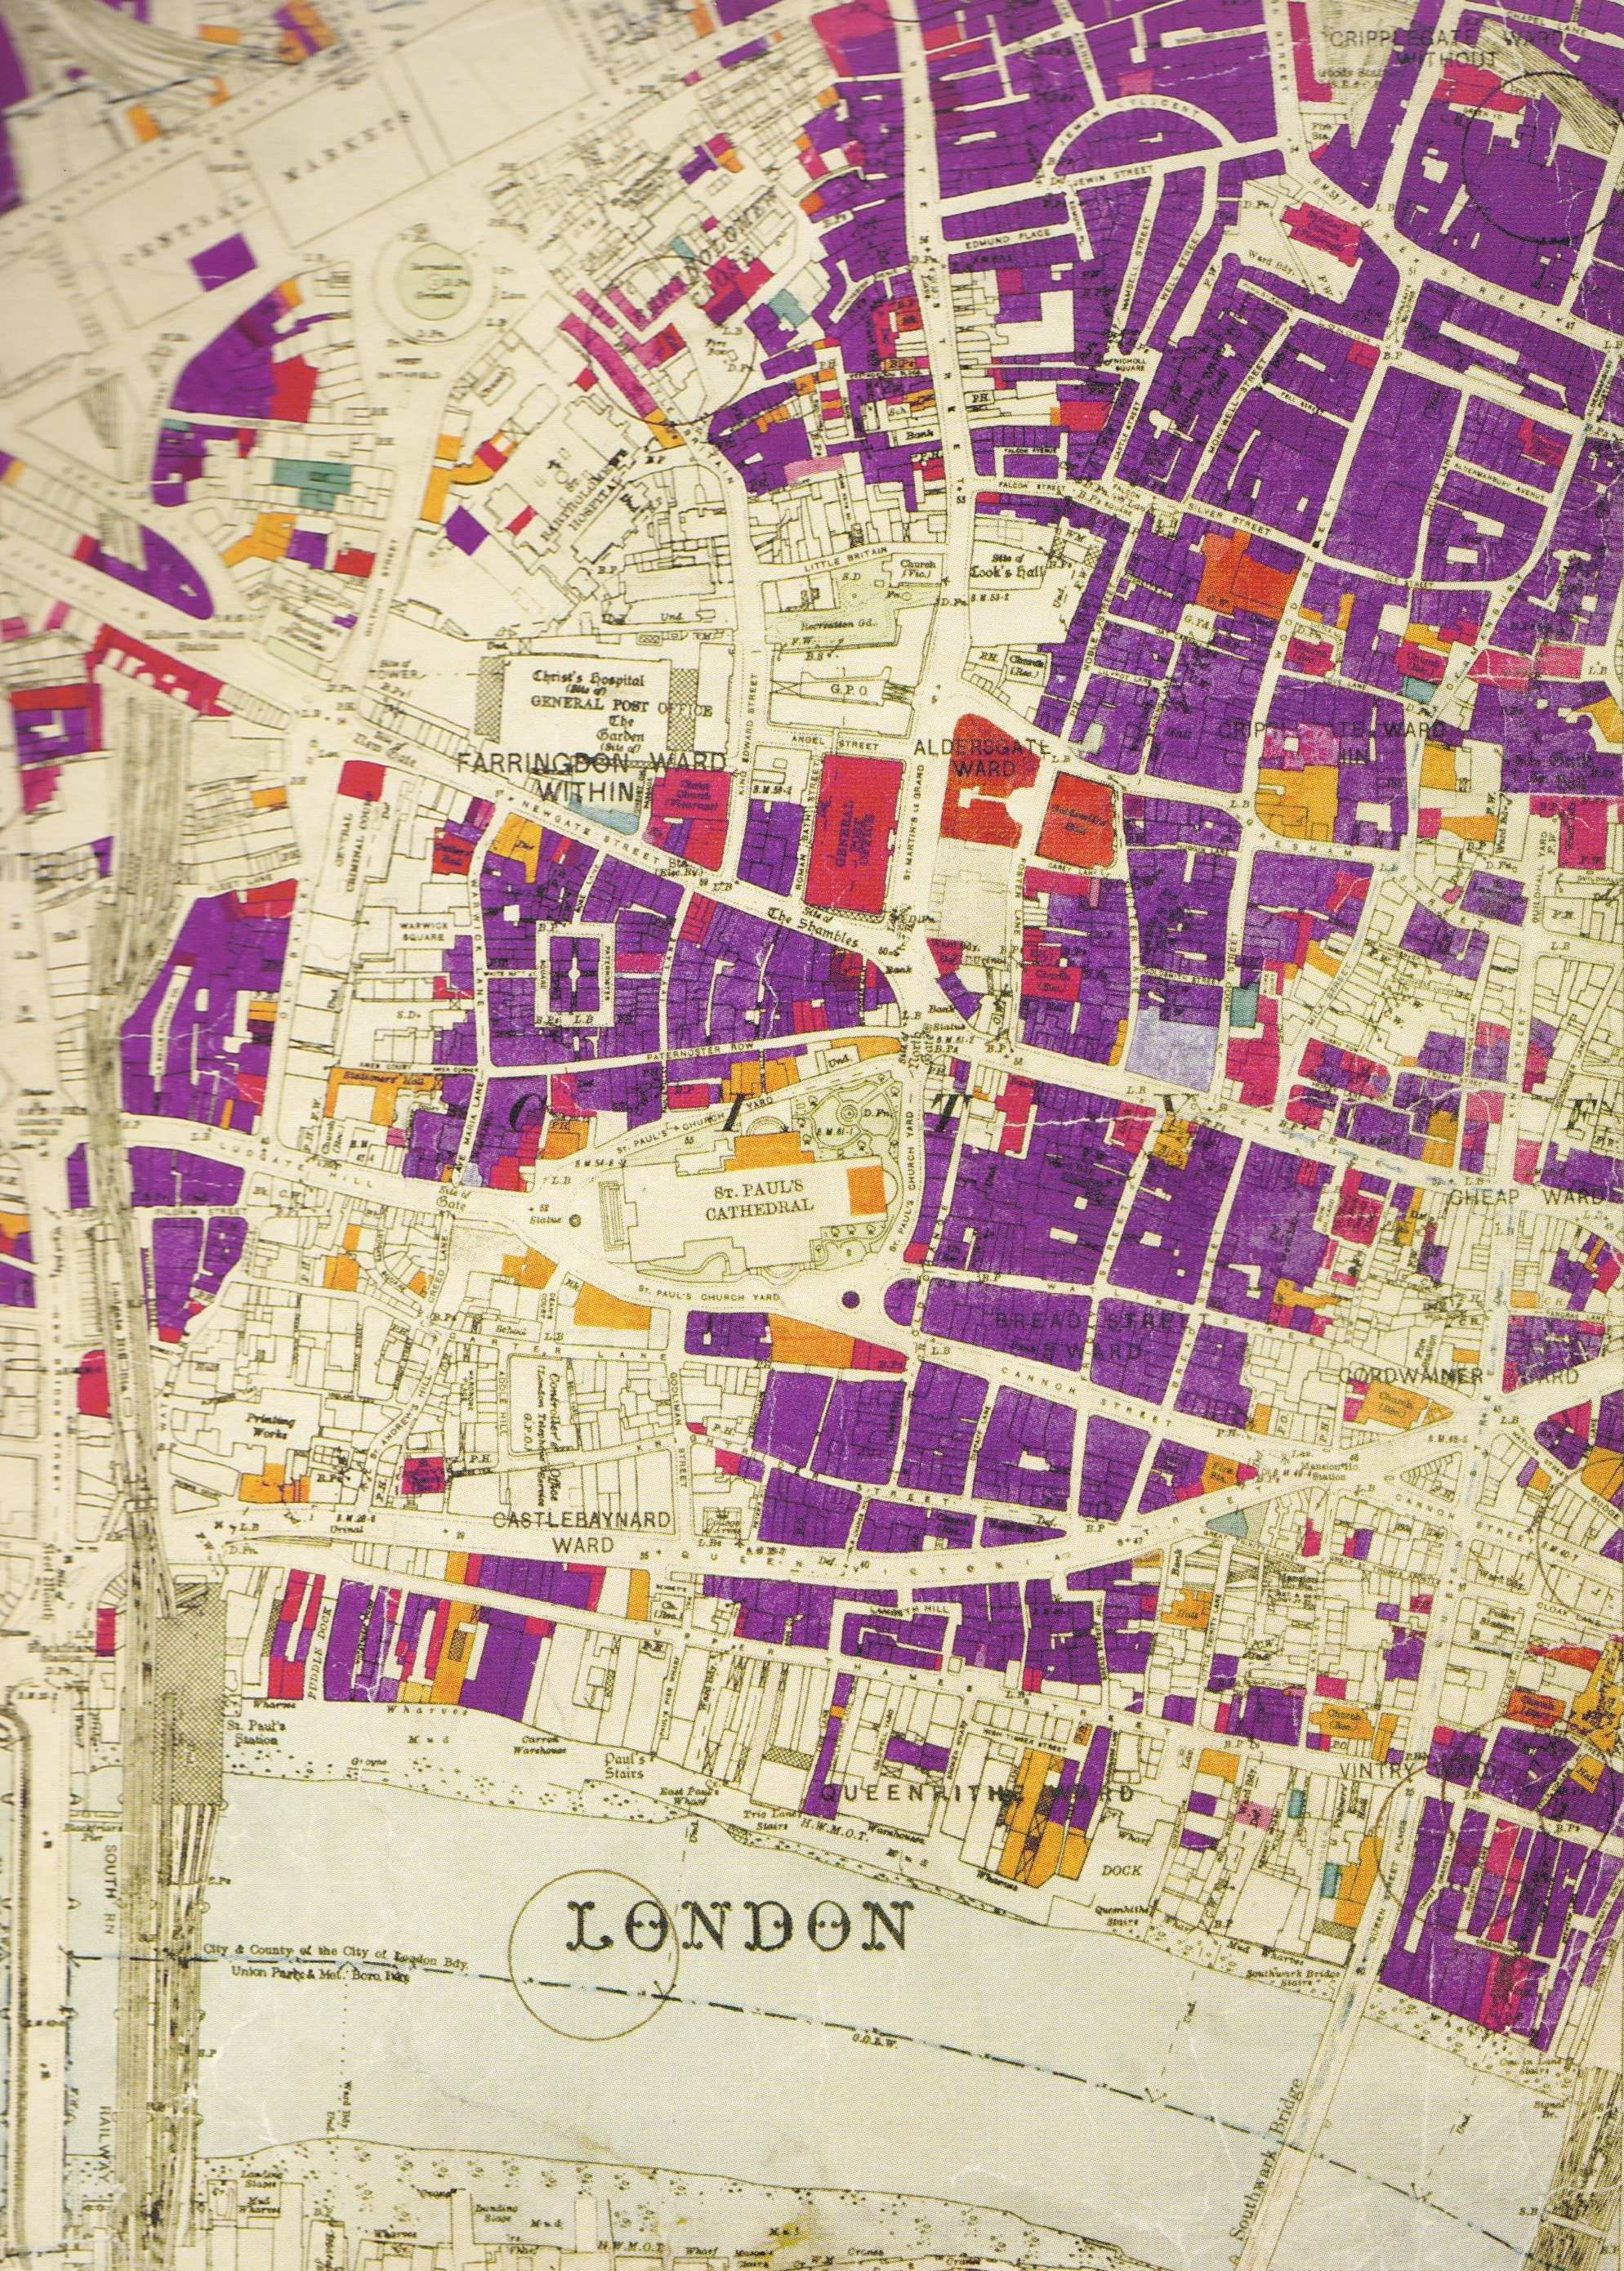
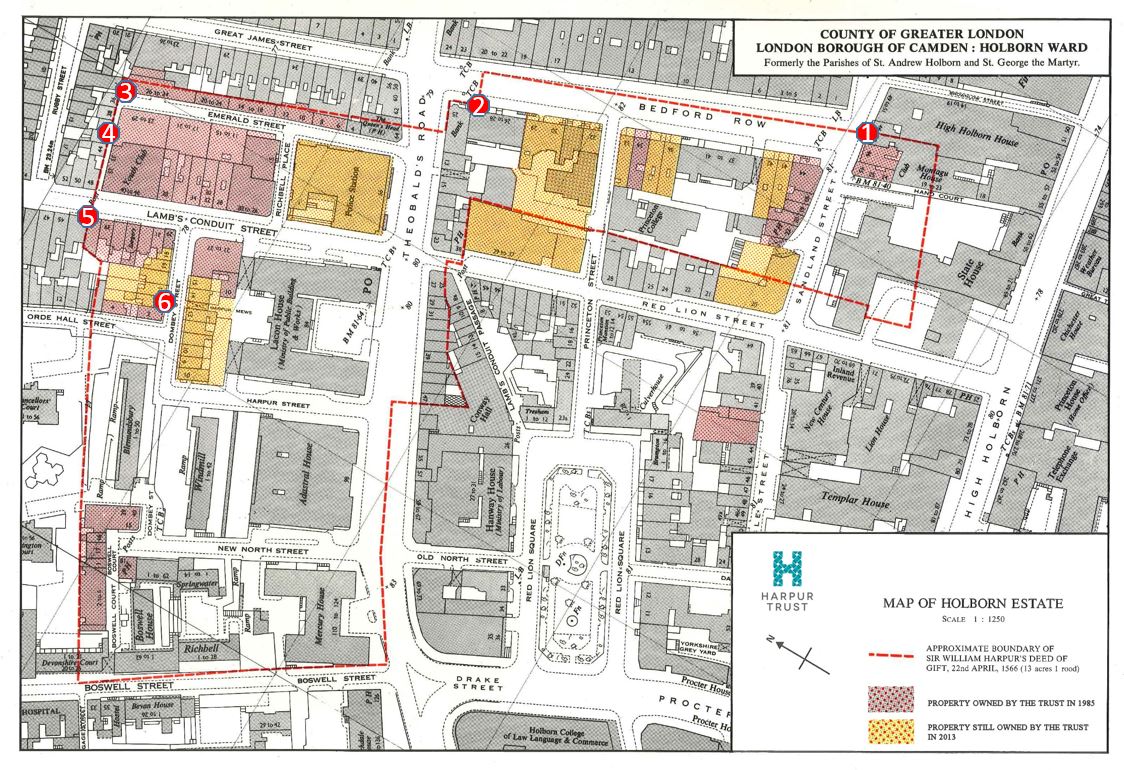
The following map (kindly provided by the Harpur Trust) shows the approximate boundaries of the original deed of gift by Sir William Harpur in 1566:

The Harpur Trust estates map Sep 2013 FINAL
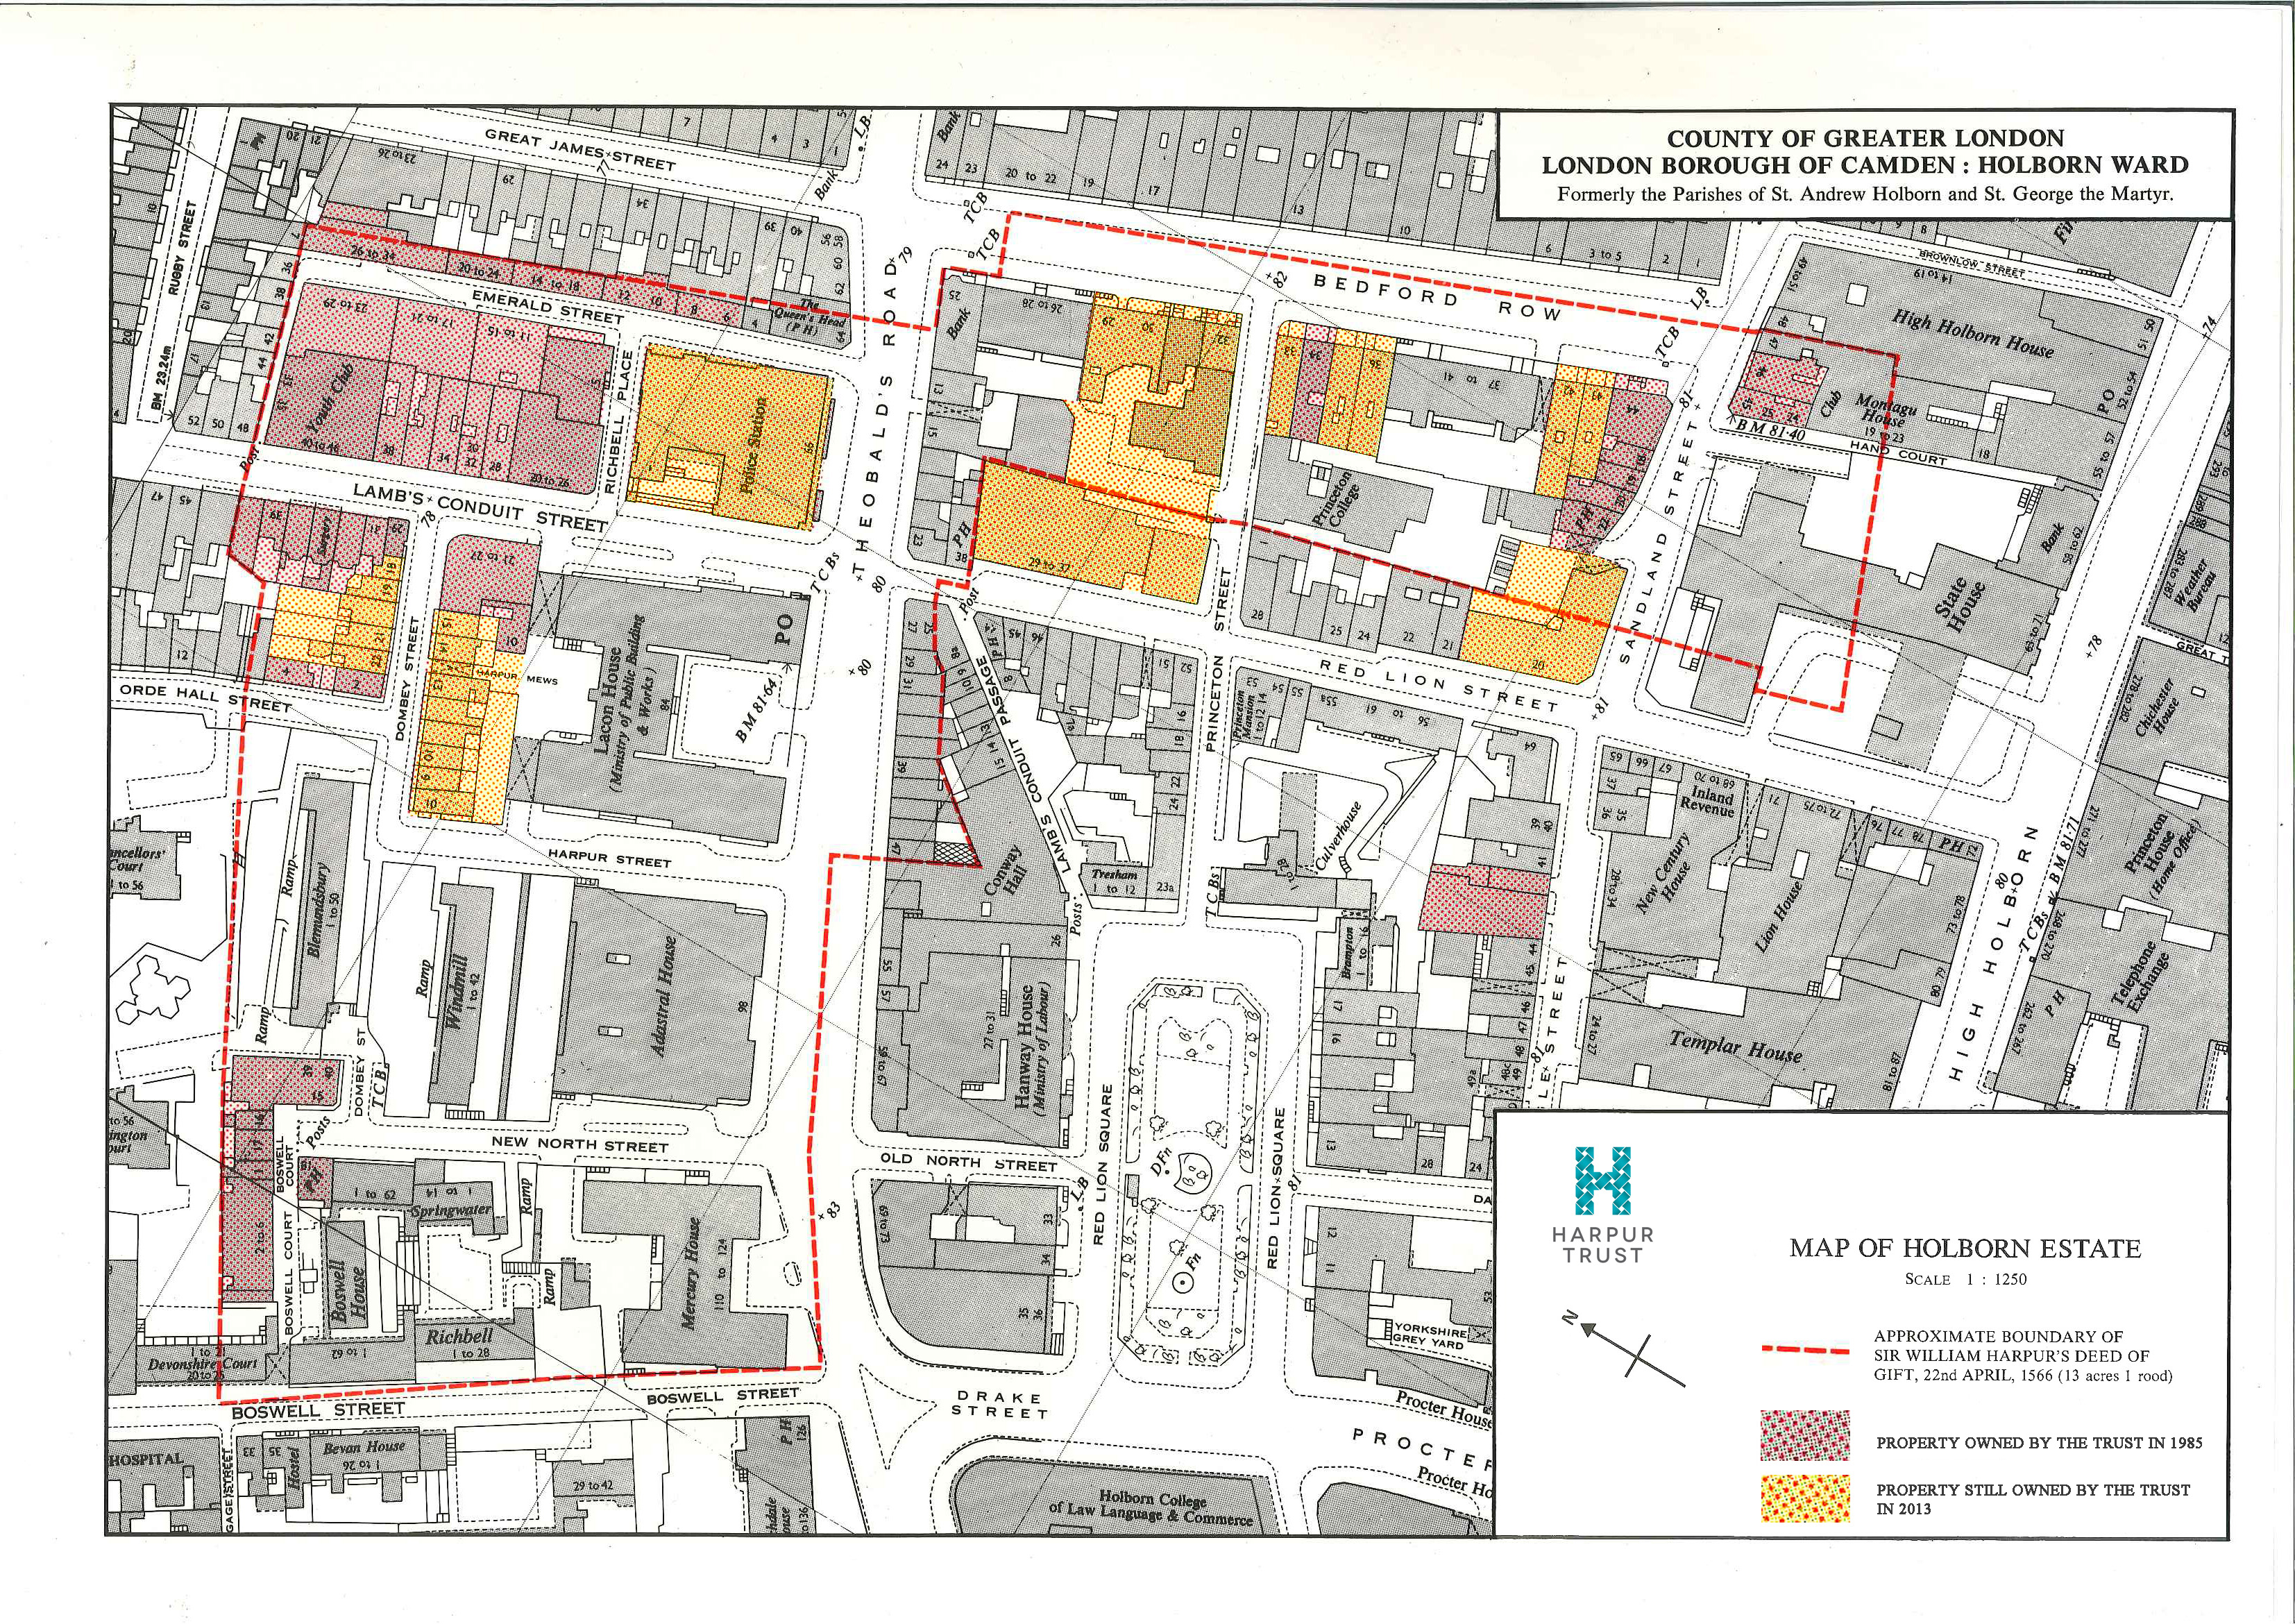
Whilst this map shows the majority of the original estate, it was not until 1654 when it took this final shape. There were some small blocks of land in Harpur’s deed separate from the main block and in a Chancery decree of the 16th February 1654 an exchange of smaller, detached parcels of land took place leaving the estate in its final form.

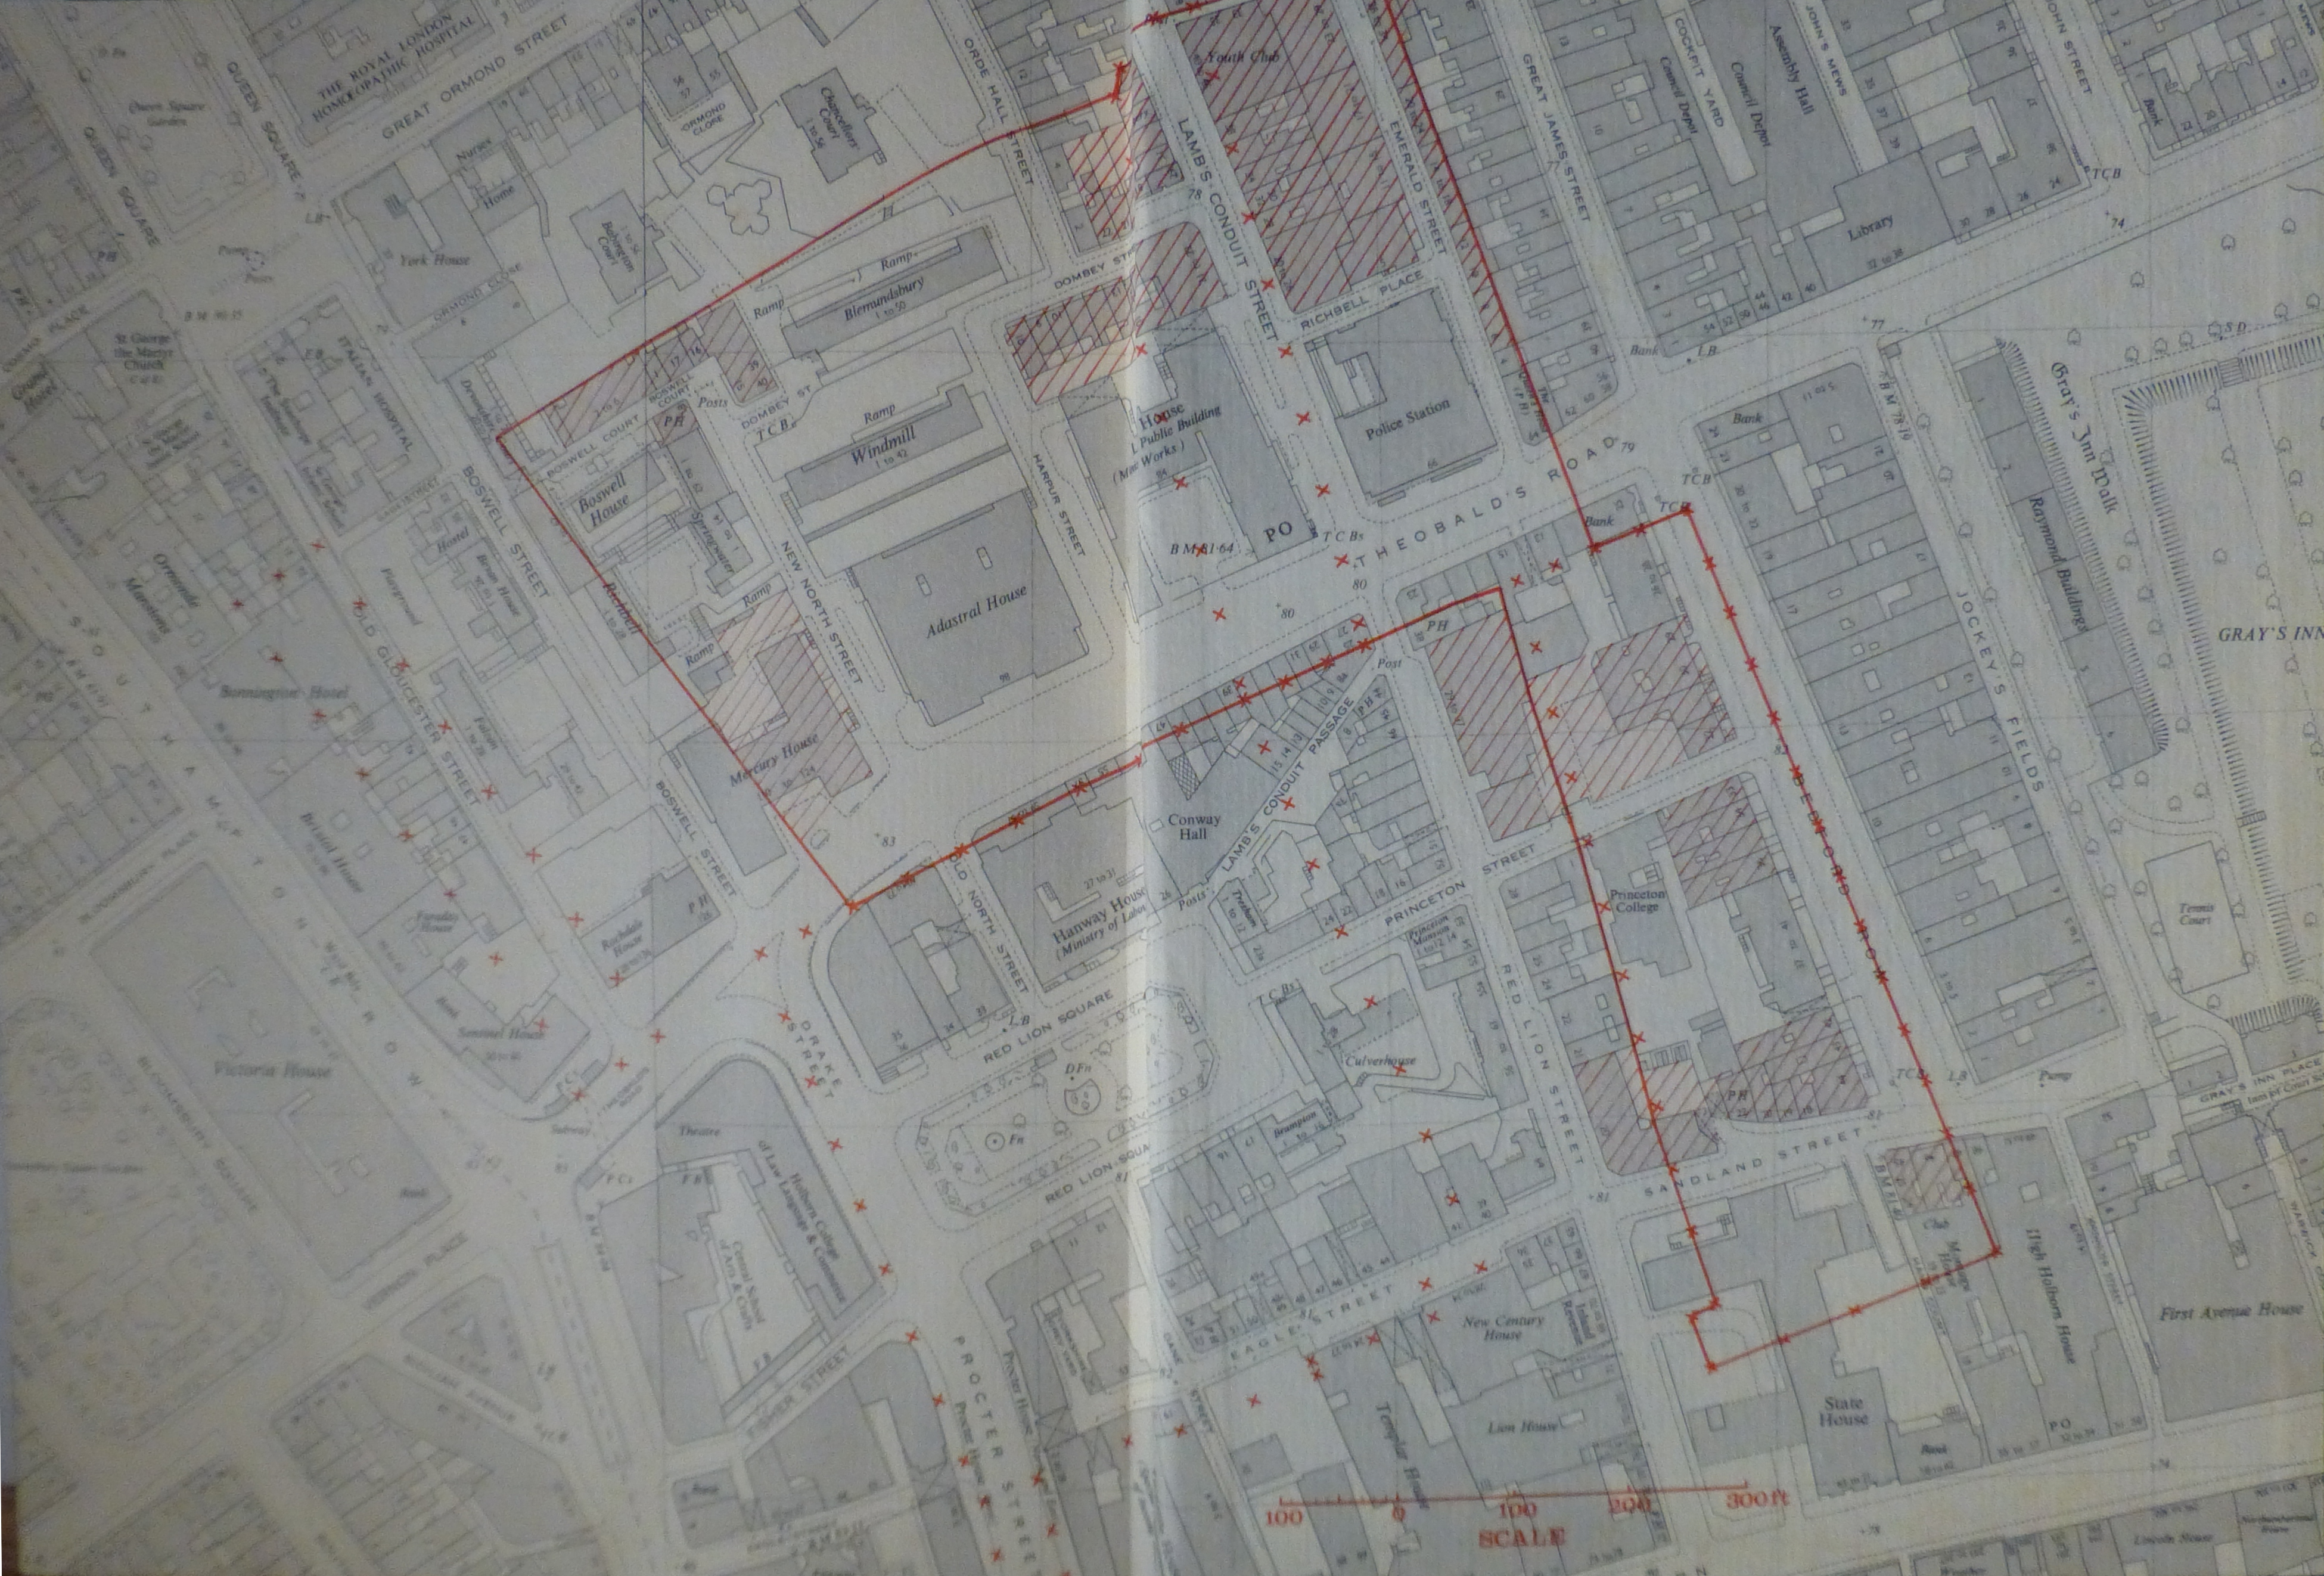
The following map from the Joyce Godber’s Harpur Trust book shows the original blocks of land identified by the red crosses to the left of the main block of land, which were part of the exchange to consolidate the estate into a single block.

book map 1

Just prior to the transfer of the land to Bedford Corporation, in 1565 the land was let on a 40 year lease to Richard Bacon. On transfer, this brought in a sum of £12 per annum.

Having found the first boundary markers for the Bedford Charity, I wondered if any further remained and if it was possible to trace the outlines of a 1566 transfer of land, on the streets of 2015 London.

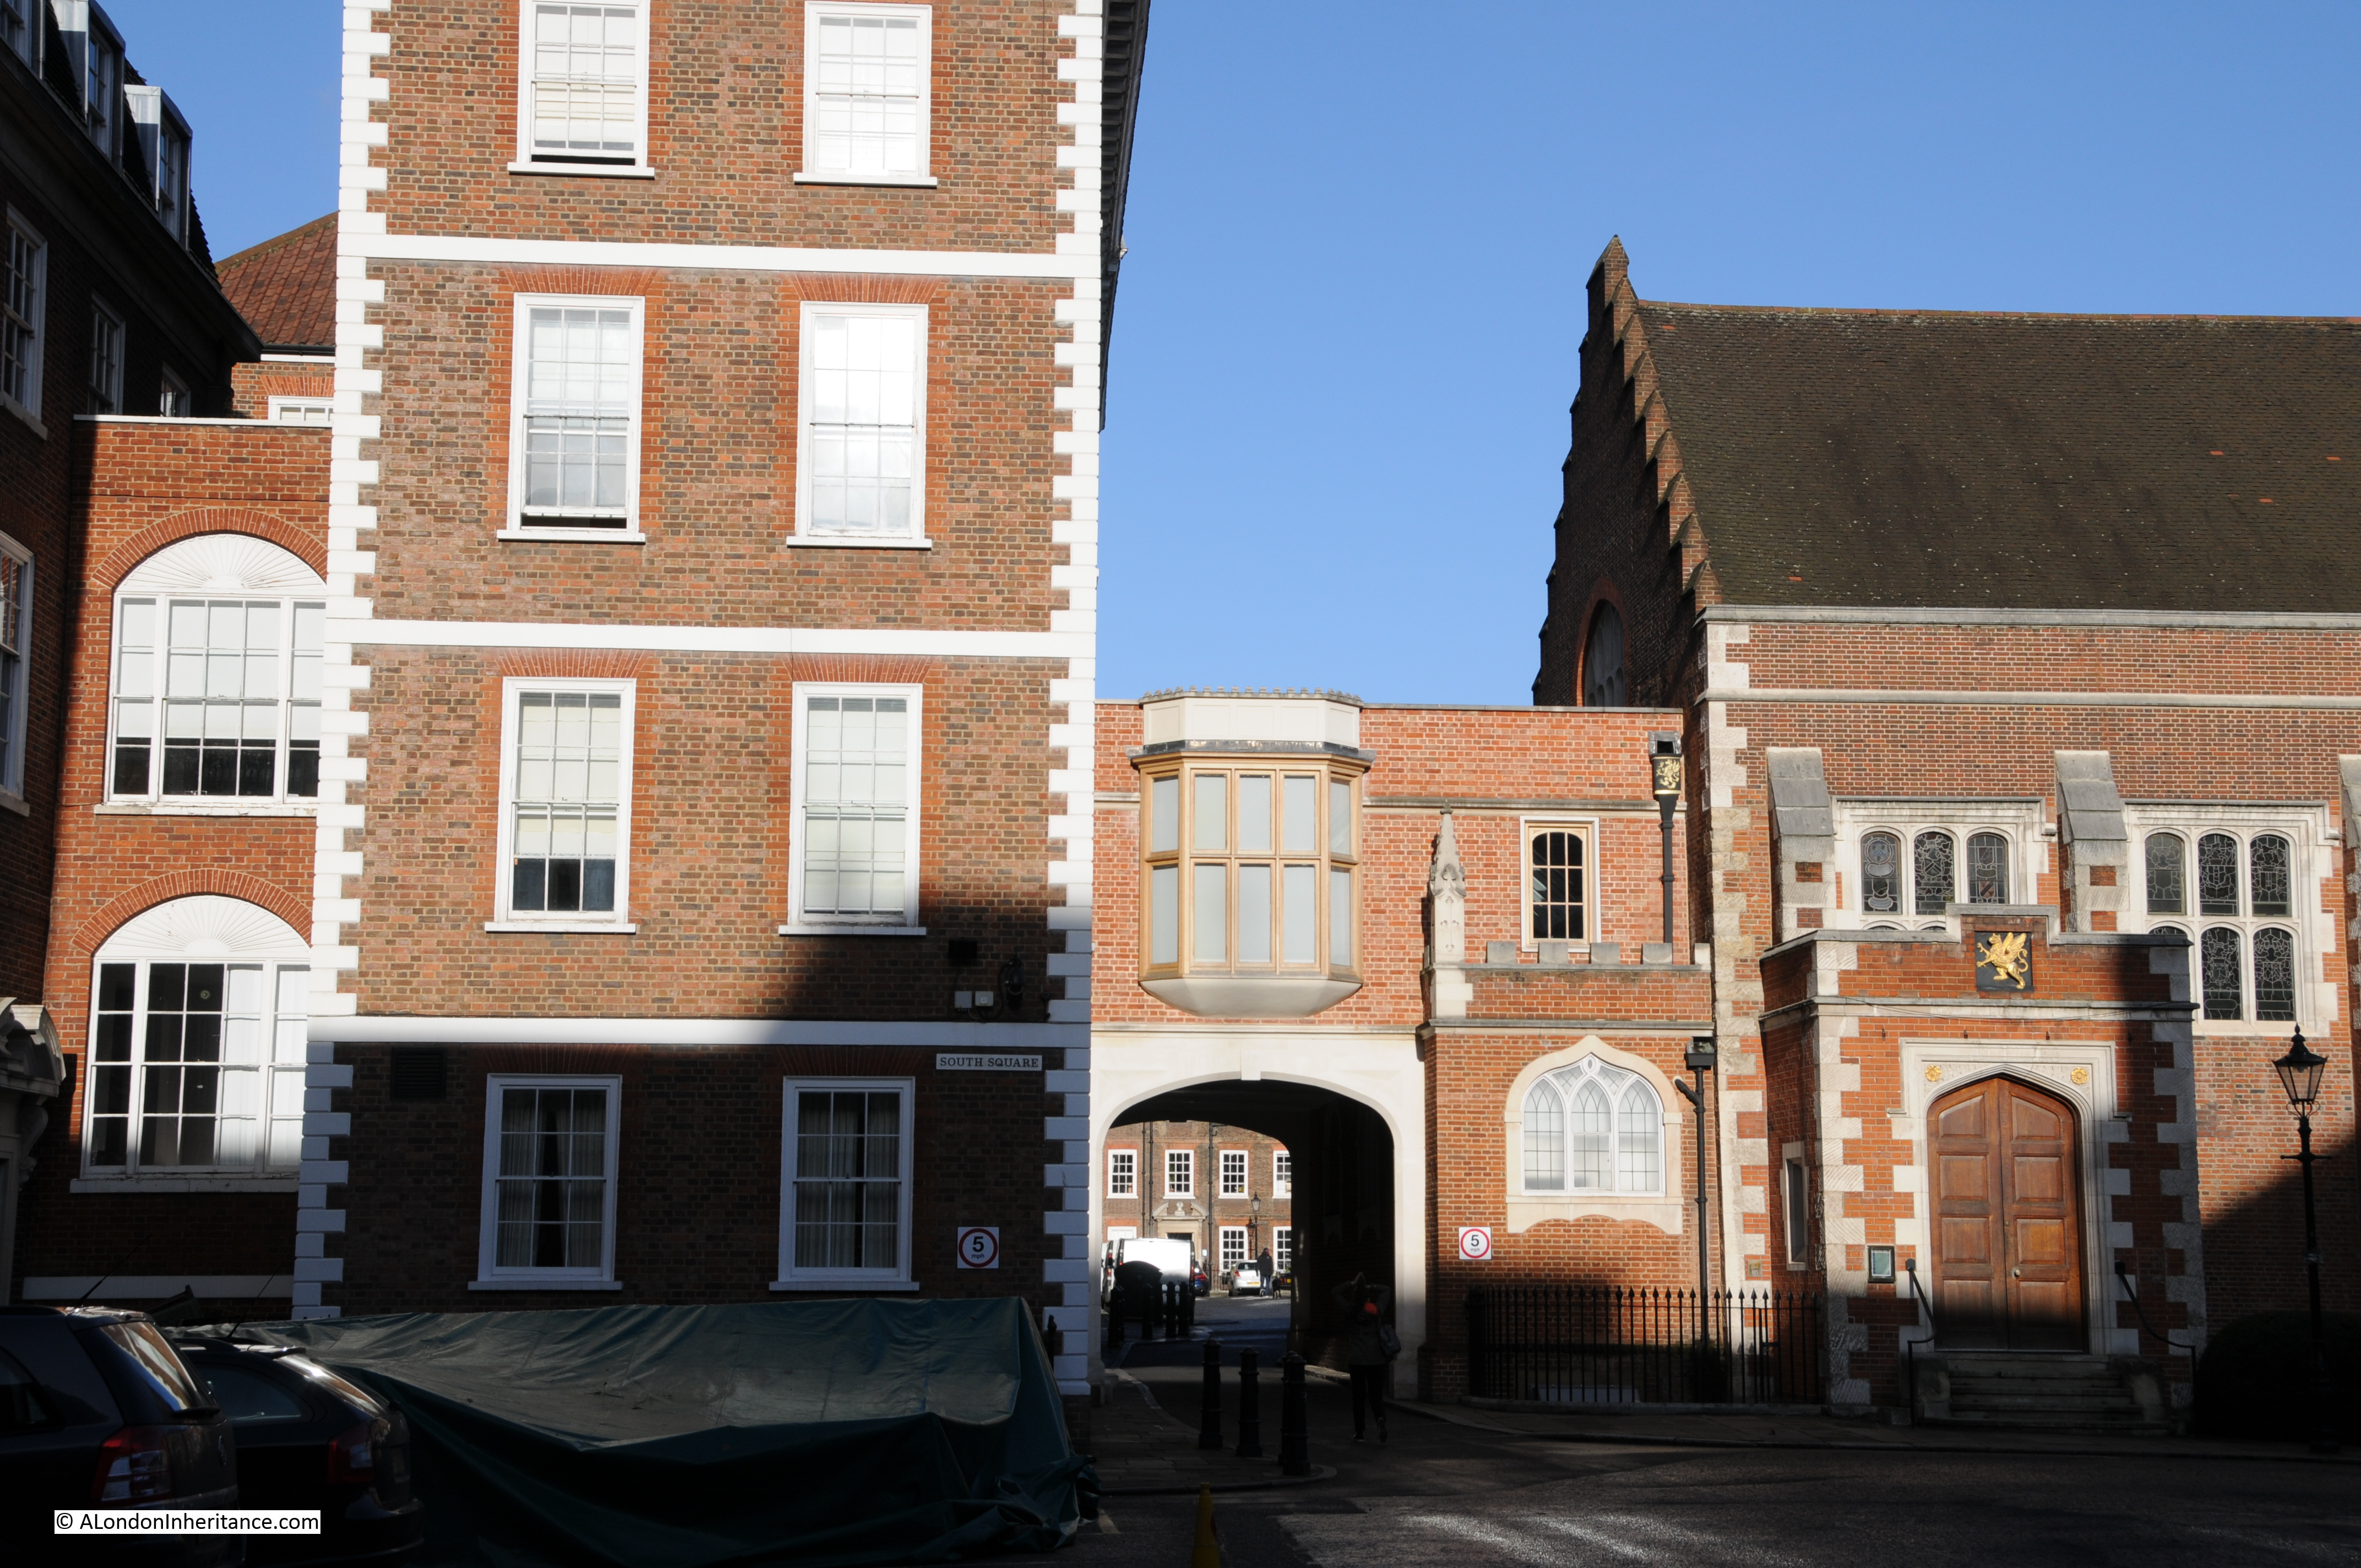
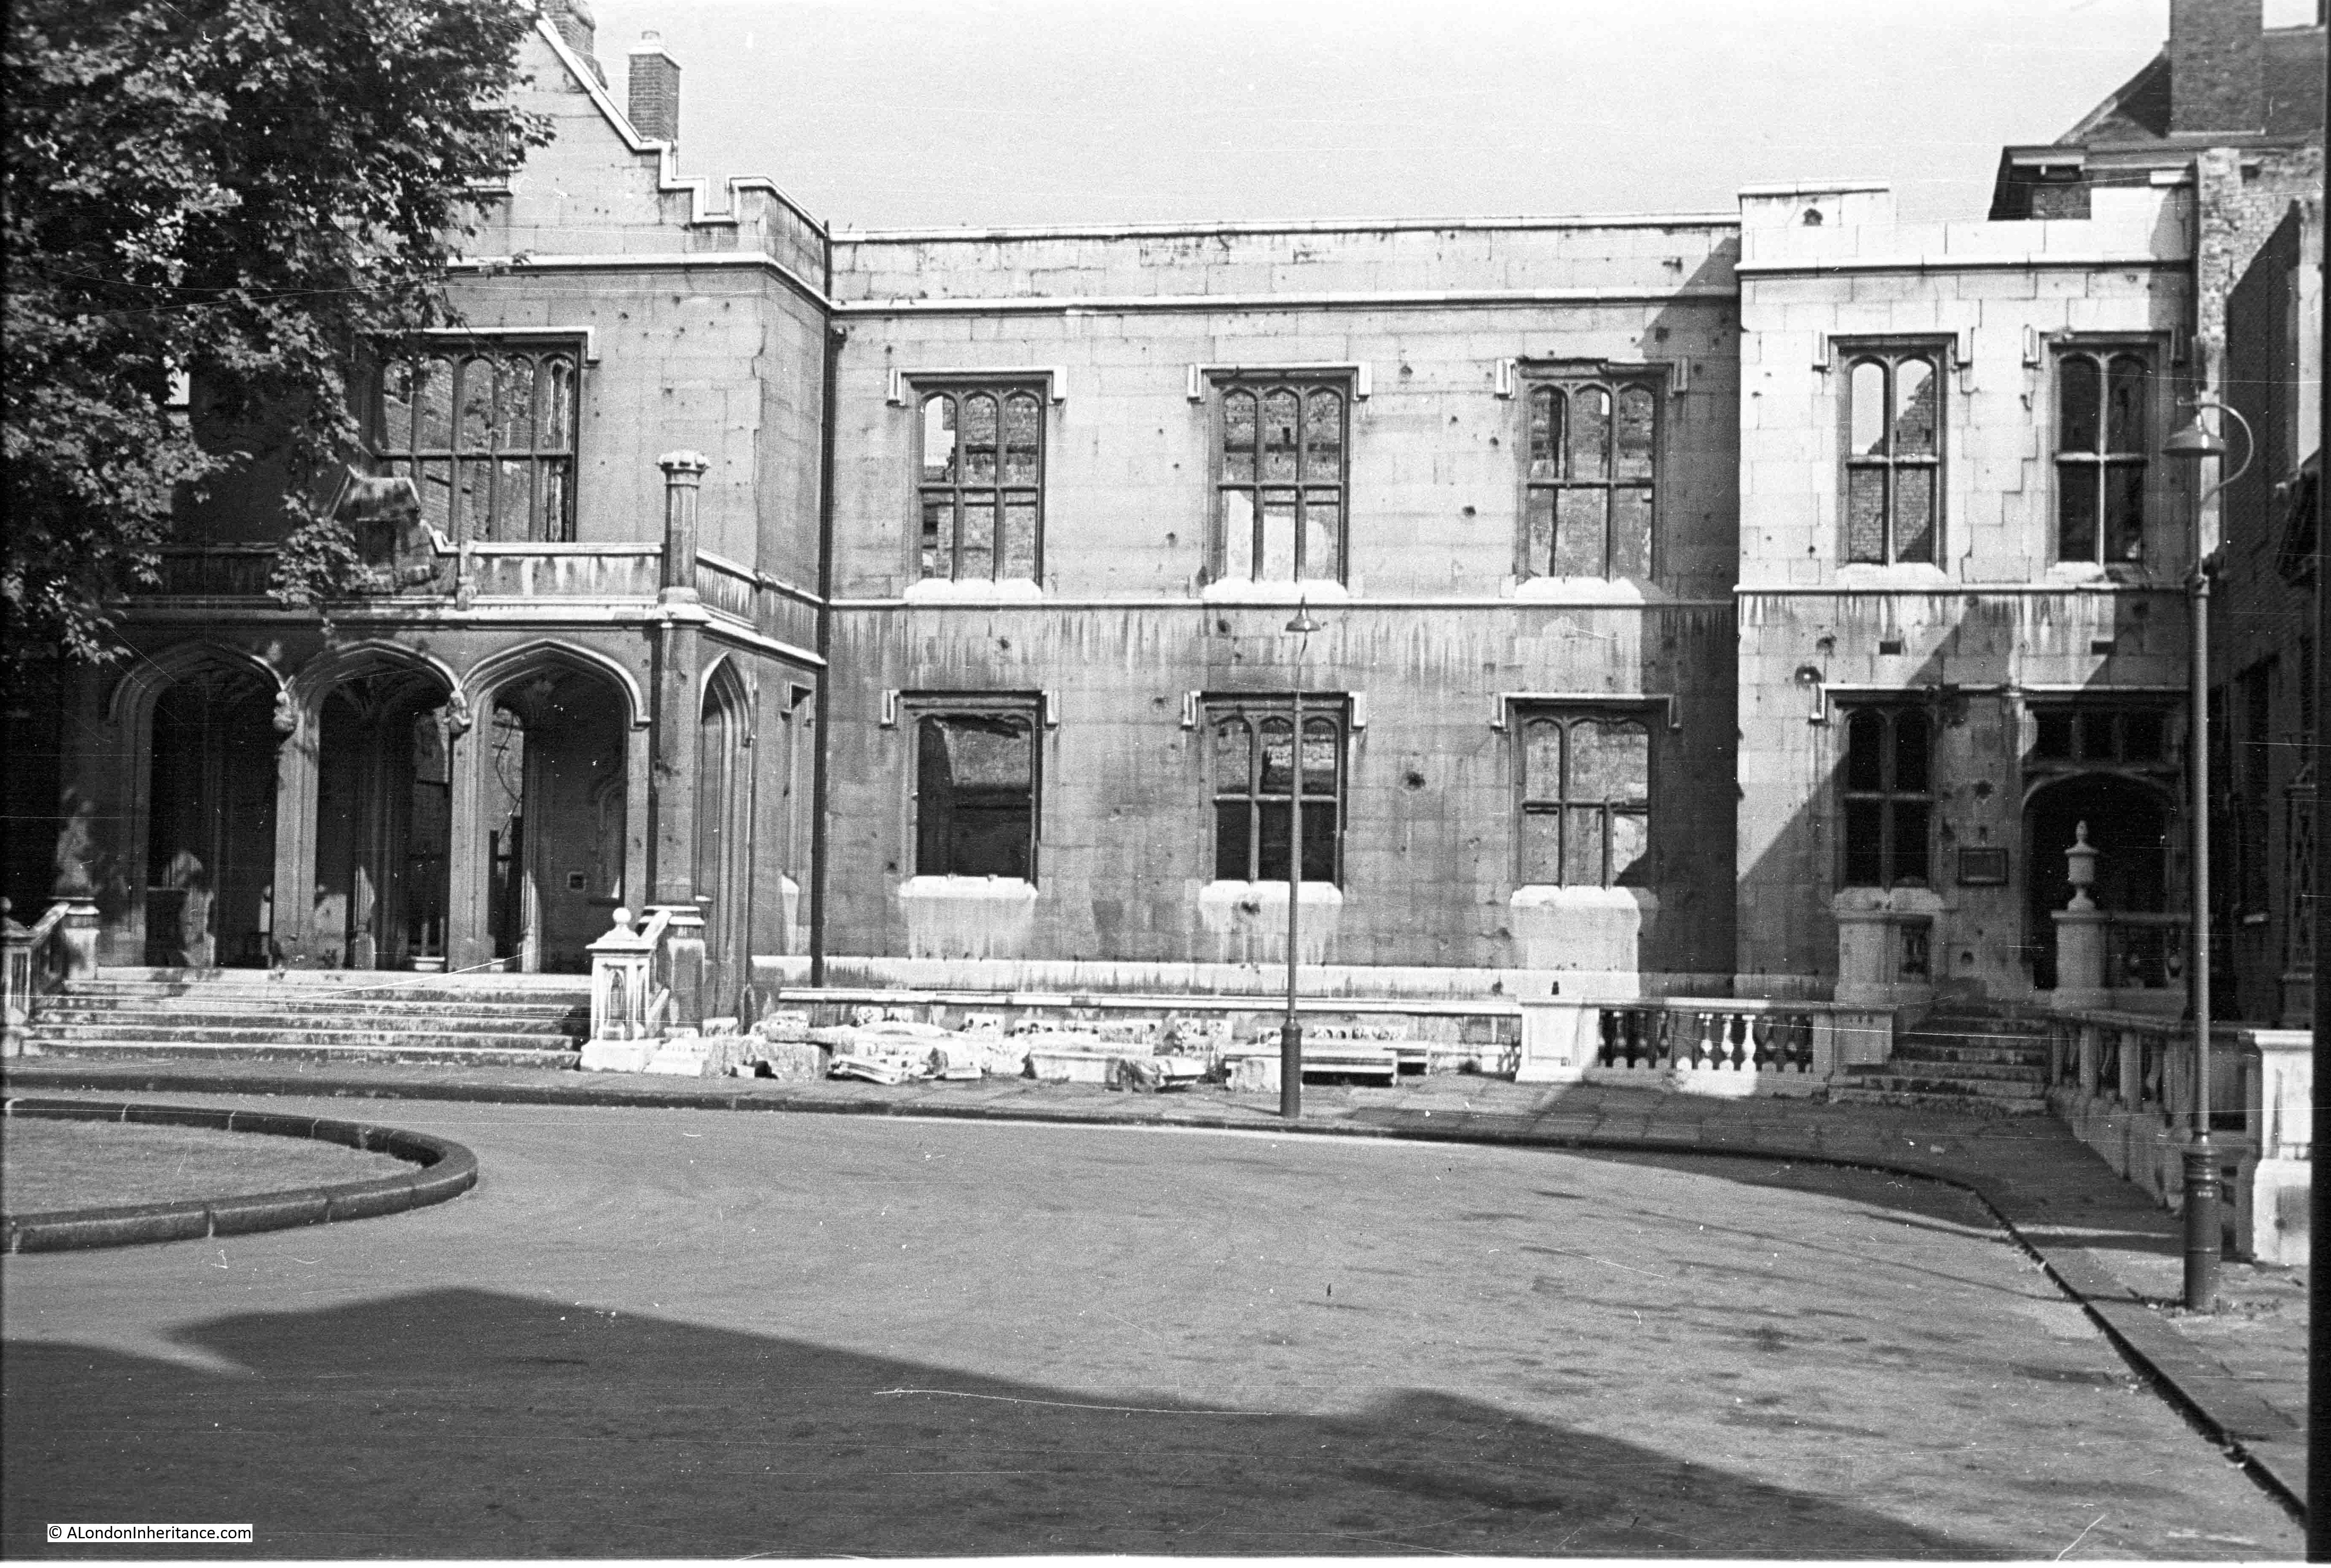
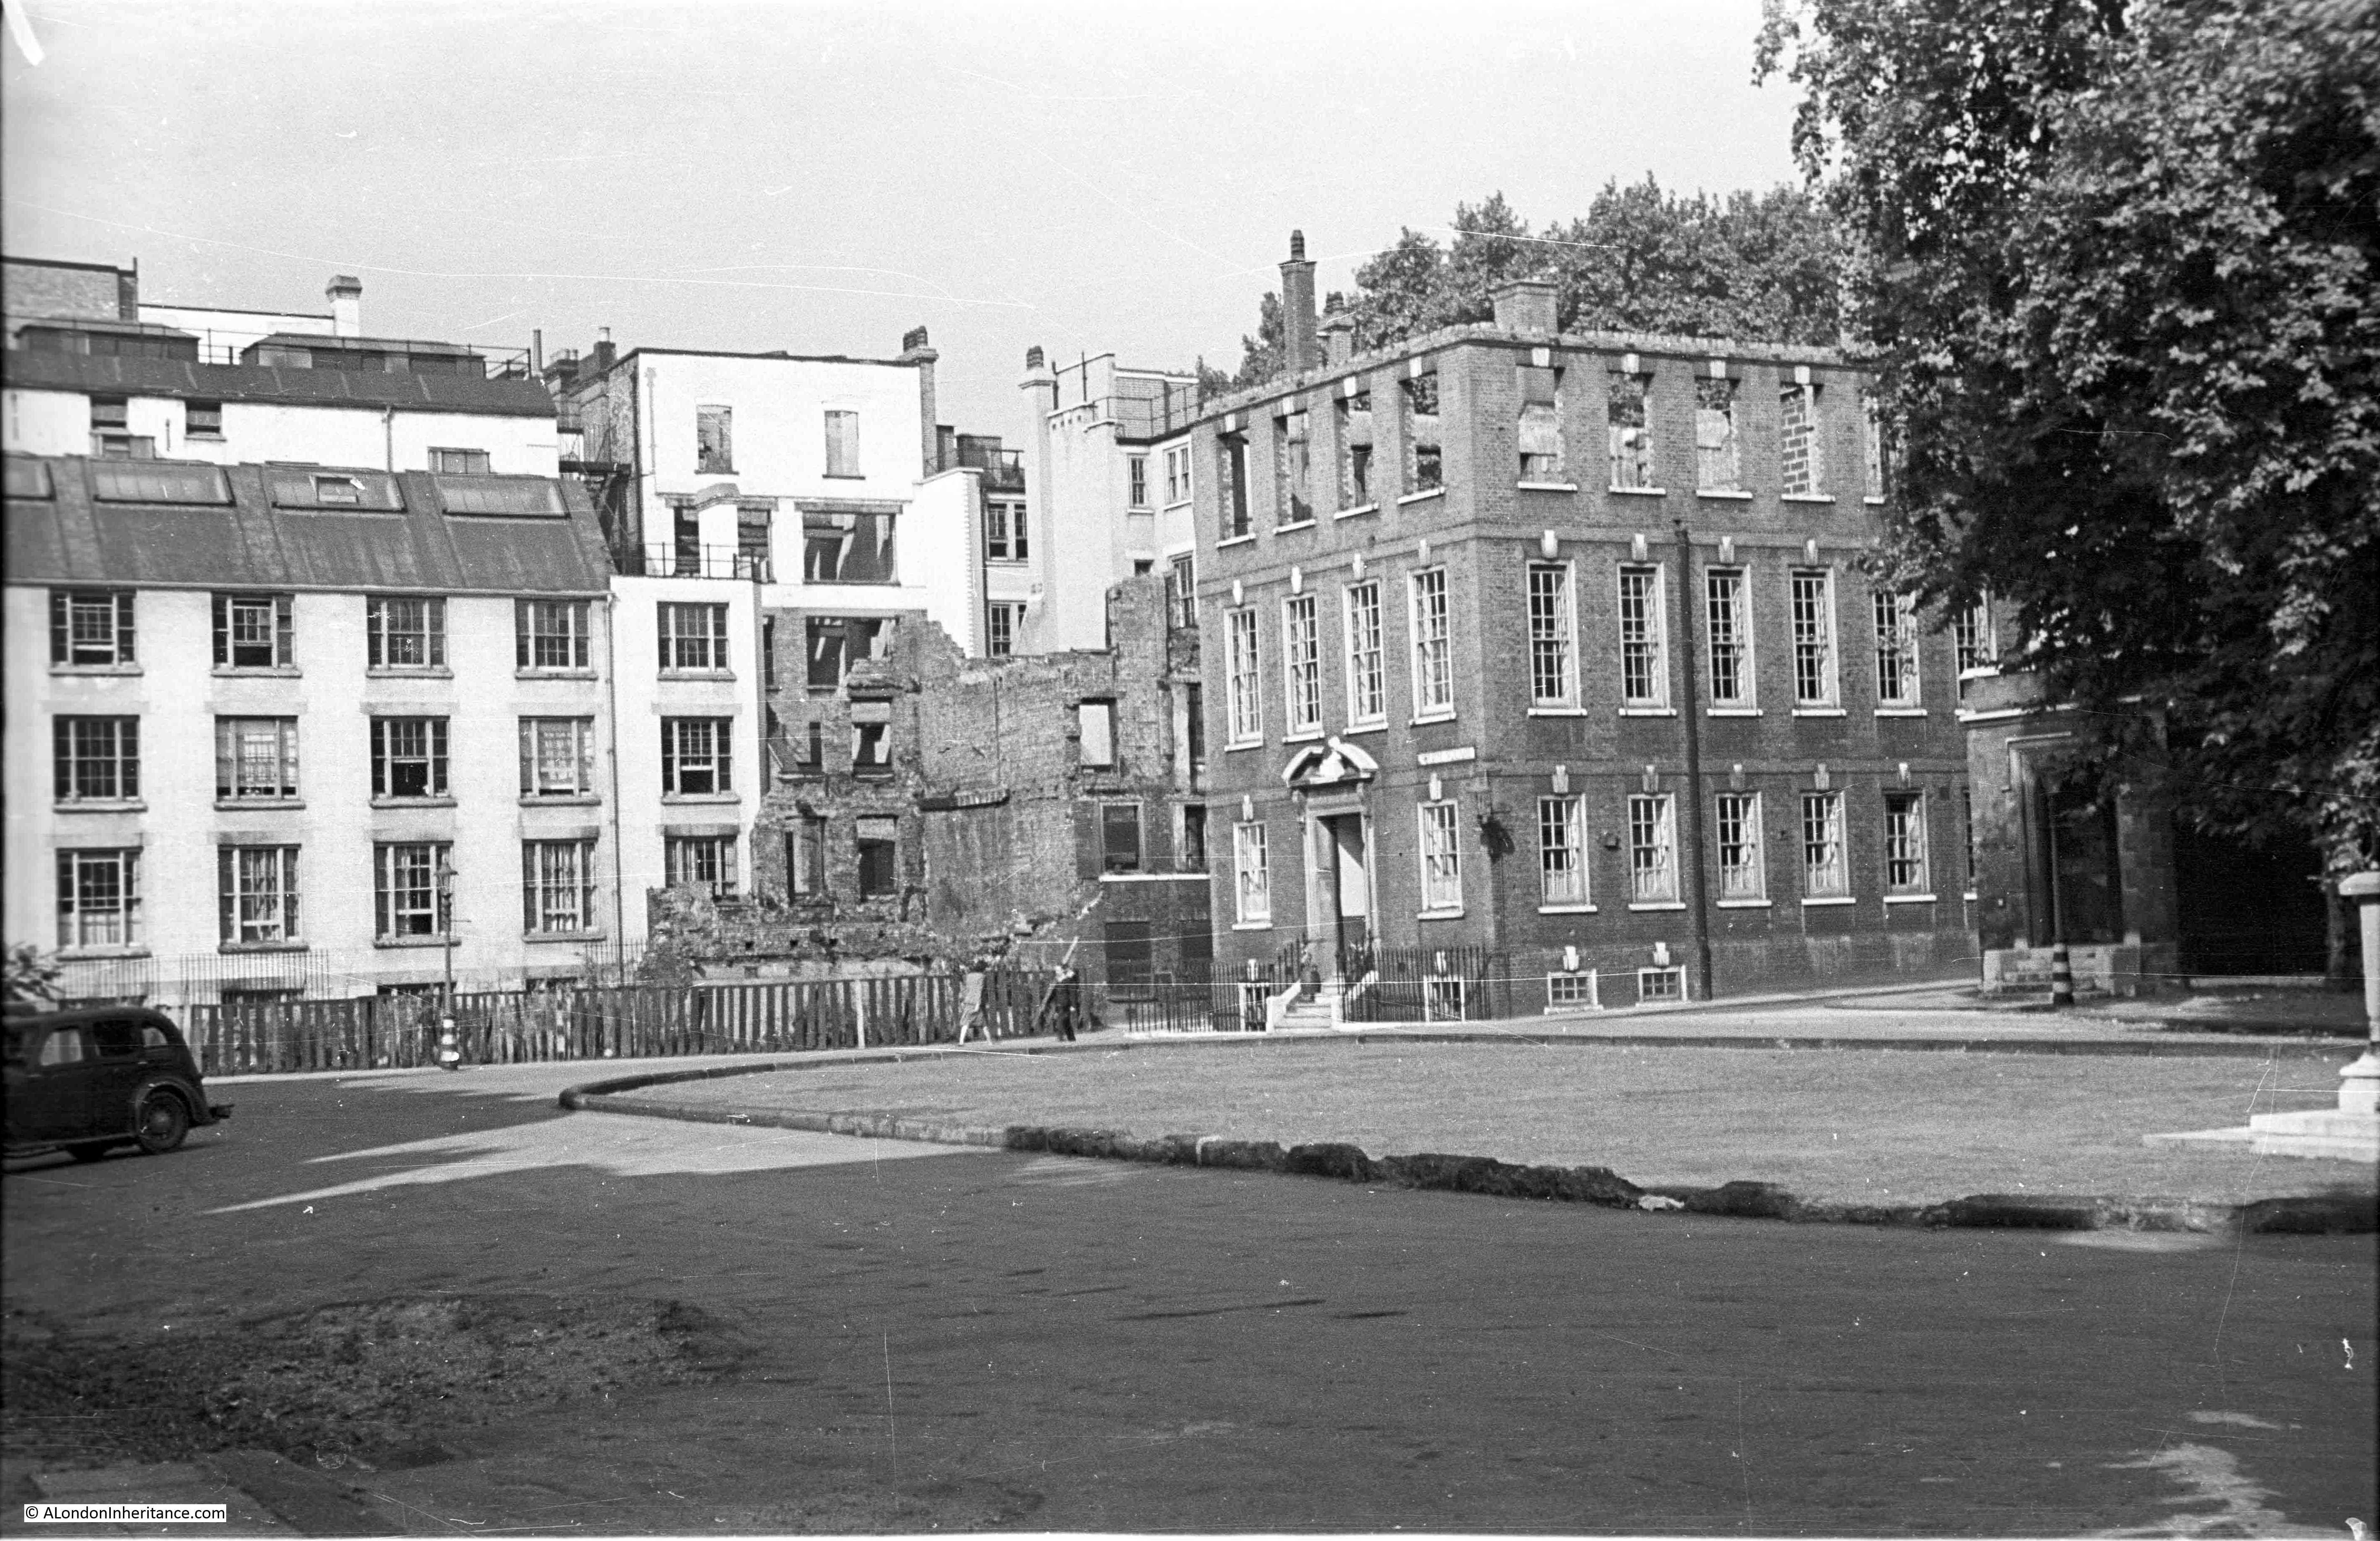
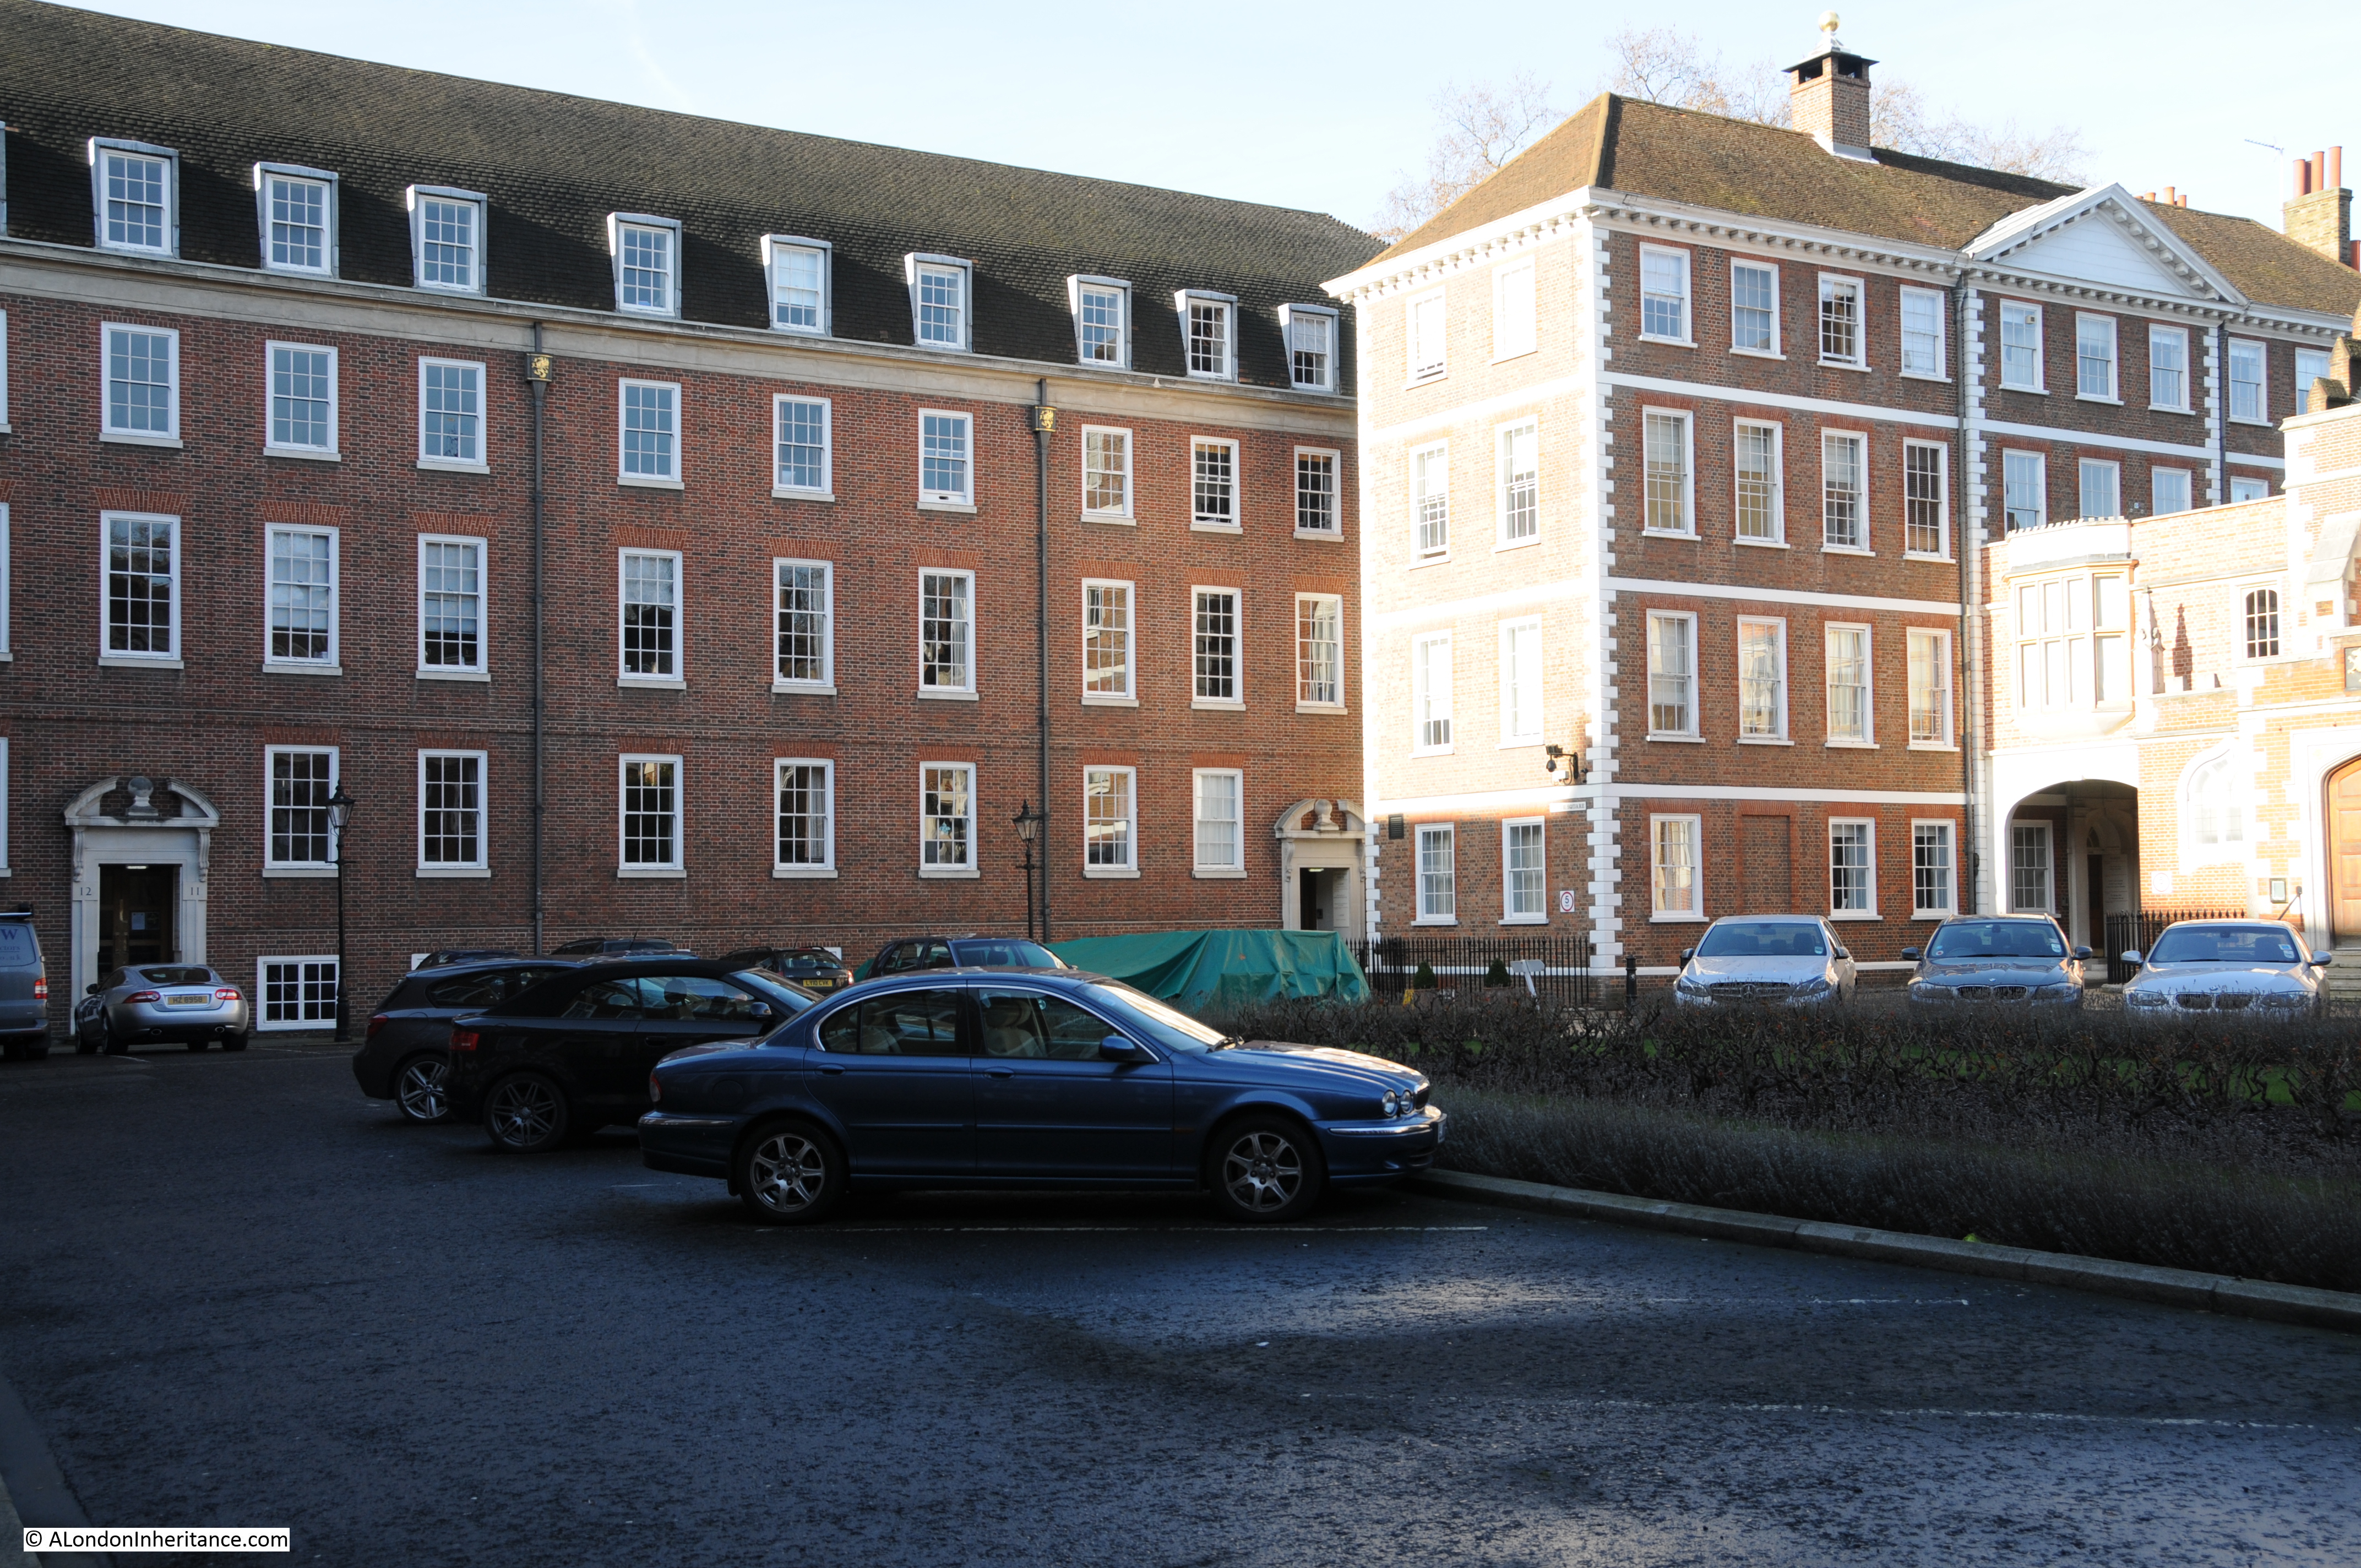
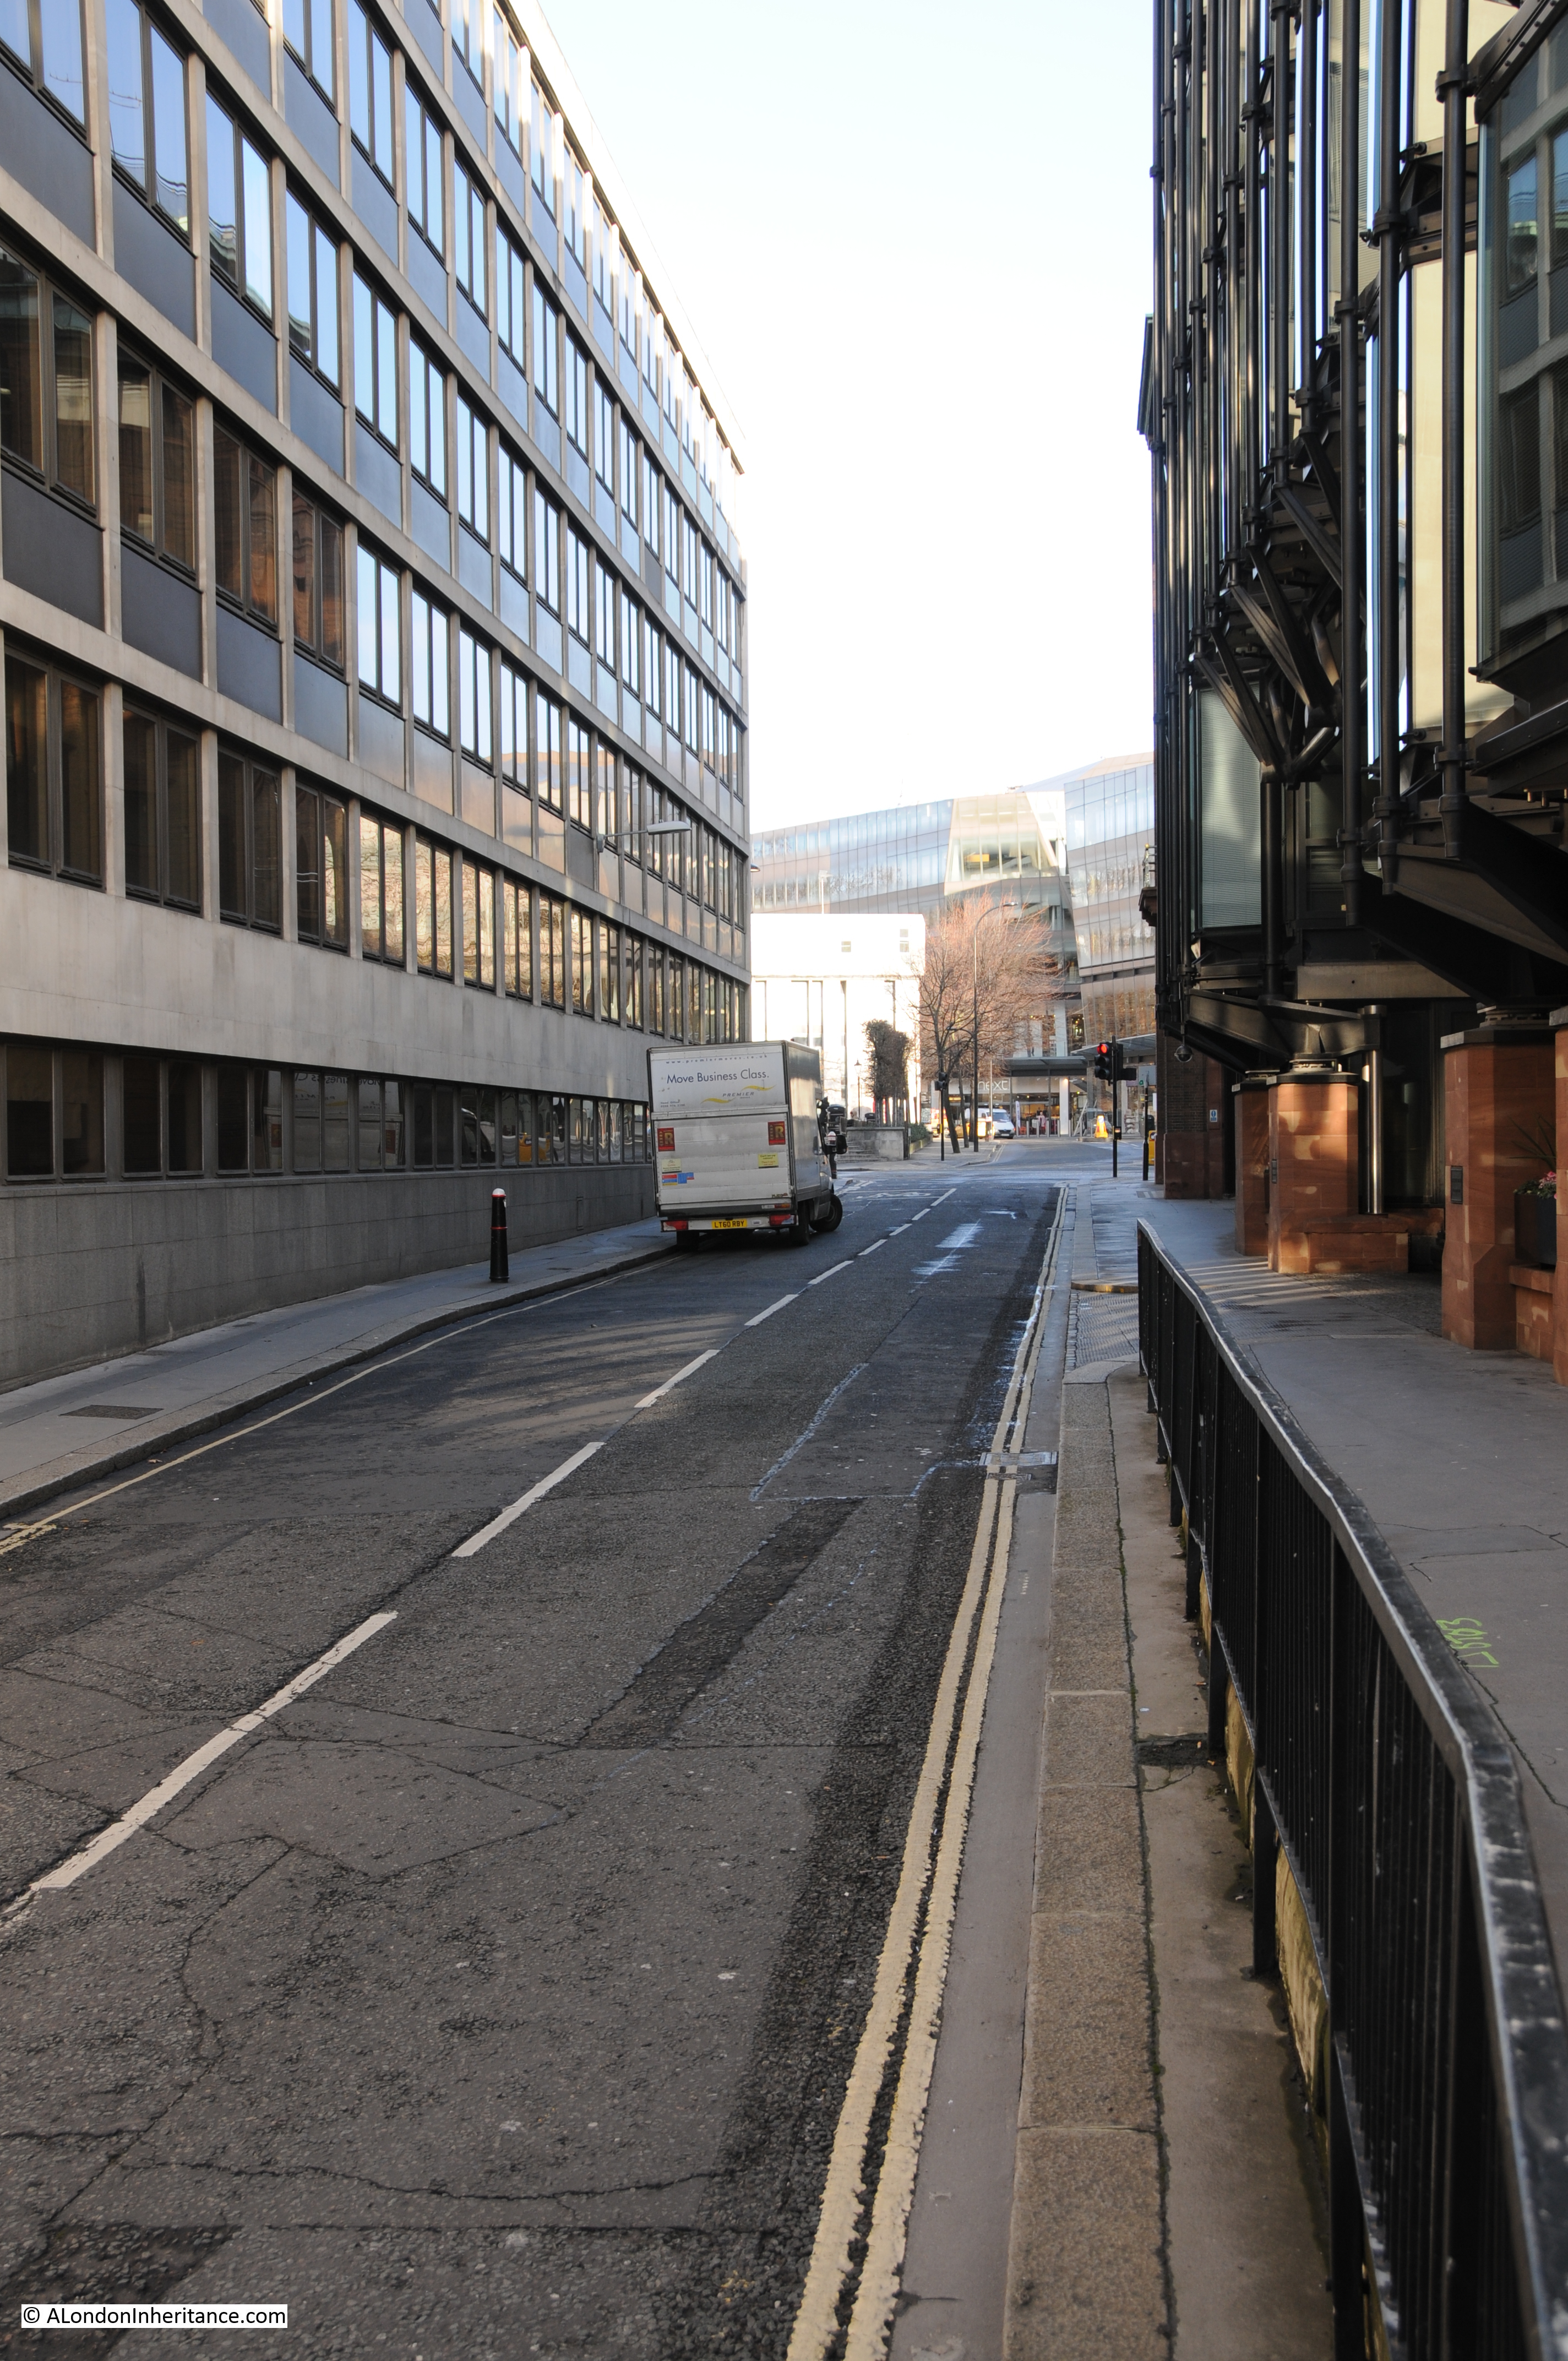
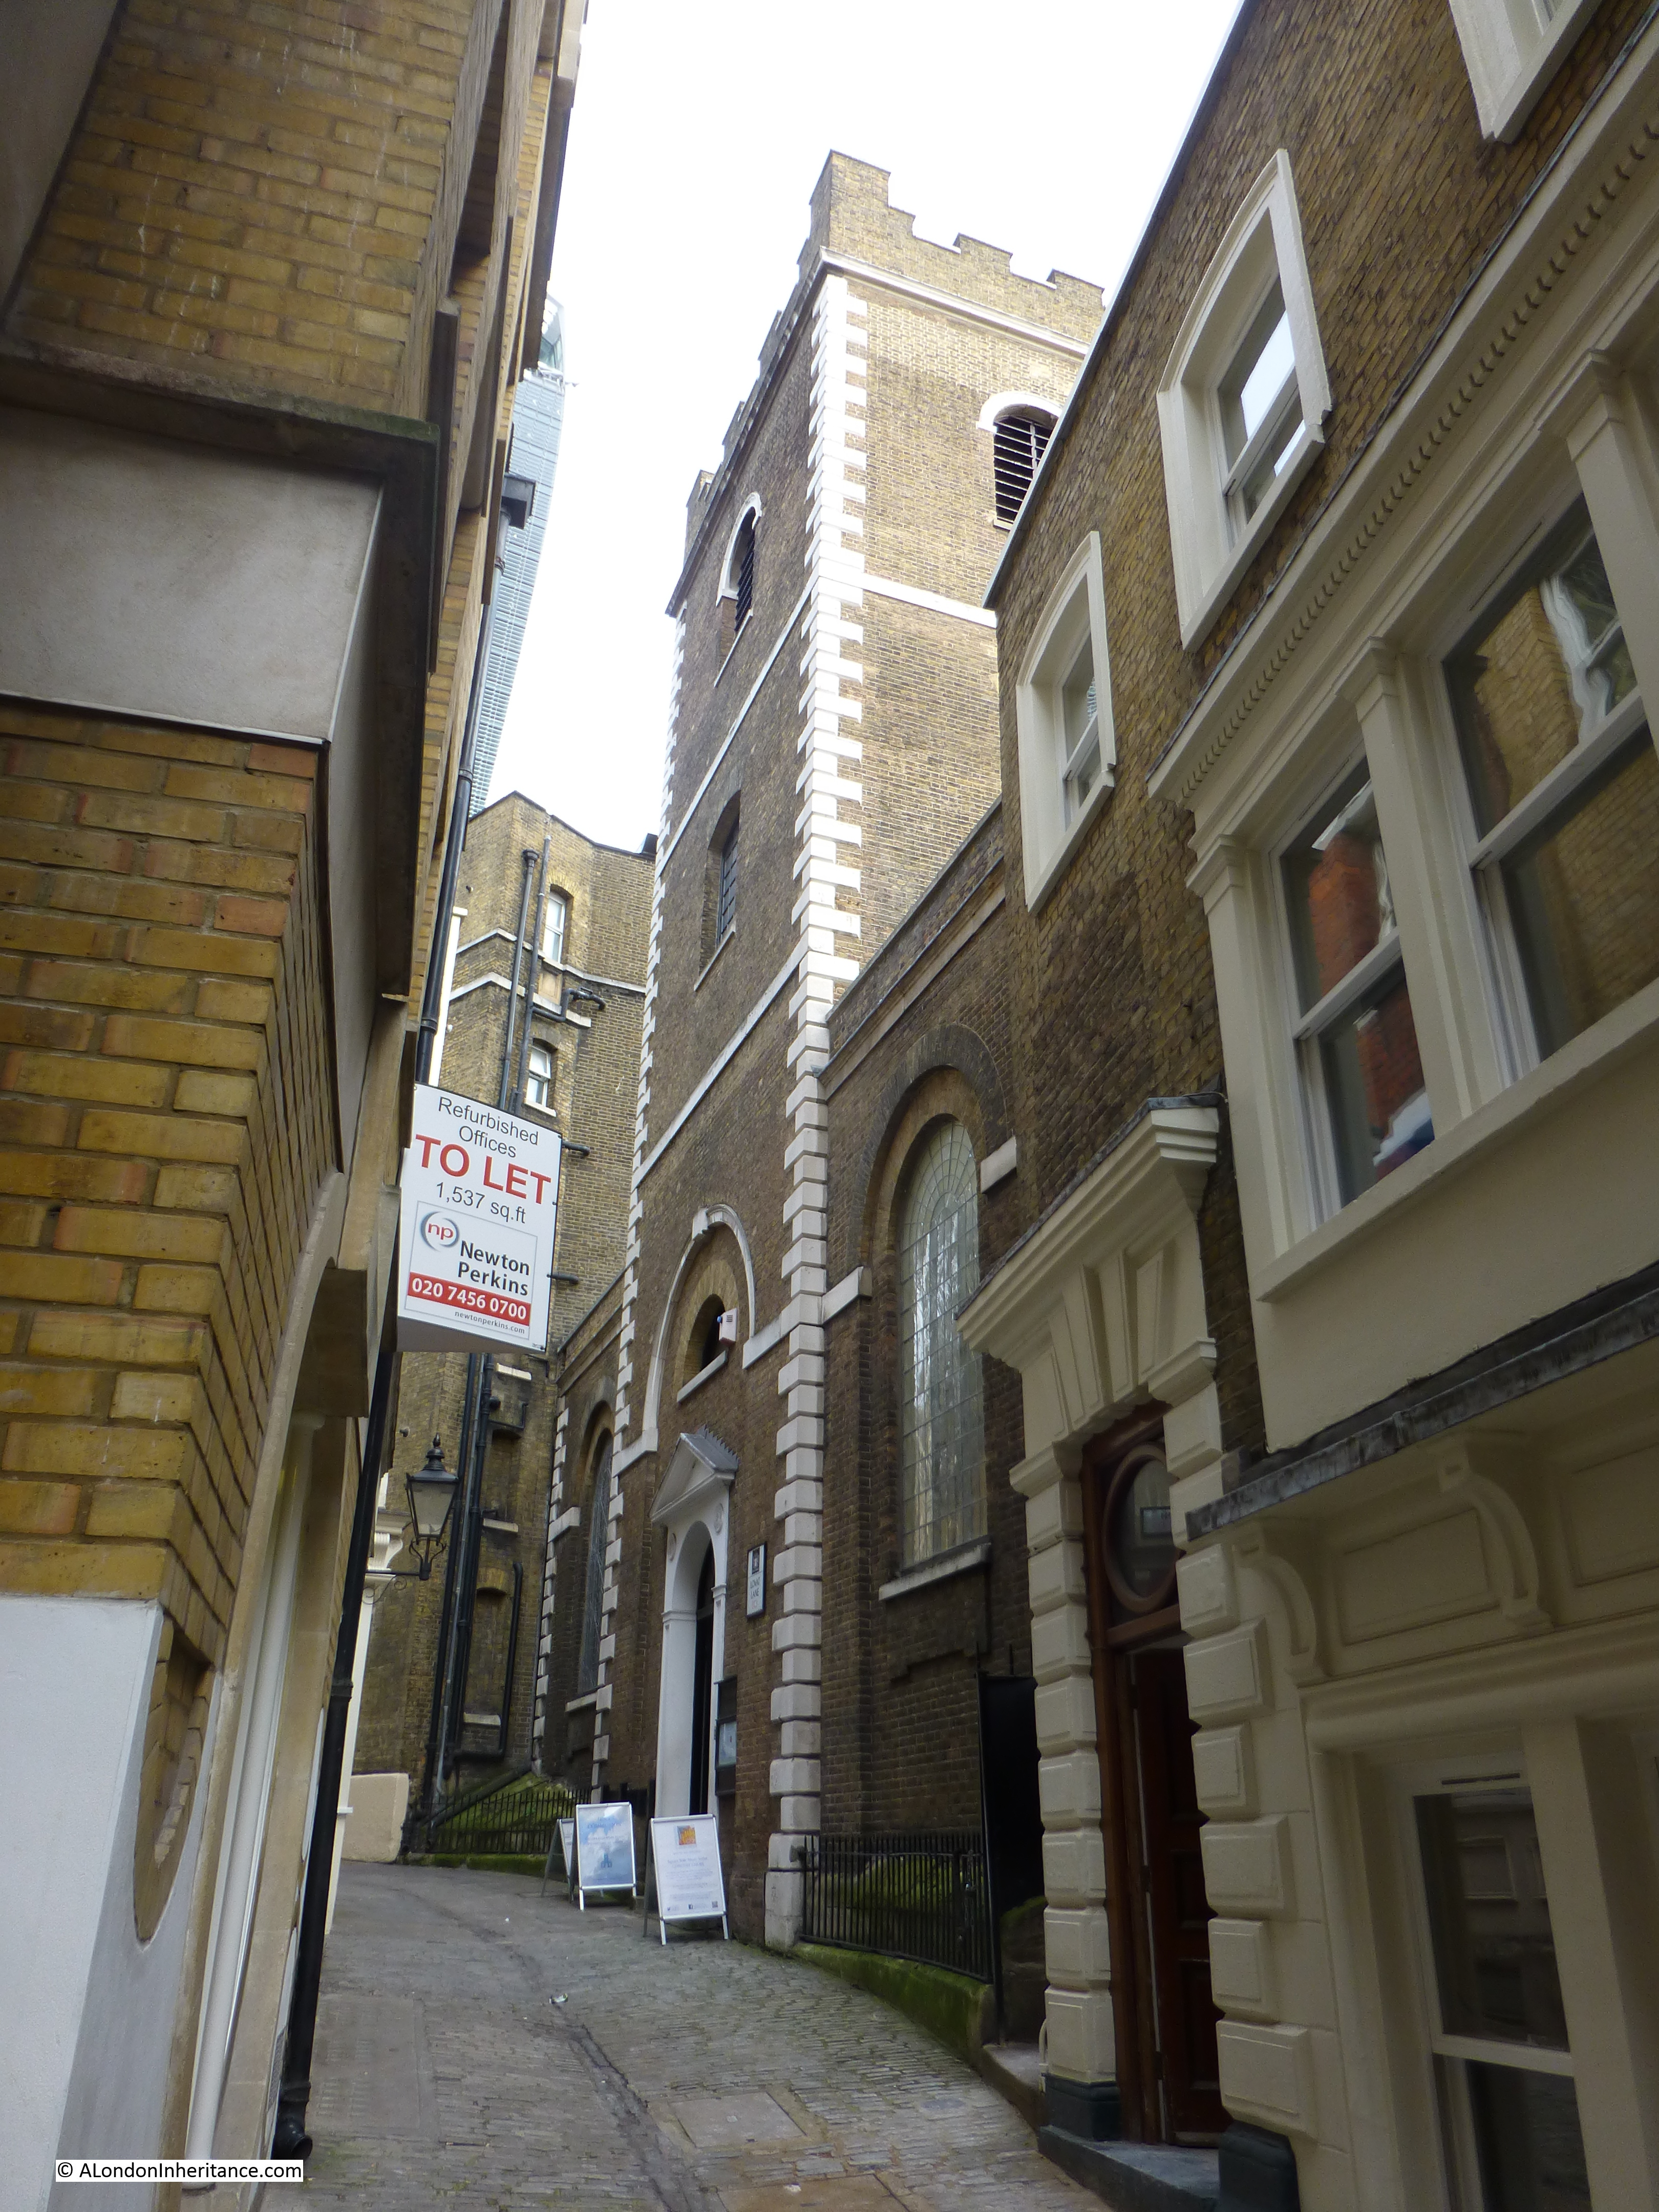
I started at the Holborn end of Bedford Row, with the water pump to my right. Bedford Row is a superb wide street of broadly similar architectural styles (despite the rather aggressively pollarded trees). Bomb damage during the war has been repaired rather than rebuilt.

From this point of view, the boundary runs down the centre of the street and the original Harpur land is to the left.

Bedford Row 7

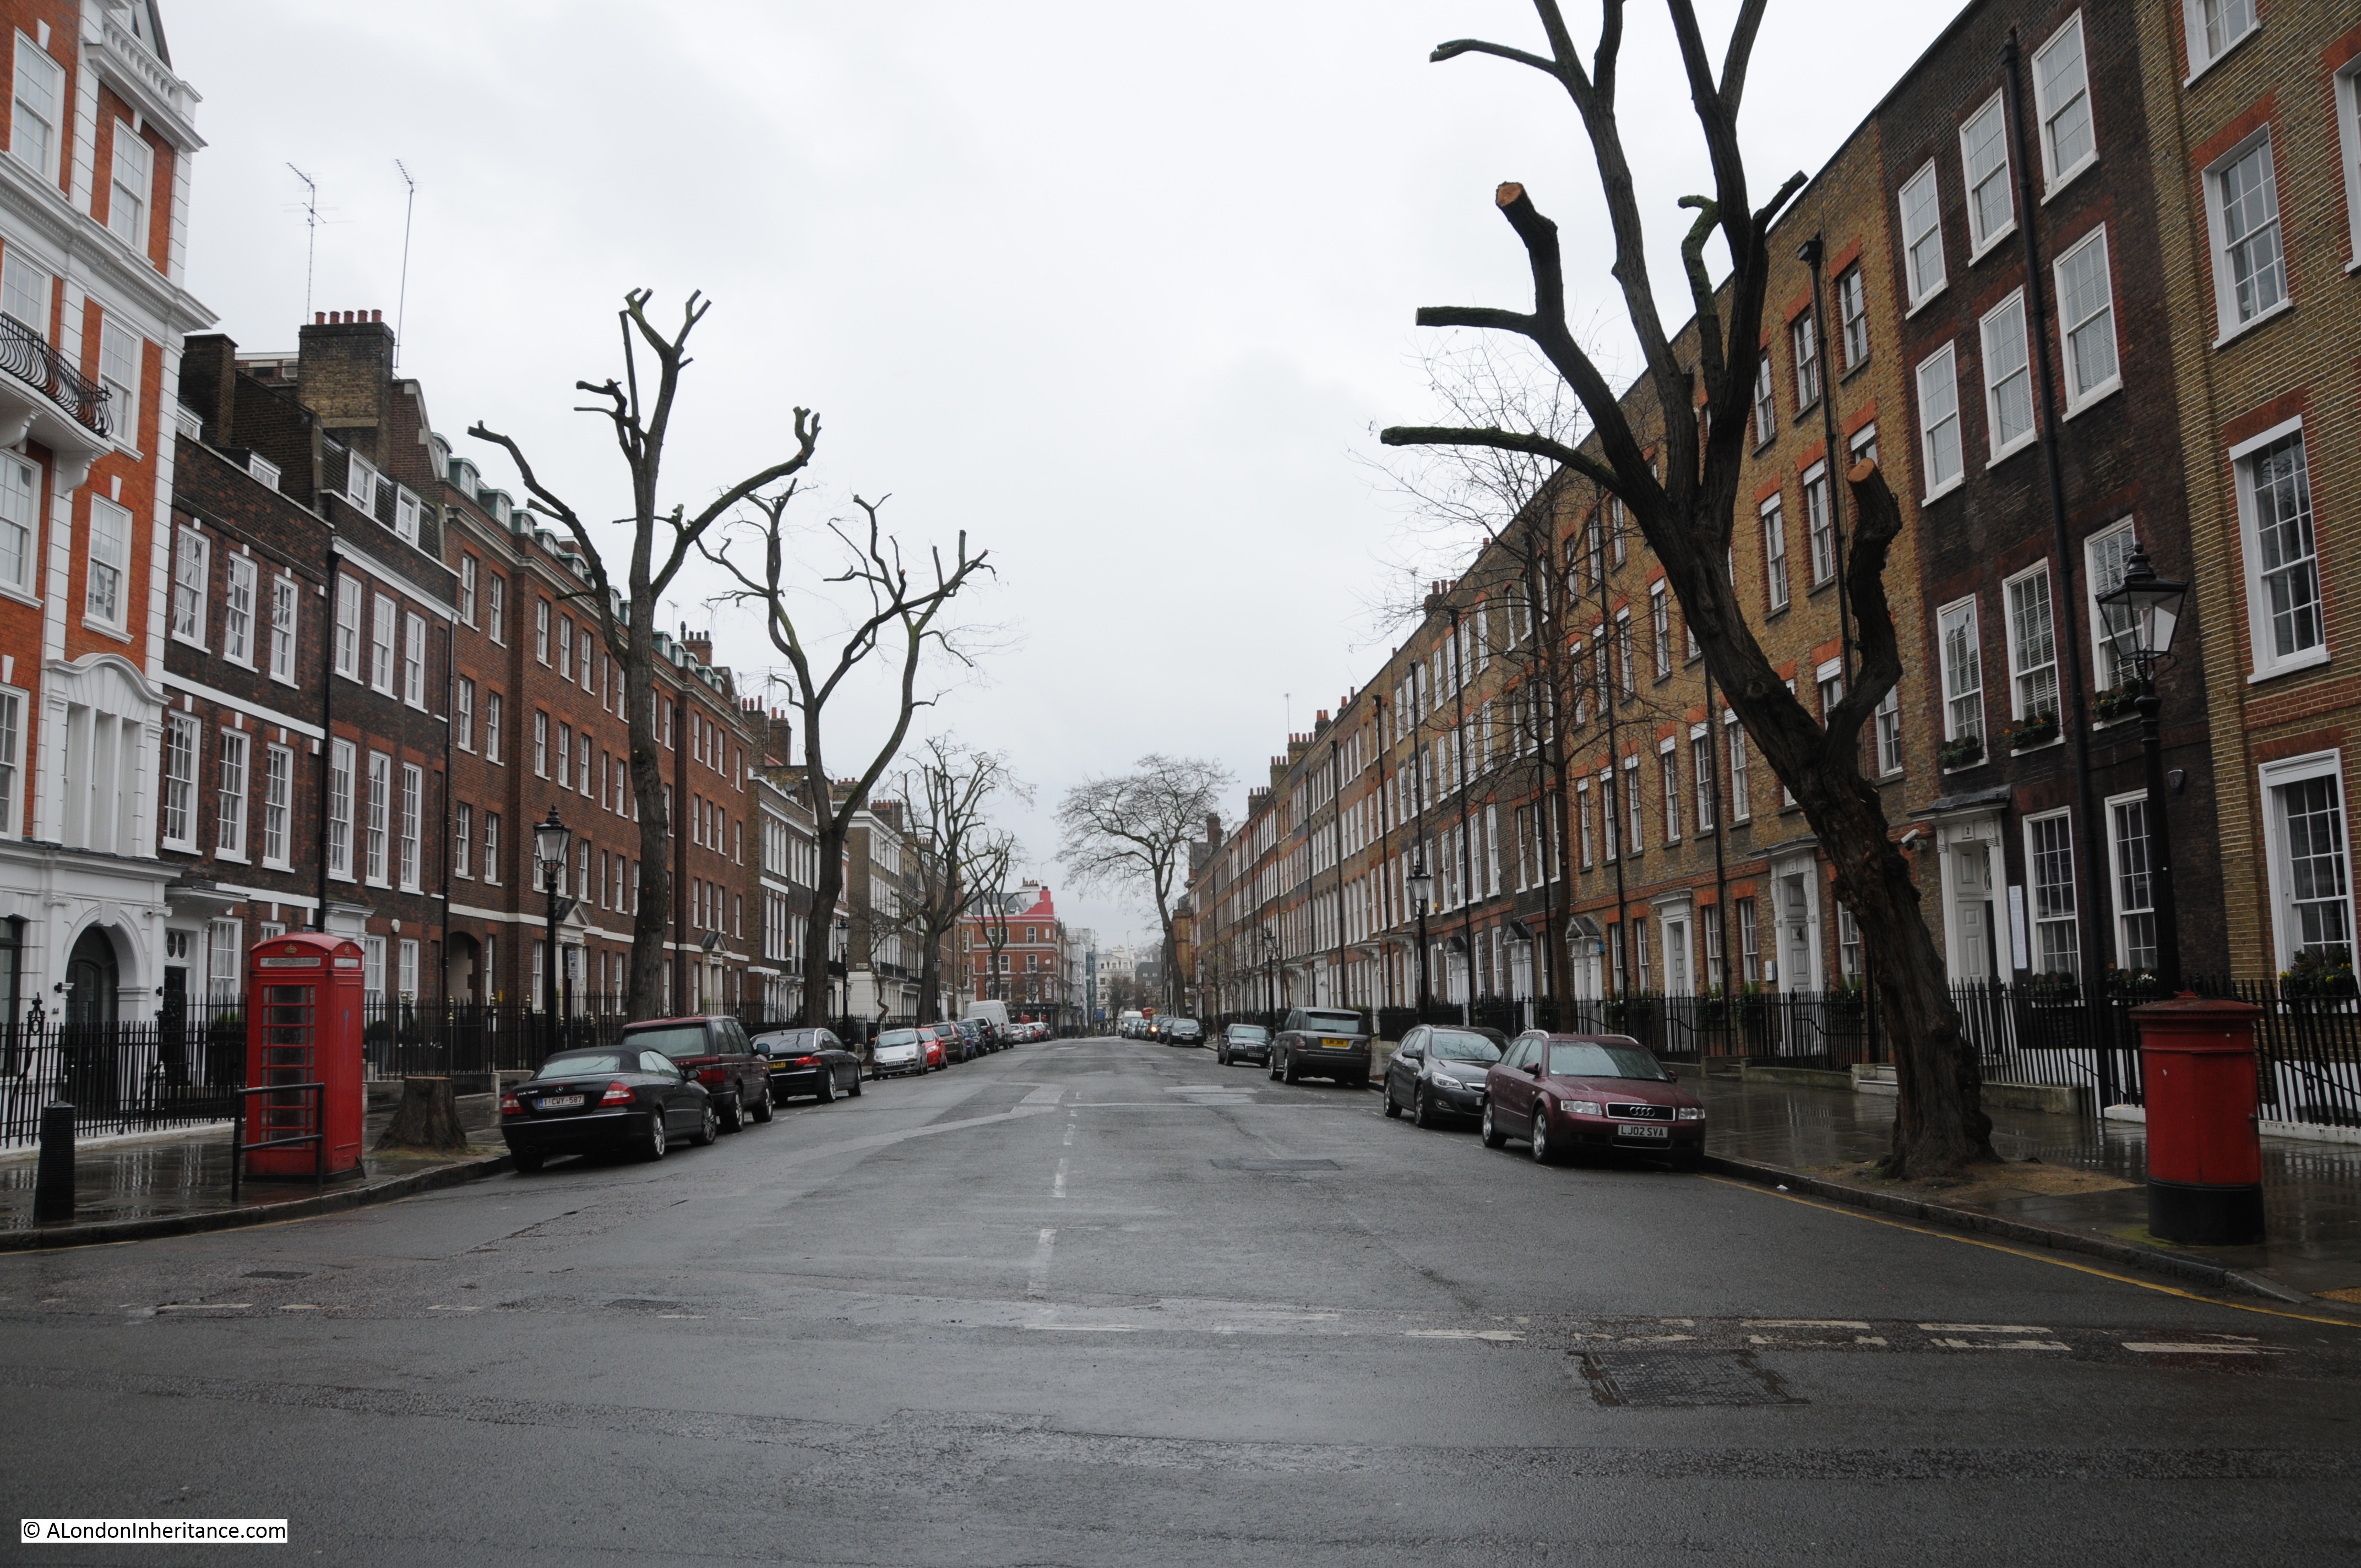
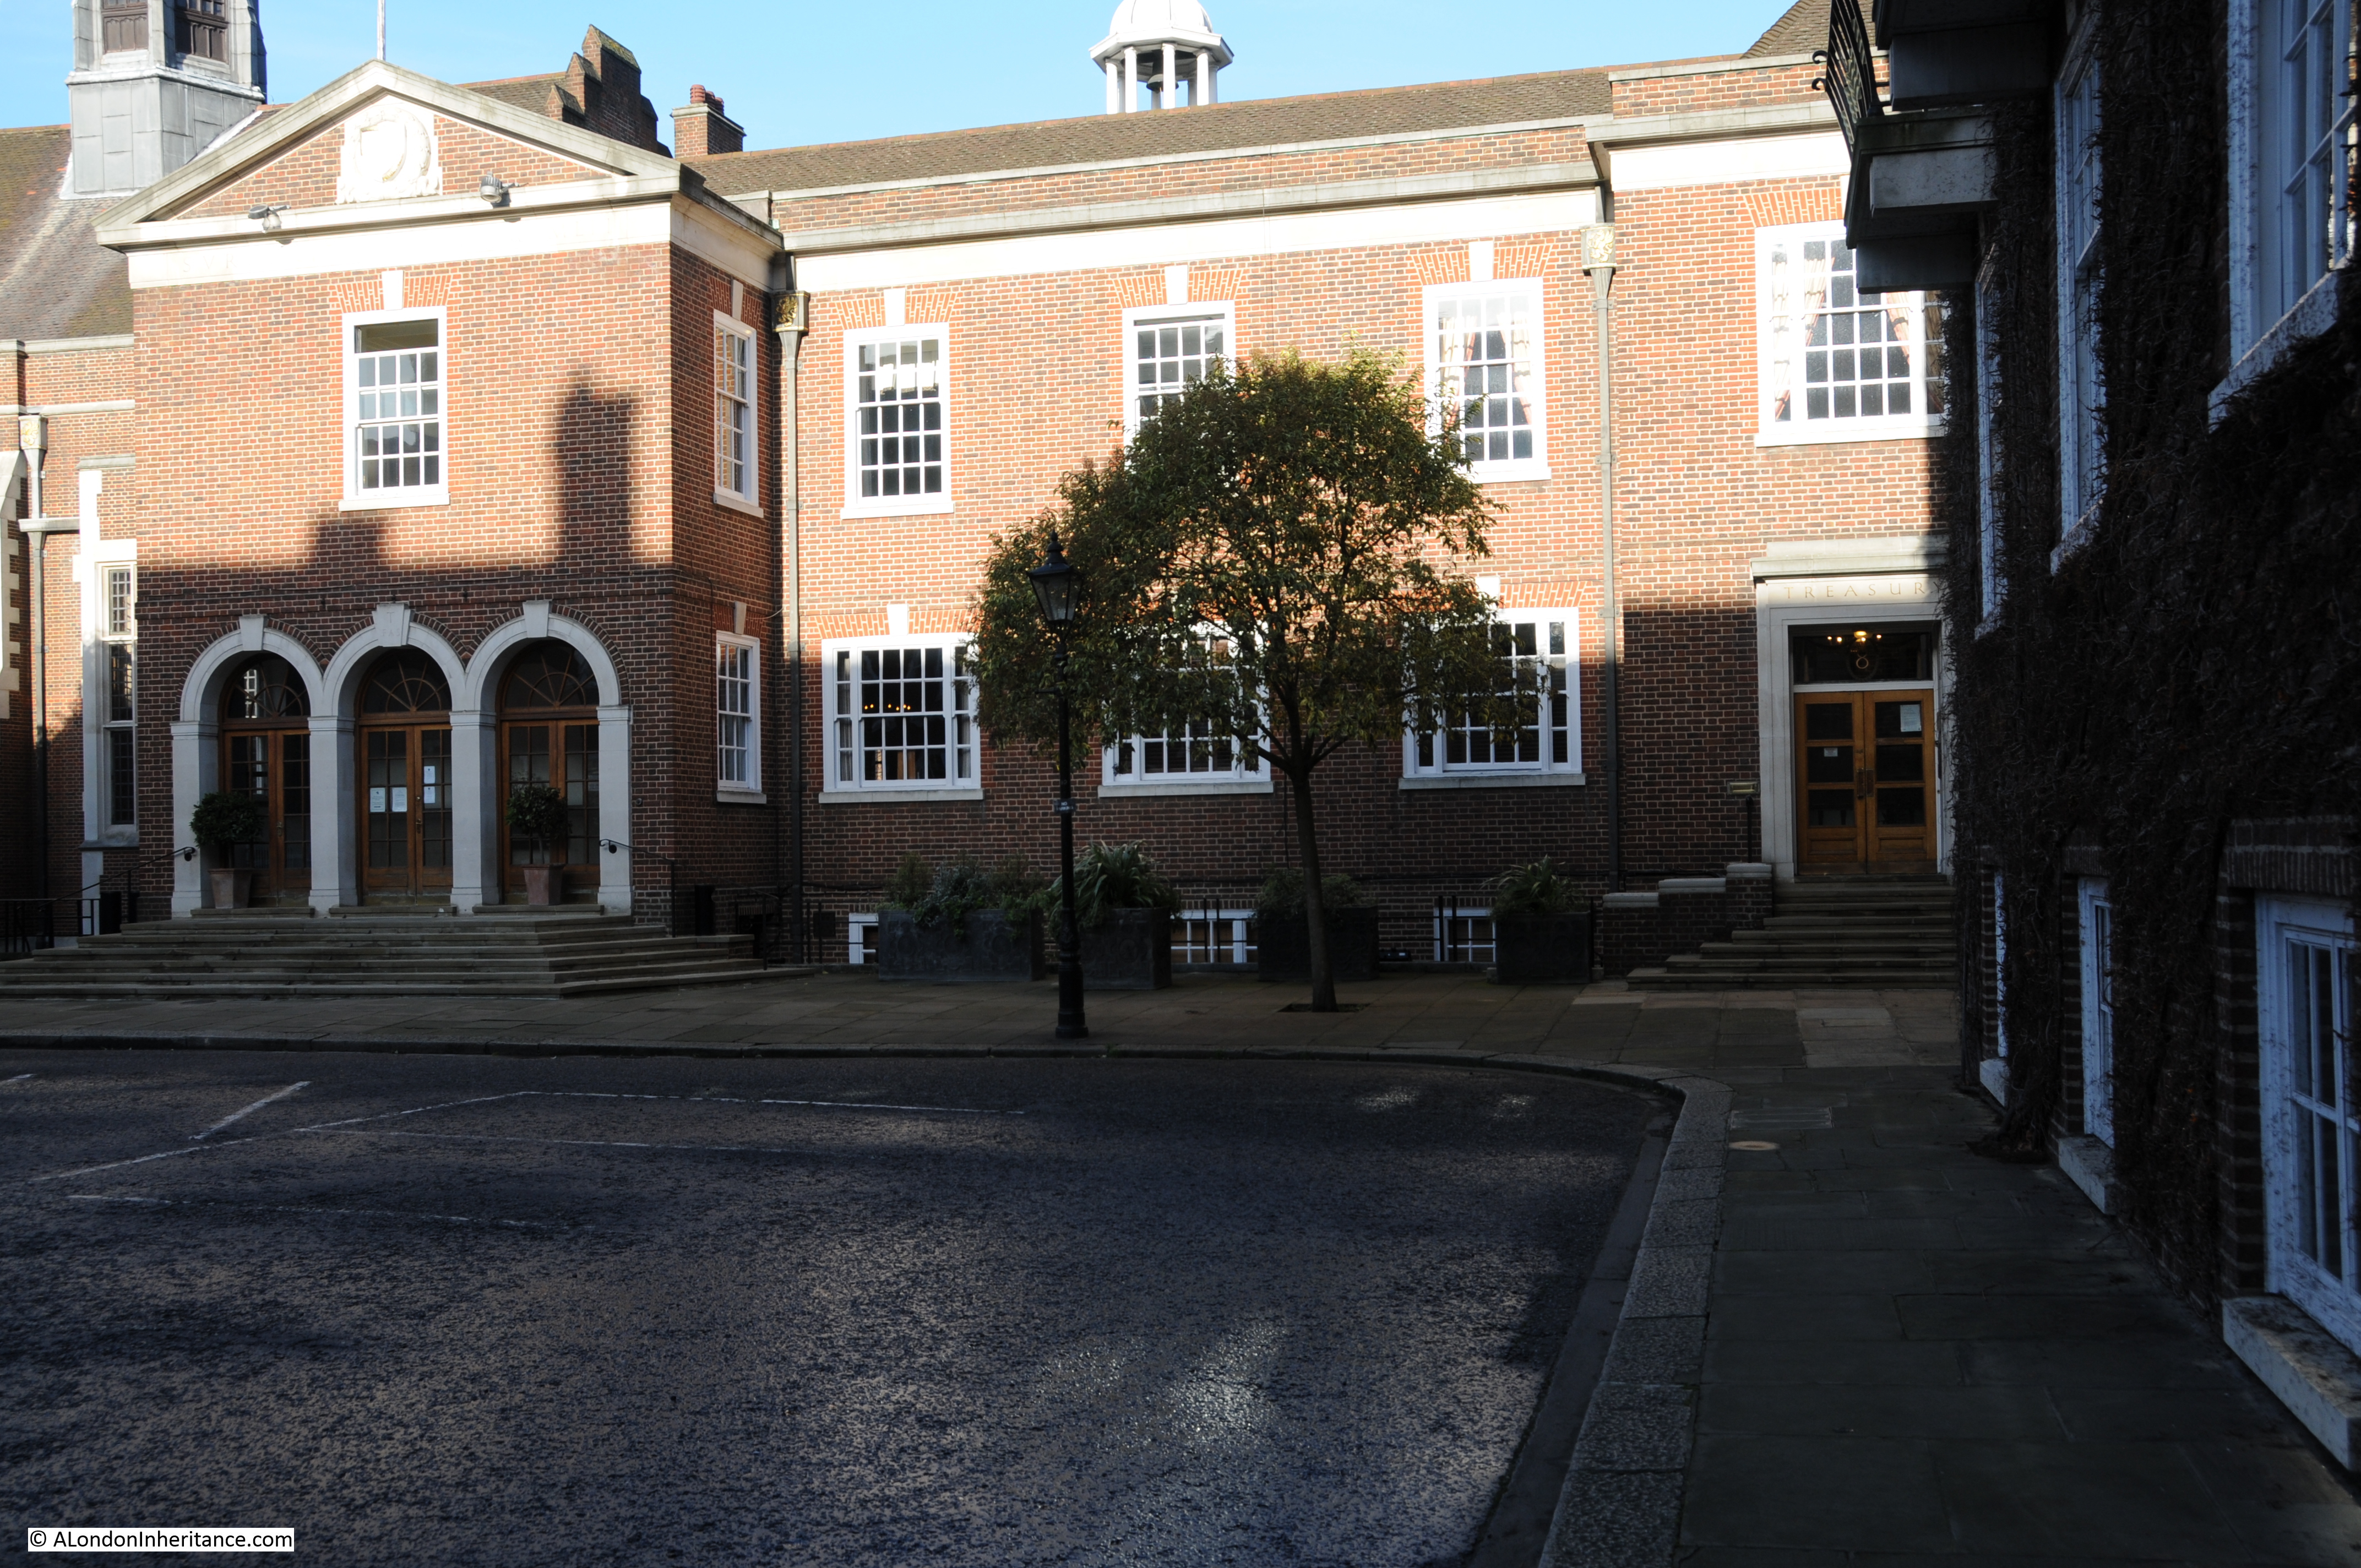
I made two visits to the area, one on a cloudy, wet day, the other with clear blue sky and a February sun which really highlighted the brickwork:

Bedford Row 3

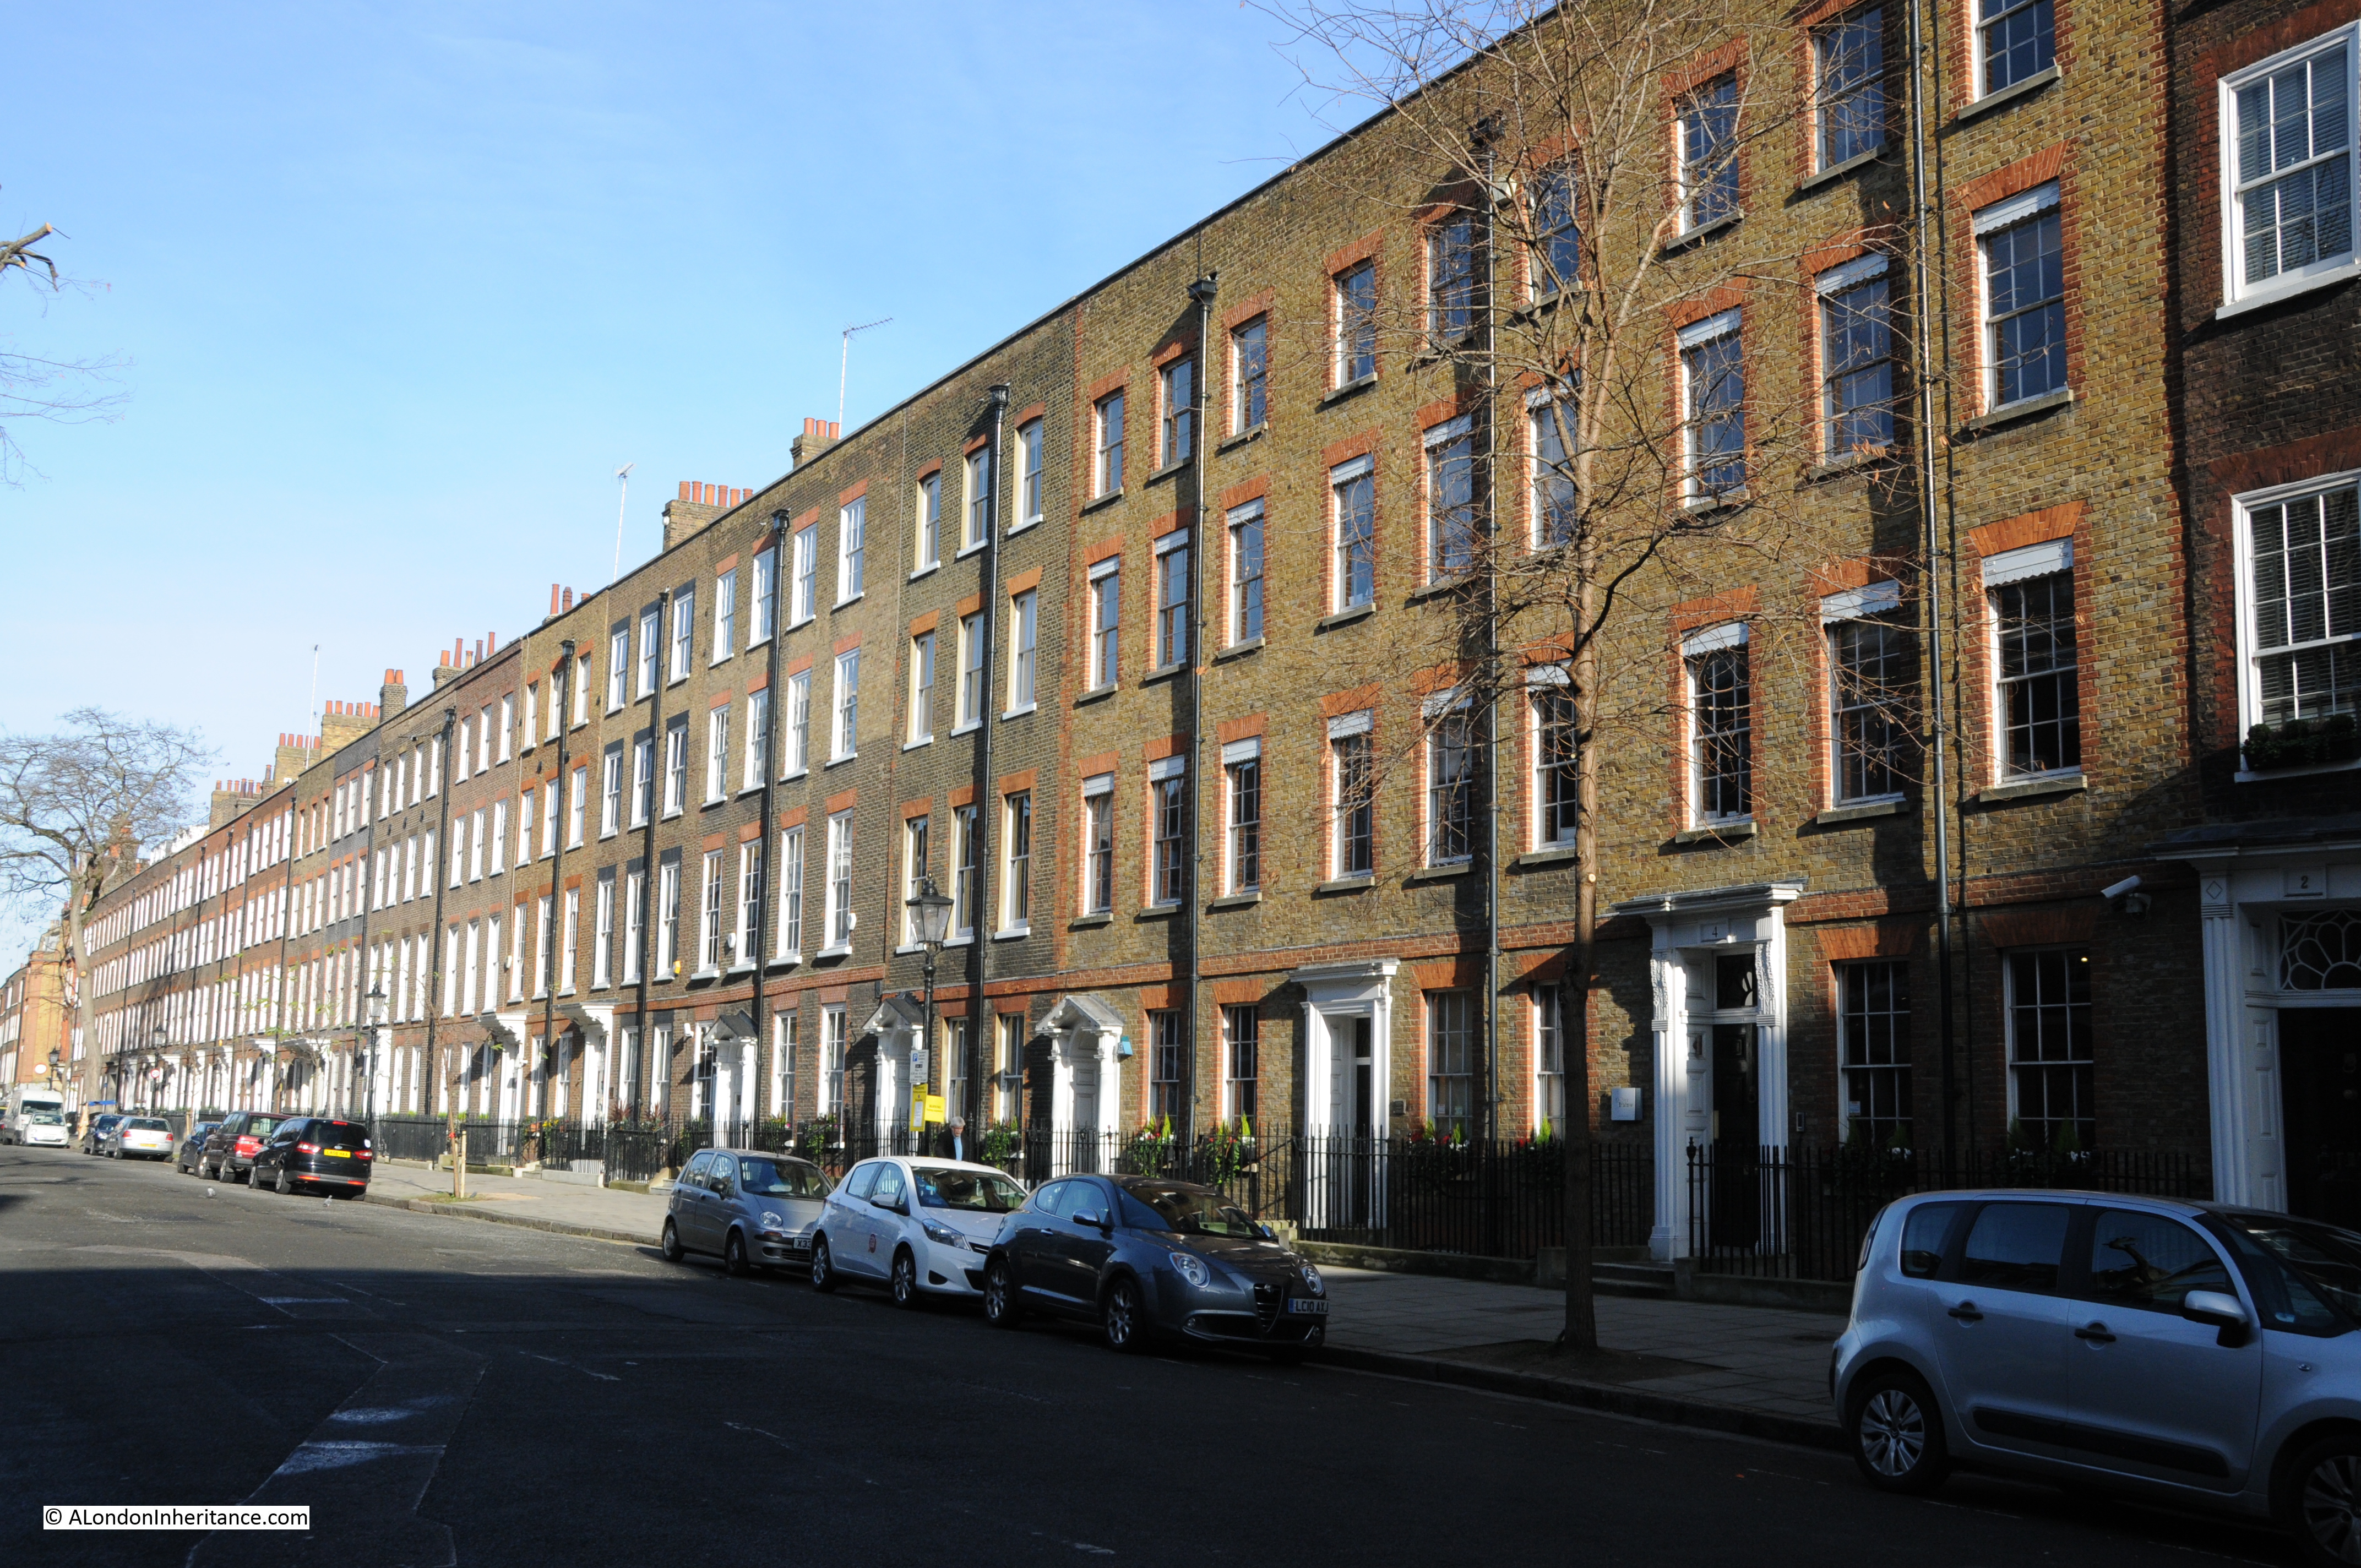
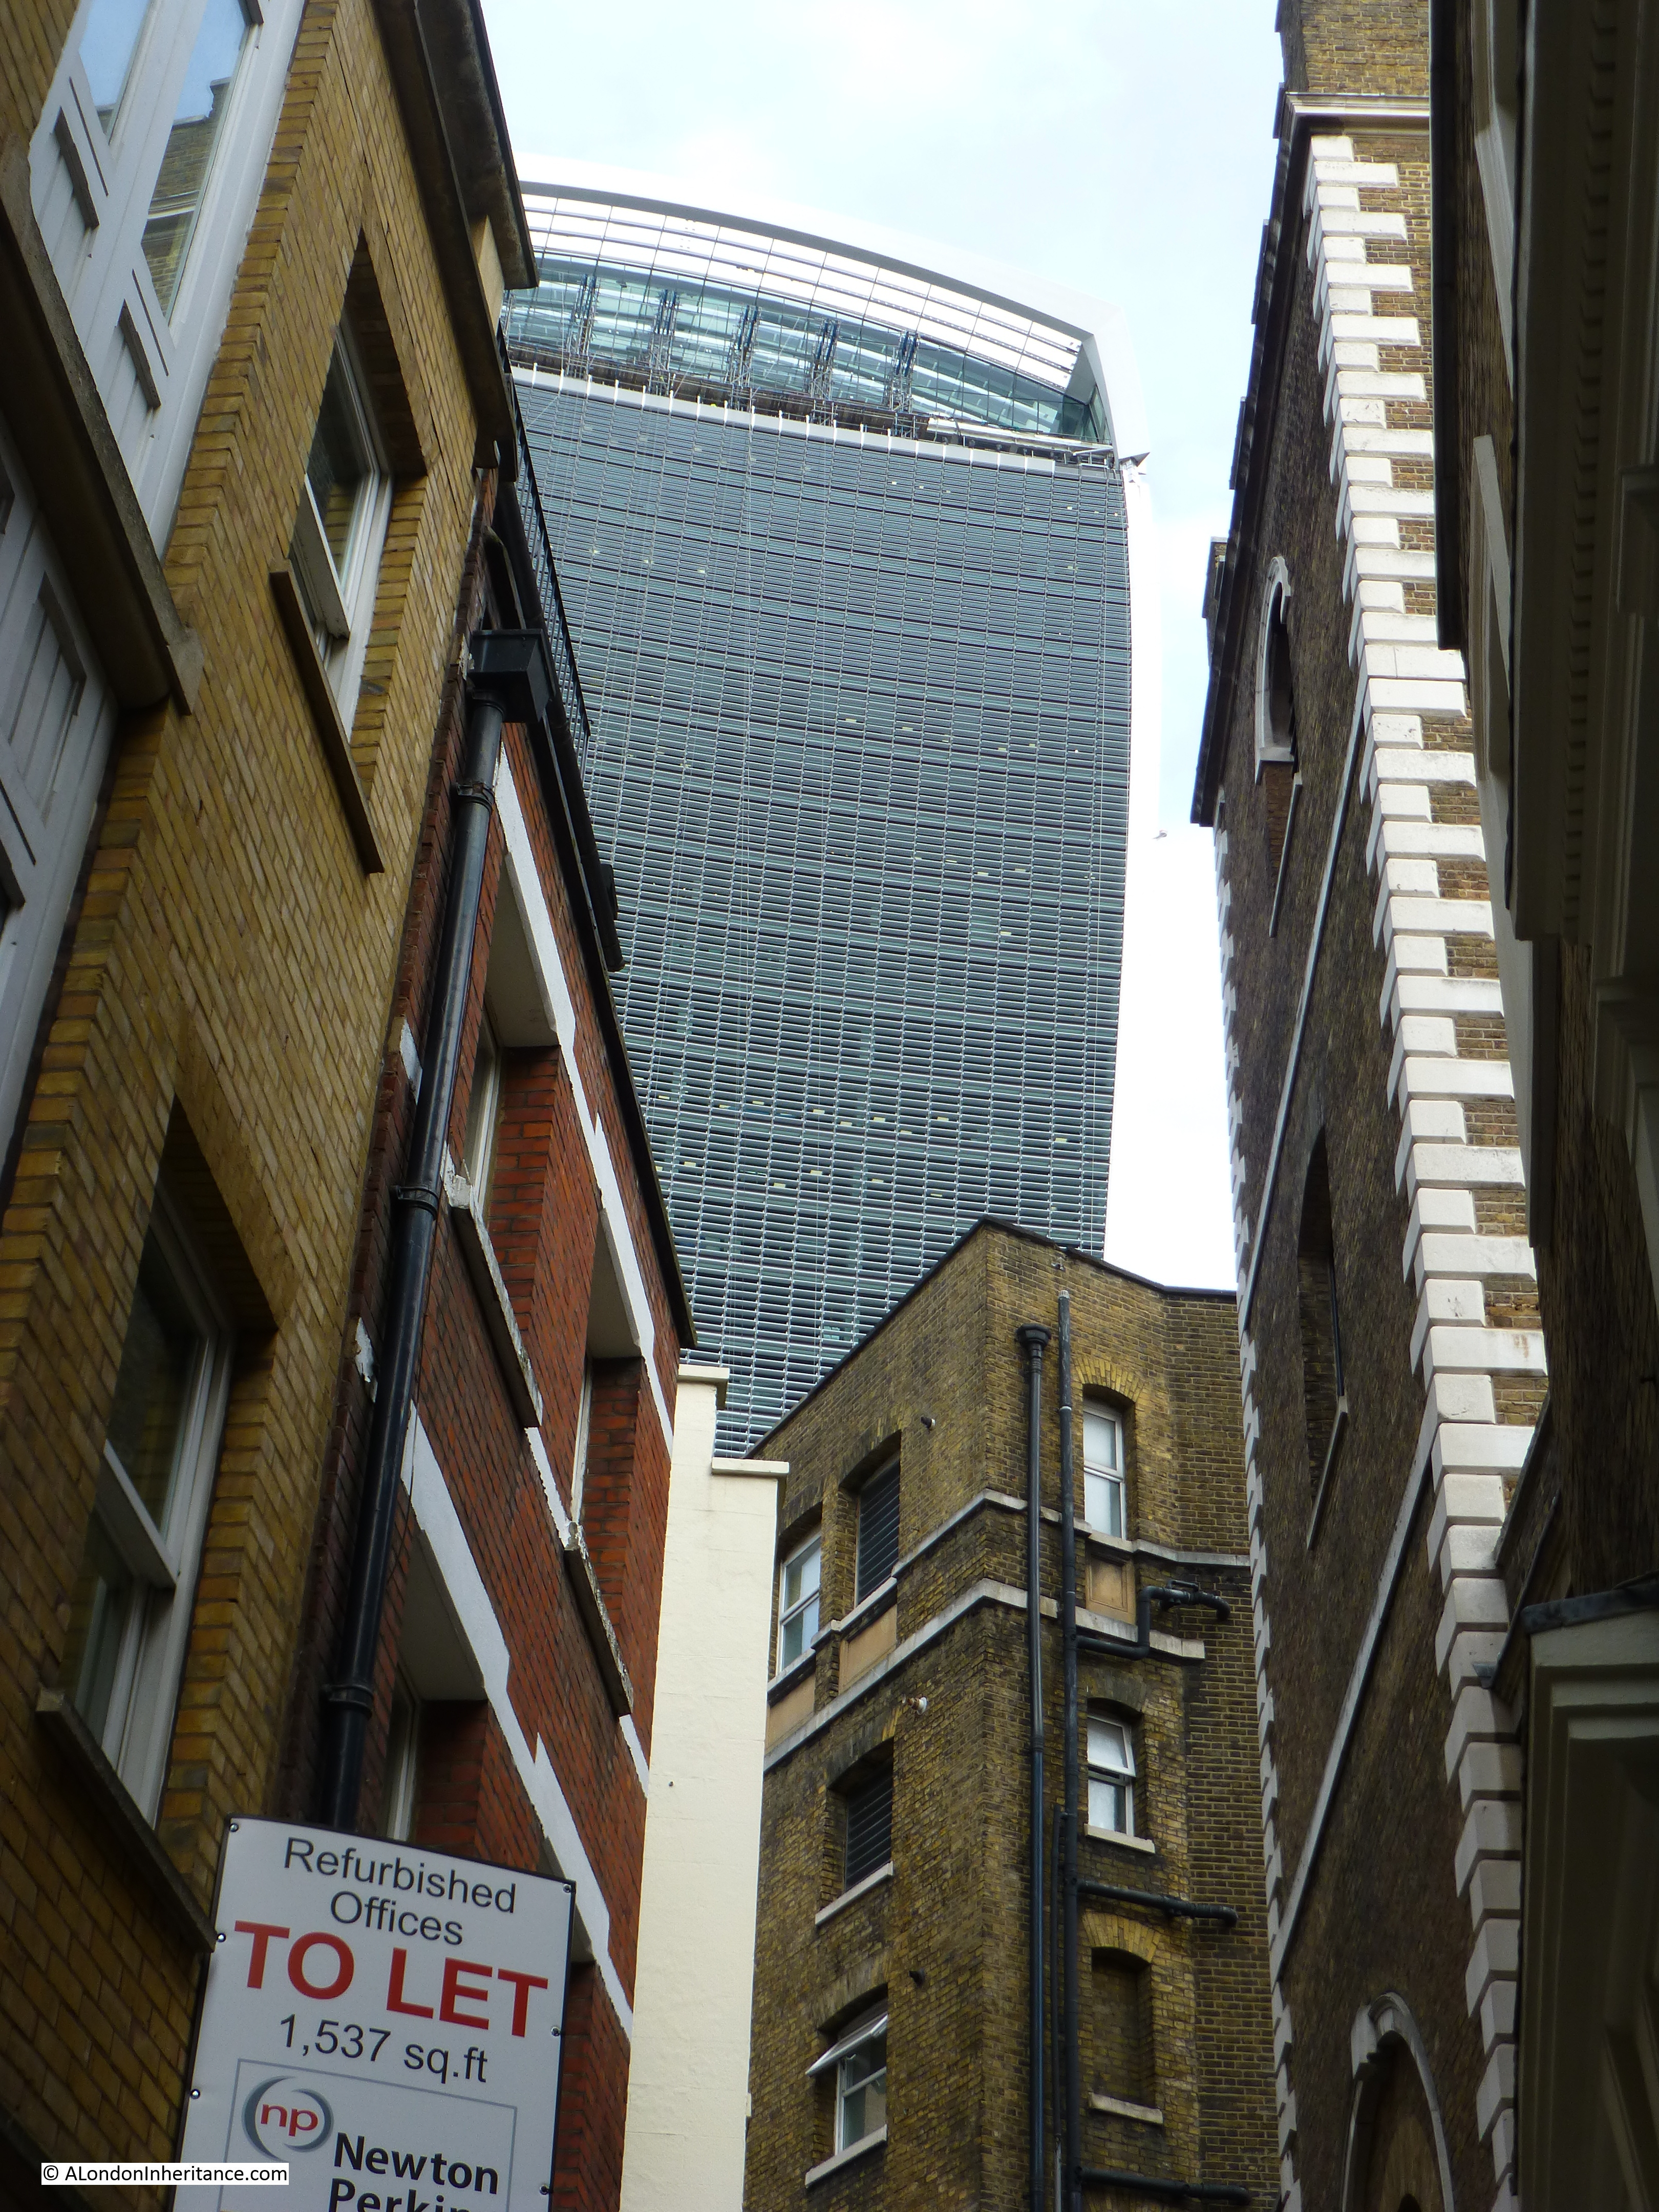
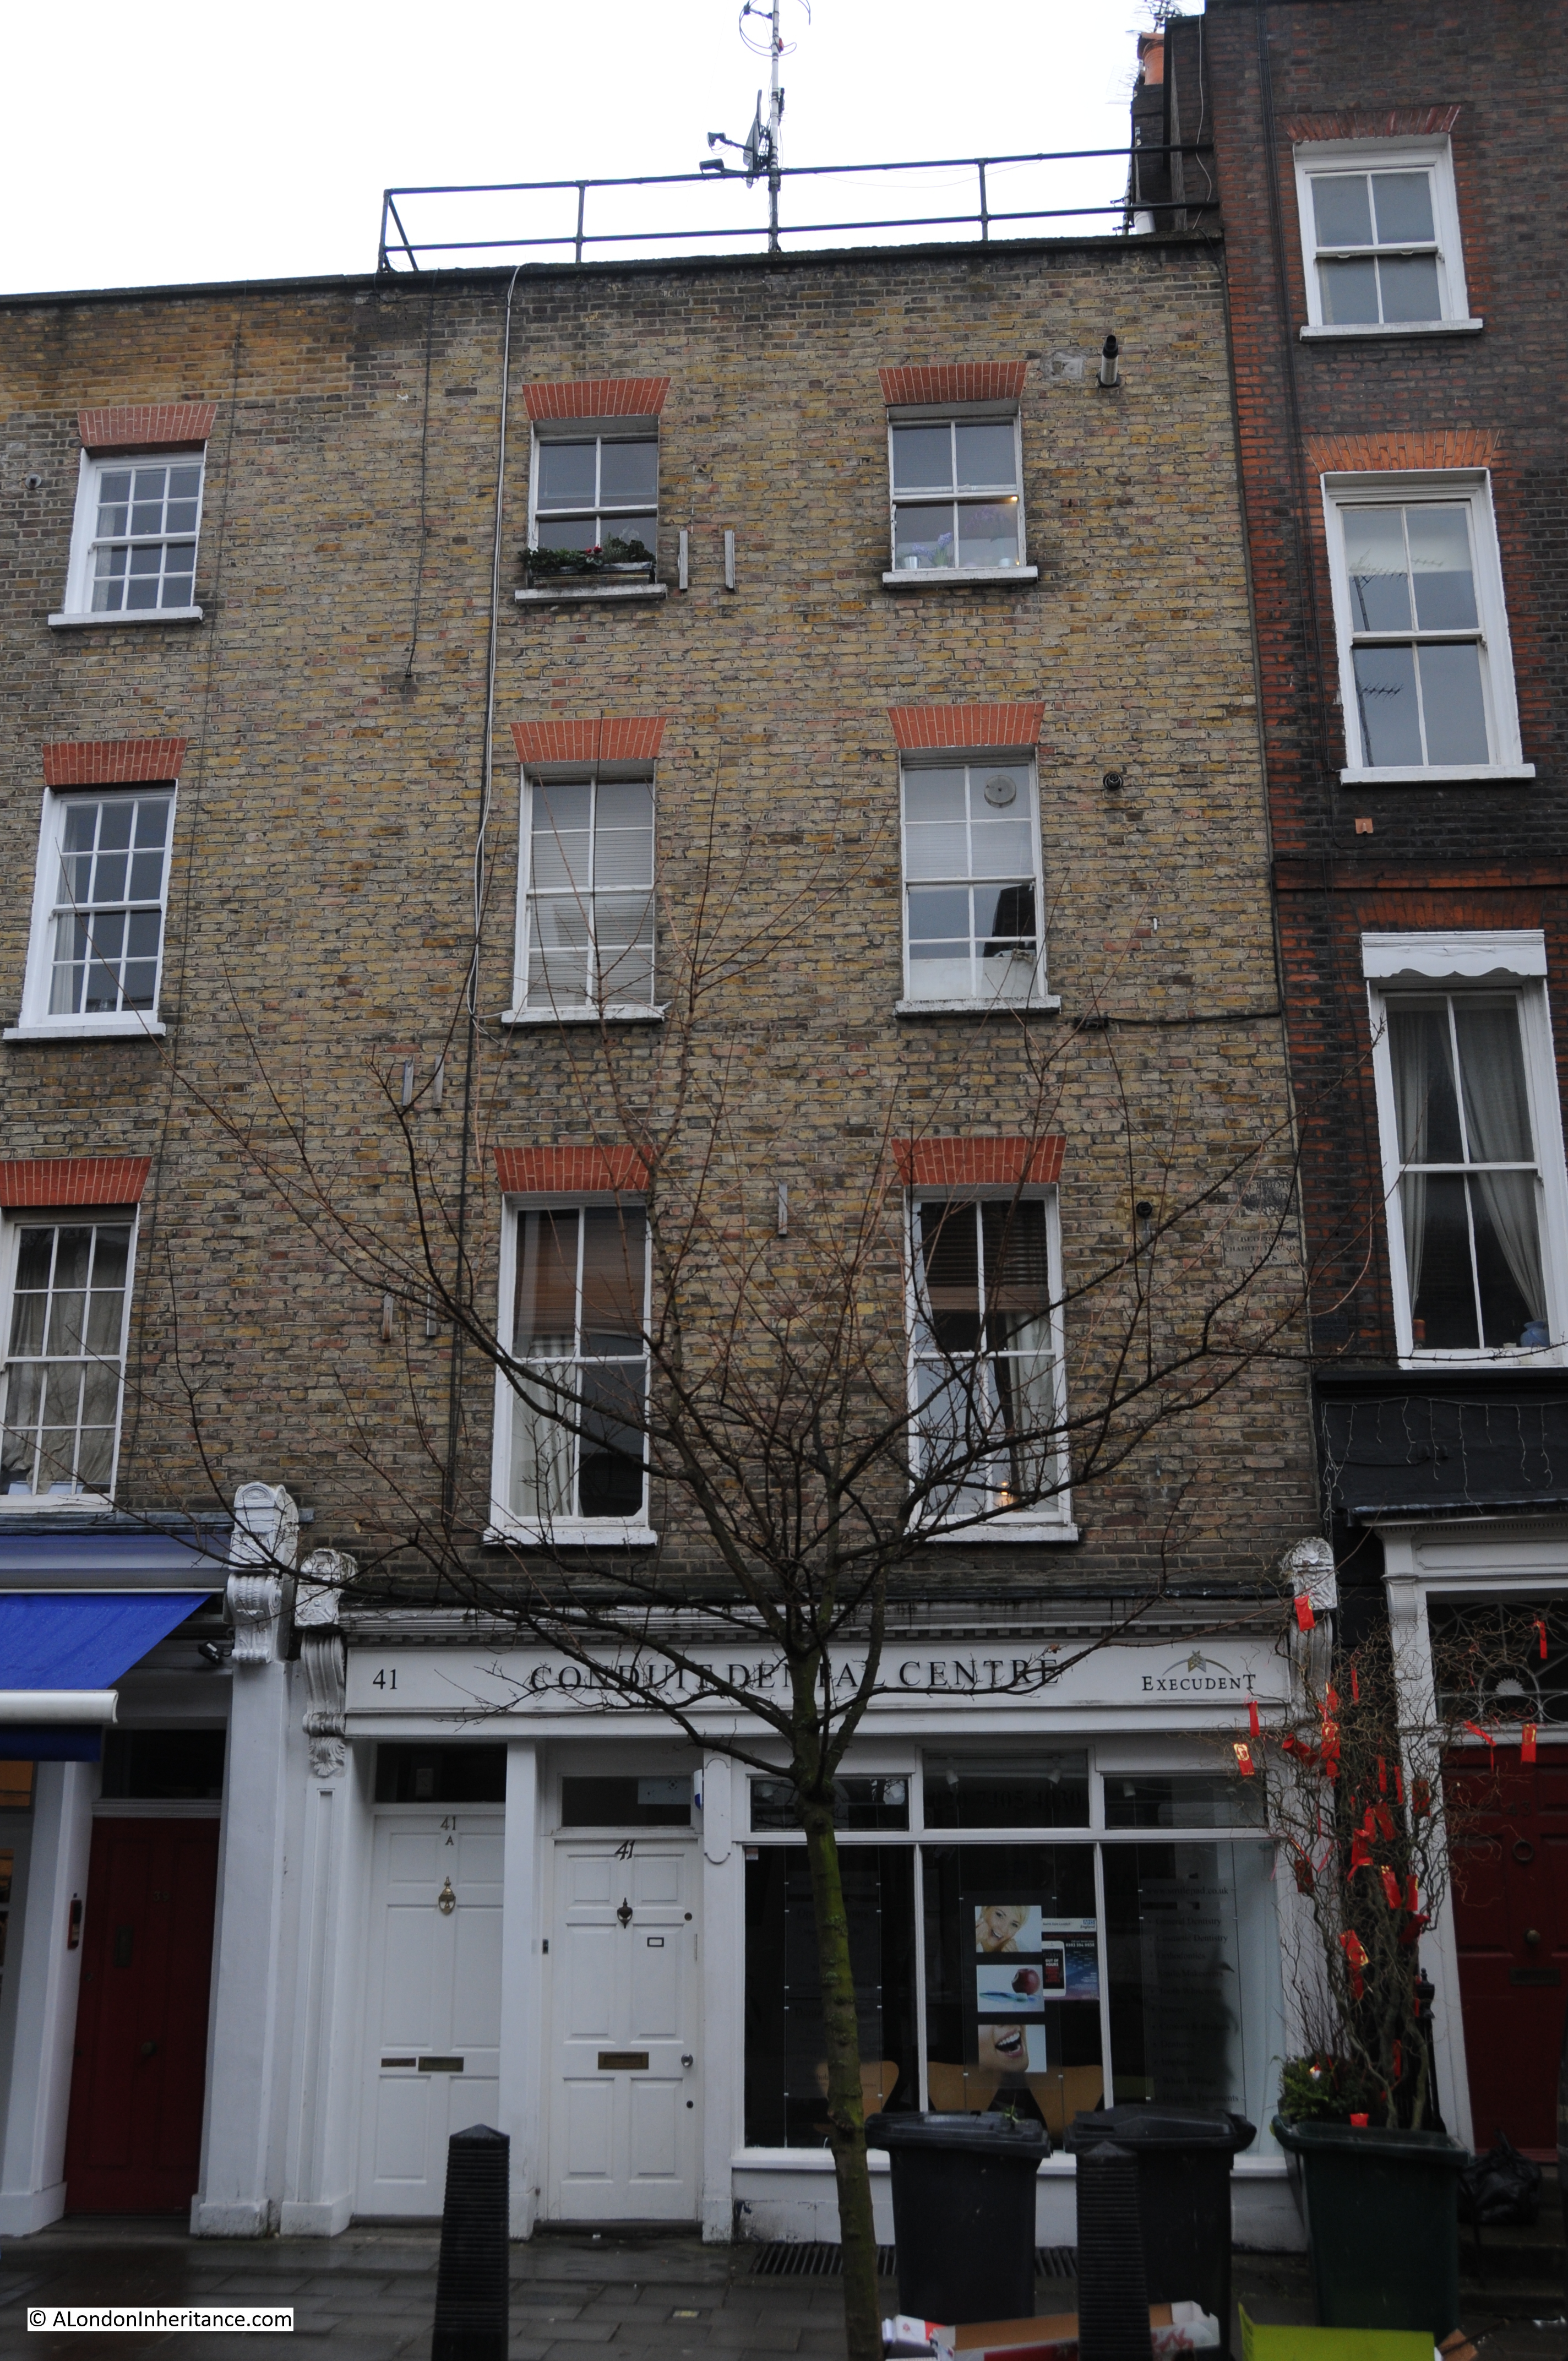
Due to the proximity of Grays Inn, many of the buildings now house activities associated with the legal profession.

Bedford Row 5

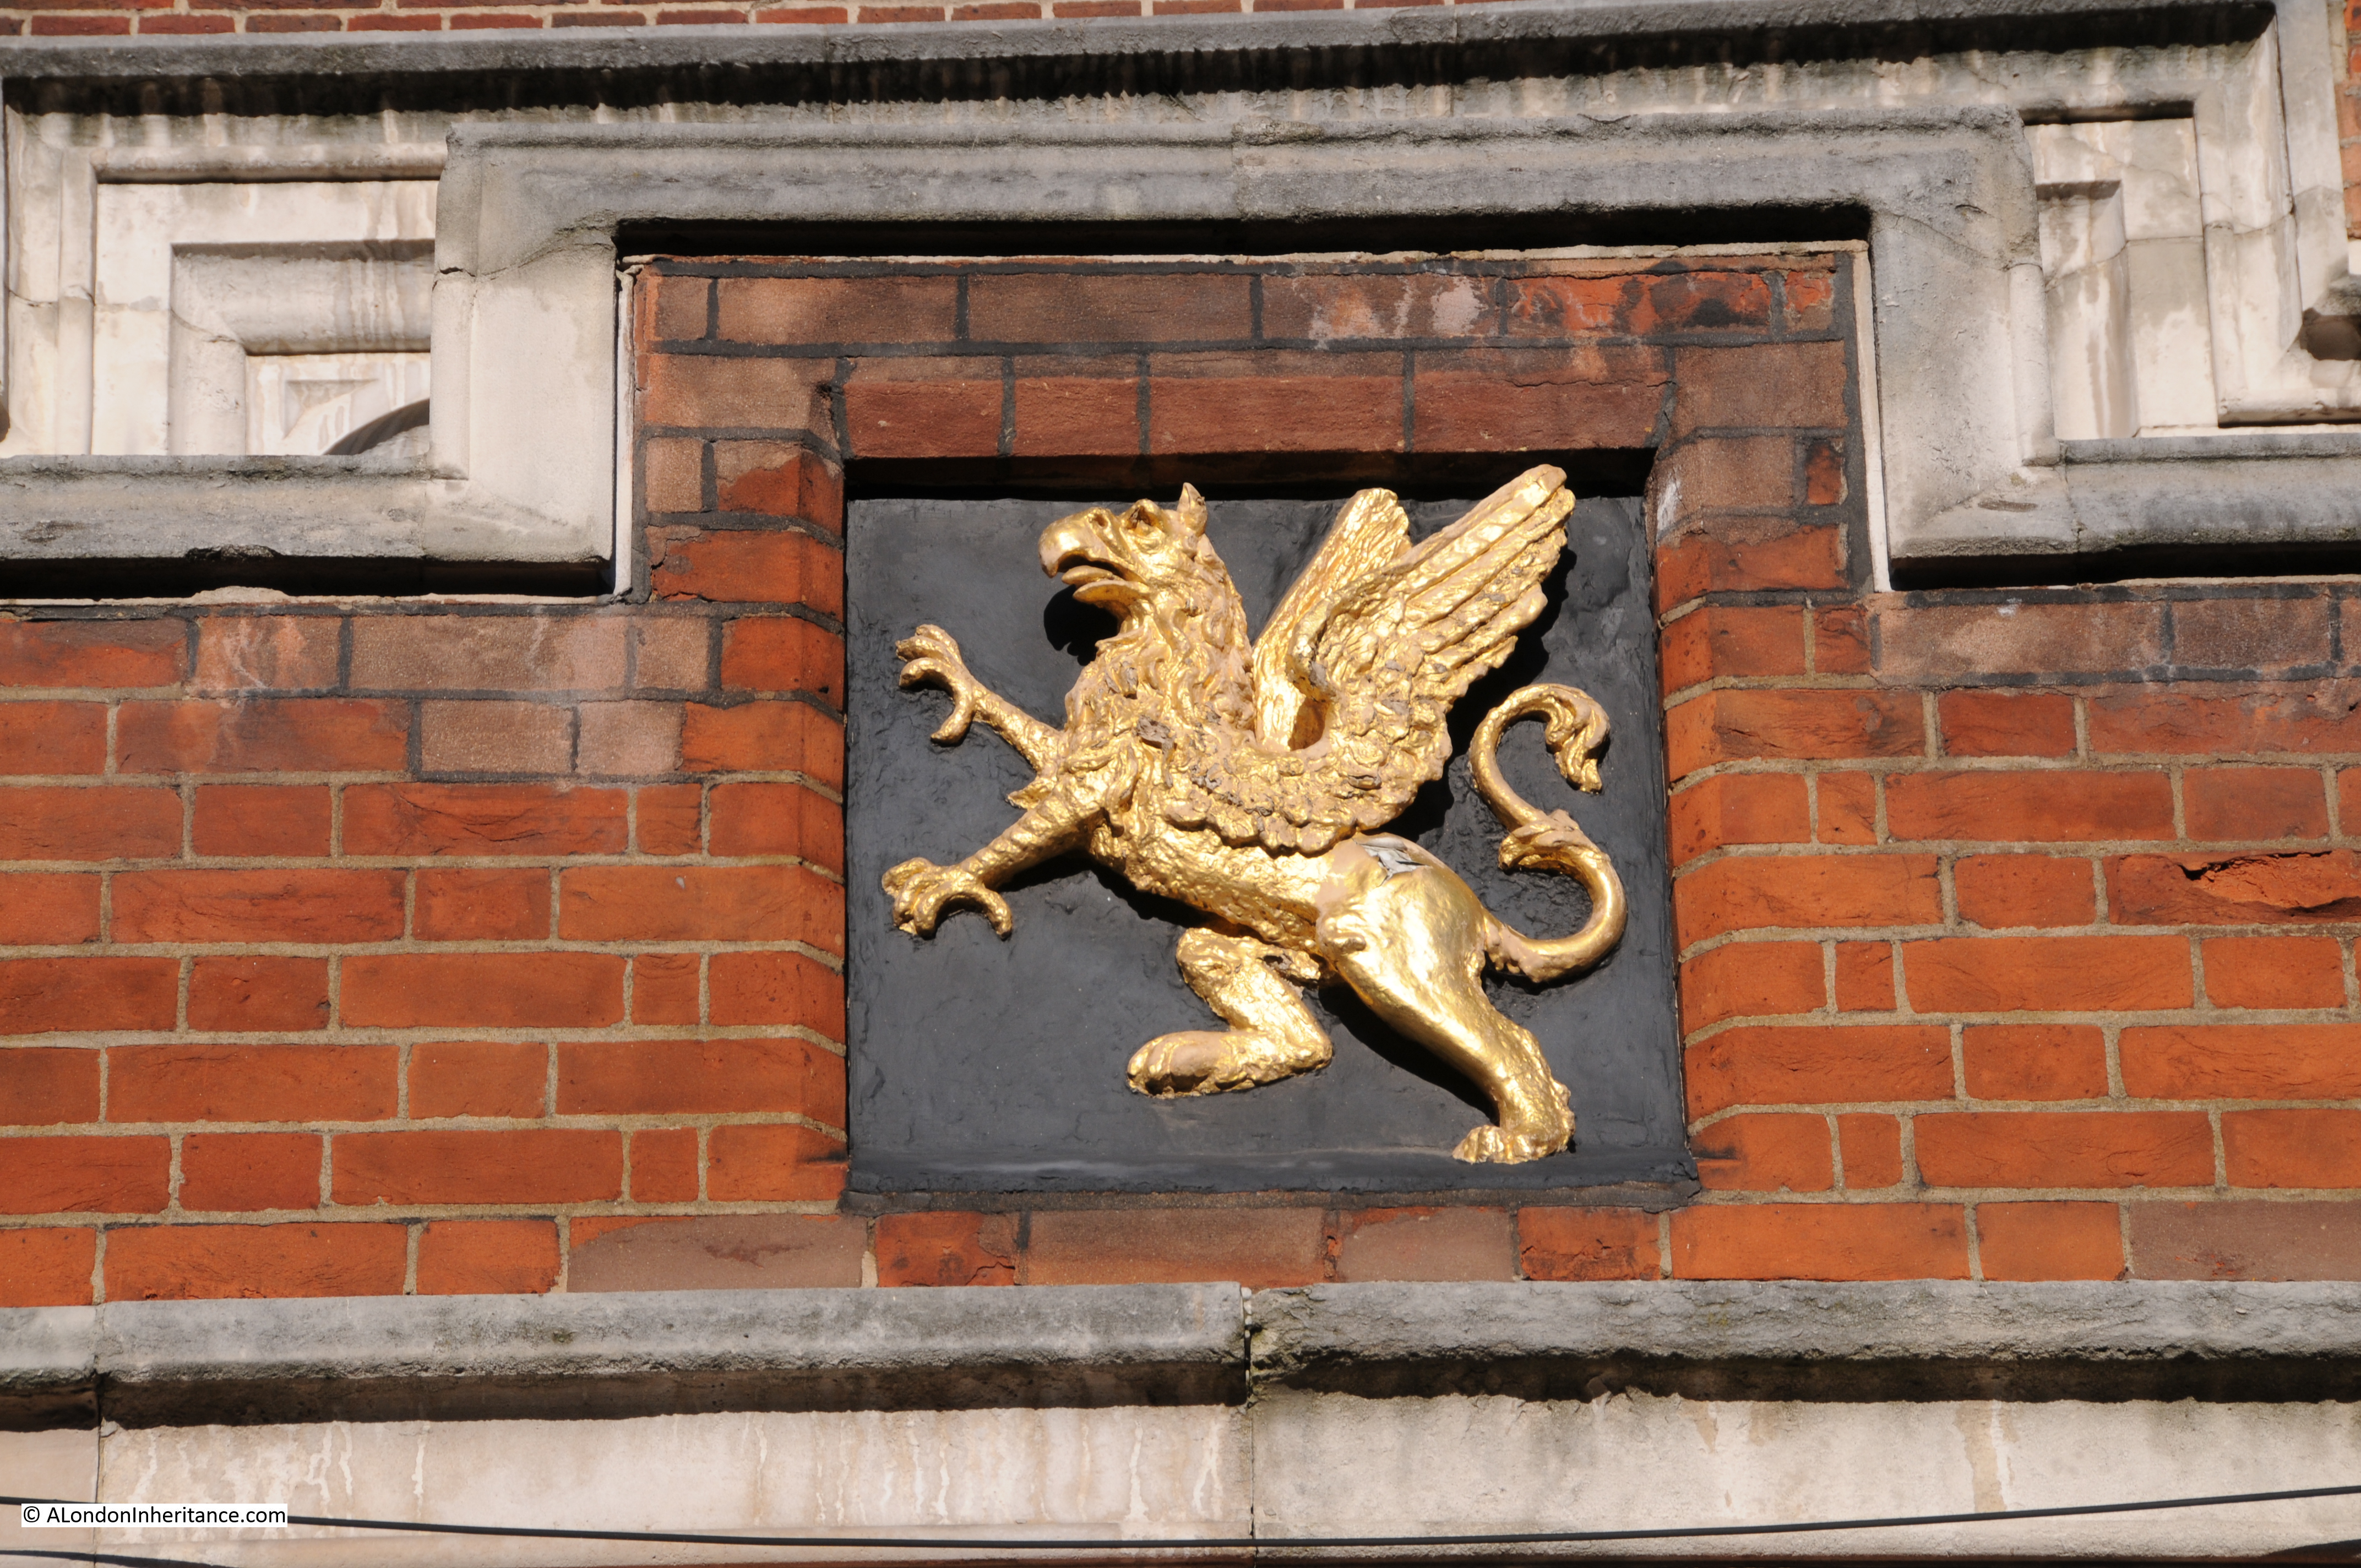
Although some buildings retain reminders of earlier occupation:

Bedford Row 4

So how many indications of the original Harpur land could I find? I have annotated the Harpur Trust map with the locations of the boundary markers that I was able to find.

Marker 1 is the first, at the end of Bedford Row, adjacent to the water pump shown in the earlier photo:

Harpur map with locations

At the end of Bedford Row, at marker 2 in the map where I found the following from 1803 to show where the boundary came from the centre of the street onto the edge of the building.

This one is dated 1803. The different dates are down to the building work that was being carried out on the land, and when the commissioners of the charity would periodically come down from Bedford and “perambulate” the boundaries of the land.

Bedford Row 6

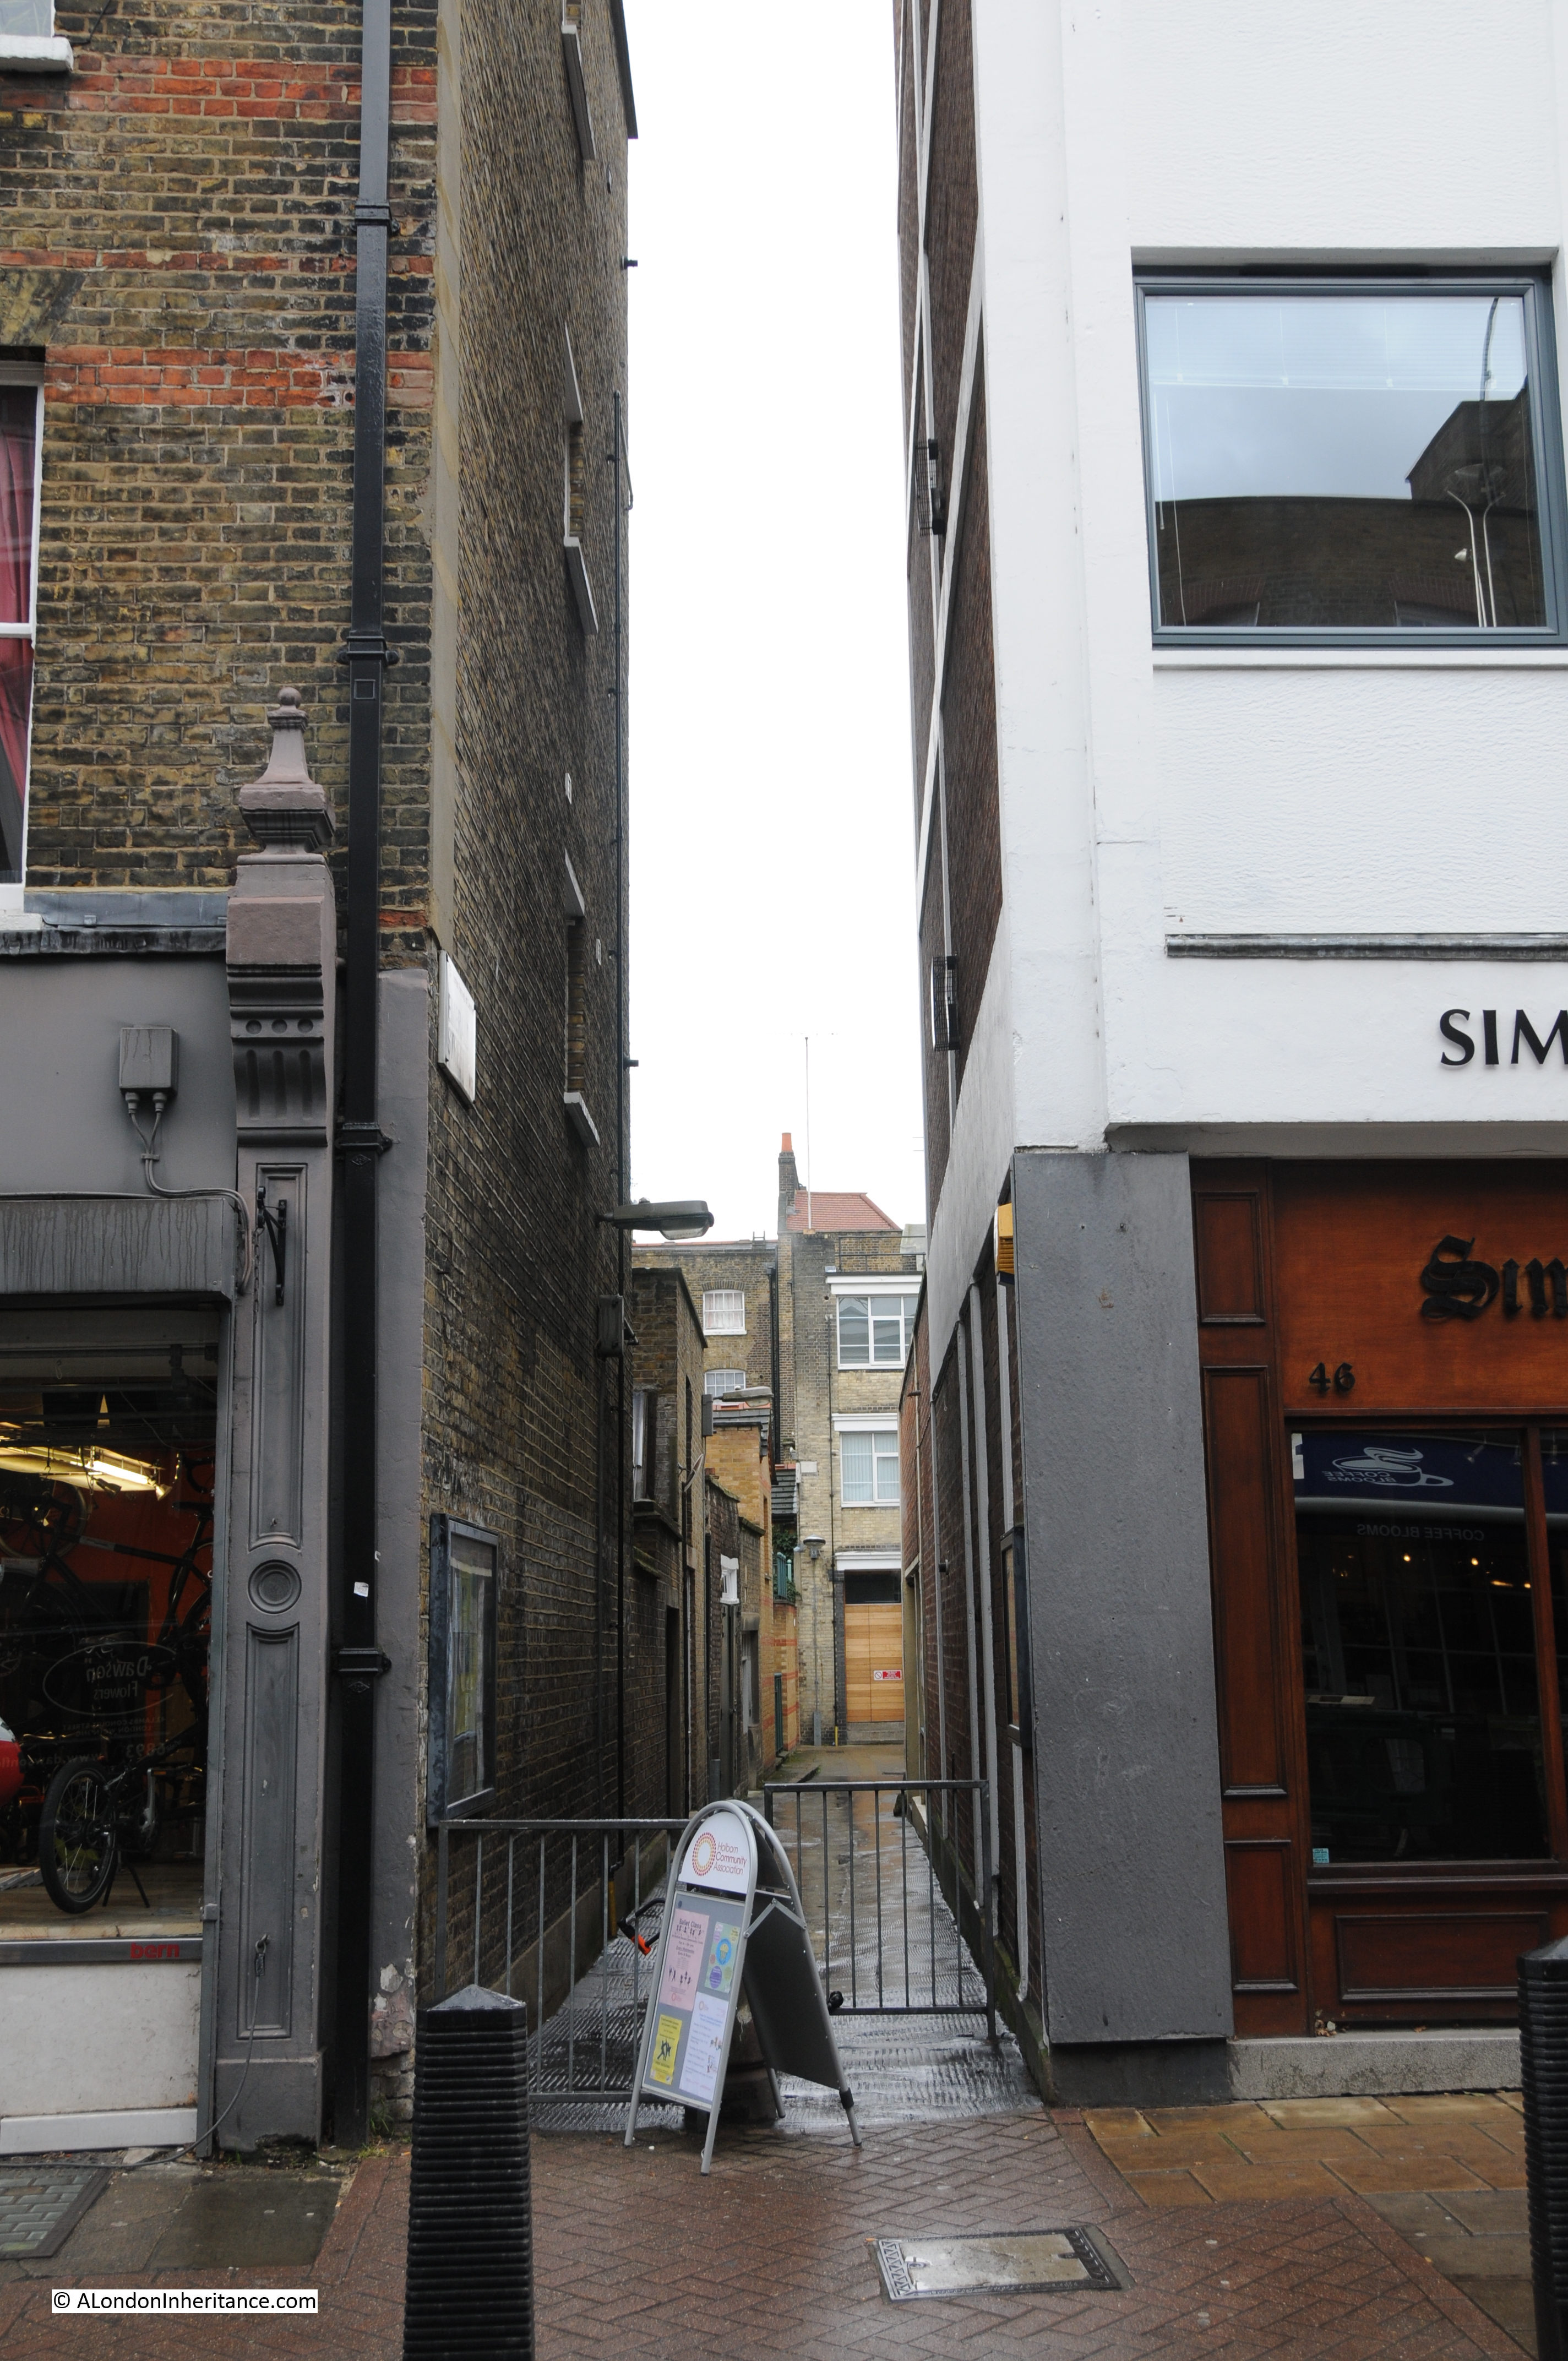
Now cross over Theobalds Road and walk down Emerald Street. At the very end at marker 3 in the map is this boundary marker.

Bedford Row 8

Now head down the small alley from Emerald Street, leading up to Lamb’s Conduit Street and half way along on the right are two of the Bedford boundary markers, one from 1776 and the other from 1838. These are shown in marker 4 in the map.

Bedford Row 9

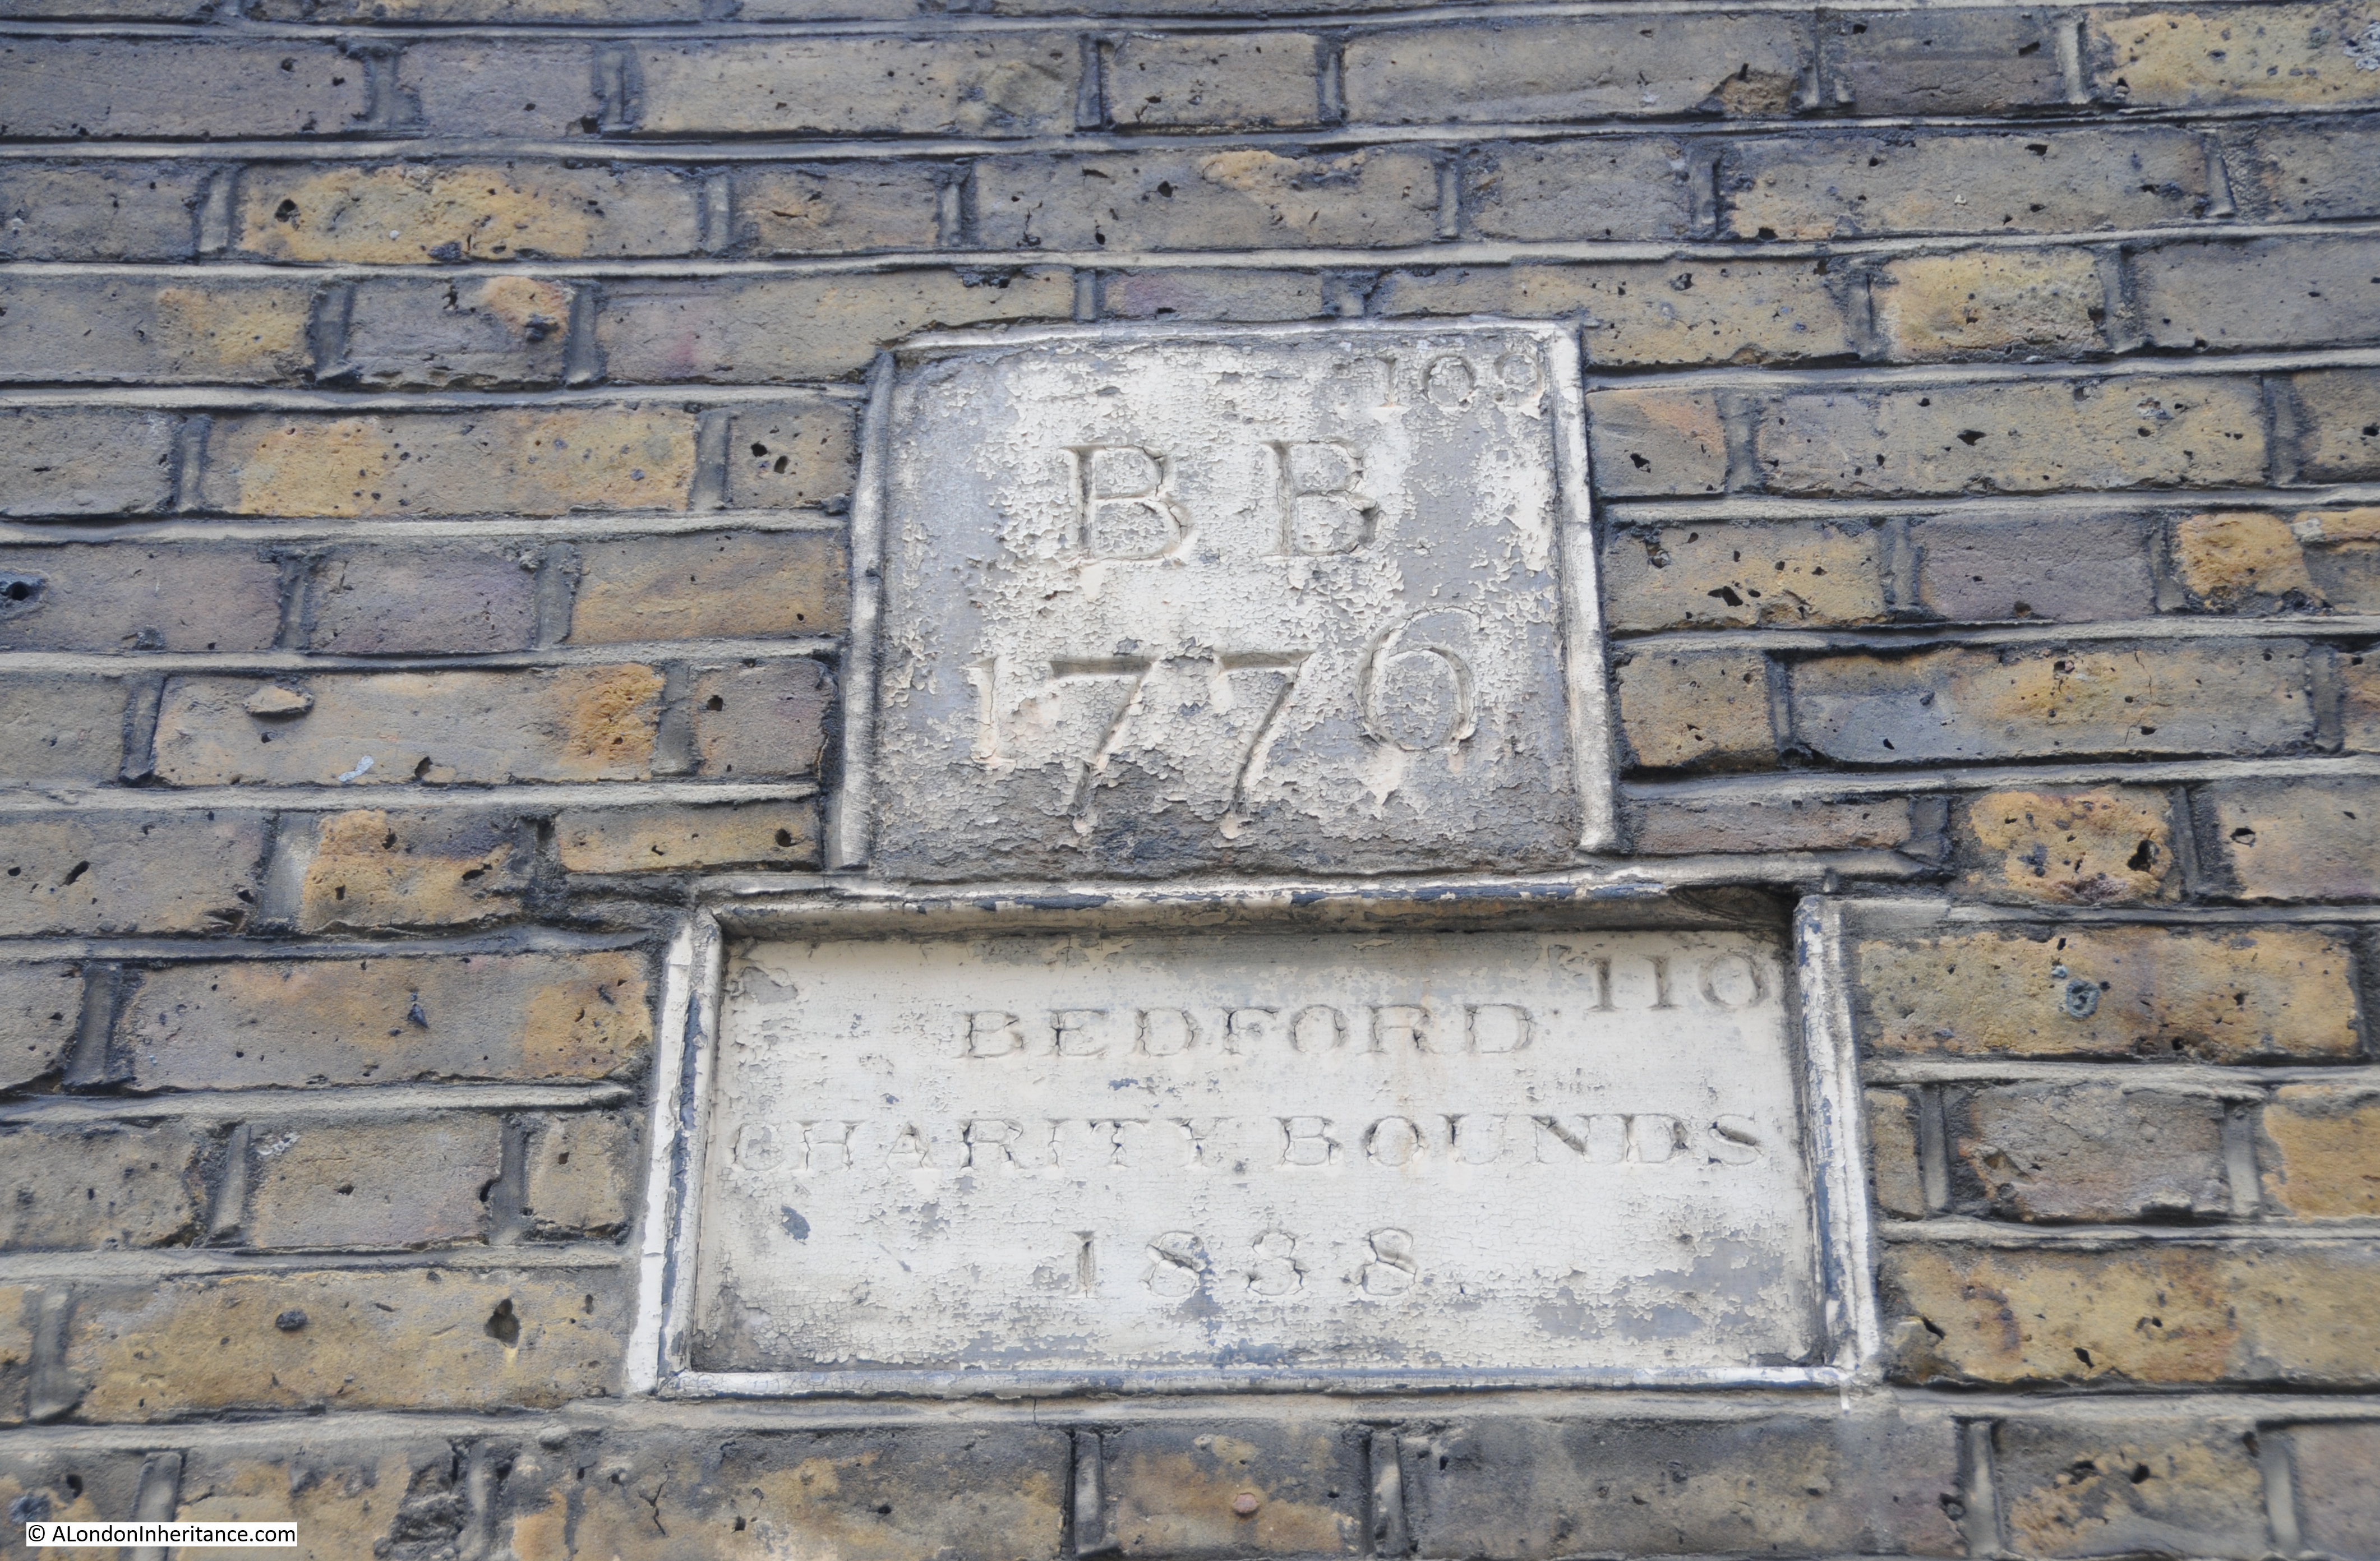
From Lamb’s Conduit Street we can look back down the alley (part of Emerald Street). Boundary marker 3 can be seen half way up the wall of the building at the far end of the alley. Marker 4 is half way along on the left.

Bedford Row 12

Lamb’s Conduit Street derives its name from William Lamb who erected a water conduit n the site in 1577 by restoring an earlier dam in one of the tributaries of the River Fleet.

The next set of boundary markers are on a building in Lamb’s Conduit Street, directly across from the alley. These were from 1803 and 1838. Marker 5 on the map.

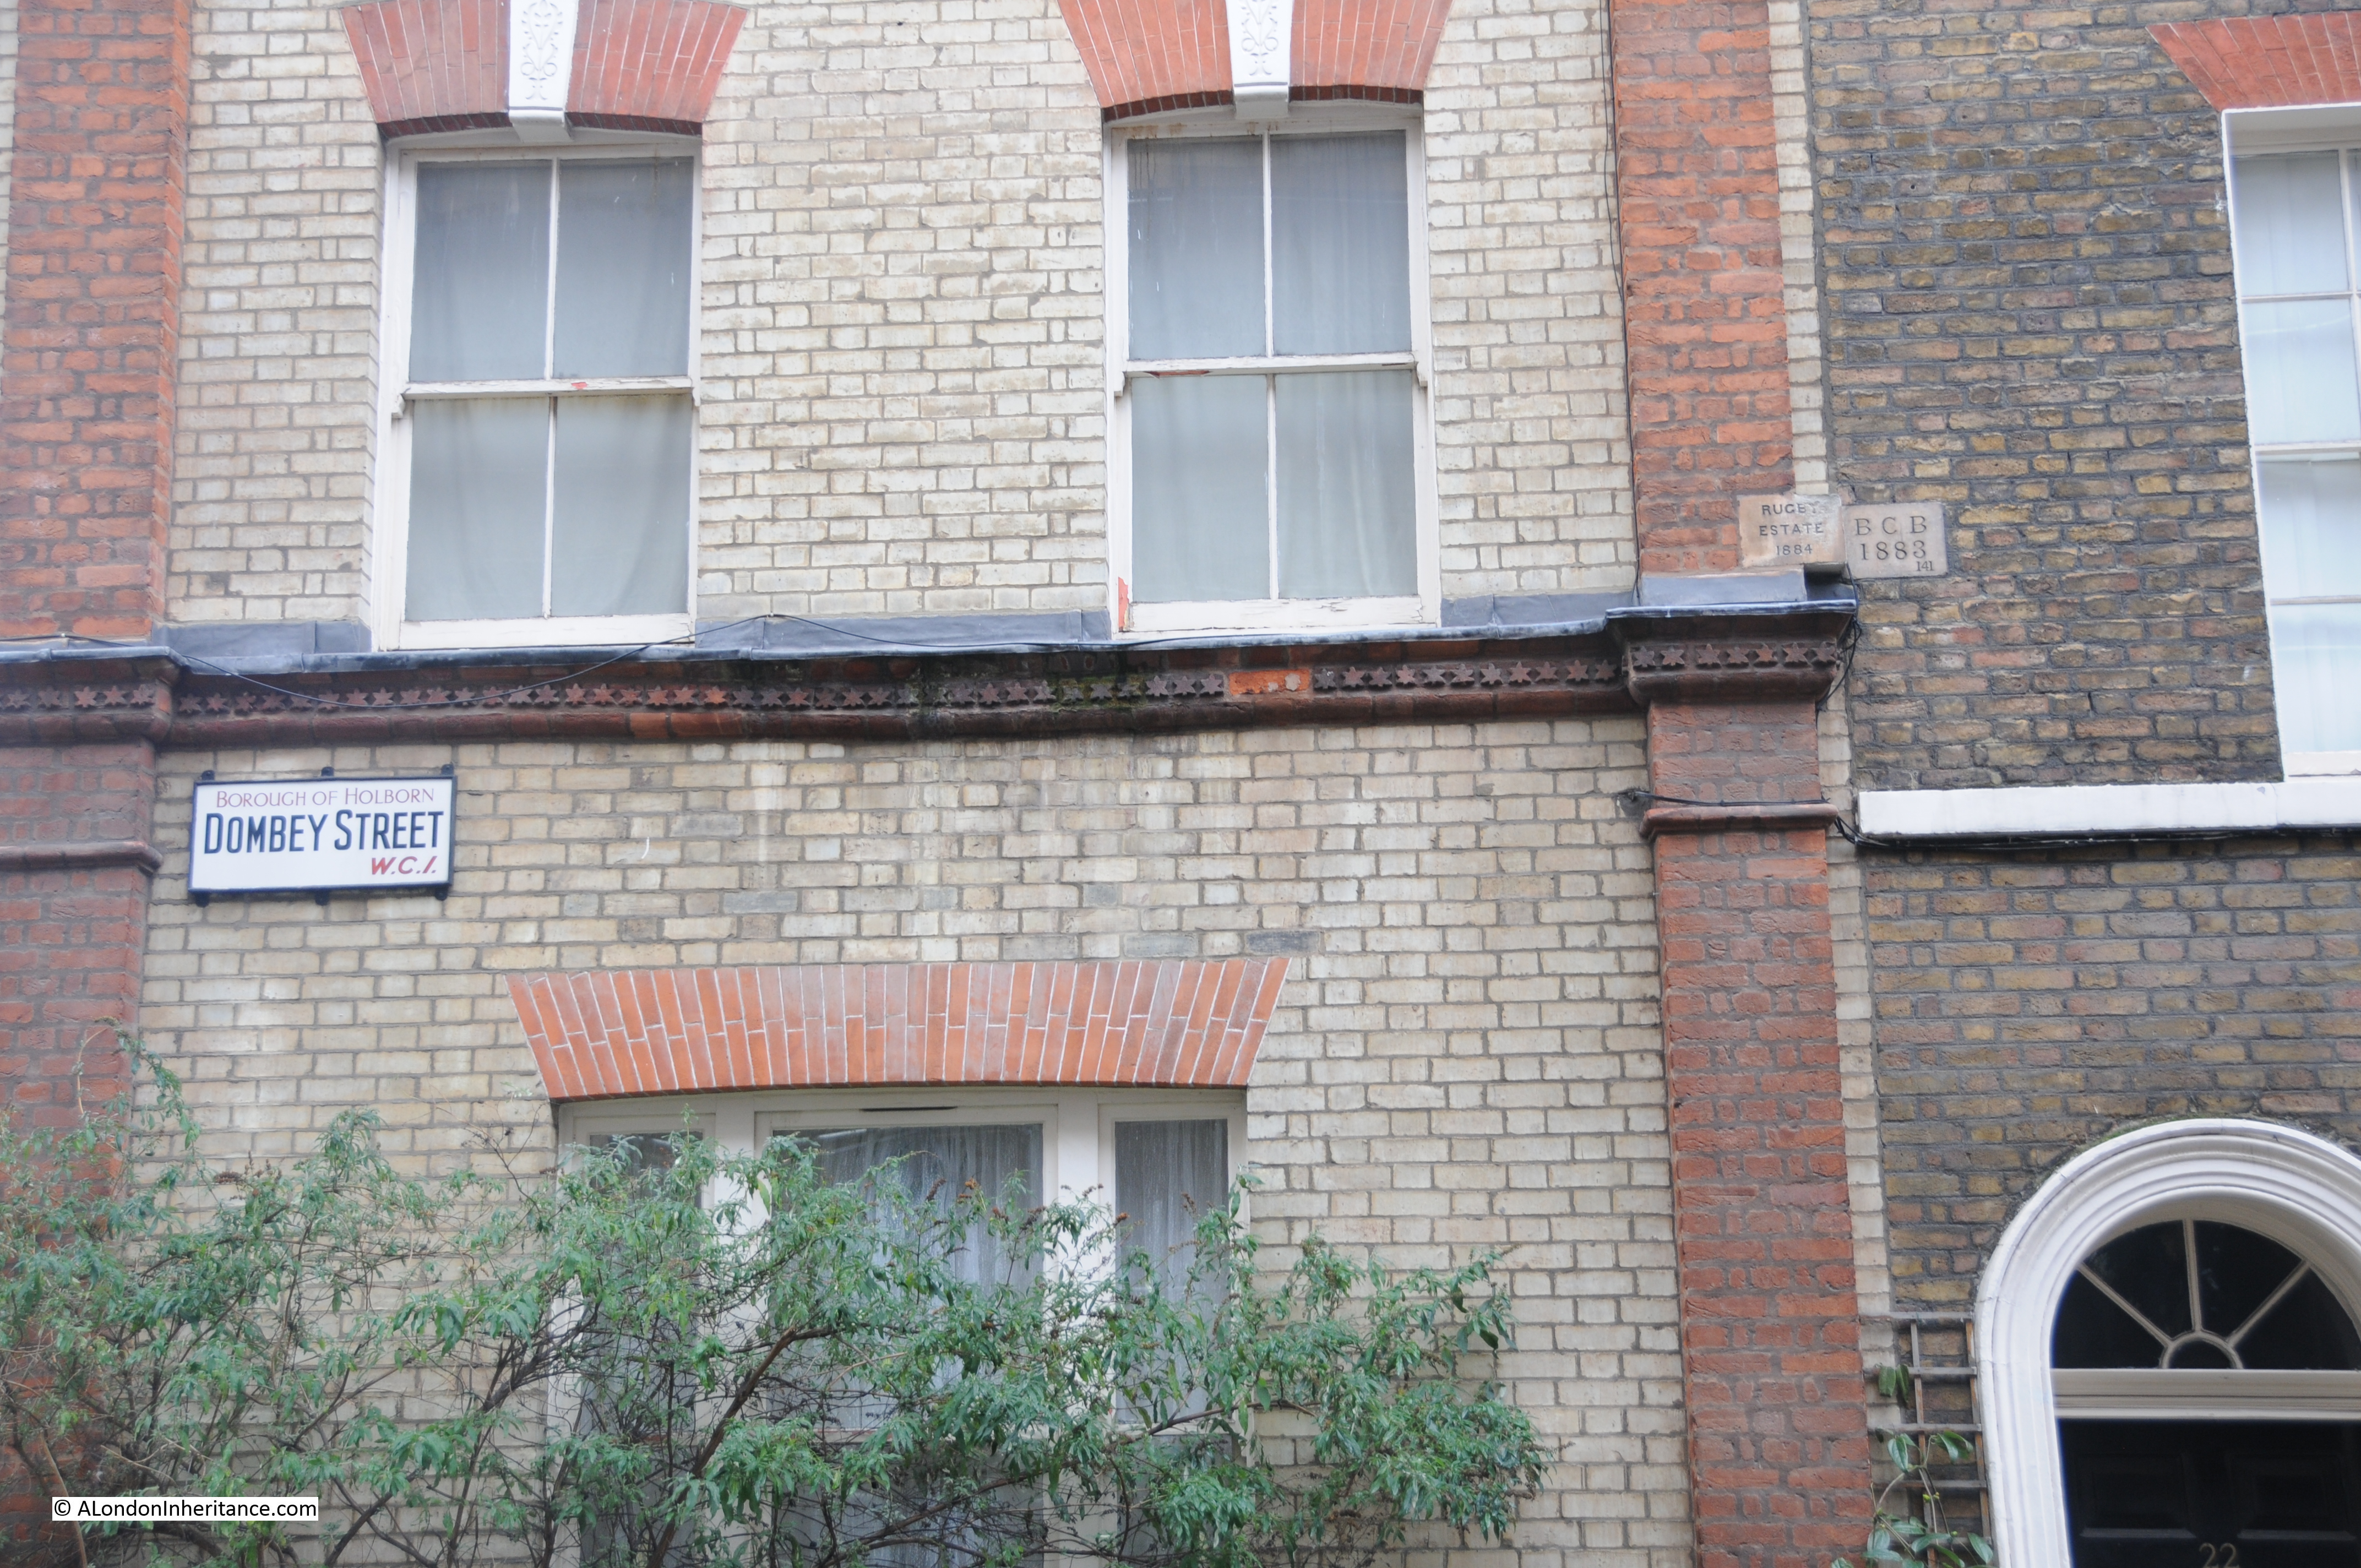
It is here that there is a marked boundary with another estate. Just below the Bedford markers on the building on the right is a boundary marker for the Rugby Estate, dated 1824. The Rugby estate was an 8 acre parcel of land that was part of a bequest to Rugby School in 1567. As with the Harpur estate, the Rugby estate was mainly meadow / pastureland at the time of the bequest, however rapid development over the coming years would add considerably to the estates income.

Bedford Row 10

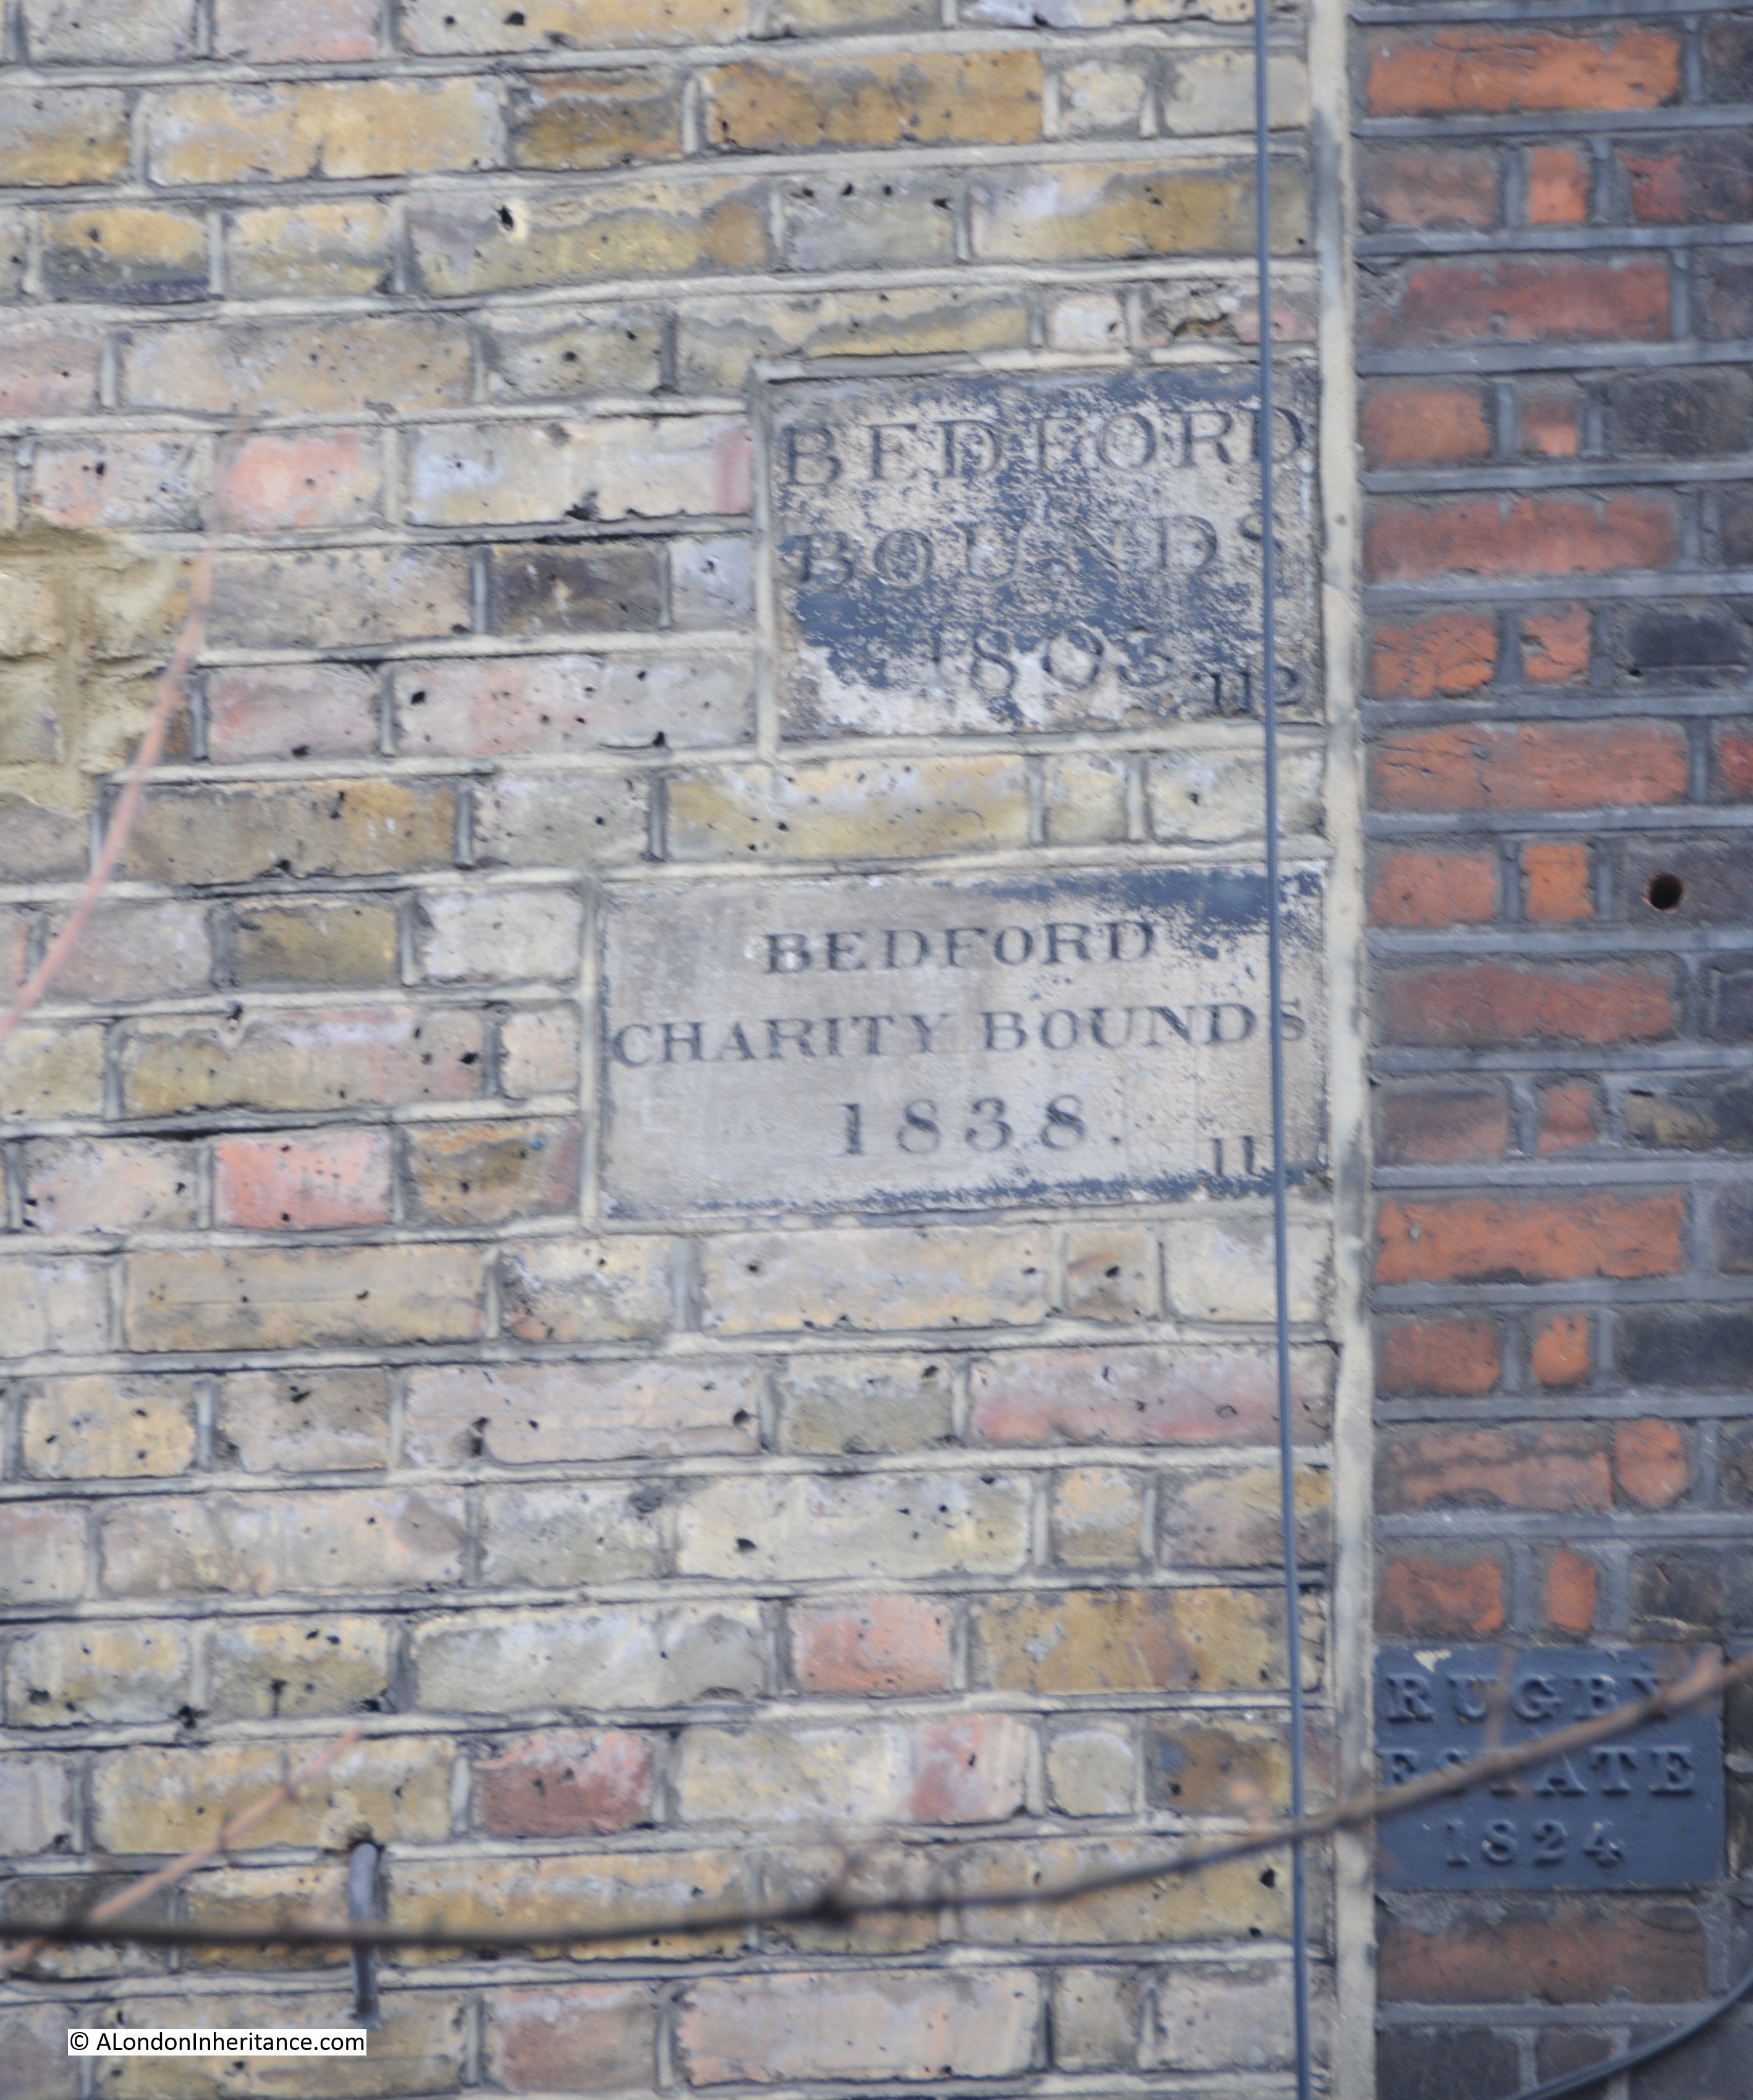
Photo taken from the end of the alley looking towards the building with the Bedford boundary markers and the Rugby marker on the building on the right. Not easily seen, but are just behind the tree branches.

Bedford Row 11

The next pair of markers are strange. I cannot explain their location. Following the map, to get from Lamb’s Conduit Street to Orde Hall Street where I expected the next set of markers to be found, I found the pair shown in the following photo at marker 6 in the map. This area should be clearly within the Bedford / Harpur estate, however the marker on the right is Bedford 1883 and on the left is Rugby 1884. I can only assume that this was a later sale of land between the two estates in the later part of the 19th century, although strangely the Harpur map shows these buildings as being still owned by the Harpur Trust in 1985 and 2013.

Bedford Row 14

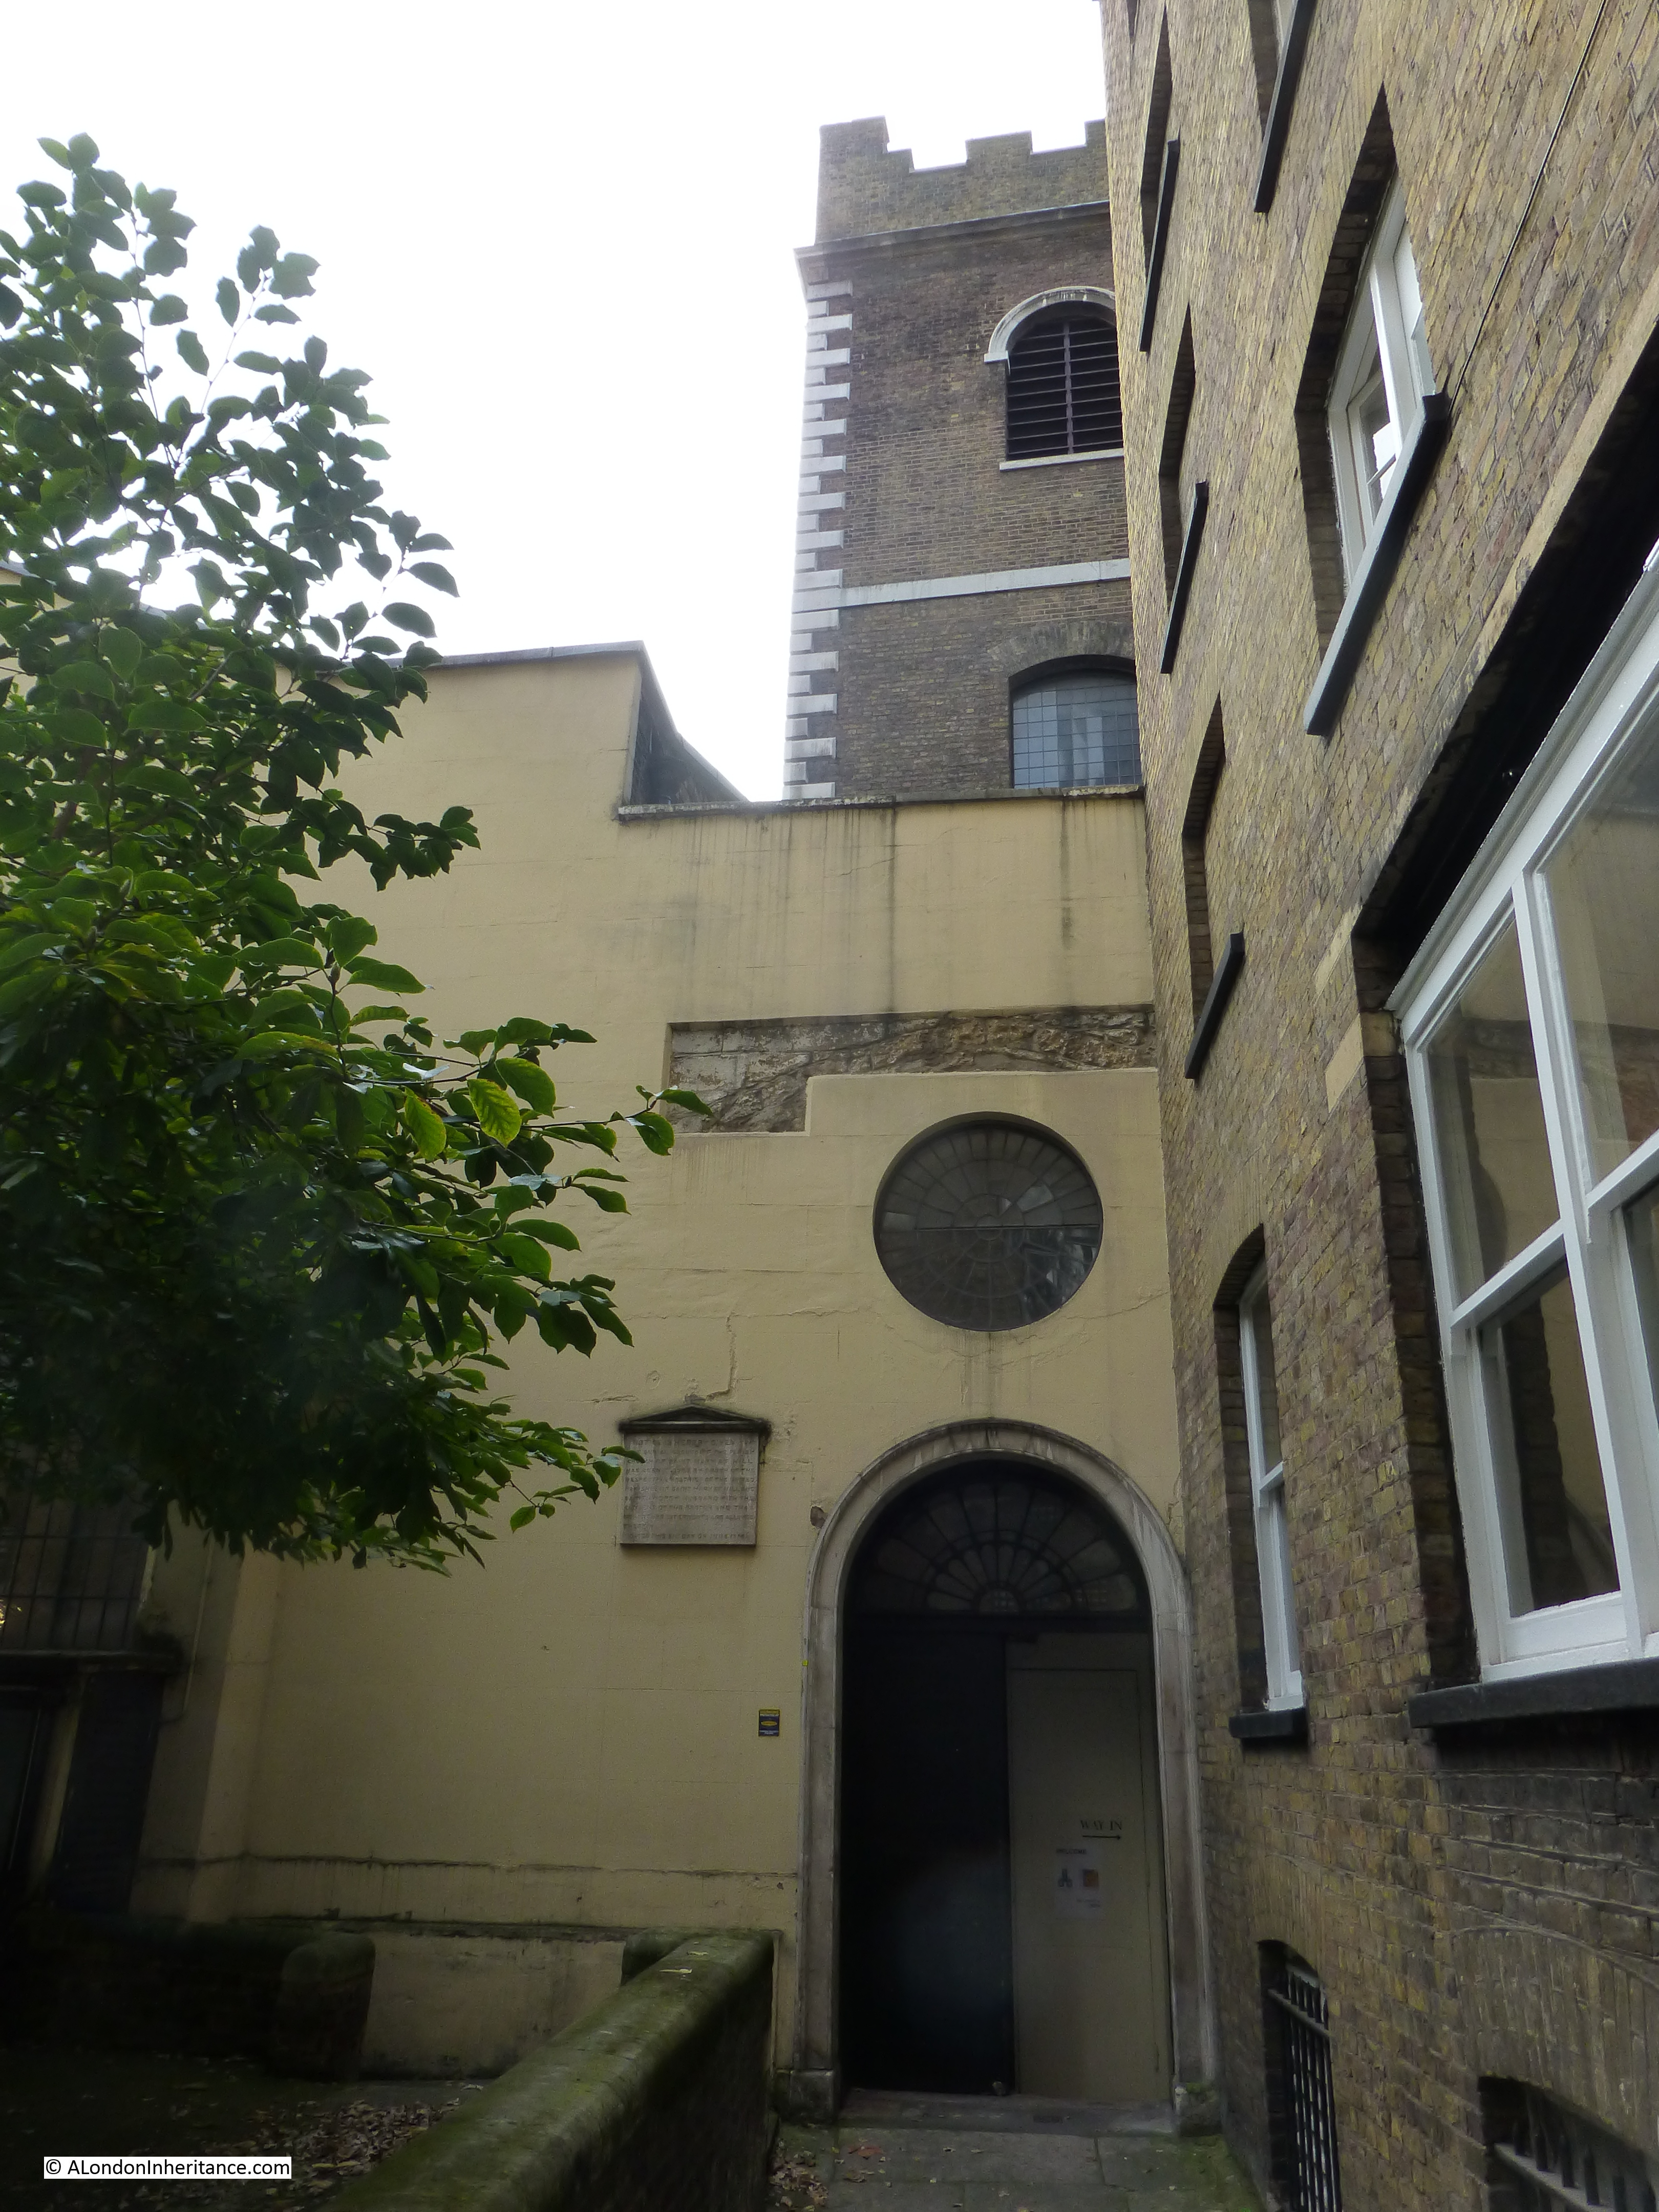
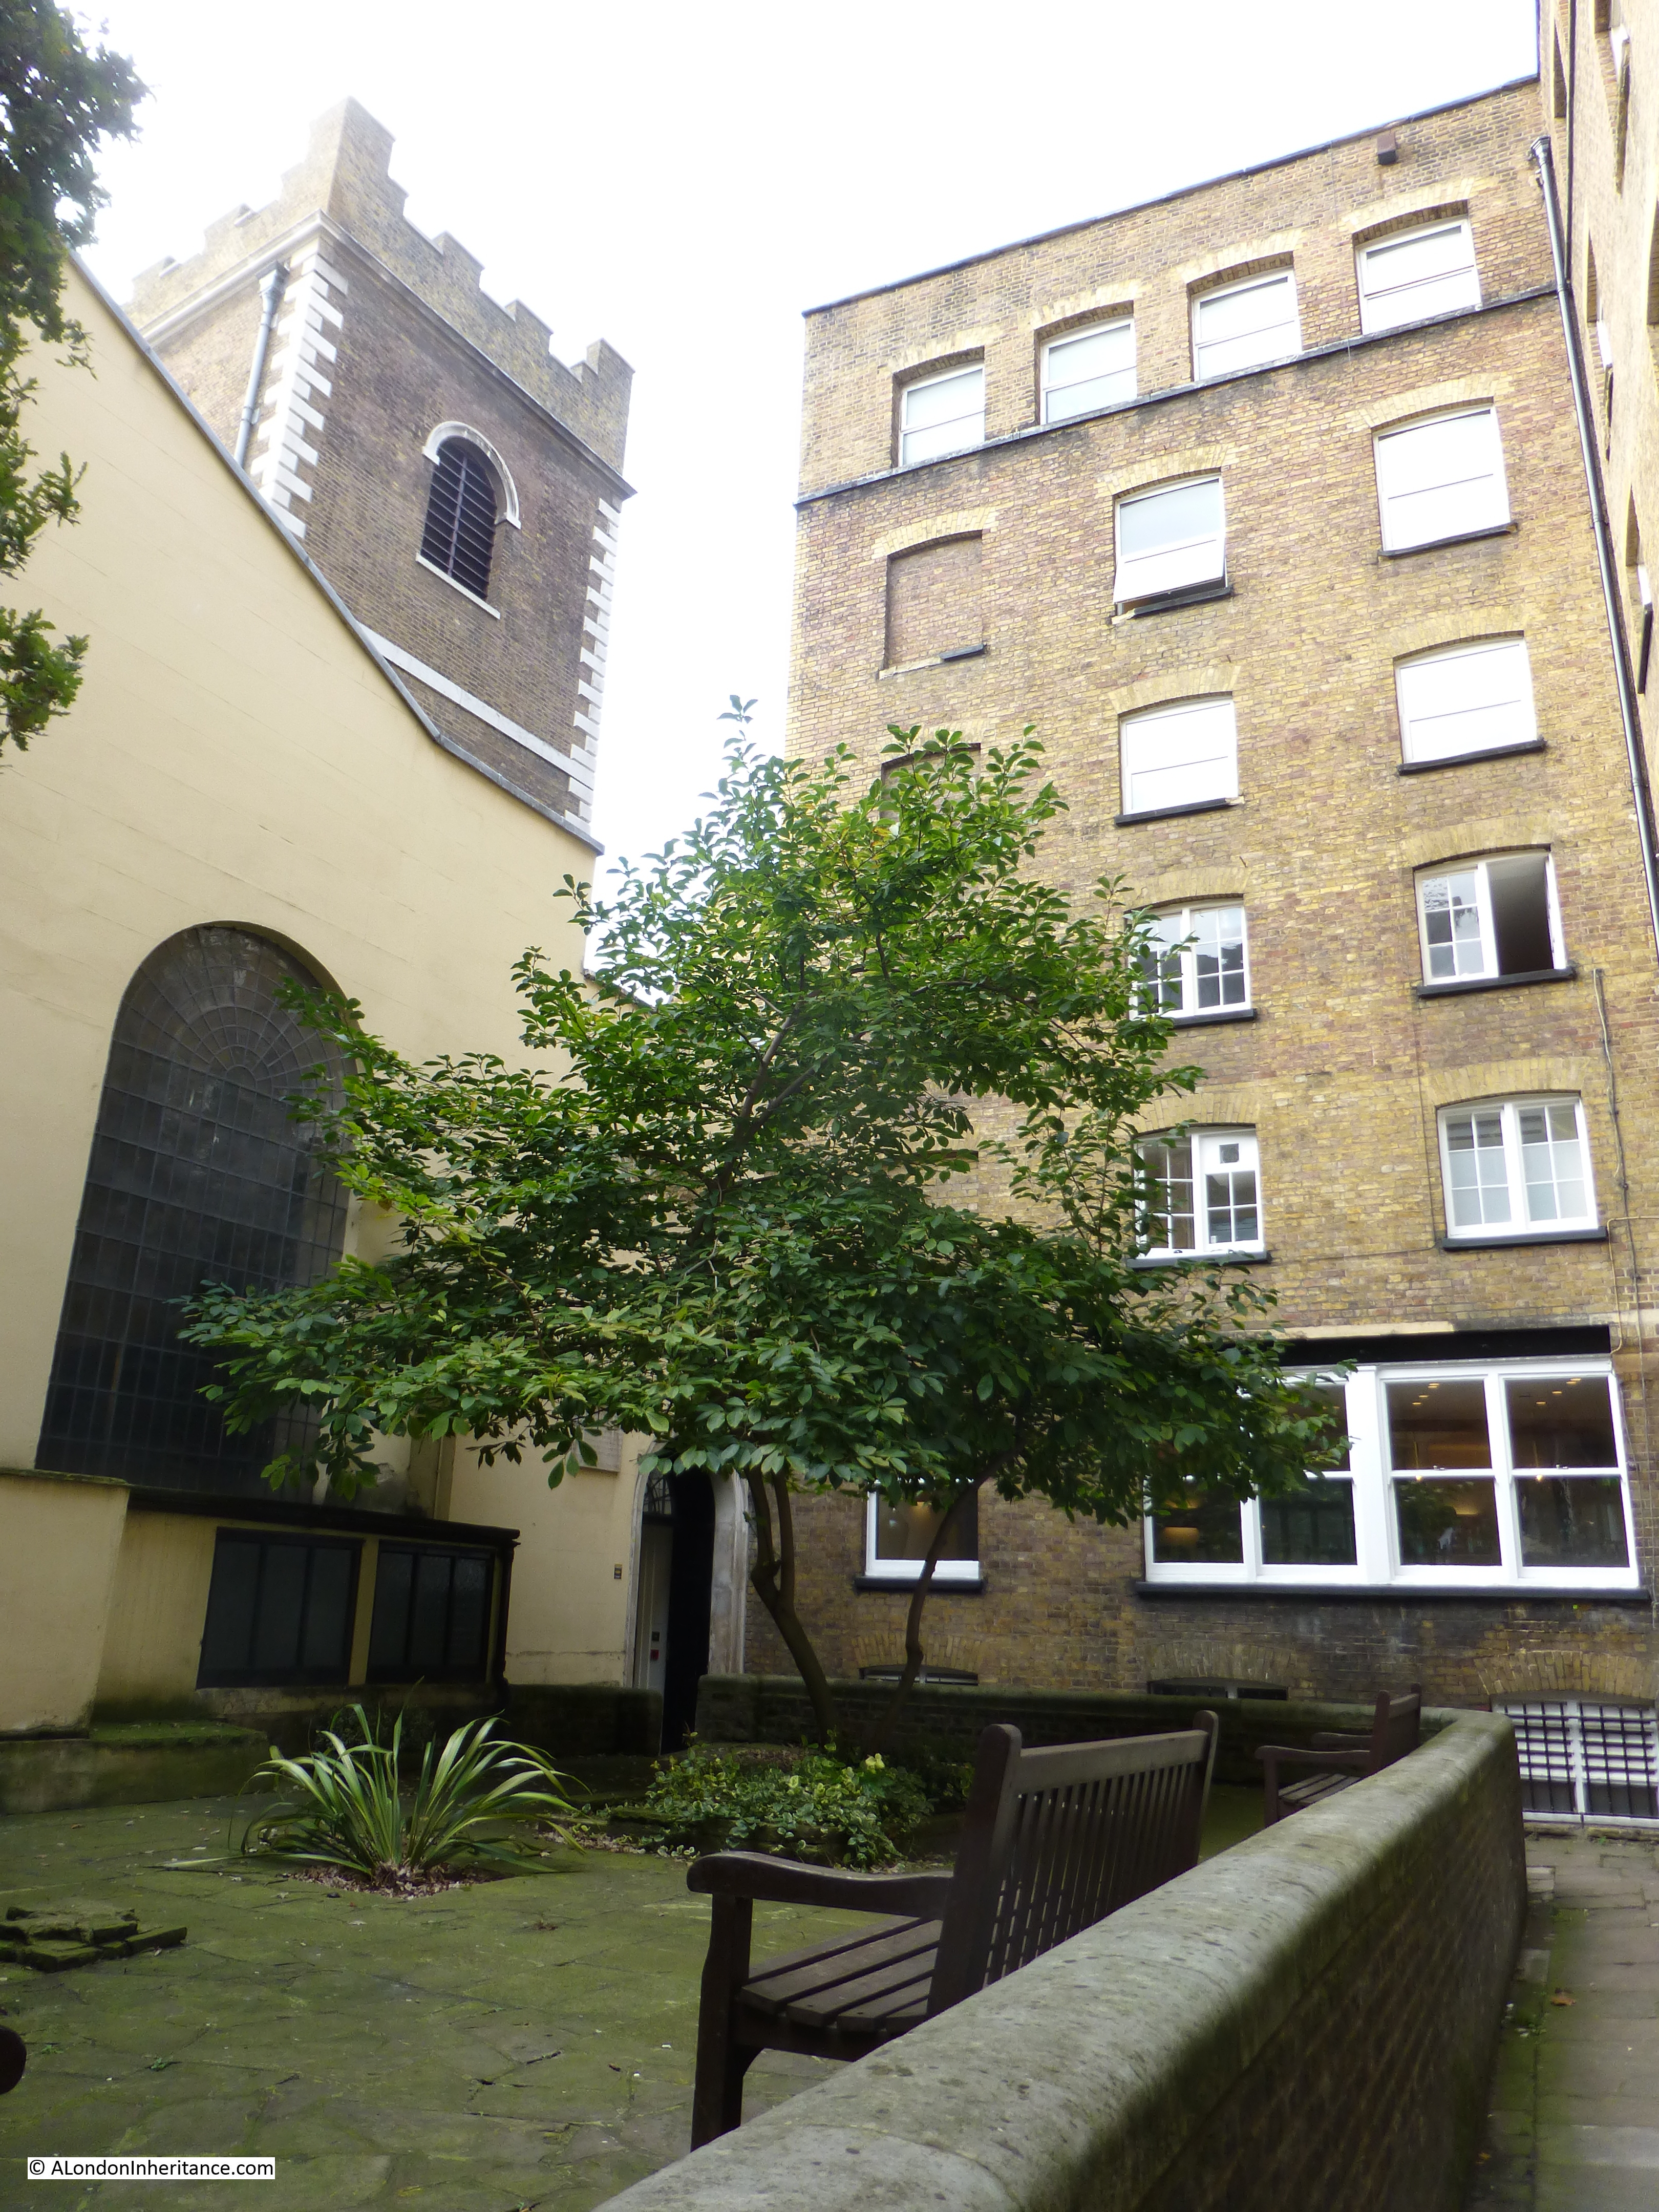
Despite walking the rest of the route of the boundary I was not able to find any more boundary markers, although there are still a number of reminders of the Harpur legacy.

A small alley off Dombey Street leads to Harpur Mews:

Bedford Row 13

And this is Harpur Street:

Bedford Row 15

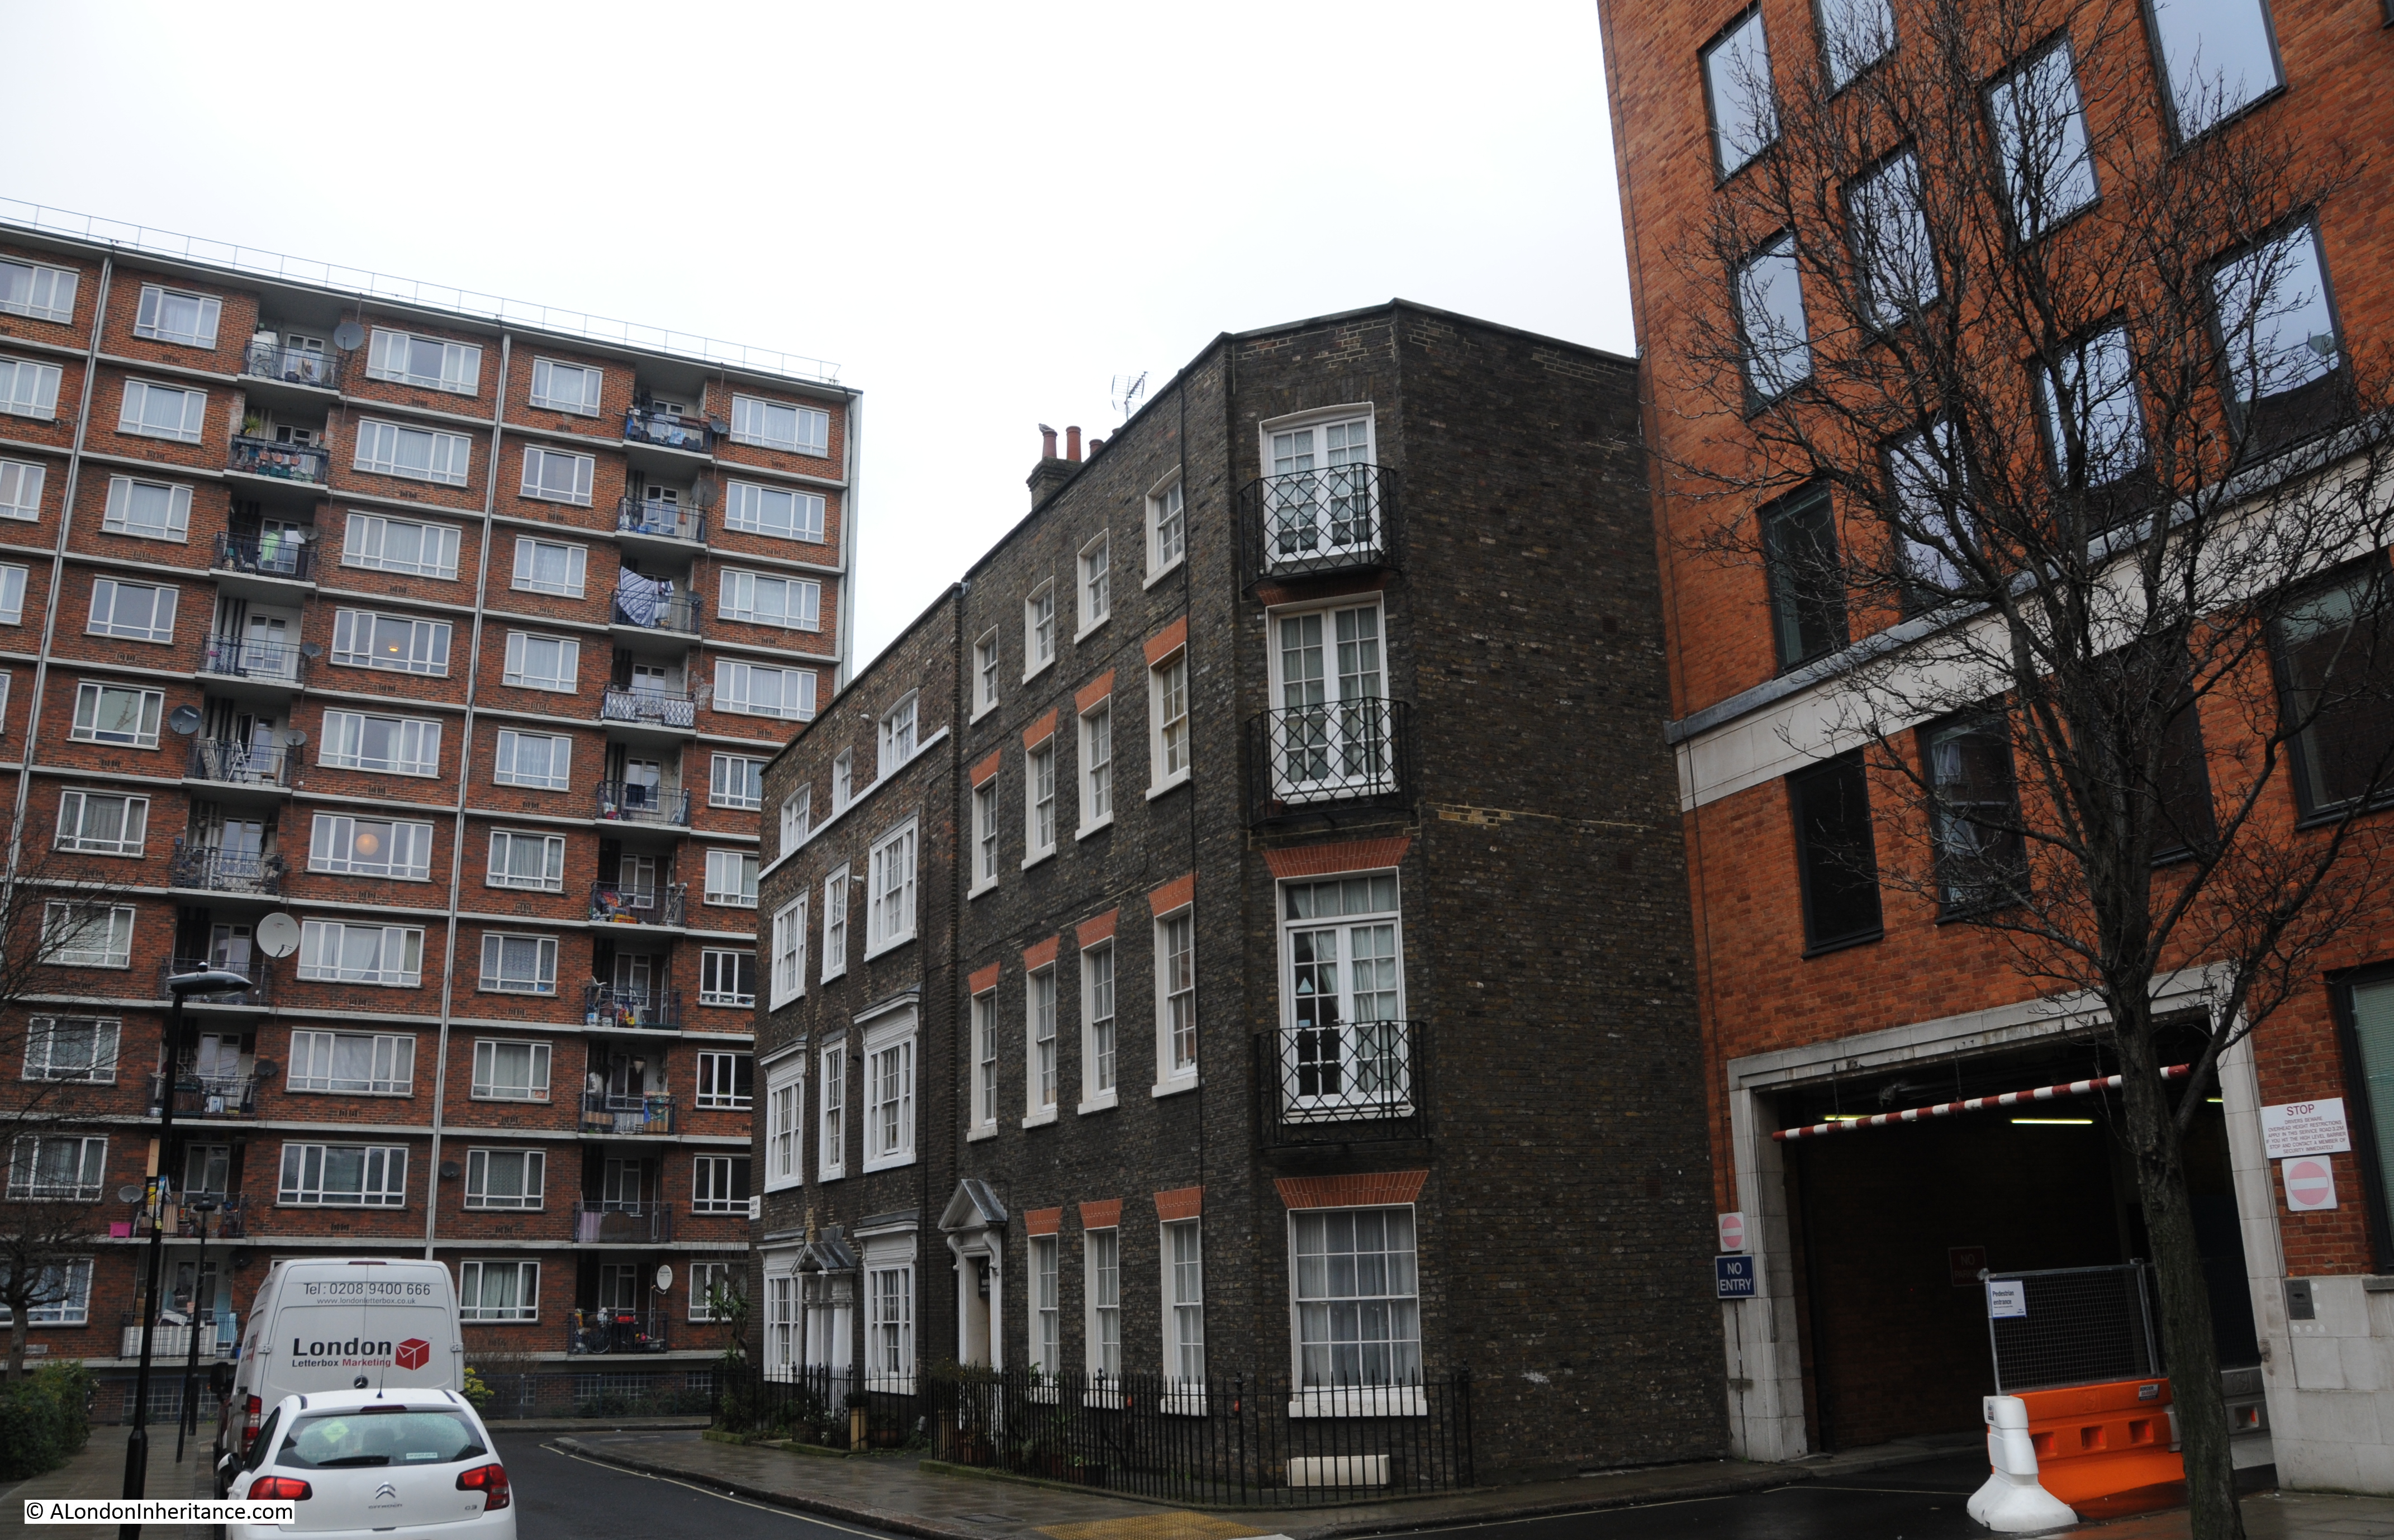
The far house is original and the house nearest the camera is a post war development.

An example of how boundaries between estates were often challenged can again be found in the book “The Harpur Trust” by Joyce Godber;

“There were soon to be more complications over the London lease. The Great Fire of 1666 set in motion a tide of building in London. One of the most active developers was Nicholas Bourbon, who had qualified as a physician, but who had speculative interests  which included setting up in 1681 an office for fire insurance. A contemporary says that the trade of medicine failing, he fell into that of building, and the fire of London gave him means of doing and knowing much of that kind….All his aim was profit. By 1683 he had contributed to the development in the Strand, Soho and elsewhere. Another contemporary notes in his diary in 1684 on 11 June “Dr. Barebone, the great builder, having some time since bought the Red Lyon fields nears Gray’s Inn to build on….the gentlemen of Gray’s Inn, thinking it an injury to them, went with a considerable body of 100 persons, upon which the workmen assaulted the gentlemen and flung bricks at them. Red Lyon Field, now Red Lyon Square, adjoined the revised Harpur land on the southwest; between it and Gray’s Inn were trees and open space, now Bedford Row. the case came before the Privy Council, where it was said that Barbon marched about the fields at the head of his workmen, shouting and halloing.”

William Harpur died on the 27th February 1574 at the age of 77. He was buried in St. Paul’s church, Bedford.

The Bedford Charity is still going, renamed the Harpur Trust, and still using income from the properties owned within the original Harpur estate to support education in the town of Bedford.

Remarkable that 450 years later, Harpur’s original bequest continues to benefit education and can still be traced on the streets of London, and that going in search of a water pump can lead you off in a totally different direction of London’s history.

The sources I used to research this post are:

  • The Harpur Trust 1552 – 1973 by Joyce Godber published in 1973
  • My thanks to the Surveyor of the Harpur Trust for the provision of the map

alondoninheritance.com

One Year Of Blogging, Seventy Years Of Photography

A year ago I wrote my first blog post. It was about the location of the first bomb on central London in the last war, a site in Fore Street commemorated by the sign in one of the photos my father took shortly after the war:

IMG01992 - 1

It seemed a fitting place to start a blog where my main focus is to discover how London has changed over the last seventy years, and to learn more about the history of each location.

It has been a fascinating year and I have learnt so much about London by researching the subject of each week’s post.

I would like to thank everyone who has read, commented, provided some additional information, subscribed by e-mail and followed on Twitter. It is really appreciated.

To mark the first year, it would perhaps be a good time to provide some background as to why I started the blog and the photography that I am using to build up a personal view of how London has changed.

As a family, we have a long attachment to London. My great-grandfather was a fireman in East Ham, my grandfather worked in an electricity generating station in Camden, but it was my father who was born and lived in Camden during the last war, who started taking photos of London at the age of 17 in 1946. I also grew up listening to family stories about London and being taken on walks to explore the city.

I have had his collection of photos for many years. Not all of the photos were printed, many were still only negatives and have been stored in a number of boxes in the decades since the photos were originally taken.

Film for cameras immediately after the last war was in short supply. The first film he used was cut from 35mm movie film which had to be rolled into canisters before use. When standard 35mm camera film cartridges became more readily available, the film quality also improved with Ilford being a major provider to the retail market.

I have been looking after these boxes of photos and negatives and about 10 years ago started a project to scan all the negatives. The very early ones on the worst film stock were starting to deteriorate so the time was right to begin this work. Due to family, work and other commitments it took the 10 years (and now on my third negative scanner) to complete the series of black and white photos, over 3,500 covering not only London, but also post war cycle trips around the UK and Holland along with his period of National Service starting in 1947.

Some of the storage boxes of negatives:

negatives 1It was a really interesting project. Seeing long-lost London scenes appear on the computer screen. Never knowing what a new strip of negatives might contain.

A number of the photos were easily identifiable. Those which my father had printed often had the location, date and time written on the back, but for many there was no location.

Flicking through these photos on the computer, a project to find the locations, understand the changes since the original photo was taken and use this as a means to learn more about this fascinating city seemed the logical next step.

I also needed an incentive to follow this through. A blog seemed a possible method to document the project and attending one of the Gentle Authors blogging courses last February provided the final kick I needed to get this underway.

Photography just after the war was very different when compared with the cameras available today. My father started taking photos using a Leica IIIc camera in 1946.

Leica_IIIc_mp3h0295

(Photo credit: By Rama (Own work) [CC BY-SA 2.0 fr (http://creativecommons.org/licenses/by-sa/2.0/fr/deed.en)], via Wikimedia Commons)

Leica produced these from 1940 to 1951 and apparently they were readily available after the war, brought home by returning solders who had bought them cheaply in Germany. This was the source of my father’s camera.

Unfortunately he sold this in 1957 to purchase a Leica IIIg camera, however this one I still have as he continued to use this until the late 1980’s when he finally bought a new SLR camera. This is his Leica IIIg which I still posses:

Leica IIIG 1The lens on the camera is not the standard for the Leica IIIg, it came from my father’s original Leica IIIc. Lenses on the Leica III range up to and including the “g” model were a screw fitting and compatible throughout the range, so although the camera body of the Leica IIIg was not used for the early photos of London, the lens was from the original Leica IIIc and was used for all the 1940s and 1950s photos in my blog.

I have recently had the camera serviced to fix a sticking shutter, so a future project for the Spring is to start taking photos using the Leica, which, having the same lens as used for the original photos should make it easy to get the same perspective. Not always possible when using a new digital camera with a completely different lens for the current comparison photos.

It will be an experience to be taking photos of the same scene, from the same place, almost 70 years apart and with the photo taken through the same lens.

I have used cameras with inbuilt light meters since my first camera in the mid 1970s. The Leica III range did not have this facility and external measurement was needed in order to set the correct aperture and speed before taking a photo. I still have the Weston Light Meter that my father used for all his photography with both the Leica IIIc and g:

Weston 1The Weston Master Universal Exposure Meters were made by Sangamo Weston in Enfield from 1939 and provided a method of measuring the light level. The user would hold up the rear of the light meter (which had a light-sensitive cell which generated an electric current proportionate to the intensity of the light), towards the subject of the photo. The meter on the front would then display the light intensity and using the dial below the meter, this reading would be used to calculate the aperture and speed settings for the camera, specific to the scene being photographed.

With practice it was possible to visually estimate the light level and the settings needed, and some degree of wrong exposure could be corrected when the photo was developed in the dark room. There was both an art and a skill to getting the correct exposure, something I need to try to learn before taking the Leica back onto the streets of London.

Any serious amateur photographer of the late 1940s and 1950s would develop their own photos and my father was no exception (he was also a member of the St. Brides Institute Photographic Society). The lens on the camera also served as the lens on the enlarger which projected the negative onto the paper during the developing process (another reason why he kept the lens from the first camera).

When printing photos, it was useful to record the details, not just when and where the photo was taken, but also the settings on the camera and developer. He recorded this on the back of the photo. The following is a photo of the Thames at Shadwell:

shadwell front

And on the rear is recorded that the photo was taken on the 26th May 1953 at 11:15 am, along with the speed and aperture settings and that a filter was used. On the third line is recorded the film type and the parameters used during developing.

Ishadwell rear

My father continued taking photos of London through the 1980s and 1990s. I have started scanning these and they cover not just central London, but also the Isle of Dogs, north and east London, Greenwich etc.  The posts on London Hairdressers and Murals and Street Art from 1980s London are some of the first I have scanned.

I started taking photos of London in the mid 1970s (can an urge to photograph London be inherited?). The photos from the posts on Baynards Castle and a Dragon Rapide over London are some of my early photos.

The first camera I could afford on pocket-money was a Russian built Zenith-E. The only problem with this camera was a random sticking shutter so you would never know whether you would have a good photo until after they were printed. Very frustrating.

My first serious camera was a Canon AE-1 bought on hire purchase in the late 1970s when I first started working.

ae1

A job on the South Bank, started in 1979, introduced me to the photos my father had taken when he showed me the printed photos he had taken of the same area just after the war and before the Royal Festival Hall and the Festival of Britain.  I think it was from this point that I knew I wanted explore all the photos he had taken. I included some of these photos in last years posts here, here and here.

I switched from film to digital in 2002 and now use a compact Panasonic Lumix and a Nikon D300 and hopefully soon a Leica IIIg if I can master the techniques needed to correctly set the exposure levels.

Digital photography has provided significant benefits over film photography, however having been through the process of scanning these negatives, the earliest of which are almost 70 years old it does make we wonder how many of today’s digital photos will still be usable in 70 years time.

Negative film can be stored cheaply in a shoe box and providing it is not exposed to extremes of heat, cold, humidity and light will last a long time. To view the original photo, it is simply a matter of shining a light through onto a receptive surface, whether photo paper, within a scanner etc.

Apart from professionally archived digital photos, how many personal digital photos will survive the next 70 years? Computer hard disk failures, changes in technology etc. over the next 70 years may well mean that the majority of photos will be lost or unreadable.

Looking back on the first year of the blog, one of the most remarkable events happened when I published the following photo of a man repairing a chair on a London street:

Chairmender2

Thanks to the Internet, the photo was seen by Rachel South who identified him as her grandfather, Michael George South. Remarkably, Rachel is still following the same craft and her website can be found here. The original post is here.

My favourite location from the first year has to be the Stone Gallery of St. Paul’s Cathedral.  It was from here that just after the war my father took a series of photos showing the whole panorama of London. The devastation caused by bombing in the immediate vicinity was clearly visible and the City skyline looks very different when compared with today.  The full posts can be found here and here, and below is one example of the original photo, looking towards Cannon Street Station with the 2014 photo of the same scene following:

IMG02591- upload

And the same scene in 2014:

DSC_1392-uploadMuch of the devastation around St. Paul’s was caused on the night of the 29th December 1940. It was fascinating to research the story of the St. Paul’s Watch and the night of the 29th December for posts here and here.

London continues to change. One of the major projects going through planning approvals during the year was the Garden Bridge. This will have a dramatic impact on the Thames and surrounding areas. I gave my thoughts on this in a post in December which can be found here.

The Garden bridge will have a very dramatic impact on this view from Waterloo Bridge:

garden bridge 13So looking forward to the second year, I have many more places to explore and research. I plan to extend the range a bit further. My father took a river trip from Westminster to Greenwich and there are a whole sequence for photos showing the old docks and wharfs along the river as they were in the early 1950s. Also a series of photos of Hampstead will require a couple of visits to hunt down all the locations from these original photos.

Again, my thanks for your interest in the blog, and if you see someone in the coming year on the streets of London trying to work out how to take a photo with an old light meter and camera, that will be me with the Leica IIIg.

alondoninheritance.com 


Aldwych Underground Station

I have an underground map from 1963 and whilst there are some very significant differences when compared with an underground map of today, for example the yet to be constructed Jubilee Line, there is one station on the 1963 map that has disappeared.

Underground Map 1

Find Holborn Station in the above map. This has the Central and Piccadilly lines passing through, and there is a short stub section of the Piccadilly line going to an Aldwych station.

Aldwych station closed to passengers in 1994, however every so often the London Transport Museum organises tours of the station and yesterday I headed to Surrey Street, just of the Strand to take a look inside a station that I have walked past many times, but have never seen inside.

The external entrances of the station are still very visible. The station was built on a block of land between the Strand and Surrey Street with an entrance in each.

The following photo shows the block with the Strand entrance on the right and the Surrey Street entrance just visible on the left.

Aldwych 2

A close up of the Surrey Street entrance. The tiling is a very distinctive feature on both entrances:

Aldwych 1

The station was built on the site of Royal Strand Theatre which closed on the 13th May 1905. The site had been a theatre for much of the 19th century. The Royal Strand opened on the 5th April 1858 and was a reconstruction of the Strand Theatre which had previously stood on the site.

The underground station opened in 1907 as the Strand Station. It was renamed Aldwych in 1915.

On entering the station, one is greeted with a now empty set of telephone booths. A reminder of the pre-mobile days when a fixed pay phone was needed to make a call when travelling in London.

Aldwych 18

The original lifts remain, although they do not work and were one of the reasons why the station closed. The lifts were still mainly the original 1907 equipment and replacement was urgently needed, however the very significant cost of replacing two lifts could not be justified for a station with only 450 passengers a day.

Aldwych 21

Passenger numbers through the station were very low from opening. This resulted in the ticket office being closed in 1922. Ticket booths were built into the lift cars so as well as operating the lift, the lift man could sell and collect tickets.

Lift control equipment:

Aldwych 19

Without operational lifts, the platforms are now reached by a spiral staircase of some 160 steps. The base of the staircase:

Aldwych 22

Platform 1 is the first platform to visit. This has an old Northern Line train in position along the platform. This platform and the train are used for training of the Underground’s Emergency Response Unit and has also been used as a film set for a considerable number of TV programmes and films. The old posters are more recent reproductions as part of creating an authentic platform for filming.

Aldwych 6

Aldwych was not part of the main Piccadilly Line and only had a shuttle service operating to Holborn.

More advertising posters:

Aldwych 13

This platform still has an operational track towards Holborn station:

Aldwych 8

During the war, Aldwych station was a major air raid shelter which could accommodate up to 1500 people and was equipped with first aid facilities and a canteen. The train service to Holborn was suspended on the 22nd September 1940 from when the station was used as a shelter. The following photo is from the Imperial War Museum’s collection (© IWM (D 1675))

IWM (D 1675)

The following, also from the Imperial War Museum’s collection (© IWM (HU 44272)) illustrates just how basic and uncomfortable the facilities were, but considerably safer than being above ground during a major raid.

IWM (HU 44272)

The shelter formally closed as a shelter in May 1945 when war ended. peak usage had been during the early years of the war, with a second peak when the V1 and V2 weapons were targeted at London during the closing year of the war.

To get from platform 1 to platform 2 there is the walkway above the platforms as is typical in many other operational stations:

Aldwych 5

Platform 2 is very different to platform 1. This platform was closed for train services in 1914 with only platform 1 continuing to be used. Much of this area and the tunnel to Holborn was used as a store-room during the war. Many of the treasures from London museums were moved here for safety, including the Elgin Marbles from the British Museum. This is looking in the direction of Holborn.

Aldwych 24

On the right can be seen part of the original Strand name of the station, shown below in more detail:

Aldwych 12

Only the “AN” still visible of Strand. The “Station Closed” posters are modern reproductions.

Platform 2 has also been used by London Underground to create mock-ups of station tiling and decoration in a realistic environment.

The opposite end of the platform, away from the Holborn direction is bricked off, with the exception of a door:

Aldwych 10

Behind the door is the original 1907 run off tunnel:

Aldwych 15

If a train did not stop, it would continue into the run off tunnel which had sand laid along the ground to try to slow the train. At the end of the tunnel are the original 1907 buffers and beyond these the tunnel terminates in a brick wall. Hopefully the dragging effect of the sand and the buffers would have done their job.

Adjacent to the run off tunnel are some of the original stairs. believed to have been intended as the original entrance to the platform:

Aldwych 14There are also a number of tunnels which were never used by passengers and remain in their basic state. Even when the station was under construction there were concerns that passenger numbers would be low so only the main exit / entrance passages were fully finished.

Aldwych 16It was here that our guide told the story of why it is possible to feel a breeze, without the passing of any trains through the station.  The lead actress in the last play to run at the Royal Strand Theatre before it was demolished to make way for the station  was so unhappy that the play that was going so well was being cut short, swore to come back and haunt the station.

Sniffer dogs in training at the station have also been known to avoid this area of the station. A nice story, but looking into the dark of these tunnels does allow the imagination to run wild for a moment.

Aldwych 17

All too soon, it was time to climb back up the 160 steps to ground level and head out into Surrey Street, which as the sign below suggests, provides a short walk down to Temple Station.

Aldwych 20

A fascinating insight into one of the disused underground stations that are to found scattered across the underground system. As usual, the tour was superbly run by the London Transport Museum, with their highly knowledgeable staff and volunteers as guides.

alondoninheritance.com

Battersea Power Station, Pimlico Gardens, The Tyburn And Vauxhall Bridge

Battersea Power Station is one of London’s most well known industrial landmarks. The first phase of the power station was completed in 1933 and the station finally stopped generating electricity in 1983.

Since then, the majority of the building has been left a shell, preserved due to being a grade 2 listed building and the subject of various schemes for rebuilding and regeneration of the area.

My father took the following photo of the power station from the north bank of the Thames, in the very early 1950’s when three-quarters of the building was complete.

Battersea 2

When the photo was taken, the power station only had three chimneys. Power stations are frequently built using a modular approach so that the site can start generating electricity as soon as possible and capacity added when there is sufficient demand and an economic justification. This approach was used in the 1930’s and continues to this day.

Battersea “A”, the first phase of the power station consisted of the right hand side of the building as seen from the north bank. Construction of this part of the building started in 1929 and the station was operational soon after the Sir Giles Gilbert Scott brick exterior work was finished in 1933.

Battersea “B”, the left side of the building commenced in 1944 with the fourth chimney completed in 1955 when the power station reached the configuration that was to last until closure.

There have been many failed scheme to reconstruct the building since closure, however work finally started last year, so before there was too much change, last summer I took a walk along the north bank of the Thames to take some photos from the same position as my father’s original.

Battersea 1

There is about 62 years between the two photos and although the power station is now only a shell of the original, the overall impression of the site is of very little change in the intervening years. The first crane has arrived on site and the very early stages of work has commenced on the building.  The site will soon change dramatically.

The gas holder in the background in both the original and later photos is nearly 300 feet high and 180 feet across and could hold seven million cubic feet of gas.

I recently found another photo my father took, probably on the same day. This was at the very end of a strip of negatives and has some damage to the edge which caused a problem with scanning but I finally managed to scan the following:

Battersea 12

This photo was taken from the north end of Chelsea Bridge and very clearly shows the three chimneys, with a crane at the far corner, probably engaged in the construction of the remaining part of Battersea “B”.

This year, I took the following from the same position as my father’s original photo, which also shows how work has rapidly increased since the summer of last year.

Battersea 11

Following publication of this post, I received the following from Adrian Prockter who runs the “knowyourlondon” blog:

“Only three chimneys were required because there were only three boilers underneath. The fourth chimney was added purely for decoration and, probably more importantly, to provide an even weight distribution for the building. Because it is built on clay, a symmetrical shape will provide an even pressure across the foundations”

Which answers why in all the photos I have seen of Battersea in operation, I have not seen one with smoke from the fourth chimney.

Battersea power Station is now a major construction site. One of the first major changes being the removal of the chimney on the corner of the building to the right of the photo. The level of corrosion and cracking on the original chimneys was such that they were considered unsafe without major work. Apparently the only way to deal with this was to dismantle the original chimneys and then rebuild to the same designs. Unfortunately when the building is complete they will not be the original chimneys, but at least the overall appearance of the building with a chimney at each corner will be the same.

Battersea Power Station was photographed from the air by Aerofilms during the period the building evolved from the initial configuration with two chimneys through to the final four chimneys. The following photo was taken in 1946 and clearly shows the three chimneys in operation with a space in the lower quarter where the final generating unit and chimney would soon be added to complete the building.

EAW001432

This Aerofilms image taken in 1952 shows the main building nearing completion with only the fourth chimney to be added. My father’s photo’s would have been taken at around the same time.

EAW048057

I have no idea whether there is any truth in this, but one of the stories my father told me as a child was that when construction of the building was on-going during the 1930s and tensions with Germany were on the rise, there were rumours in London that the chimneys were actually very large guns. The fact that the chimneys point straight up so would not have been very effective as guns does not seen to have been considered. No idea whether this is true, but a nice story.

The following photo is of the cranes on the edge of the river that were used to unload coal from barges on the river to conveyor belts that moved the coal to storage areas ready to be burnt.

As well as above ground storage, the power station also had a sunken storage area adjacent to the river. This was almost 200 yards long and was able to store 75,000 tons of coal.

The cranes ran on rails and could move along the river edge to the location of the waiting barge. The current cranes are from the 1950s, replacing the original cranes from the 1930s. These cranes are also grade 2 listed and will be retained.

Battersea 3

As well as the external appearance, Battersea Power Station had a number of other very unique features.

The power station had a gas-washing plant. This was able to remove more than 90 per cent of the sulphur in the smoke emitted during operation. The plumes of smoke were white rather than the very dark smoke from other earlier power stations. A very key benefit given the problems that London was experiencing at the time with air pollution.

Another unique feature of the power station improved the living conditions of people on the north bank of the river. The Churchill Gardens housing estate is opposite the power station and is heated by the power station. The Pimlico District Heating Undertaking implemented a system whereby exhaust steam from two turbines in the power station was used to heat water to 200 degrees Fahrenheit. It was then pumped under the river to a storage system on the north bank where it heated water in the residential supply before being circulated back to the power station. For the time, a very unique combined heat and power system.

The weather when I took my first Battersea photo last summer was excellent so a walk back along the north bank of the river into central London was a very easy decision. There are a number of interesting locations along the short stretch to Vauxhall Bridge.

The first is the lovely Pimlico Gardens between the Grosvenor Road and the river.

Battersea 6

At one end of the gardens is a statue to William Huskisson, a member for parliament but unfortunately also one of the first to be killed in a railway accident.

From “The Face of London” by Harold Clunn:

“Huskisson was killed by a locomotive at the ceremonial opening of the Liverpool and Manchester Railway on 15 September 1830. The procession of trains had left Liverpool, and at Parkside, the engines stopped for water. Contrary to instructions, the travellers left the carriages and stood upon the permanent way. Huskisson wanted to speak to the Duke of Wellington, and at that moment several engines were seen approaching along the rails between which he was standing. Everybody else made for the carriages, but Huskisson, who was slightly lame, fell back on the rails in front of the locomotive Dart, which ran over his leg; he was carried to hospital, where he died the same evening.”

After such a terrible end, Huskisson now quietly watches over Pimlico Gardens:

Battersea 7

Pimlico’s river front was not always so calm. From “The Trip down the Thames by the Victoria Steamboat Association’s Steamers, 1893”:

“Pimlico, once noted for its public gardens. Among them was ‘Jenny’s Whim’ a summer resort of the lower classes, where duck hunting, bull-baiting and al fresco dancing were the order of the day”

A short distance on, the River Tyburn reaches the Thames as recorded by the following plaque on the Thames Path which records the route of the river:

Battersea 13

If we walk on a short distance and walk along Vauxhall Bridge, and providing the tide is low, the Tyburn outflow tunnel is very visible:

Battersea 8

From Vauxhall Bridge we can also look back at the sweep of the river and the power station. This will look very different in a few years time. The south bank of the river from the end of Vauxhall Bridge to Battersea Power Station is currently under a frenzy of building with the new American Embassy and a large number of flats / apartment buildings all of which are probably outside the financial reach of the majority of Londoners.

Battersea 9

The first Vauxhall Bridge was built in 1811-16. The current bridge was opened in 1906 and the most interesting features of the bridge are not visible when crossing over the river. The following photo shows the eastern side of the bridge. Above each of the granite piers is a colossal bronze statue, four on each side of the bridge. The statues were by Alfred Drury and F.W. Pomeroy and are of draped women representing the Arts and Sciences. They were added to the bridge in 1907.

Battersea 10

On the eastern, downstream side of the bridge are Drury’s statues representing Science, Fine Arts, Local Government and Education:

east side statues

On the western, upstream side of the bridge are Pomeroy’s statues representing Agriculture, Architecture, Engineering and Pottery:

west side statues

Each statue weighs roughly two tons and as can be seen from the above photos are very detailed. It is a shame that these probably go unnoticed by the majority of people travelling across and around Vauxhall Bridge.

The sources I used to research this post are:

  • Arthur Mee’s London (A complete record of London as it was before the bombing) published in 1960
  • The Face of London by Harold Clunn 1970 reprint
  • Lure and Lore of London’s River by A.G. Linney

alondoninheritance.com

The Lost Buildings of South Square, Gray’s Inn

Gray’s Inn is one of those self contained areas in London with a very distinct character when compared to the surrounding streets. One of the four Inns of Court with the long held right to call a person to the Bar and to hold the position of Barrister.

Within Gray’s Inn are many different squares, buildings and alleys, there is also a large area of formal gardens, also known as The Walks which have a history dating back to their creation in 1606 by Sir Francis Bacon.

Whilst the history of Gray’s Inn could fill a number of posts, for this week I want to focus on one small area of Gray’s Inn.

There are several small entrances to Gray’s Inn, many of which are closed and locked outside of working hours and last Saturday, on a very bright January morning I walked down the only entrance that is open at the weekend, the same entrance that my father had walked down 67 years ago to photograph some of the buildings damaged by wartime bombing.

Walk from Chancery Lane underground station along Holborn and immediately before the Cittie of Yorke pub, you will find an archway through which a narrow side street provides the main entrance to Gray’s Inn. Walk down this side street, to the first square. This is South Square, the subject of this week’s post.

Stand just inside the entrance and look out to South Square. This would have been the view just after the war:

South Square 1

The dark area on the right is the back of one of the wooden doors that closed off the entrance. I am not sure why my father took the photo from this position rather than move into the square.

The building on the right is the Hall, the focus for the communal life of the Inn. The building on the left is one of the 17th and 18th century buildings that ran along the edge of the square and provided offices and accommodation for the members of the Inn.

The type of damage to the building on the left is typical of incendiary bombs, where a bomb has landed on the roof, caused a fire which was extinguished before reaching the floors below. The archway between the two buildings provides access to the rest of Gray’s Inn with Gray’s Inn Square being just beyond the arch.

In 2015 I took the following photograph of the same view:

South Square 4As you will see from this and the following photos I did not pick the best day to avoid deep shadows. A very bright, but low January sun caused deep shadows from the surrounding buildings.

The Hall on the right was rebuilt after the war with the main features of the building being retained.

The original Hall was built-in 1555-60 and we can get a view of what the Hall was like from “Arthur Mee’s London – A Complete Record Of London As It Was Before The Bombing”:

“The Hall is famous for its magnificent hammerbeam roof and is a noble example of Elizabethan architecture. Its windows have heraldic glass of the 16th and 17th centuries, and the walls are gay with heraldry painted on its Queen Anne panelling. Here hang portraits of three Stuart kings, with Nicholas and Francis Bacon, Bishop Gardiner, and Lord Birkenhead. there is also a fine portrait of Queen Elizabeth showing her as a young woman, She is said to have given the oak screen at the west end of the Hall; it has four richly carved columns supporting a beam on which the decorated gallery rests. On the gallery balustrade are busts of women, and figures holding palms and wreaths recline in the spandrels of the arches. It was in this hall that Shakespeare’s Comedy of Errors was acted at the Christmas of 1594.”

The oak screen mentioned in Mee’s text was said to be made from the wood of a galleon from the Spanish Armada. Although the Hall suffered severe damage in the war the screen had been taken apart for removal and was fortunately recovered with minimal damage. The screen is now in the rebuilt Hall.

The Hall is also one of the few buildings in London that was bombed in both the first and second world wars. In the first, an incendiary bomb landed on the Hall but was quickly extinguished before any serious damage, unlike the second war.

The following photo shows the pre-war interior of the hall (“Reproduced with the kind permission of the Masters of the Bench of the Honourable Society of Gray’s Inn”.)

Hall Gray's Inn

What did surprise me was that the entrance to the rest of Gray’s Inn had been slightly relocated to the left and the original building on the left has been replaced with one of post war construction. A real shame, as from the post war photo, damage did not seem too bad and before visiting the site I was expecting to find the same buildings, but with repairs to the top floor and roof.

The Archivist of the Hon Soc of Gray’s Inn has kindly provided the following information regarding the building on the left:

“the large building to the left of the little bridge, although in the style of the other buildings in the squares, was the Common Room block, built only in 1905 to replace a ramshackle brick structure (this area is the site of the old kitchens). It was in fact repaired after the war, I imagine for precisely the reason you give, but was taken down in 1970/71 – when the bridge was also taken down, although rebuilt in 2011 –  and replaced by the present building, by the architect Quinlan Terry. One of the aims was to align the frontage with that of  No 1 Gray’s Inn Square behind it, and the block was moved several yards to the west, in the process covering the old passageway that used to run from that corner of South Square into Field Court, which was just off the left side of your father’s photo”

Just above the door to the Hall in both the modern and post war photos can be seen the badge of Gray’s Inn, the golden griffin on a black background.

South Square 7

The griffin as the badge of Gray’s Inn has been in use from the 1590s, replacing an earlier badge.

If you now enter the square, turn right and walk to the corner of the square, look across to the building next to the Hall. This is the old Steward’s Office or Treasury Office (built in the 1840s)and this is the photo my father took just after the war:

South Square 2

The name “Gray’s Inn” dates from the 14th century: the premises of the manor house of the de Grays were in use as an Inn of Court by, at the latest, 1388, including the Chapel.

Today’s view of the site of the old Steward’s office is shown below:

South Square 5

A very different building following post war reconstruction, but with the same style of three arches to the entrance.

Now turn to the left and look at the far side of the square. After the war this side of the square was still showing the severe damage suffered during the war:

South Square 3

The building on the right is the same building as in the first photo looking into the square. Post war this side of the square was completely rebuilt:

South Square 6

Whilst this is a post war reconstruction, note that the entrances are the same style as the original building to the right. I suspect that these entrances were recovered from other buildings when they were demolished and reused on the post war buildings to integrate them more into the square and give the impression of earlier construction.

Charles Dickens would have known the South Square well as he was employed there between 1827-8 as a clerk. South Square featured in Dickens David Copperfield. It was in South Square that Tommy Traddles and his wife had rooms at the top of the house when they were first married and it was in this house that they had to house the five sisters from Devonshire when they came to visit.

As with so many places in London, South Square is not the original name. The Inn was originally divided into four courts, Coney Court, Holborn Court, Field Court and Chapel Court. Holborn Court was the original name for South Square.

To the right of the Chapel is the Library. This was also destroyed in the last war and with it, some 32,000 books were lost including books such as the complete collection of old English and Ecclesiastical laws of the sixteenth and seventeenth centuries.

The rebuilt library along one side of South Square with the statue of Francis Bacon standing in the central gardens:

South Square 8

Very few of the original buildings survived the considerable damage done to South Square during the last war, a couple of buildings have survived including this one from 1759.

South Square 9

This building has the same entrance as the building in the post war photo and the same as on the post war reconstructions. The square must have been a fantastic sight before wartime destruction if the three sides of the square were this type of building with identical entrances lining the square, all facing the original Hall and Chapel.

The sources I used to research this post are:

  • My thanks to the Archivist of the Hon Soc of Gray’s Inn for providing corrections to the original text and for the pre-war photo of the interior of the Hall
  • The Lost Treasures of London by William Kent published in 1947
  • Georgian London by John Summerson published in 1945
  • Arthur Mee’s London (A complete record of London as it was before the bombing) published in 1960
  • The Face of London by Harold Clunn published 1932
  • London by George H. Cunningham published 1927
  • Old & New London by Edward Walford published 1878

 alondoninheritance.com

Distaff Lane – How London Streets Have Changed Over The Centuries

Distaff Lane is to be found on the western edge of the City. Just south of St. Paul’s Cathedral and running down from Cannon Street, past the church of St. Nicholas Cole Abbey to Queen Victoria Street.

It sounds like an old street name, which indeed it is, however Distaff Lane is a perfect example of how the City streets have changed over the centuries and what may appear today to be original City streets and lanes are a creation of the last 60 years.

I came upon Distaff Lane when I was looking for the location of one of the photos that my father took in the City just after the war.

The following photo shows the shell of a church in an area which has suffered considerable bombing damage. I was able to identify this as St. Nicolas Cole Abbey by the shape and features of the church, along with the position of Cannon Street Station, the original roof of which can be seen on the right of the photo in the distance.

Distaff lane 1

I could not get to the precise location of where my father took this photo due to subtle changes in street layout. The nearest I was able to get to show the same scene today is shown in the photo below:

Distaff lane 2

The church was fully restored after the war, including the replacement of the spire. The features on the church tower, along with the window to the right of the base of the tower identify this as the same church as the original photo.

Note how the orientation of the street has changed slightly and also the width. In the post war photo the kerb of the street can be seen by the plant growth along the edge. The original street was quite narrow compared to the current street.

The following Google Map shows the location of the church (the church is marked on the map as The Wren, this is the café in the church):

Distaff Lane can be seen curving up from Queen Victoria Street, running past the church then up to the cross roads with Cannon Street, New Change and St. Paul’s Churchyard. The name Distaff Lane is also given to the small pedestrian walkway segment that runs on to join Peter’s Hill and Sermon Lane, and it was from this location just along the pedestrian walkway, looking down Distaff Lane to the church that I took the modern day photo.

Distaff Lane is a perfect example of how London’s streets have changed over time. Not just appearance, but also location and name.

Distaff Lane is in Bread Street Ward, so a good place to start understanding how the area has changed over the centuries is the Bread Street Ward map from 1766, as shown below:

Distaff Map 2I have extracted the area of interest from the ward map to show the detail below:

Distaff Map 3The church at top left is St Augustine Watling Street. This church is adjacent to St. Paul’s Cathedral which is to the top left of the map extract. The block of land below Watling Street which includes Cordwainers Hall is now within the pedestrian area around St. Paul’s. The last Cordwainers Hall on the site was destroyed in the 2nd World War.

Below this is the original location of Distaff Lane, running to the right into Baising Lane. This is now Cannon Street. Cannon Street originally ran the length of Baising Lane and was extended across Distaff Lane in 1853-4 when Cannon Street was widened and extended up to St. Paul’s Church Yard. You will see opposite Cordwainers’ Hall another street call Little Distaff Lane. When the original Distaff Lane was replaced by Cannon Street, the “Little” was lost and this street then became Distaff Lane. This was the position up to the point where redevelopment started after the war.

Cordwainers’ Hall also gives us the origin of the name Distaff Lane. From Old and New London:

“Cordwainers’ Hall, No 7 Cannon Street, is the third of the same Company’s halls on this site, and was built in 1788 by Sylvanus Hall. The stone front, by Adam, has a sculptured medallion of a country girl spinning with a distaff, emblematic of the name of the lane, and of the thread used by cordwainers and shoemakers.”

A distaff is a stick or spindle used in spinning onto which wool or flax is wound. Some sources also state that this activity was carried out in the lane, which may well be true.

Harold Clunn in The Face of London provides us with a view of what the area in front of Cordwainers Hall was like:

“A widening of the roadway between this building and St. Paul’s Churchyard would afford a great relief to the very tiresome congestion of traffic caused by slow-moving vehicles, and that greatest of all abominations, the draught-horse, which seems to monopolize the vicinity of St. Paul’s Churchyard.”

The same book also provides a view of the type of trade that was carried out here;

“One of these great blocks situated between the Old Change and Distaff Lane was originally occupied by the large German firm of Berens, Bloomberg and Company, dealers in fancy foreign goods of all kinds who came to England shortly after the conclusion of the Napoleonic Wars”.

The following extract from the 1940 Bartholomew’s Reference Atlas of Great London shows the area as it was just before the destruction of the last war:

Distaff Map 4

Here we can clearly see Cannon Street running adjacent to Cordwainers Hall over what was the original Distaff Lane.

The original Little Distaff Lane is now Distaff Lane and runs from Cannon Street to the junction with Knightrider Street  adjacent to St. Nicholas Cole Abbey.

Knightrider Street runs over the route of the original Old Fish Street in the Bread Street ward map.

Distaff Lane was also probably called Mayden Lane at one point as Stow records in 1603:

“And on the south side from the Red Lion Gate to the old Exchange, and downe the same Exchange on the East side, by the west end of Mayden Lane, or Distar Lane to Knightriders Streete, or as they call that part thereof, Old Fishstreet”

Now returning to the same area today:

We can summarise the changes to the single street which currently bears the name Distaff Lane.

Distaff Lane is the short pedestrian stretch and then the whole of the road that routes past St. Nicholas Cole Abbey up to Cannon Street and also the short stretch that routes down to Queen Victoria Street (the street name may not be shown, Google map inserts do not always show the street names along their full length).

The short stretch down to Queen Victoria Street (which can be seen on the post war photo and the modern-day photo as a road turning off on the right side) was probably the original Old Change Hill.

This length of Knightrider Street (which was Old Fish Street in the original 1766 ward map) is now the enlarged Distaff Lane, which has also included Old Change Hill.

And finally the stretch from the church up to Cannon Street was originally Little Distaff Lane.

Distaff Lane is a perfect example of how London has evolved over time. Streets with names that have been in use for many centuries may not always be in their original location, and streets have often changed their names several times.

To finish, a quick walk along Distaff Lane.

This photo is looking down what was Old Change Hill. Now just a short length of road which stops before it can enter Queen Victoria Street.

Distaff Lane 3Walk past this turn off and look left and this is the scene now. This was once the Old Change. It went up from here, crossed Cannon Street and Watling Street. It is now Old Change Court.

Distaff Lane 4Walk up to the church of St. Nicholas Cole Abbey and we can look back down Distaff Lane (or what was Knightrider Street).

Distaff Lane 5From the same position, turn round and look up Distaff Lane towards Cannon Street. Although very uninspiring, this is the only part of the street that can justify the use of the name Distaff. This is the original Little Distaff Lane.

Distaff Lane 6At the top of Distaff Lane, turn right and walk a short distance, then look back to St. Paul’s. This stretch of road is the original Distaff Lane as shown in the Bread Street Ward map (although considerably widened). The original name was lost when Cannon Street was extended to St. Paul’s Churchyard.

Distaff Lane 7Walking up to St. Paul’s Churchyard we can see the sign recording the location of the Cordwainers’ Hall as shown in both the original Ward map and the 1940 map.

Distaff Lane 8And finally, this is the location of the Cordwainers’ Hall now. A whole block of buildings were destroyed in the last war and post war redevelopment changed this to a pedestrian / garden area, and opened up the view to St. Paul’s.

Distaff Lane 9

You may also be interested in my post on the church of St. Nicholas, Cole Abbey which can be found here

The sources I used to research this post are:

  • The Face of London by Harold Clunn published 1932
  • London by George H. Cunningham published 1927
  • Old & New London by Edward Walford published 1878
  • Bartholomew’s Reference Atlas of Great London published 1940
  • A Survey of London by John Stow, 1603. Oxford 1908 edition
  • London Lanes by Alan Stapleton published 1930
  • Bread Street Ward Map by Thomas Bowen 1766

alondoninheritance.com


The Waterloo Air Terminal

Following the closure of the Festival of Britain, the Southbank site was swiftly cleared apart from the Royal Festival Hall which was always planned as a permanent facility unlike the rest of the Festival buildings.

One part of the Festival site did remain for a few more years and provided support to the rapidly growing Heathrow Airport to the west. In the early days of Heathrow, transport options to the airport were very limited. The Bath Road ran alongside which provided a route for cars / taxis and there were some limited bus services to the airport, however the extension of Underground and Rail services were still many years in the future. The airlines operating out of Heathrow needed to provide passengers for this new and rapidly growing form of transport with easy access to the airport from the centre of London.

One of the main entrances to the Festival of Britain was on York Road facing the main entrance of Waterloo Station. This entrance also had a dedicated entry / exit to the Underground system at Waterloo with the escalators diving underneath York Road to reach the tunnels to the Northern and Bakerloo lines.

The Festival of Britain was held during the summer of 1951, and two years after closure, on the 27th March 1953 the York Road entrance to the site re-opened as the BEA Waterloo Air Terminal serving passengers on BEA flights and other airlines operating out of Heathrow for which BEA acted as a handler. (BEA or British European Airways was formed in 1946 and merged with BOAC, the British Overseas Airways Corporation in 1974 to become British Airways)

The following photo of the Waterloo Air Terminal was taken in York Road from the end of the access road to the main entrance of Waterloo Station.

Waterloo terminal 1

A British European Airways truck is parked outside the building, a poster advertising events at the Royal festival Hall is on the right. County Hall, the home of what was the London County Council can be seen to the left.

My 2015 photo taken on a damp January morning from roughly the same position is shown in the photo below:

Waterloo terminal 4

In the original photo, the London Underground sign can be seen on one of the columns of the building to the left. In the 2015 photo the underground station is just under the footbridge as it enters the office block. The station entrance and the escalator tunnels down to the main underground stations have not changed in the intervening years which provides a perfect reference point in the old and new photos.

Walk further along York Road towards County Hall and we can look back and get another view of the Air Terminal and the Underground Station entrance can be seen just behind the bus.

Waterloo terminal 3

The Waterloo Air Terminal was in use between 1953 and 1957 and provided check-in facilities, luggage drop-off (which would be collected and taken separately to Heathrow) and a regular coach / bus service provided passenger transport to the airport.

For a short period starting on the 25th July 1955 and ending on the 31st May 1956, a trial helicopter service was run between the Waterloo Air Terminal and Heathrow using the space remaining from the Festival of Britain and a Westland-Sikorsky S55 helicopter, however the high cost of the tickets and the limited capacity of the helicopter did not justify running the service and the coach / bus services remained as the primary means of transport. The helicopter service carried 3,822 revenue paying customers during operation.

Walk to the traffic lights where Chicheley Street meets York Road, walk down Chicheley Street and cross over to the Jubilee Gardens where we can look back towards York Road. This was the rear of the Waterloo Air Terminal:

Waterloo terminal 2

The main terminal is underneath the arches. The building on the left is the BEA Cargo Depot. The coach park is on the right. To the left can be seen the railway viaduct which runs from Hungerford Bridge into Waterloo East. Roughly the same scene in 2015:

Waterloo terminal 5A much larger Air Terminal was constructed by BEA in Cromwell Road in 1957 and the services provided by the Waterloo Air terminal were relocated to Cromwell Road allowing the closure of the site and the redevelopment of the area.

The building that is now located on the site of the Waterloo Air Terminal is Shell Centre, built as the UK Head Offices of the Royal Dutch / Shell group of companies and was constructed on the site shortly after the closure of the air terminal from 1957 to 1962.

Aerofilms took a superb photo of the site after closure of the Festival of Britain and removal of many of the buildings including the central Dome of Discovery, the outline of which can be seen in the centre left of the photo below. It was the large area occupied by the Dome of Discovery that was used for the helicopter service.
EAW048068

The Waterloo Air Terminal can be seen in the lower centre of the photo with York Road running left to right. The curved roof of Waterloo Station can just be seen at the bottom of the photo. The Royal Festival Hall is clearly seen and to the right is the Shot Tower which would soon be demolished.

The Waterloo Air Terminal was only open for 4 years, but during those years it played a small, but significant role in supporting the development of Heathrow. A clear sign in the immediate post-war years of how Heathrow would become such a key part of London’s transport infrastructure.

alondoninheritance.com

St Mary At Hill And Lovat Lane

My posts of last weekend covered some of the extensive damage suffered by the City of London during the war. Fortunately there were areas that escaped with only light, cosmetic damage and have also survived the considerable development in the intervening 70 years. Places remain where it is still possible to get an impression of what London was like as a city of narrow lanes.

The church of St Mary At Hill is best approached not by the road of the same name, but turn off the busy East Cheap / Great Tower Street and head down Lovat Lane. This is the scene which meets you.

st mary at hill 1

Lovat Lane is a narrow lane that heads down to Lower Thames Street and retains the width of many of the city lanes prior to the war. Buildings face directly onto the lane and we can see the tower of St Mary at Hill which, unusually for a City church, still appears to be higher than the immediate surroundings.

The name Lovat Lane is recent. The lane was originally called Love Lane and was changed around 1939 to avoid confusion with the Love Lane further north off Wood Street. This change also appears to have justified the lane being included on maps. In the Bartholomew’s London Atlas for 1913, Love Lane is included in the index and referenced to the correct grid square in the map, however it is not shown. In the 1940 Bartholomew’s Atlas, the name has now been changed to Lovat Lane and is shown on the map. Various early references attribute the original name as being due to the frequenting of the lane by prostitutes, however this may be wrongly using the same source for the other Love Lane which Stow refers to as being “so-called of wantons”. The new name Lovat was chosen due to the quantity of salmon being delivered to Billingsgate Market from the fisheries of Lord Lovat.

As with many other City churches, a church has been recorded as being on the site since before the 12th century. The church was severely damaged in the 1666 Great Fire and then came under the rebuilding programme of City churches managed by Wren, however it was probably Wren’s assistant Robert Hooke who was responsible for much of the design and reconstruction of the church. The “At-Hill” part of the name is due to the church being located up the hill from Billingsgate and the downwards slope of Lovat Lane is one of the locations where the original topography of the City can still be seen with the streets sloping down from the higher ground down to the river.

Despite the central location of St. Mary, the church survived the blitz, although a fire in 1988 severely damaged the Victorian woodwork, the organ and the ceiling, however the interior has been superbly restored.

Before entering the church, walk past the church and look back up Lovat Lane, again we get a really good impression of what the narrow city lanes would have looked like. Remove the modern-day signage and add some dirt to the road surface and soot stain to the brick walls and we could have travelled back in time.

st mary at hill 7

Although just as we walk back up to enter the church, the modern-day City intrudes:

st mary at hill 8

The church prior to the Great Fire, in common with many other City churches of the time had a spire. These were made of wood and covered in lead. In 1479 the church of St. Mary at Hill paid “Christopher the Carpenter” 20 shillings to take down the spire and 53 shillings to rebuild using 800 boards, two loads of lead, nails and ironwork costing 14s 7d.

On entering the church we can see the following carved Resurrection Panel.

st mary at hill 6

From the information sheet;

“The Last Judgement relief is a very unusual example of late 17th century English religious carving, and most likely dates from the 1670s. Its carver is unknown, but we do know  that the prominent City mason Joshua Marshall was responsible for the rebuilding of the church in 1670-74: his workshop may have produced the relief.  Exactly where the relief was originally positioned is uncertain; most likely it stood over the entrance to the parish burial ground and was brought inside in more recent times.

St. Mary-at-Hill’s relief is one of a small number of Last Judgement scenes carved in later 17th century London.”

We can now enter the main body of the church and a wide space opens up before us, surprising considering the external appearance from Lovat Lane:

st mary at hill 5

The restoration following the 1988 fire created a very simple interior. The original box pews were lost and not replaced leaving a large open space from where we can look up and admire the interior of the roof, restored following the fire of 1988:

st mary at hill 2Again a surprise given the external appearance of the church from Lovat lane.

Within the church before the Great Fire was a large Rood, a cross or crucifix set above the entry to the chancel. In 1426 a new Rood was installed at St. Mary at Hill and cost £36, a very considerable sum at the time. A great stone arch was built to support the Rood, however in 1496 the arch required underpinning to support the weight and to achieve this the church procured three stays and a “forthright dog of iron” weighing 50 pounds.

At the same time the Rood was renovated and we can get an idea of what this must have looked like by the items that were included in the renovation:

– to the carver for making of three diadems, and of one of the Evangelists and for mending the Rood, the Cross, the Mary and John, the crown of thorns and all other faults

– paid to Underwood for painting and gilding of the Rood, the Cross, Mary and John, the four Evangelists and three diadems

It must have been a very impressive sight. The work was funded through a subscription being raised across the parish. Parishioners contributed a considerable sum towards the upkeep and decoration of their church. In 1487 a parishioner, Mistress Agnes Breten paid £27 to have a tabernacle of Our Lady painted and gilded. In 1519 a parishioner provided a large carved tablet to hang over the high altar at a cost of £20. Thirty years later at the time of the reformation the tablet had to be sold and only raised 4s 8d, a time that marked the end of the type of church decoration that had persisted from the medieval period.

Back towards the entrance is the magnificent organ, built by the London organ manufacturer William Hill in 1848. It is the largest surviving  example of his early work and reputed to be one of the ten most important organs in the history of British organ building. William Hill worked for the organ builder Thomas Elliot from 1825 until Elliot’s death in 1832. He had married Elliot’s daughter so on his death he inherited the company. The Hill’s workshop was London-based in St. Pancras and was known for building organ’s of the highest quality, providing organs for many important locations including Birmingham Town Hall and York Minster. The business continued until 1916 when Hill and Son as the company was known amalgamated with another organ builder Norman and Beard of Norwich. The combined company of Hill, Norman & Beard diversified into cinema organs in addition to church organs, however the limited market for these specialist products resulted in the company closing in the 1970s.

st mary at hill 3The organ was restored following the fire of 1988 and rededicated in 2002.

The church has one more secret to reveal. Step through the side door and we are out into what remains of the churchyard. Totally enclosed on all sides and only accessible either through the church or through the small alley at the far end of the churchyard which leads through to the street of St. Mary-at-Hill.

st mary at hill 9A plaque on the wall informs us that “the burial ground of the parish church of St. Mary-at-Hill has been closed by order of the respective vestries of the united parishes of St. Mary-at-Hill and Saint Andrew Hubbard with the consent of the rector and that no further interments are allowed therein – Dated this 21st day of June 1846.” Following closure, all human remains from the churchyard, vaults and crypts were removed and reburied in West Norwood cemetery.

st mary at hill 10The reference to St Andrew Hubbard is an example of the consolidation of parishes after the 1666 Great Fire, The church of St Andrew Hubbard was not rebuilt and the parish integrated with that of St. Mary at Hill.

Looking back towards the doorway we can see, above the round window some of the original fabric exposed .

st mary at hill 11

And at the end of the churchyard, one final look back before entering the short alley that takes us into the street of St. Mary at Hill.

st mary at hill 12

With not too much imagination, Lovat Lane and St. Mary at Hill provide a glimpse of what the City of London was like when many of the City streets were lanes and churches stood tall above their surroundings. Highly recommended for a visit.

St. Mary at Hill is regularly opened by the Friends of City Churches

The sources I used to research this post are:

  • The Old Churches Of London by Gerald Cobb published 1942
  • Old Parish Life In London by Charles Pendrill published 1937
  • Historic Streets of London by Lilian & Ashmore Russan published 1923
  • London by George H. Cunningham published 1927
  • Old & New London by Edward Walford published 1878
  • Bartholomew’s London Atlas, 1913 and 1940 editions

 alondoninheritance.com


The Second Great Fire Of London – 29th December 1940

In yesterday’s post I introduced the St. Paul’s Watch. In today’s post I will focus on the night of the 29th December 1940. Although there had been many bombing raids on London since mid 1940, the first raid where the survival of St. Paul’s Cathedral was at risk and where the Watch were tested in the extreme was on Sunday 29th December 1940.

Before getting into detail, an overview of the area around St. Paul’s Cathedral will help set the scene. The following photo shows St. Paul’s and immediate surroundings just before the war. The Cathedral was surrounded on all sides by narrow city streets, closely packed buildings typically of up to six floors in height. St. Paul’s Cathedral was still the dominant building standing high above the surroundings.

st pauls aerial view 1

To the north was Paternoster Square and Paternoster Row. Historic streets that were one of the centres of the publishing industry with many thousands of books stored in these buildings.

To the north-west is the tower of Christchurch Greyfriars, to the north-east is the tower of St. Verdast alias Foster on Foster Lane and immediately to the south-east of the Cathedral is the square tower of St. Augustine, Watling Street.

To the south, the land dropped down to the River Thames with the extensive warehousing that was still a feature of the City river banks.

The German raid planned for the night of the 29th December was to feature an initial attack led by a specialist Pathfinder Squadron, followed by the first wave of bombers with mainly  incendiary bombs and some high explosive to set the City alight, followed much later in the evening by the second wave of bombers with high explosive bombs. The clear intention was to destroy the City with key strategic targets being the bridges over the river, train stations and tracks and communications centres such as the Faraday building on Queen Victoria Street which was a centre for the London Telephony system and also for international telephony circuits.

The role of the Pathfinder squadron was to locate the target using a beam radio system where radio signals transmitted from the Continent would direct a plane to its target with a change in signal where beams crossed indicating a key geographic point to commence the attack.

The planes of the Pathfinder Squadron flew over the countryside between the coast and south London and on approaching Mitcham the signal changed indicating the point from where a carefully planned course and time would lead the planes directly to the centre of London.

This approach allowed for accurate bombing despite the heavy layers of cloud below. The aim of the Pathfinders was to start fires which the main bomber force could then follow.

At the planned time the bombers released canisters containing the incendiary bombs. On the drop down, the canisters then broke open to shower individual bombs over a wide radius.

The waves of the main bomber force then started to arrive, each loaded with canisters of incendiary bombs and the occasional high explosive bomb.

The following photo from the IWM collection (© IWM (MUN 3291)) show the 1KG incendiary Bomb that was dropped in such large numbers on the night of the 29th December.

incendinary bomb
These were relatively small devices and could be easy to deal with, however when dropped in such large numbers, it only took a few to start fires in hard to reach locations that could very quickly get out of control.

The 1KG incendiary was 34.5cm long and 5cm in diameter. The body was of magnesium alloy with a filling of an incendiary compound (thermite). On hitting the ground, a needle was driven into a percussion cap which ignited the thermite. The heat from this also ignited the magnesium casing causing an intense heat which would ignite any flammable material that the bomb was in contact with.

For the St. Paul’s Watch, the first indication of the danger to the Cathedral came soon after 6pm when they heard a sound described as “a scuttle full of coals being spilled on the floor” which was the sound of incendiary bombs landing all around the Cathedral.

In the crypt headquarters for the Watch, a log was kept throughout the war recording individual events as they happened. Incidents being recorded in a very “matter of fact” way, logging the time and the incident.

The log is still held in the St. Paul’s Archives, the delicate state reflecting the years and conditions of use through the war. I took the following photo of the log covering the 29th December 1940, now in such a delicate state that it needs to be treated almost like a medieval manuscript.

Logbook 1

The two pages covering the 29th December 1940 are shown below:

Logbook 2

The first page shows a quiet run up to Sunday the 29th, the routine call to the Fire Station the main recorded event.

Towards the bottom of the page, the events of Sunday the 29th start to be recorded (I have tried to interpret the text in the log, any errors are mine):

  • Incendiary bombs Library Floor 6.50
  • Colonnade Stone Gallery
  • Extinguished 7.5
  • Incendiary S.E. Buttress 7.15

The second page continues:

Logbook 3

With events continuing into the evening:

  • Fire S.E. Pocket Roof 7.20
  • 8.30 Fireman report of bomb on S.E. roof
  • 8.45 Fire West End Trophy (room or roof?)
  • 8.50 Rang for Fire brigade for West End
  • 8.55 Rang Fire Brigade to say we are holding the fire and they can cancel the (call?)
  • 11.30 returned to AHQ

The “stand to” was then recorded the following Monday morning at 9:40 after what must have been a most exhausting night.

The log does not really do justice to the fight that the Watch had on their hands that night. I suspect that there were too many events and they were too busy to phone through details.

The book “St. Paul’s Cathedral In Wartime” by W.R. Matthews, the Dean of St. Paul’s during the war and who was in the Cathedral on the night of the 29th provides a more detailed account.

“in half an hour fires were raging on every side of the Cathedral, but we had no leisure to contemplate the magnificent though terrible spectacle for many bombs had fallen simultaneously on different parts of the Cathedral roofs. Watchers on the roof of the Daily Telegraph building in Fleet Street, who had a full view of St. Paul’s from the west thought that the Cathedral was doomed and told us later that a veritable cascade of bombs was seen to hit and glance off the Dome. Some of these bombs fell on the long stretches of the Nave and Choir roofs and some into what are known as pocket roofs, i.e. the lower roofs over the aisles; others landed in the Cathedral gardens producing a fairly like effect amongst the trees and shrubs on the north and south sides. Twenty eight incendiary bombs fell on St. Paul’s and its precincts that night. Some of the bombs penetrated the roofs and came to rest on the brick or hardwood floors over the vaulting, but some lodged in the roof timbers and started fires. It may be imagined that the volume of the attack and its dispersal over the wide area of the roofs presented a hard problem for the defence”

Adding to the number and location of fires, the Watch now faced a further problem, the availability of mains water.

That evening, three, thirty-six inch and twelve other large mains were damaged and when water was most needed there was a very low tide on the River Thames. Hoses and pumps pulling water from the river became clogged with mud and the use of Fire Boats became impossible.

By 8 p.m. there were some three hundred pumps at work in and around the City, trying to pull water from whatever source was available, the number of pumps also having the effect of reducing the overall pressure.

The effect on the Cathedral was the failure of all external supplies of water. The Watch was now down to the supplies of water that had been stored in whatever container could be found or used in the days of preparation. Planning that proved extremely fortunate as these kept up supplies to the stirrup pumps which proved the key tool in getting to incendiary bombs and fires in extremely difficult places across the roofs of the Cathedral. Stirrup pumps and sand bags now became the only tools available in the defence of the Cathedral.

The conditions on the roofs for the Watch must have been extreme. The following photo (©Mirrorpix) was taken from the Cathedral on the evening of the 29th December looking over towards Paternoster Square.

W28_10.jpg

The Chapter House can be seen in flames with the roof lost in the lower part of the photo, just to the left of the statue. See my earlier post which can be found here showing the same scene taken by my father after the war, along with my 2014 equivalent.

The photo also shows one of the other challenges to the Watch and to fighting the fires in general. On the evening of the 29th there was a strong south-west wind. This had the effect of blowing heat, burning embers and smoke across the Cathedral from the south, rapidly spreading the fires and making conditions for fighting the fires extremely hazardous (there were also reports that charred paper from City offices had been found as far afield as Upminster after the 29th)

Returning to the Dean’s account of the evening:

“The action in the Cathedral became for a while a number of separate battles on which small squads fought incipient fires at different places on and beneath the roofs. Some of the bombs were easily dealt with, as for example that one which fell to the floor of the Library aisle and was extinguished by Mr Allen and myself. I have a special affection for the scar left by that bomb on the floor – it represents, I feel, my one positive contribution to the defeat of Hitler ! But some of these battles were arduous and protracted. Bombs which lodged in the roof timber were very dangerous and hard to tackle. More than one of these took three-quarters of an hour before they were put out and had to be attacked by two squads, one from below and the other from above. The lower squad had the additional discomfort of being drenched by the pumps of their more elevated colleagues.”

The benefit of all the previous evenings of preparation, training and exercise and the work of Godfrey Allen in preparing the Watch and the defences of the Cathedral were now clearly evident in the way the members of the Watch went to work.

The Dome was always considered a very vulnerable part of the Cathedral. Not only was the Dome one of the defining features of the Cathedral, it was also at a very high risk from fire.

Wren’s design for the Dome was ingenious.  Along with the Dome, there is the Lantern structure at the top of the Dome. the Dome alone could not support the weight of the Lantern, therefore Wren constructed three domes. There is the interior Dome, visible from the floor of the Cathedral. Above this there is a second Dome, actually a brick cone structure reaching up to the Lantern and supporting the weight of the Lantern. The third, exterior dome that we see from outside the Cathedral is constructed around this cone, with a wooden structure supporting the lead on the exterior of the Dome and supporting the weight of the Dome by wooden beams and joists resting onto the cone and the floor.

Any penetration of the Dome by an incendiary would gain access to this wooden structure which could quickly develop into a fire that would engulf the Dome.

Whilst the Watch was busy fighting the fires across the roof, the Cathedral received a call from Cannon Street Fire Station to say that the Dome was on fire. A team was dispatched to deal with this new threat and found that whilst the Dome was not actually on fire, an incendiary bomb had not fully penetrated the Dome and was lodged half way through the lead roof, which was beginning to melt.

Watch teams were allocated to patrol the Dome, but fighting fires in this area was difficult with Watch members having to balance along beams of wood to get to a fire, carrying a stirrup pump and bucket of water.

The bomb eventually fell out of the Dome and onto the Stone Gallery where it was quickly dealt with. The molten lead presumably not providing enough support and the weight distributed in such as way that it fell outwards rather than in.

The survival of the Cathedral was critical for many reasons. In 1940, America had not yet entered the war and there were factions that assumed that the UK was a lost cause and could not withstand the German onslaught. When the Dome was hit, American reporters were already sending cables to their newspapers in the US that St. Paul’s had been lost. The ability of London and the country as a whole to survive the blitz was critical in demonstrating to the US that the UK would withstand the attack and act as a base for any future attack on the occupied continent.

The Dean records: “Whilst the whole sky over the City was brighter than day with the flames that were leaping all around St. Paul’s, Mr Churchill sent a message to the Guildhall that the Cathedral must be saved at all costs. The Guildhall sent the message on to us. We were grateful for this voice from the outside assuring us that the thoughts of many were with us that night, though it would not be true to say that the Watch was spurred to greater efforts, for it was already extended to the limit of human endurance.”

By late evening the areas around St. Paul’s were ablaze. In addition to the above photo of Paternoster Square, the following is from Ludgate Hill looking up towards the western front of the Cathedral on the evening of the 29th December 1940 (photo ©Mirrorpix)

W27_15.jpg

This photo was taken at night, with no artificial lighting. The scene is lit by the fires burning around St. Paul’s. It was claimed to be as bright as day. The vehicles lined up along the road are those of the fire crews working on the surrounding buildings. To the right can be seen fires in buildings between the Cathedral and the River and to the left can be seen the glow of fires from Paternoster Row and down towards Cheapside.

74 years later, on the evening of the 29th December 2014 I took the following photo of the same scene:
st pauls BW

A much calmer scene with only the stopping of tourist buses providing any activity.

Just to the left of where this photo was taken is Ave Maria Lane, a short road that leads from Ludgate Hill to Amen Court. On the 29th December 1940 this lane was ablaze with fire crews working in pairs trying to stop the spread of the fires (photo ©Mirrorpix). Two men and a hose trying to control a long stretch of burning buildings, with the constant threat of explosions, bombing and the structural failure of the burning buildings causing a catastrophic collapse into the street.

W22_3.jpgAnd on the 29th December 2014 I stood in Ave Maria Lane contemplating what it must have been like, and took the following photo:

Ave Maria LaneAnother perspective of the area around St. Paul’s on that evening can be found in the memoirs of the wonderfully named Commander Sir Aylmer Firebrace, Chief of the Fire Staff and Inspector-in-Chief of the Fire Services. On the evening of the 29th December he was working through London to see what needed to be done and what support was required. He started travelling by car from Southwark where serious fires were developing. Across the river he had to abandon the car and worked through the city, walking from Cannon Street to the Redcross Street Fire Station just to the north of St. Paul’s.

Redcross Street is one of those lost under the Barbican development. Fore Street used to extend to St. Giles Cripplegate from where Redcross Street ran roughly north to Golden Lane which still remains. Stand on the north side of St. Giles and look slightly west of north across the water and that is the routing of Redcross Street and the location of the Fire Station is directly in front of you.

We join Commander Firebrace in the control room at the Redcross Street Fire Station:

“In the control room a conference is being held by senior London Fire Brigade (LFB) officers. How black – or, more realistically, how red – is the situation, only those who have recently been in the open realise.

One by one the telephone lines fail; the heat from the fires penetrates to the control room and the atmosphere is stifling. earlier in the evening, after a bomb falls near, the station lights fail – a few shaded electric hand lamps now supply bright pin-point lights in sharp contrast  to a few oil lamps and some perspiring candles.

The firewomen on duty show no sign of alarm, though they must know, from the messages passing, as well as from the anxious tones of the officers, that the situation is approaching the desperate.

A women fire officer arrives; she had been forced to evacuate the sub-station to which she was attached, the heat having caused its asphalt yard to burst into flames. It is quite obvious that it cannot be long before Reccross Street Fire Station, nearly surrounded by fire will have to be abandoned.

The high wind which accompanies conflagrations is now stronger than ever, and the air is filled with a fierce driving rain of red-hot sparks and burning brands. The clouds overhead are a rose-pink from the reflected glow of the fires, and fortunately it is bright enough to pick our way eastward down Fore Street. Here fires are blazing on both sides of the road; burnt-out and abandoned fire appliances lie smouldering in the roadway, their rubber tyres completely melted. the rubble from collapsed buildings lying three and four feet deep makes progress difficult in the extreme. Scrambling and jumping, we use the bigger bits of masonry as stepping stones, and eventually reach the outskirts of the stricken area.

A few minutes later L.F.B. officers wisely evacuate Redcross Street Fire Station, and now the only way of escape for the staff and for the few pump crews remaining in the area lies through Whitecross Street (also now lost under the Barbican development)”.

Quite remarkable to stand outside St. Giles Cripplegate and consider these events happened here 74 years ago, and that this area is so close to St. Paul’s Cathedral, which had it not been for the Watch would almost certainly have suffered the same fate and been severely damaged if not destroyed by fire.

One of the frustrations for the St. Paul’s Watch and also for many members of the Fire Services was that so much could have been saved if many of the buildings also had a Watch, or were open for access. From their vantage point on the Cathedral, members of the Watch saw many instances where an incendiary landed on the roof of a building and smouldered before the heat caused a fire to take hold.

Immediately after landing, an incendiary bomb was relatively easy to do with, sandbags, a stirrup pump and a small supply of water were sufficient, however after a while when the magnesium coating had ignited, temperatures reached very high levels and anything flammable within range of the bomb would catch fire and spread very quickly. Had other buildings employed teams to watch over the roofs, many fires could have been extinguished quickly. As it was the weekend, many buildings were also locked and secured so whilst a bomb may be visible on the roof, gaining access was a challenge.

The lack of water also prevented fires being extinguished. The St. Paul’s Chapter House could have been saved when hit by an incendiary if there had been six buckets of water immediately available.

The scope of the fires that the L.F.B had to fight and the resources needed were immense. The regional L.F.B record for the night recorded that:

  • There were 6 conflagrations that needed one hundred pumps each
  • 28 fires each needing over thirty pumps
  • 51 fires needing twenty pumps
  • 101 requiring 10 pumps each
  • And 1,286 fires which had one pump each

Pumps were sourced from the rest of London and surrounding regions to help fight the fires in the heart of the City. Around 2,300 pumps were eventually in use that night. (Just before the war there had been only 1,850 pumps covering the whole of Great Britain. Far more than this were in use in the City alone on that one night.)

Late in the evening, although the City was ablaze and the Watch keeping a careful watch on the possibility of burning embers spreading the fire to the roof of St. Paul’s the All Clear was surrounded.

German plans had been for further waves of bombers after the first waves with incendiaries, to then attack with high explosive bombs which would have ripped the city apart, have been a very severe risk to those trying to control the fires and to the equipment used to fight the fires.

The weather over France had been getting worse, the grass runways were being turned into mud and late in the evening the command was given to cancel the waves of bombers with high explosive bombs.

The tide also turned in the Thames and the returning water provided much-needed resources for the considerable numbers of pumps now fighting the fires throughout the rest of the night.

After a long night, the situation was bought under control by 8 a.m. on the morning of the 30th, however many fires continued to burn, but did not spread.

My father was 12 years old at the time and lived in flats near Albany Street just off Regents Park. His account of the night:

“1940 ended spectacularly with the great City fire raid of December 29/30. The sirens wailed shortly after 6 p.m. and the raid was in full swing in a matter of minutes,. For once there was only the sound of planes passing overhead and gunfire, no explosives seemed to be dropping. I found this very strange, And then slowly came the orange glow of fires, small at first then increasing in intensity. During a lull in the raid I ventured out to walk the short distance to Camberley House where I knew that a flat section of the roof, accessible to tenants, would provide me with a panoramic view from Highgate to the City. The sight was breath-taking. Two miles to the south-east raged a huge line of fire with great columns of flames shooting hundreds of feet into the night air at intervals as buildings collapsed into the inferno, and later as the raiders returned in numbers showers of incendiaries could be heard with a noise like an express train, well heard above the combined noise, planes, guns and the shots of the night fighters overhead. the sound was unusually distinctive. The raid ended abruptly, just after 9 p.m. and to my astonishment the raiders never returned. After the “All Clear” sounded I went out again looking for shrapnel, now a form of currency between boys. The night had become as day, the great orange glow reflected from the low clouds. Even the barrage balloons appeared as glowing orange balls. the smell of smoke filled the air and from the far off, the roar of flames and dull crash of falling buildings combined to sound like some distant, gigantic blow lamp”

The Dean of St. Paul’s summed up the night’s events:

“The Cathedral came out of this night of havoc with no serious injury. When we reviewed the situation, remembering the perils which had been endured, we were astonished and thankful. The damage amounted to two burnt partitions in the Library Aisle, local injury to the lead and timber work of the roofs and a desk in the Surveyor’s office. When we looked out over the City we saw an appalling scene of destruction. The area to the east, west and north was laid waste and many of the buildings burned for days.”

After the All Clear had been sounded, Londoners were amazed to see that St. Paul’s Cathedral was still standing. The billowing smoke and colour created by the fires resulted in the strange visual effect of the Dome of the Cathedral appearing to float on a glowing sea of cloud, with the colours changing as the wind blew in different directions.

An estimated 24,000 incendiary bombs fell on London that evening. The potential impact of each bomb being amplified by the damage that a single out of control fire could cause, given strength by the wind that blew across the City.

To give an idea of the devastation, the following extract from the London County Council Bomb Damage Maps (source: the London Metropolitan Archives) illustrates the bomb damage around St. Paul’s. (Purple is damaged beyond repair). Whilst this covers the period 1939 to 1945, much of this damage was on the night of the 29th December 1940.

bomb damage map

The scenes that welcomed workers returning to the City on the Monday morning were of devastation. Fires still burning and the streets covered in debris and with fire fighting equipment. The following photo was taken on the morning of Monday 30th December and shows Ludgate Circus and the road up to St. Paul’s. The results of the night’s work still clearly visible.

Ludgate 1

To walk around the Cathedral, late in the evening of the 29th December 2014, the contrast with that night 74 years ago was very apparent. The streets were quiet, Christmas decorations added light to the scene and the Cathedral was lit up, not by fire but by spotlights which nightly turn the Cathedral into one of the most dramatic and beautiful landmarks of the City.

st pauls 2

The incendiary that lodged in the Dome, must have been in the area of the Dome shown in the above photo. It was reported by the Fire Station at Cannon Street so would have been in this segment.

Towards Cheapside, another difference between the two nights is apparent. In 2014, the night was clear with a moon shining across the City. Had the weather been like this 74 years ago, the later waves of bombers carrying high explosive would have been able to take off and the outcome for St. Paul’s, the City and the Fire Fighters would have been very different.

st pauls 3

And down on the Thames, the tide was high in 2014 and had this been 1940 would have been able to supply the water needed for the hundreds of pumps across the City and for the riser water system of St. Paul’s Cathedral, along with the Fire Boats that would have attacked the fires in buildings along the water front..

river thames 1

That rounds off my two posts covering the St. Paul’s Watch and the raids on the night of the 29th December 1940.

I hope this has done justice to the work of the Watch during this single day, and during the war, as well as the London Fire Brigade who worked tirelessly throughout that night, and through the war.

It has been fascinating to research and learn and I have only scratched the surface on this subject. I recommend the excellent books in the sources section below for further reading.

The sources I used to research this post are:

  • I am very grateful to Sarah Radford, Archivist at St.Paul’s Cathedral for providing access to the documents covering the St. Paul’s Watch
  • The Dean of St. Paul’s Cathedral during the war, the Very Reverend W.R. Matthews published a comprehensive account titled St. Paul’s in Wartime published in 1946 (this article only scratched the surface of the work of the Watch. I recommend this book for a detailed and very readable account)
  • St. Paul’s In War and Peace published by the Times Publishing Company in 1960
  • Fire Service Memories by Commander Sir Aylmer Firebrace published in 1949
  • The London County Council Bomb Damage Maps 1939 – 1945 published by the London Topographical Society 2005
  • Bartholomew’s Reference Atlas of Great London published 1940
  • The three black and white photos covering St. Paul’s, the view over Paternoster Square and Ave Maria Lane are from Mirrorpix who retain the copyright for these photos

alondoninheritance.com

The St. Paul’s Watch

In August of last year, I was standing on the Stone Gallery of St. Paul’s Cathedral on a beautiful sunny day with London looking fantastic in all directions. I had my iPad with me which contained photos my father had taken from the same place just after the war, showing a very different London. I covered these photos in two posts which can be found here and here.

Looking at the devastation caused by wartime bombing, it was remarkable that St. Paul’s survived relatively unscathed. How had this happened, and what would it have been like to have experienced such a dramatic event in London’s history?

I wanted to find out more, and I have written two posts consolidating the results of some research carried out since that August day. I decided to pick one day’s events to provide some focus. The bombing on the 29th December 1940 caused fires of such intensity and scale that it became known as the 2nd Great Fire of London and from a distance it appeared that St. Paul’s would be lost.

I have split this across two posts which I will publish over two days on the 3rd and 4th of January 2015. This post covers the St. Paul’s Watch, the volunteers who protected the Cathedral during the war. The second will cover the night of the 29th December 1940, the 2nd Great Fire of London.

My apologies for the length, however I hope you will find these two posts as interesting to read as I did to research. (Unless otherwise stated, in this post, all photos and documents are from the St. Paul’s Cathedral Architectural Archive).

So let’s start with:

The St. Paul’s Watch

In the months leading up to the start of the 2nd World War, there was much preparation in London for what was expected to be a devastating war from the air. Limited bombing during the 1st World War had shown the possibilities, further developed in the Spanish Civil War and then by the Blitzkrieg or lightning form of mechanised warfare used by Germany in the attack on Poland which was the catalyst for bringing the UK into formal war with Germany.

St. Paul’s Cathedral was considered at high risk from aerial bombing. Unlike today, the Cathedral was by far the tallest building in London, standing clear on one of the two hills that formed the original City. Not only was the Cathedral an architectural masterpiece created by Wren, one of London’s main architects after the Great Fire, it was a central landmark in the life of Londoners and to the nation.

In the month’s leading up to the start of the war, the Cathedral started to prepare. On Saturday, 29th April 1939 one of the regular meetings of the Chapter of St. Paul’s was held, and although a regular meeting, this day’s session was different, it was to start planning for how the Cathedral could be protected.

During the 1st World War, a volunteer watch had been kept at the Cathedral and it was along these lines that planning for the new threat was made, with the creation of a volunteer Watch who would have responsibility for defending the Cathedral against any form of aerial attack.

Mr Godfrey Allen, the Cathedral Surveyor was appointed to command the Watch and preparations were made to put the Cathedral onto a war footing.

One of the first challenges was to find sufficient manpower to mount a fulltime, day and night watch over the Cathedral. This was at a time when the majority of the able-bodied, younger male population was expected to be involved within the armed forces. The Cathedral Watch initially started with 62 volunteers from the Cathedral staff, however this number was not sufficient to maintain a full 24 hour Watch over the Cathedral and many of these volunteers were also approaching retirement and when action was needed across the heights of the Cathedral, in the roof spaces, under the Dome etc. additional support was needed.

At the suggestion of Mr Godfrey Allen, a request by the Dean was made to the Royal institute of British Architects (RIBA) for volunteers to join the Watch. RIBA was a perfect match with members having knowledge of architecturally complex buildings and therefore perfectly suited to working in a building such as St. Paul’s and the age profile of experienced architects probably made a larger pool of people available.

The Dean of St. Paul’s made the following appeal:

“St. Paul’s Cathedral is in urgent need of double the present number of Firewatchers. The average strength at the moment is about 20 men a night. Dr. W.R. Mathews, the Dean, is sending out an appeal for volunteers and his first letters have gone to the Royal Institute of British Architects and to the High Commissioners for each of the dominions. He stated yesterday that the work is interesting and volunteers have the unique privilege of being given the freedom of the Cathedral. They are expected to watch one night a week; but the hours of duty can be adjusted to suit individual requirements. The watchers are required to be at the Cathedral not later than 9.30 PM. Subsistence allowance is paid and bunks, blankets and mess room accommodation are provided.”

I would have thought that being given the freedom of the Cathedral would have been a considerable incentive for anyone interested in the architecture and history of the building.

The appeal was successful as another 40 volunteers came forward, with the first full meeting held on the 15th September 1939 and from the 25th September a regular “night shift” from 9.30pm to 6.30am was maintained.

Whilst the Watch was made up of volunteers, it was far from an amateur operation. Under the guidance of Godfrey Allen the Cathedral was prepared and the members of the Watch participated in an extensive series of lectures, training and exercises to prepare them to work in the expected intense bombing to come.

Many of the original lecture notes and training material remains in the archives at St. Paul’s. The following two pages are the initial Air Raid Precautions documented in November 1939. The level of planning and preparation is very clear and highlights what is needed to protect such a complex building as St. Paul’s.

Firewatcher document 2

© The Chapter of St Paul’s Cathedral

Note the reference to “gas proof area” and “gas curtains” in the following page. This was before any serious bombing had commenced and there was still an expectation that as well as explosive bombing, London would also be attacked with poisonous gas. Exercises included first hand experience of gas. A hut in Cripplegate was used to provide the experience of passing through a chamber filled with tear gas. Fortunately this was to be the only contact that London and the members of the Watch had with the much dreaded gas.

Firewatcher document 3

© The Chapter of St Paul’s Cathedral

The complexity of St. Paul’s, the numerous stairs, small corridors, access to roof spaces, access to the external roofs, access to the interior of the Dome etc. were a considerable challenge for those volunteering and without an in-depth knowledge of the building. Many sessions were held, training the members of the Watch to find their way around the Cathedral. Where to find equipment, water supplies, telephones etc. and to be prepared to do this whilst the Cathedral was in the dark,  being bombed, on fire and with the constant threat of high explosive bombs.

To give some idea of the types of small corridors that connect different parts of the upper building, the following are two photos that I took on the way to the Archive.

st pauls corridor 1

Adding to the challenge of trying to get to the site of a fire, the Watch would probably have to work through these corridors by torch-light whilst carrying tools and buckets of water. Remove the electric lighting, cabling and pipes and these corridors are probably unchanged since the time the Cathedral was originally built.

st pauls corridor 2

There were a number of key factors to be considered when fighting a fire.

Large quantities of water could do damage to the fabric of the building. There was a balance to be achieved with using the right approach to extinguish a fire without causing undue damage to what is an architecturally complex and delicate building.

There was the issue of access to difficult locations. In a building as complex as St. Paul’s with many small, hidden locations, access to a large quantity of water was just not possible.

And availability of large quantities of water was always a concern as would be demonstrated on the night of the 29th December 1940. Water would be required not just for St. Paul’s, but also to protect all the buildings in the City. Storage was a problem, the River Thames was tidal and bombing could also damage the pumps extracting water from the river and the complex pipes and hoses bringing water up from the river along the City streets.

One of the key tools in use by the St. Paul’s Watch was the Stirrup Pump. The following photo from the Imperial War Museum collection © IWM (FEQ 864) shows a typical Stirrup Pump in use by the St. Paul’s Watch:
Stirrup Pump

The Stirrup Pump was in such great demand as a fire fighting tool that at one stage, just a single factory in 1941 was producing 10,000 a week. As with all other areas of the Watch, there were detailed instruction and training in the use of the Stirrup Pump.

Firewatcher document 13

© The Chapter of St Paul’s Cathedral

It is interesting to read in one of the introductory lectures that the Cathedral was classified as a “business premises” with the Dean and Chapter being the occupier. As the occupier, their responsibilities were clearly defined as:

  1. for organising the fire watch;
  2. for supplying equipment, appliances and water;
  3. for the instruction and training of fireguards;
  4. for keeping a register of all attendances and defaults;
  5. for giving directions as to the place and time the fireguards are to perform their duties;
  6. for providing sleeping accommodation, bedding, adequate sanitary arrangements and lighting;
  7. for providing facilities of access to all parts of the building, except such parts as may reasonably be excluded

As well as the Watch, St. Paul’s was also prepared for the possibility of direct bombing by the removal of all that was possible to remove and the protection of anything that could not be removed.

The Grinling Gibbons Choir Stalls were dismantled with the more valuable pieces being sent out of London, the rest being stored in the crypt. The ironwork gates by Tijou along with Wren’s model of the Cathedral were also sent out of London. The rarer books were sent from the Library to the National Library of Wales.

Statues and busts which could be moved were relocated to the crypt. For anything that could not be moved, for example the memorial tablets to the Wren family, they were bricked in to provide some degree of protection.

There are a number of photos in the Cathedral Archives that show the Watch. These appear mainly to be posed photos, possibly for newspapers and magazines, however they provide a very good record of the Watch and their working conditions.

A lecture class given in the Stewards Office:

Firewatcher photo 1

© The Chapter of St Paul’s Cathedral

The following photo shows Stretcher Practice in the Dome galleries. In preparing for any bombing, there was a very real concern that the Watch could suffer injury. The Watch would not have waited until bombing has ceased to go out and fight fires, the Watch would have been across the roofs, in the Dome etc. looking out for damage, fighting fires and checking for incendiary bombs that had lodged in hidden parts of the Cathedral in the middle of raids.

Bringing those injured down the long stairs from the upper reaches of the Cathedral was not considered practical, therefore arrangements were in place and tested to lower casualties on stretchers over the edge of the upper areas (for example the Whispering gallery) and lower them down to the ground floor of the Cathedral. I am not sure what would have been more frightening, the external threat from bombing, or being lowered in one of these from the great heights of the Cathedral.

Firewatchers photo 3© The Chapter of St Paul’s Cathedral

Another photo showing stretcher lowering being tested:

Firewather photo 2

© The Chapter of St Paul’s Cathedral

The risk of injury or death was not just when on Watch in the Cathedral. The journey into the Cathedral was just as intense. From St. Paul’s Cathedral in Wartime by the Dean of St. Paul’s:

“Many of our members came from distant parts of London and the task of getting to St. Paul’s on many a noisy night might have daunted the stoutest heart, but it did not daunt the Watch. They came through darkness, falling shrapnel from our guns, and the debris of wrecked buildings, sometimes having to throw themselves on the ground when a bomb fell near, on foot or on bicycle when other transport failed, they came to keep their Watch, whilst those they relieved made similar nightmare journeys home. Men at the look-out posts on the roof glanced occasionally towards their homes and offices wondering what they would find there on the morrow. Some saw their homes go up in flames, but they did not flinch”

This rather puts the modern-day irritation of a delayed train on the way home in context.

The following photo shows members of the Watch at one of the advance locations around the Cathedral:

Firewatcher photo 5© The Chapter of St Paul’s Cathedral

And another similar photo:

Firewatchers photo 7

© The Chapter of St Paul’s Cathedral

Locations were set-up around the Cathedral that could be used as waiting and reporting points and to control specific areas of the Cathedral. Each was equipped with a telephone to enable reporting back to the Control Station in the Crypt of the Cathedral.

These photos also show the ages of the Watch. In 1939 conscription covered males of between 18 and 41 and by 1942 this has been extended to the age of 51. This would have limited the pool of men available to the Watch only to those over the age of conscription.

The remainder of 1939 and the first half of 1940 was relatively quiet for the Watch. Training progressed, exercises were performed and the Cathedral was prepared as best as possible for what was still a threat that whilst imagined had not yet been experienced.

Bombing of central London of any intensity started in August 1940 when on the 24th there was some limited bombing of the City with two bombs near the Cathedral. The first air attack took place on the 7th September when an attack was concentrated on the London Docks. Members of the Watch experienced this first major raid from the high points of the Cathedral. From the Dean’s book:

“It was a golden, peaceful evening and, as the light faded from the sky, the angry red glow in the east, diversified by leaping flames, dominated the prospect, while from time to time the peculiar thud of bursting bombs punctured the silence. We were a silent company as we gazed upon the apocalyptic scene, each no doubt pondering many things. We noted, without remark the apparent absence of defence – an observation which we were to make often in the next few weeks. We wondered how long it would last before the attack moved westwards to the heart of London. We feared that the whole port of London was being annihilated. At last someone spoke, “It is like the end of the world,” and someone else replied, “It is the end of a world””.

For the Watch training and preparation continued. Note the Watch members assigned medical tasks in the following photo with the cross on the white helmet.

Firewaychers photo 6
© The Chapter of St Paul’s Cathedral

Axes and hoses were key components of equipment, however hoses were very dependent on having a readily available source of water under pressure.

Firewatchers photo 8

© The Chapter of St Paul’s Cathedral

The availability of water was a constant issue for the Watch team. As would be found on the 29th December 1940, when water from the River Thames could not be relied on. Damage to pumps and pipes was always a risk, but also low tides in the river which took the main body of water below the level of the intake pipes.

The Cathedral had then as well as now a riser system providing distribution around the Cathedral:

Water Riser 1

However in the event of mains supplies of water failing, these would be of little use. The Watch team prepared the Cathedral by storing supplies of water in all areas of the Cathedral using any form of container that could hold water. This would be invaluable in fighting the fires on the 29th December.

The area to the immediate north of the Cathedral was destroyed in the raid of the 29th December. In the following months the buildings were cleared and water storage tanks installed. The outlines of these were still visible in the photos my father took from the Stone Gallery after the war. The following photo taken from the Cathedral shows the tanks in place, a couple of which can be seen in the lower right of the photo.

Firewatcher photo 4

© The Chapter of St Paul’s Cathedral

Following the initial raids, the St. Paul’s Watch settled into a routine of periods when there would be intense activities, raids almost daily for a number of months, followed by periods of quiet, a time to regroup and repair damage.

The Watch were critical in protecting the Cathedral from fire and the huge amount of incendiary bombs that fell on the City. The Cathedral suffered a few direct hits from high explosive bombs during the war. The following photo shows bomb damage in the North Transept caused by falling debris.

St Pauls bomb damage 1

© The Chapter of St Paul’s Cathedral

The Cathedral had a very narrow escape on the 12th September 1940. The night had been one of intermittent attacks and in the early morning a high explosive bomb fell very close to the South West Tower. It narrowly missed the tower by a few feet and penetrated deeply below the road surface. The bomb did not explode, but due to the soft clay beneath the surface, the bomb gradually sunk deeper, eventually to reach a depth of 27 feet 6 inches below the surface.

The bomb was removed on the 15th September and taken to Hackney Marshes where the bomb was blown up, it left a crater 100 feet in diameter. Had the bomb exploded on impact it would almost certainly have taken out the whole of the South West Tower and much of the West front of the Cathedral.

There was very little that the Watch could do with an explosive bomb. If one hit the Cathedral it would explode on contact, any bomb that did not explode, either due to a fault or a delayed action fuse, was left to the professional bomb disposal teams.

Emphasis for the Watch was always on the roofs of the Cathedral, the Dome and the risk of fire.  The following memorandum from Godfrey Allen in September 1941 details the duties and procedures to be used in an emergency.

Firewatcher document 1

© The Chapter of St Paul’s Cathedral

The Dome patrol was critical to ensure that a fire could not get hold in the timbers supporting the Dome. The Dome must have been a strange place to be during the height of a raid. In his book, W.R. Matthews recorded that:

“The Dome was not a healthy place in the height of a blitz and the patrol was changed at half-hourly intervals. Men have told me of the awesome feeling they experienced when carrying out their patrols in the darkness of the Dome while the battle ranged around them and of how the din seemed to be magnified by the Dome, like the beating of a drum. If they had any compensation it was perhaps that of witnessing from their lofty perch of the Stone Gallery the spectacle of the Battle of London as few others can have seen it.” 

Training continued throughout the war, the types of threats continued to evolve and updates from the appropriate authorities provided the Watch with information on the threats they may have to face.

The following two pages are an Intelligence Notice from the Corporation of London detailing new models and versions of bombs.

  • A 1Kg Anti-Personnel Bomb
  • Parachute Bomb
  • Jet-Propelled Glider Bomb
  • A new version of the Phosphorus Incendiary Bomb

Firewatcher document 4

 © The Chapter of St Paul’s Cathedral

Firewatcher document 5

© The Chapter of St Paul’s Cathedral

In researching the work of the Watch, one name keeps recurring, whether as the author of much of the training materials and instructions for how the Watch should operate, to the very limited number of books that have been written about the Watch. Godfrey Allen was the Surveyor of the Fabric before the War (he held the post from 1931 to 1956) and took on the command of the Watch for the duration. It was not only his intimate knowledge of the construction and layout of the Cathedral, but also his organisational abilities in moulding the Watch into the team that protected the Cathedral during the height of the blitz. He was also responsible for the immediate repairs needed to those parts where bomb damage had been suffered, both the immediate repairs to protect the building from the elements, but also the long-term repairs.

Before the war, Godfrey Allen was also responsible for the St. Paul’s Heights policy. These were put together in the 1930s following the construction of The Faraday Building and Unilever House, which started to obstruct the views of St. Paul’s. The Heights Policy has remained in force ever since and is now part of the Local Development Framework of the City of London.

Mr Godfrey Allen (in the white hat) in the crypt control room.

Godfrey Allen 1

© The Chapter of St Paul’s Cathedral

The Dean of St. Paul’s wrote at the end of the war “If any one man could claim to have saved St. Paul’s, that man is Mr Allen”.

The Christmas and New Year card sent by Godfrey Allen to members of the Watch for Christmas 1940, during and continuing into the peak period of the London Blitz.

Christmas Greetings

© The Chapter of St Paul’s Cathedral

During the latter stages of the war, there were no threats to the Cathedral (apart from the period of V1 and V2 rocket attack), however the Watch still maintained a nightly vigil. To help with the monotony of nightly exercises the Watch organised a series of lectures and the following provides an example of the lectures from one week in January 1945:

C.A. Linge The Preservation of Durham Cathedral
J.D.M. Harvey Time
J. Steegman Iceland to Istanbul n Wartime
R.M. Rowett Women in Poetry
P.B. Dannett Some Lantern Slides, Record and Pictorial
Basil M. Sullivan The People of India

The Watch continued until the very end of the war in Europe. The “stand down” of the Watch was arranged and an act of worship planned for the final meeting of the Watch on the 8th May 1945. By coincidence, this was also the day that the German forces surrendered, VE day and the Cathedral was crowded all day long with frequent services held from early morning to dusk (an estimated minimum of 35,000 people attended the services during the day along with countless others who called into the Cathedral to mark the day’s events). The final meeting of the Watch took place at the end of the day’s public events.

thanksgiving 1

© The Chapter of St Paul’s Cathedral

One of the closing paragraphs from Godfrey Allen’s reply to the Dean during the Service of Thanksgiving sums up what the members of the Watch must have felt at the end of such an intense period in their lives as well as in the history of St. Paul’s and London.

“To many of us, I am sure, these years will prove to be the most memorable of our lives and when we recall them in the quiet of our homes we shall think, not only of the horror and waste of those dreadful days and nights, but also of the great building which bound us all together and for which we fought with all our might.”

To provide a lasting reminder of the work of the St. Paul’s Watch, the following tablet was set in the floor by the western end of the Cathedral:

floor plague

In tomorrow’s post I will cover the night of the 29th December 1940, the impact to the area around St. Paul’s Cathedral, and how the Watch protected the Cathedral from the surrounding devastation.

The sources I used to research this post are:

  • I am very grateful to Sarah Radford, Archivist at St.Paul’s Cathedral for providing access to the documents covering the St. Paul’s Watch
  • The Dean of St. Paul’s Cathedral during the war, the Very Reverend W.R. Matthews published a comprehensive account titled St. Paul’s in Wartime published in 1946 (this article only scratched the surface of the work of the Watch. I recommend this book for a detailed and very readable account)
  • St. Paul’s In War and Peace published by the Times Publishing Company in 1960

 alondoninheritance.com